
Air leaks in your home cost more than you might expect. In fact, poor sealing can account for 25 to 40% of your annual heating and cooling bills. For GTA homeowners dealing with brutal winters and humid summers, that’s a significant amount of money leaving your home through invisible gaps around windows, doors, and baseboards. Most people wonder whether caulking or weatherstripping is the better fix. The honest answer is that both tools serve different purposes, and knowing which to use where makes all the difference between a quick patch job and a long-lasting, energy-saving seal.
Table of Contents
- Understanding air leaks and energy loss in GTA homes
- Caulking vs. weatherstripping: what’s the difference?
- Choosing the right product for Canadian winters
- When and where to use caulking, weatherstripping, or both
- Maintaining your seals: inspection, replacement, and professional help
- Why a “both/and” approach is best for GTA homes
- Take the next step: expert caulking and weatherstripping services in Toronto
- Frequently asked questions
Key Takeaways
| Point | Details |
|---|---|
| Seal leaks for savings | Air leaks can waste up to 40% of your home’s heating and cooling costs, but targeted sealing saves 15–30% on bills. |
| Use both methods | For the best results, combine caulking (for stationary gaps) and weatherstripping (for movable parts). |
| Pick products wisely | Choose caulk or weatherstripping rated for Canadian winters to ensure durability and performance. |
| Inspect annually | Yearly checks and timely replacement keep your home comfortable and energy efficient. |
Understanding air leaks and energy loss in GTA homes
Toronto’s climate is demanding. Temperatures swing from below -20°C in January to above 35°C in July, and that constant freeze-thaw cycle puts serious stress on the seals around your windows and doors. Small gaps that form over time let conditioned air escape and outside air flood in, and your furnace and air conditioner work overtime to compensate.
The numbers are striking. Effective air sealing can deliver 15 to 30% energy savings with a payback period of just 3 to 6 years, compared to 60 or more years for new window replacements. That means sealing your home properly is one of the smartest investments you can make right now, without spending tens of thousands of dollars on new windows.
The most common air leak locations in GTA homes include:
- Window frames and trim, where caulk shrinks and separates over time
- Door frames and thresholds, which see heavy use and frequent temperature changes
- Baseboards and interior trim, especially in older homes with settling foundations
- Attic hatches, which are among the most overlooked but significant sources of heat loss
- Electrical outlets and plumbing penetrations on exterior walls
“Sealing air leaks is one of the most cost-effective improvements you can make to any home. It outperforms almost every other renovation in terms of payback speed and comfort improvement.”
Use an energy savings calculator to estimate what your specific home could save. For more detail on the direct financial impact, the guide on how caulking lowers your energy bill lays it out clearly. You can also explore how an insulation upgrade for efficiency works alongside air sealing for even better results.
To address these leaks effectively, you need the right tools. So which tool handles which job? Let’s clarify the difference between caulking and weatherstripping.
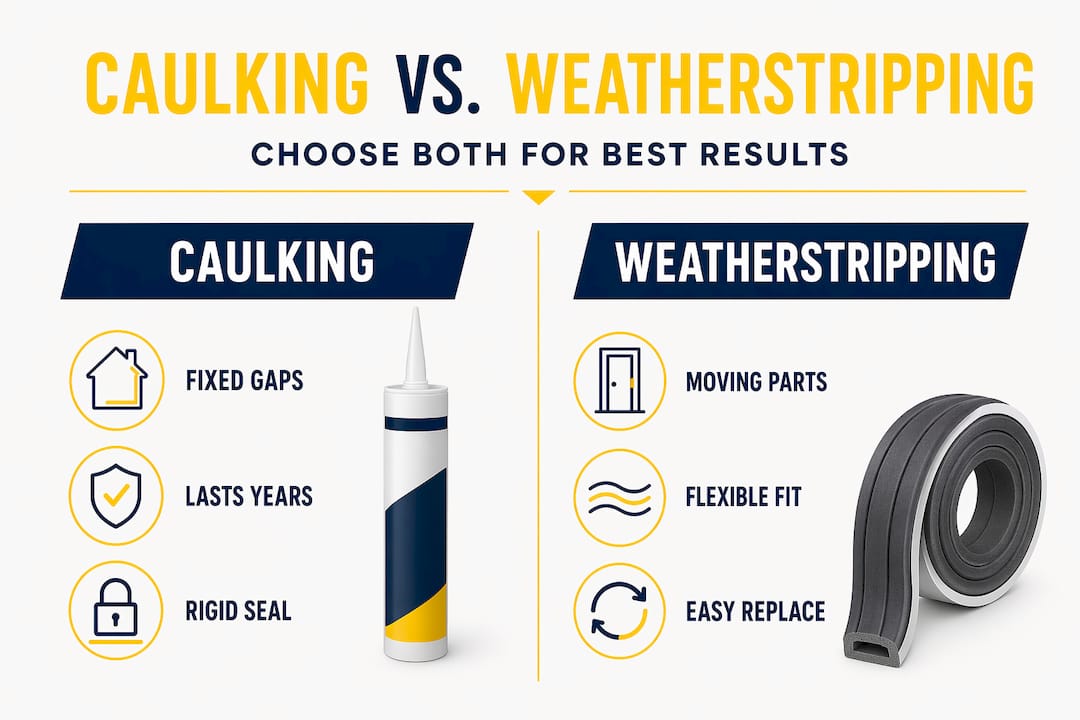
Caulking vs. weatherstripping: what’s the difference?
These two products are often grouped together, but they work in completely different situations. Using the wrong one in the wrong place will lead to failure quickly, costing you time and money.
Caulking seals stationary gaps and cracks, such as around window frames, door trim, and baseboards, up to about 1/4 inch wide. Weatherstripping, on the other hand, seals movable parts like door edges and operable windows that open and close repeatedly.
Here’s a quick comparison to help you choose:
| Feature | Caulking | Weatherstripping |
|---|---|---|
| Best for | Fixed gaps and stationary joints | Moving parts (doors, operable windows) |
| Flexibility | Low, forms rigid seal | High, compresses and releases |
| Typical lifespan | 10 to 20 years (silicone) | 2 to 5 years depending on type |
| Application difficulty | Moderate, needs prep | Easy to replace yourself |
| Indoor use | Yes (acrylic latex) | Yes |
| Outdoor use | Yes (silicone/polyurethane) | Yes |
The key distinction is movement. If the gap you’re sealing is part of a surface that moves, caulk will crack and fail within months. If it’s a permanent gap between two fixed surfaces, weatherstripping won’t adhere properly and won’t hold.

Here are the situations where each product belongs:
Caulking is the right choice when:
- Sealing around window frames where the frame meets the wall
- Filling gaps between door trim and siding on the exterior
- Closing cracks along baseboards or where walls meet the floor
- Sealing around pipes or wires that pass through exterior walls
Weatherstripping is the right choice when:
- Sealing the edge of a door where it meets the frame when closed
- Sealing the bottom of a door with a door sweep or threshold seal
- Sealing operable windows along the tracks or sash edges
- Sealing attic hatch perimeters that open and close
The role of caulking in home insulation goes deeper than most homeowners realise. You can also review the weatherstripping basics guide from the U.S. Department of Energy for a solid breakdown of product types.
Pro Tip: Never use interior acrylic latex caulk on exterior surfaces. It will crack and peel within one GTA winter. Always match the product to its intended environment.
Having clarified the distinction, it’s important to select products that actually hold up through GTA’s harsh climate. So, which caulks and weatherstripping materials stand up to our winters?
Choosing the right product for Canadian winters
Not all caulks and weatherstripping materials are built for freeze-thaw cycles. Choosing the wrong product is one of the most common mistakes GTA homeowners make, and it leads to seals failing after just one or two seasons.
For exterior applications, silicone or polyurethane caulk is the right choice. These materials remain flexible through temperatures as extreme as -40°C, resist UV exposure, and can last 10 to 20 years when applied correctly. Silicone is particularly good around windows and doors because it doesn’t shrink or crack as the building moves through seasonal cycles.
For interior work, acrylic latex caulk is a practical choice. It’s easy to paint over, cleans up with water, and lasts 5 to 10 years in indoor conditions where it isn’t exposed to weather.
| Product | Best location | Temperature range | Lifespan | Paintable? |
|---|---|---|---|---|
| Silicone caulk | Exterior windows, doors | -40°C to 150°C | 15 to 20 years | No (or with special paint) |
| Polyurethane caulk | Exterior gaps, masonry | -30°C to 80°C | 10 to 15 years | Yes |
| Acrylic latex caulk | Interior trim, baseboards | Standard indoor range | 5 to 10 years | Yes |
| Foam weatherstripping | Light-use windows, frames | Moderate range | 1 to 3 years | No |
| V-strip (tension seal) | Door edges, sliding windows | Wide range | 5 to 10 years | No |
| Door sweeps/thresholds | Door bottoms | Wide range | 5 to 10 years | No |
For weatherstripping specifically, foam tape is inexpensive and easy to install but wears out quickly, especially on high-traffic doors. V-strip (also called tension seal) weatherstripping is made from metal or durable plastic and holds up far better on frequently used doors and windows. It’s a better long-term investment despite costing slightly more upfront.
Here’s a straightforward process for selecting and installing the right products:
- Identify the gap type. Is it fixed or does it move? Fixed gets caulk; movable gets weatherstripping.
- Measure the gap. Gaps under 1/4 inch use caulk or foam. Gaps over 1/4 inch need expanding foam or backer rod before caulking.
- Determine indoor or outdoor. Choose your product based on exposure, not convenience.
- Clean the surface. Remove all old caulk, dirt, and moisture before applying anything new.
- Apply and tool the seal. Smooth caulk within a few minutes of application. Press weatherstripping firmly and evenly.
- Test the seal. For doors, close them on a piece of paper. If it pulls out easily, the seal isn’t tight enough.
For exterior-specific guidance, the article on caulking for extreme weather is an excellent resource. You’ll also find the guide on weatherproofing windows with caulking practical and straightforward. A broader view of winterising your home is also worth reviewing before the cold season arrives.
Pro Tip: Inspect and upgrade your seals every fall before temperatures drop. Applying caulk below 5°C leads to poor adhesion and early failure, so timing matters in our climate.
When and where to use caulking, weatherstripping, or both
Most GTA homes need both products working together for complete air sealing. Using only one approach leaves gaps in your overall system.
Caulking works best on:
- Window and door frames where they meet the wall or siding
- Baseboards and trim along exterior walls
- Visible cracks in stucco, brick mortar, or siding
- Utility penetrations where pipes, wires, or vents pass through walls
Weatherstripping works best on:
- Exterior door edges and the gap between the door and frame
- Door bottoms where air rushes in underneath
- Operable windows, especially casement and double-hung types
- Attic hatch perimeters that lift open and closed
For gaps larger than 1/4 inch, such as those around rim joists in your basement or large gaps in framing, expanding spray foam is the right solution before finishing with caulk or trim. Using caulk alone on a 1/2 inch gap won’t hold and will pull away from the edges within a season.
“The most airtight homes use all three: caulk for fixed gaps, weatherstripping for moving parts, and spray foam for large or irregular openings. Skipping any one of these leaves energy savings on the table.”
The combination approach is important. A door that has perfectly applied weatherstripping but a gap in the frame caulking will still leak. The two products seal different parts of the same door system and work best together.
For long-term results, the guide on maintaining your windows for airtightness is worth bookmarking. And for broader seasonal preparation, the winter maintenance checklist covers all the bases.
Pro Tip: A simple candle or incense stick test on a windy day reveals air leaks quickly. Hold it near door frames, window edges, and baseboards and watch for movement in the smoke or flame.
Maintaining your seals: inspection, replacement, and professional help
Seals don’t last indefinitely. Toronto’s climate accelerates wear faster than in milder regions, and even high-quality products need periodic inspection and replacement.
Annual inspection is essential for GTA homes, particularly after the first hard freeze of the season. What you’re looking for includes:
- Cracked or brittle caulk that has separated from the surface
- Missing sections of caulk or weatherstripping where the material has fallen away
- Hardened foam weatherstripping that no longer compresses when the door closes
- Draughts felt near door or window edges on cold or windy days
- Condensation or frost on interior surfaces near windows, indicating cold air infiltration
Here’s how to do a thorough inspection in about 20 minutes:
- Walk the perimeter of each exterior door and window on a cold, windy day.
- Run your hand along all caulked joints. Look for gaps, cracks, or separation.
- Close each door and window fully, then feel along the edges for air movement.
- Check weatherstripping for compression. If it’s flattened and no longer springs back, it needs replacing.
- Inspect basement rim joists and attic hatch edges while you’re at it.
Most DIY homeowners handle basic weatherstripping replacement and interior caulking without issues. Exterior caulking, especially around windows on upper floors or along large areas of trim, benefits significantly from professional application. Professionals achieve cleaner, longer-lasting seals because they know how to prep surfaces correctly, choose the right product for the location, and apply consistent bead widths that adhere properly.
Pro Tip: The most common DIY mistake is applying new caulk over old without removing the old material first. New caulk won’t bond properly to old caulk, and the seal will fail within months.
For a financial perspective on the long-term value of keeping seals in good condition, the guide on saving money by sealing windows is worth a read.
Why a “both/and” approach is best for GTA homes
There’s a persistent idea among homeowners that you pick one solution, either caulking or weatherstripping, and that handles the problem. In our experience working across the Greater Toronto Area, that thinking leads to frustration and repeat repairs.
Caulking creates a permanent seal but has no flexibility for moving parts. Weatherstripping compresses and releases with use but wears down faster than caulk. Neither one alone covers every gap in a typical door or window system.
The real mistake we see is not choosing the wrong product, it’s choosing only one. A homeowner who replaces all the weatherstripping on their front door but ignores the cracked caulk along the door frame hasn’t actually solved the air leakage problem. They’ve improved one part of the system while leaving another part open.
Short-term thinking costs more in the long run. Foam weatherstripping is cheap and easy to apply, but replacing it every year or two on a heavily used door adds up quickly. Investing in V-strip or a quality door sweep paired with correctly chosen exterior caulk means you won’t be back at the hardware store every fall.
The other overlooked variable is material matching. Understanding the difference between caulk types and sealants is genuinely important because using the wrong product in the wrong location causes early failure regardless of how well it’s applied. We’ve seen silicone applied indoors over paint, which won’t adhere, and acrylic latex used on exterior brick, which cracks after one freeze-thaw cycle. These aren’t minor inconveniences. They mean redoing the work entirely.
The honest professional advice is this: take the time upfront to match the product to the surface, the exposure, and the movement involved. The payoff in durability and energy savings is well worth it.
Take the next step: expert caulking and weatherstripping services in Toronto
If you’re ready to stop losing money through air leaks and want results that last through Toronto’s toughest winters, Kettle Contracting is here to help. Our team of caulking specialists works on residential and commercial properties across the GTA, delivering clean, durable seals that actually perform through freeze-thaw cycles, wind, and seasonal movement.

Start with our detailed guides, including how to go about preparing your windows for caulking and the practical science behind making caulk last for the long term. When you’re ready to move from reading to doing, reach out to us for a free quote or a professional inspection. We’ll identify your home’s biggest air leak points and recommend the most cost-effective approach for your specific situation.
Frequently asked questions
Can I use caulking instead of weatherstripping on my windows?
No, caulking is only appropriate for stationary gaps and will crack quickly if applied to moving parts like operable window sashes or door edges. Use weatherstripping wherever movement is involved.
How often should I replace weatherstripping in Toronto’s climate?
Most weatherstripping needs replacing every few years, particularly foam types. GTA’s harsh winters accelerate compression and cracking, so inspect every fall and replace any material that no longer seals tightly.
Is it worth sealing older windows or should I replace them?
Sealing with caulk and weatherstripping offers a much faster payback than window replacement, typically 3 to 6 years compared to 60 or more for new windows. Unless your window frames are structurally compromised, sealing is almost always the smarter first step.
What type of caulk lasts longest in Canadian winters?
Silicone and polyurethane caulks are the best performers for outdoor use in Canadian conditions, lasting 10 to 20 years while remaining flexible through extreme temperature swings. For indoor use, acrylic latex is easier to work with and still delivers 5 to 10 years of reliable performance.
Recommended
- Can Window Caulking Lower My Energy Bill? | Smart Ways to Save at Home – Kettle Contracting
- Energy Savings Calculator: Caulking Your Windows – Kettle Contracting
- Why Caulking Your Home Windows Can Save You Money – Kettle Contracting
- How to Weatherproof Your Windows with Caulking – Kettle Contracting