
When you’re pulling together a renovation bid for a GTA property, caulking is one of those items that gets lumped in as an afterthought or buried inside a vague “finishing” allowance. That oversight costs real money. Poorly scoped or skipped caulking leads to water infiltration, air leaks, failed energy audits, and callbacks that erode both your budget and your renovation’s lifespan. GTA caulking work is most reliably priced and scoped per linear foot, with different price bands depending on whether contractors remove failed sealant and properly clean, prime, and prep the surface versus simply applying over existing material. Get the details right from the start, and you’ll save money, avoid disputes, and protect your building for years to come.
Table of Contents
- Why caulking matters in renovation bids
- How to scope and quantify caulking in your bid
- Understanding GTA caulking pricing: What impacts the cost?
- Choosing materials and prep for weatherproof, durable seals
- How to compare and verify caulking bids
- What most renovation bids get wrong about caulking (and how to do better)
- Ready for professional caulking in your renovation bid?
- Frequently asked questions
Key Takeaways
| Point | Details |
|---|---|
| List caulking separately | Always specify caulking as its own line item with explicit materials, prep, and locations in any renovation bid. |
| Prioritise prep work | The durability and energy benefits of caulking depend on surface preparation, proper materials, and bead geometry. |
| Understand cost bands | GTA caulking costs range widely by prep and difficulty, so match expectations with the required scope for lasting results. |
| Compare bids by detail | Insist contractors itemise each key step—removal, cleaning, backer rod, type—and avoid generic ‘caulk bead’ lines. |
| Weather and code compliance | Ensure chosen caulk and installation match Ontario climate needs and continuous air-barrier code requirements. |
Why caulking matters in renovation bids
A renovation bid without a clearly specified caulking scope is an open invitation for problems. When caulking is vague or absent, you risk water infiltrating around windows and doors, conditioned air escaping through gaps in the building envelope, and potential issues when inspections target air leakage paths. These aren’t minor inconveniences. Water damage to framing or insulation can cost thousands of dollars to fix, and persistent air leaks can meaningfully increase your heating and cooling bills year after year.
Ontario’s building code requires a continuous air barrier in renovations, meaning all edges, overlaps, and penetrations must be sealed properly. This is not a cosmetic requirement. Air-barrier caulking means sealing at the edges and penetrations of the building envelope, not just running a tidy bead along an interior window trim for aesthetics. Understanding the difference matters enormously when you’re writing or reviewing a bid.
Here’s a quick summary of why proper caulking belongs in every renovation bid:
- Water protection: Properly sealed joints prevent moisture from entering wall cavities, which protects insulation, framing, and finishes.
- Energy efficiency: Air sealing reduces heating and cooling losses, directly lowering your utility bills.
- Code compliance: Ontario requires continuous air barriers, and caulking is a primary tool for achieving this at joints and penetrations.
- Comfort: Drafts and cold spots near windows or doors are often the result of failed or missing caulk.
- Resale value: A well-sealed, energy-efficient home is more attractive to buyers and appraisers.
“Caulking in a renovation bid should be treated as air-barrier work at edges and penetrations, not just a cosmetic finish line.”
It’s also worth noting that caulking and home insurance have a closer relationship than most homeowners expect. Water damage claims tied to failed seals around windows and doors are common, and insurers are paying close attention. Getting caulking right from the outset is genuinely protective in multiple ways.
Now that you know why caulking deserves a line in your bid, let’s look at how to get the details right.

How to scope and quantify caulking in your bid
The most reliable way to avoid bid disputes and apples-to-oranges comparisons is to break caulking into specific, measurable line items. A practical bid-spec approach is to quantify and line-item caulking and joint work using measurable quantities in linear feet, with explicit requirements for backer rod, primer, sealant type, surface prep, and tooling and finish. When every bidder prices the same defined scope, you can compare them honestly.
Follow these steps when scoping caulking for your renovation bid:
- List every location by name: Identify each window, door frame, expansion joint, and penetration. Note the floor level and whether it’s interior or exterior.
- Measure and record linear feet: Walk the property and measure the total run for each location. Even a modest detached home in Toronto can easily have 400 to 600 linear feet of caulk joints once you include all windows, doors, and sill plates.
- Specify removal vs. overlay: State clearly whether the old sealant must be removed before new material is applied. Removal and replacement produces joints that last significantly longer than overlay work.
- Call out backer rod requirements: Specify the diameter and type of backer rod for each joint. Backer rod is the foam backing material that goes into wide joints before caulk is applied, and it controls joint depth and shape for better adhesion.
- Name the sealant type: Require the bidder to list the product they will use, not just the generic category. This prevents substitutions with lower-grade materials.
- Include surface prep and tooling: Explicitly require cleaning, priming where needed, and proper tooling of the finished bead.
Here is a sample cost comparison table showing typical GTA price ranges by method, based on local pricing data:
| Method | Typical GTA cost per linear foot | Notes |
|---|---|---|
| Overlay (no removal) | $2.50 to $4.00 | Shortest lifespan, not recommended for exterior |
| Full removal and reseal | $4.00 to $8.00 | Best value for durability; standard recommendation |
| Complex/high-reach joints | $8.00 to $13.00+ | Scaffolding, special primers, or difficult access included |
Also check the window caulking cost guide for a detailed breakdown of what affects pricing for window-specific work, and review preparing windows for caulking to understand what proper prep actually involves before work begins.
Pro Tip: Always include a dedicated line item in your bid for surface prep and tooling. When it’s bundled or implied, it’s the first thing that gets skipped to save time, and that’s exactly when premature failures happen.
With the main scope clarified, it’s time to dig into how GTA pricing works and what influences those numbers.
Understanding GTA caulking pricing: What impacts the cost?
Caulking prices in GTA renovation bids vary widely, and understanding why helps you evaluate whether a bid is reasonable or suspiciously low. The GTA pricing bands for caulking run from roughly $2.50 to $4.00 per linear foot for basic overlay, $4.00 to $8.00 per linear foot for full removal and new beads, and $8.00 to $13.00 or more per linear foot for complex or difficult work.
Several factors drive where a specific job falls within those ranges:
- Preparation intensity: Full sealant removal, solvent cleaning, and priming take significantly more labour than a simple overlay. This is reflected in the price, and it should be.
- Product grade: High-performance silicone or polyurethane sealants cost more than basic acrylic caulk, but they last much longer in Ontario’s freeze-thaw climate.
- Access conditions: Ground-level windows are fast and inexpensive to work on. High-rise units, second and third-storey windows, or soffits requiring scaffolding or lift equipment add real cost.
- Joint condition: Joints with significant movement history, deteriorated substrates, or previous patch-over-patch repairs take more time and skill to rehabilitate correctly.
- Number of penetrations: Electrical conduits, pipe penetrations, and HVAC openings through the building envelope all need careful sealing. More penetrations mean more labour.
| Cost driver | Lower cost scenario | Higher cost scenario |
|---|---|---|
| Surface prep | Wipe clean, no primer | Solvent clean, sill grinding, primer required |
| Sealant type | Economy acrylic | Commercial-grade silicone or polyurethane |
| Access | Ground-level exterior | Second floor with scaffolding required |
| Existing sealant condition | Clean removal | Multiple layers, bonding failure, contamination |
Pro Tip: A bid that comes in 40% cheaper than others almost always reflects an overlay-only approach with minimal prep. That saves money now but routinely leads to failure within two to three years in Ontario’s climate, which means paying for the work twice.
For a deeper look at technique-related cost drivers, the advanced caulking techniques resource covers what skilled application actually involves and why it matters for long-term performance.
Once you grasp GTA pricing, you’re ready to choose the right materials and techniques for lasting results.
Choosing materials and prep for weatherproof, durable seals
Not all caulking products perform equally in Ontario’s climate, and your bid should specify the right materials for each application. The main sealant categories you’ll encounter are:
- Silicone: Excellent flexibility and UV resistance; ideal for glass, metal, and exterior applications. Does not accept paint. Lasts 20 or more years when applied correctly.
- Polyurethane: Strong adhesion to masonry, wood, and concrete. Paintable and highly durable. A strong choice for exterior joints and window perimeters in the GTA.
- Elastomeric: Highly flexible and excellent for larger movement joints. Used in commercial applications and on building envelopes with significant thermal expansion and contraction.
- Acrylic latex: Easy to apply and paint, but limited flexibility and lifespan. Only appropriate for interior cosmetic work, not air-barrier sealing.
Surface prep is not optional. Joint geometry and surface preparation are the dominant drivers of whether a caulking job succeeds or fails, regardless of how good the product is. Your bid should require the following prep steps:
- Complete removal of all existing failed or deteriorated sealant
- Solvent or mechanical cleaning of bonding surfaces
- Backer rod installation to the correct diameter and depth for the joint width
- Primer application on porous or difficult substrates such as concrete or masonry
- Tooling of the finished bead to ensure full contact with both sides of the joint
In colder Ontario climates, winter-grade sealant application requires products that cure at low temperatures and that the contractor follows manufacturer cold-weather protocols. If work is being done in autumn or winter, this should be specified in the bid explicitly. Not all contractors account for this, and improper cold-weather application significantly shortens a seal’s life.
For guidance on product selection, the resources on choosing the right caulk, caulk for your climate, and caulking for extreme weather cover these choices in practical detail. If you’re unsure about the difference between product categories, caulk versus sealants breaks down the key distinctions clearly.
Pro Tip: Build a simple checklist into your bid specification that every contractor must confirm they’ve completed before final payment. Include: old sealant removed, surfaces cleaned and dry, backer rod installed, primer applied where required, bead tooled and continuous. This one step prevents more disputes than almost anything else.
With materials and prep decided, you’ll want to ensure bids are comparable and include essential checkpoints.
How to compare and verify caulking bids
Once you have bids in hand, use a structured approach to evaluate them side by side. A bid that says “apply new caulk throughout” tells you almost nothing. For fair comparisons between bidders, insist on descriptions of prep steps, including removal of failed sealant, cleaning, primer requirements, and correct backing depth, rather than accepting only a “new caulk bead” description.
Use this comparison checklist when reviewing bids:
- Are all locations listed by name and linear feet?
- Does the bid specify removal of existing sealant or overlay only?
- Is the sealant product and grade named explicitly?
- Is backer rod included, with type and diameter specified?
- Is surface cleaning and priming referenced?
- Is tooling of the finished bead mentioned?
- Does the bid include a warranty period and what it covers?
- Are access requirements (scaffolding, lifts) listed as a separate line?
After the work is complete, verify the results before final payment:
- Check for a continuous, unbroken bead at every location. Any gaps or thin spots are failure points.
- Press lightly on the bead at several points to confirm it adheres to both sides of the joint.
- On exterior work, check after the first heavy rain for signs of water intrusion near sealed areas.
- For energy efficiency, consider a blower door test or thermal imaging to confirm air sealing performance.
Always document the agreed preparation steps and inspection procedures in the signed contract before work begins. Verbal agreements about prep are difficult to enforce after the fact.
For a closer look at what thorough preparation actually looks like in practice, prepping for a flawless job covers the full process from start to finish.
Let’s step back and share lessons from the field you won’t find in typical bid guides.
What most renovation bids get wrong about caulking (and how to do better)
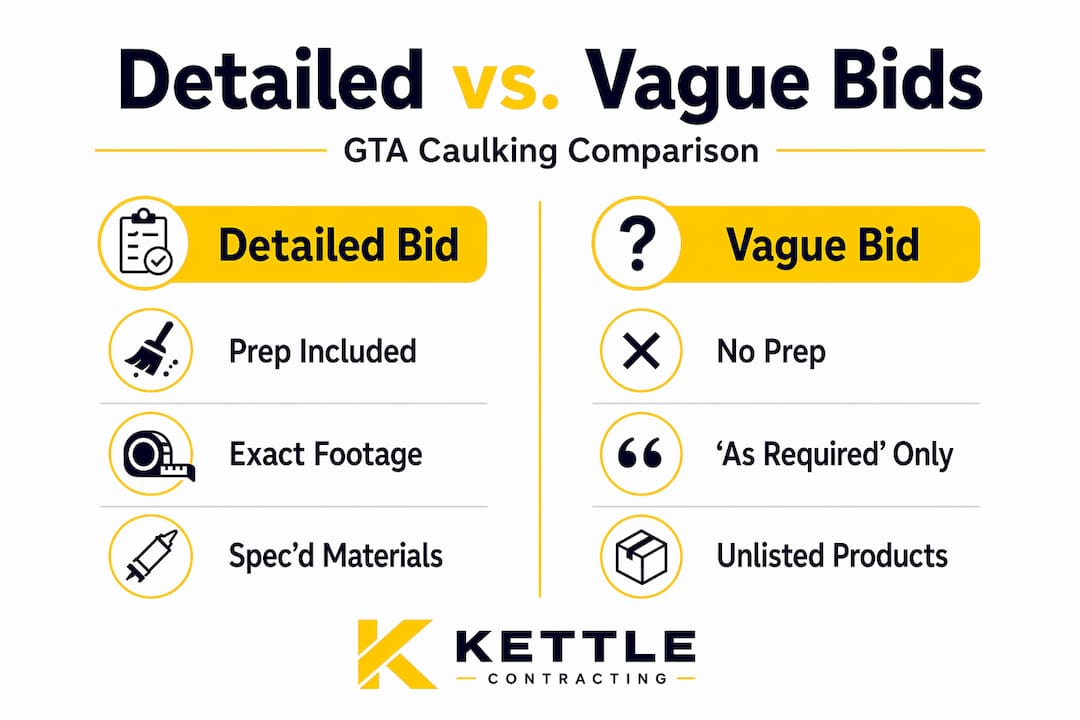
Here’s something we see repeatedly in GTA renovation bids: the caulking line reads simply “apply caulking as required.” That phrase is essentially meaningless. It doesn’t describe what’s being removed, what product is going in, how the surface will be prepared, or how the finished joint will be verified. When disputes arise about leaks or failed seals six months later, “as required” helps no one.
The honest truth is that most contractors who price caulking this way aren’t trying to deceive anyone. They’ve just always done it this way, because clients rarely push back. That’s worth changing.
The cost difference between a vague caulking allowance and a properly detailed, prep-inclusive scope is usually modest at the bid stage. But the cost difference between a seal that lasts 15 years and one that fails in three is enormous when you factor in the water damage, mould remediation, and re-sealing work that follows. We’ve seen homeowners in the GTA spend more fixing the aftermath of poor caulking than the original renovation cost.
There’s also a subtler issue: when caulking isn’t scoped in detail, it signals to contractors that the client doesn’t know or care about this part of the work. That perception changes what gets quoted and what gets executed on site. When you arrive at the table with a well-specified caulking scope, you signal professionalism, and you tend to attract and retain better contractors.
The best bids treat long-lasting caulk as a technical requirement, not a finishing touch. Specify it that way and you’ll get results that reflect that standard.
Ready for professional caulking in your renovation bid?
Getting caulking right from the bid stage is exactly where Kettle Contracting can make a real difference for your GTA renovation project.

Whether you’re pulling together specs for a single-family home or managing a multi-unit property, our team helps you build quality, code-compliant caulking into your plans from the start. We provide site evaluations, detailed scope guidance, and full-service execution by experienced caulking specialists. From preparing your windows for caulking to delivering durable, airtight seals that stand up to Ontario winters, we cover every step of the process. For a deeper understanding of what goes into a seal that truly lasts, explore our resource on the science of long-lasting caulk. When you’re ready to move forward, our team is here to help you do it right.
Frequently asked questions
Should caulking be a separate line item in my renovation bid?
Yes, always break out caulking as a distinct, measurable line in your bid by location and linear feet, with all prep steps and materials listed clearly, as detailed bid specs require explicit requirements for backer rod, primer, sealant type, and surface prep to be genuinely useful.
What’s the average cost per linear foot for exterior caulking in the GTA?
Expect roughly $2.50 to $4.00 per linear foot for basic overlay work, $4.00 to $8.00 for full removal and reseal, and $8.00 to $13.00 or more for complex or high-reach locations in the Greater Toronto Area.
What prep work must be included for durable caulking results?
Require old sealant removal, solvent surface cleaning, backer rod installation, primer on porous substrates, and correctly tooled finished beads for joints that adhere fully and last through Ontario’s freeze-thaw cycles.
How do I confirm caulking supports energy efficiency and meets Ontario code?
Specify caulking as part of a continuous air barrier at all edges and penetrations, using compliant materials and proper prep, so the system meets Ontario’s requirements for sealed overlaps and air leakage control in renovations.
Can I apply exterior caulking in winter in the GTA?
Yes, but you must use winter-grade sealants and confirm that the contractor follows manufacturer cold-weather application and curing protocols to ensure the seal bonds and performs as intended.
Recommended
- Preparing Your Windows for Caulking: A Comprehensive Guide – Kettle Contracting
- Pro Tips for Smooth and Even Caulk Application – Kettle Contracting
- Aesthetic Considerations in Window Caulking – Kettle Contracting
- Unlocking the Secrets to Long-Lasting Caulk: Science Meets Durability – Kettle Contracting