A flip property exterior sealing checklist is a structured inspection and application guide that tells you exactly where to seal, what products to use, and in what order to work before listing a property for sale. Exterior sealing, known in the industry as building envelope weatherproofing, is the single most cost-effective step a flipper can take to protect structural integrity and signal quality to buyers. Skipping it costs you on two fronts: moisture damage that surfaces during a home inspection, and energy inefficiency that buyers notice the moment they walk through the door. This guide covers every stage, from the first inspection pass to the final bead of caulk around your window frames.
1. How to perform a detailed exterior condition inspection
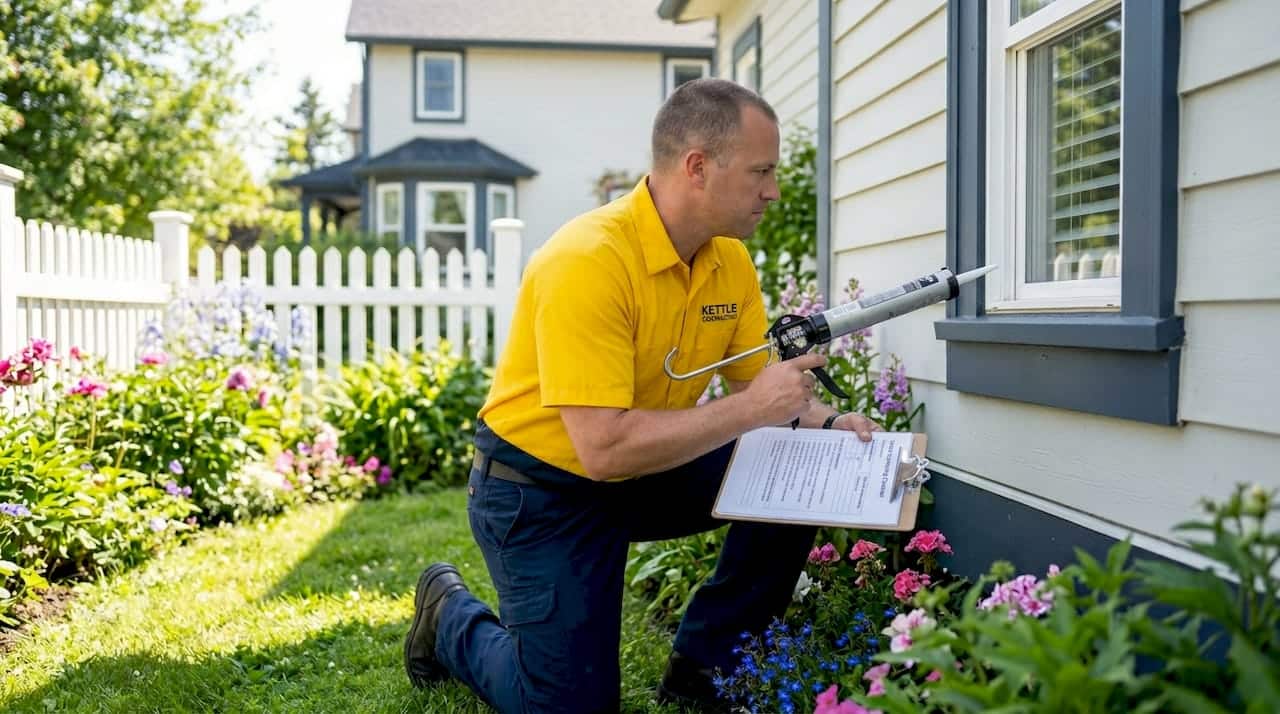
Thorough documentation of photos and notes before any sealing work is the non-negotiable first step. You need a clear record of what you found, where you found it, and how bad it is. That record drives every decision that follows.
Walk the full perimeter of the property and work from the top down. Check these areas in order:
- Roof and soffits: Look for missing shingles, cracked flashing, and gaps where the roof meets the fascia board.
- Siding: Scan for cracks, warping, gaps at joints, and any areas where the siding pulls away from the sheathing.
- Windows and doors: Check every perimeter for cracked, missing, or discoloured caulk. Press gently on the frame to test for soft wood underneath.
- Foundation: Look for visible cracks, white mineral deposits (efflorescence), and any staining that suggests water is tracking down the wall.
- Gutters and downspouts: Confirm they are attached, clear, and directing water at least 1.5 metres away from the foundation.
Transition zones deserve extra attention. Sealing window and door perimeters and siding joints is critical because these interface points are where water intrusion and air leakage are most concentrated. A blanket coating approach misses the problem entirely.
Pro Tip: Pull back any old, cracked caulk before you assess the substrate. Wood rot and mould often hide directly underneath failed sealant, and sealing over damage traps the problem rather than fixing it.
Never seal before you repair. Sequencing matters: inspect first, complete structural repairs second, then apply sealant. Reversing that order is one of the most common and costly mistakes on flip projects.
2. Choosing the right sealing materials for a property flip
Not all sealants perform equally, and choosing the wrong product for a substrate or climate is a fast way to create warranty problems after the sale. The table below outlines the most common options and where each one belongs on a flip.
| Sealant type | Best application | Approximate lifespan |
|---|---|---|
| Acrylic latex caulk | Painted siding joints, low-movement areas | 3 to 5 years |
| Polyurethane sealant | Window and door perimeters, high-movement joints | 10 to 20 years |
| PROSOCO AirDam (STP) | Air and weather barriers around window/door assemblies | 20+ years |
| Bentonite clay | Below-grade foundation waterproofing | 20+ years |
| Rubberised membrane | Above-grade foundation, exposed masonry | 7 to 15 years |
Acrylic sealants last 3 to 5 years while bentonite clay and polyurethane options offer significantly longer protection. For a flip, you want buyers and inspectors to see materials that will last well beyond the next ownership cycle.
PROSOCO AirDam is a silyl-terminated polymer sealant designed specifically to create durable, weather-tight seals around window and door assemblies. It bonds to most substrates including concrete, masonry, and wood, and it cures reliably even in cold weather. That last point matters in Ontario, where you may be sealing in temperatures that disqualify standard acrylic products.
Pro Tip: For window and door assemblies, pair your sealant with a compatible self-adhering flashing tape at the rough opening before the frame goes in. The sealant handles the exterior joint; the tape handles the sheathing interface. Together they form a complete air and moisture barrier.
The DIY-versus-professional question comes down to access and consequence. Siding joints and painted trim are manageable for a skilled flipper. Foundation waterproofing, full building envelope sealing, and any work requiring lifts or scaffolding are worth professional caulking services to get right the first time.
3. Foundation and water management sealing checklist
The foundation is where water damage starts and where repair costs escalate fastest. Address it early in your flip workflow, not as an afterthought.
Signs that your foundation needs sealing include:
- Visible cracks wider than 3 mm in poured concrete or block walls
- White chalky deposits (efflorescence) on the surface, which indicate water is moving through the wall
- Persistent dampness or water staining on the interior side of the foundation
- Water pooling within 1.5 metres of the foundation after rain
- Soil grading that slopes toward the building rather than away from it
Exterior foundation waterproofing typically costs $4,000 to $8,000 with lifespans ranging from 7 to 15 years depending on the product. That cost is far lower than the price of a failed home inspection or a post-sale water damage claim.
Exterior waterproofing outperforms interior approaches because it stops water at the source rather than managing it after it has already entered the wall assembly. Interior drainage systems and sump pumps are reactive. Exterior membrane systems are preventive.
Water management best practices to include in your checklist:
- Regrade soil so it slopes away from the foundation at a minimum 5% grade over the first 1.5 metres
- Extend downspouts to discharge at least 1.5 metres from the foundation
- Clear gutters and confirm they are pitched correctly toward downspouts
- Seal any visible cracks with a polyurethane or epoxy injection product before applying a membrane coating
4. Window and door sealing checklist for air and weather-tightness
Air leakage accounts for 30% or more of a home’s heating and cooling costs. Buyers and their home inspectors notice drafts immediately, and failing window seals are one of the most common deficiencies flagged during resale inspections.
Work through this checklist for every window and door on the property:
- Check for drafts: Hold your hand near the frame on a windy day or use a lit incense stick to detect air movement around the perimeter.
- Inspect existing caulk: Remove any caulk that is cracked, peeling, or pulling away from the substrate. Do not apply new caulk over failed old caulk.
- Clean and dry the surface: Wipe down the joint with isopropyl alcohol and allow it to dry fully before applying new sealant. Moisture under fresh caulk causes premature failure.
- Apply backer rod for wide gaps: For joints wider than 6 mm, press a foam backer rod into the gap before caulking to control joint depth and improve adhesion.
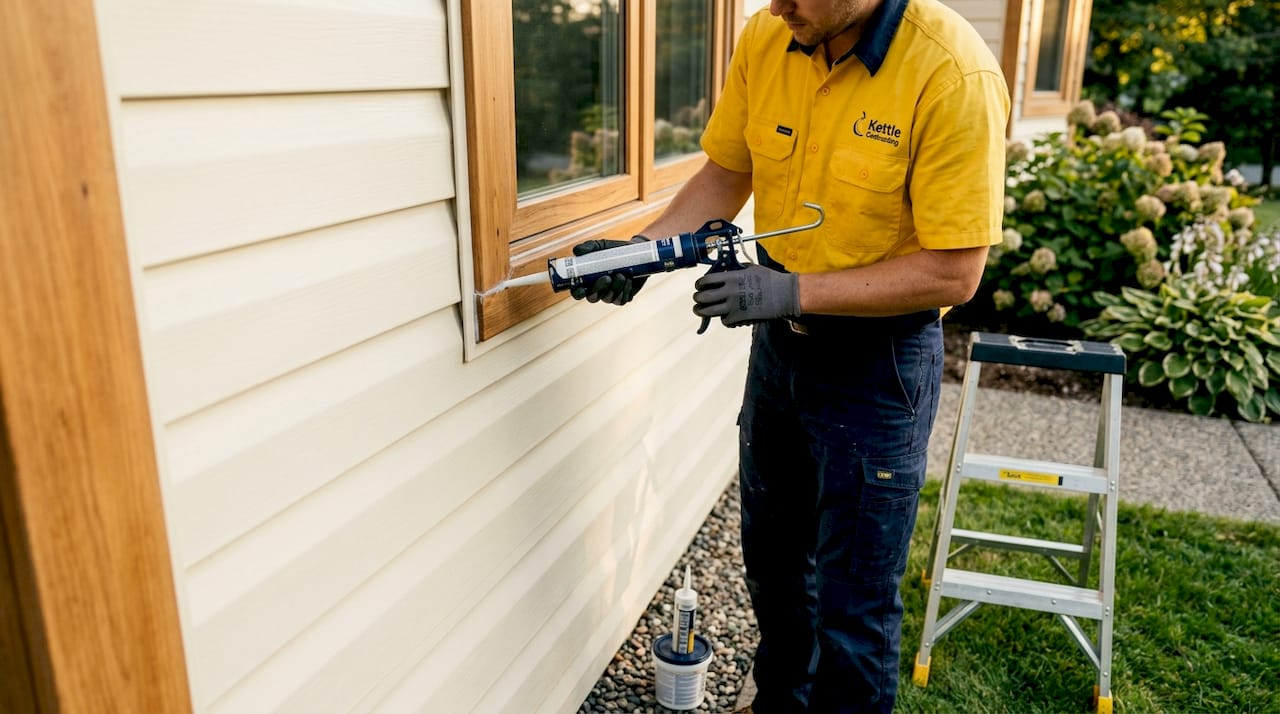
- Apply sealant in one continuous pass: Start at a corner and move steadily to avoid air pockets. Tool the bead immediately with a wet finger or caulk tool for a clean, compressed finish.
- Inspect weatherstripping on doors: Replace any weatherstripping that is compressed, torn, or no longer making full contact with the door stop.
Kettlecontracting advises against applying new caulk in temperatures below 5°C with standard acrylic products. If you are working in cooler conditions, switch to a polyurethane or STP product rated for low-temperature application. You can find detailed guidance on weatherproofing window assemblies in Kettlecontracting’s dedicated resource.
Pro Tip: After sealing, run a bead of painter’s tape along both sides of the joint before you apply caulk. Pull the tape while the caulk is still wet for a perfectly clean line. It takes an extra five minutes and makes the finish look professional.
Properly sealed windows and doors reduce drafts, prevent moisture damage, and improve the effectiveness of whatever insulation is already in the wall. For a buyer, that translates directly to lower utility bills and confidence in the property.
5. Exterior cleaning and maintenance before sealing
Sealant applied over dirty, contaminated, or deteriorated surfaces fails prematurely. Cleaning is not optional prep work. It is a direct factor in how long your sealing work lasts.
Follow this sequence before any sealing application:
- Roof washing: Clean the roof every one to three years to remove moss, lichen, and algae. Organic growth holds moisture against shingles and accelerates deterioration. Use a low-pressure wash with a diluted sodium hypochlorite solution, not high-pressure blasting that strips granules.
- Siding washing: Wash siding annually with a soft-bristle brush or low-pressure washer. Pay particular attention to north-facing walls where moisture and organic growth concentrate.
- Gutter clearing: Clear gutters twice a year, in late spring and late autumn, to prevent overflow that saturates the fascia board and foundation.
- Driveway and walkway cleaning: Pressure wash concrete and asphalt surfaces to remove oil, algae, and debris before applying any joint sealant or crack filler.
- Window and door frame cleaning: Wipe frames with a degreaser before inspection and caulking. Paint residue, dirt, and old caulk residue all reduce adhesion.
Regular exterior cleaning such as annual siding washing and biannual gutter clearing protects property value and prevents the moisture damage that undermines sealants. The cost of a cleaning visit is a fraction of the cost of replacing rotted fascia boards or repointing a foundation wall.
Ontario’s climate adds urgency to this schedule. Freeze-thaw cycles through the winter months force water into any crack or gap, and organic debris in gutters and on siding holds that moisture in place. Frequent exterior cleaning costs far less than repairing the wood rot, shingle damage, or foundation deterioration that follows from neglect. For a flip, cleaning before sealing is also the step that reveals hidden damage you need to address before any product goes on.
Key takeaways
A complete flip property exterior sealing checklist requires inspection before repair, repair before sealing, and climate-appropriate products at every transition zone to protect resale value.
| Point | Details |
|---|---|
| Inspect before you seal | Document all exterior conditions with photos and fix structural issues before applying any sealant. |
| Prioritise transition zones | Window and door perimeters and siding joints are the highest-risk points for air and water intrusion. |
| Match product to substrate | Use polyurethane or STP sealants for high-movement joints; reserve acrylics for low-movement painted surfaces only. |
| Clean surfaces before sealing | Dirty or contaminated substrates cause premature sealant failure regardless of product quality. |
| Foundation waterproofing pays off | Exterior waterproofing at $4,000 to $8,000 prevents far costlier post-sale water damage claims. |
Why sequencing is the part most flippers get wrong
After 25 years of caulking and sealing properties across the Greater Toronto Area, the single most consistent mistake I see on flip projects is the rush to make things look finished before they are actually fixed. A fresh bead of caulk over a rotted window sill looks fine in listing photos. It does not survive a home inspection, and it certainly does not survive the first Ontario winter under new ownership.
The sequencing rule is simple: inspect, repair, then seal. But under the time and budget pressure of a flip, that middle step gets compressed or skipped entirely. Flippers apply sealant over soft wood, over active moisture, over cracks that need structural repair. The sealant traps the problem and accelerates the damage it was supposed to prevent.
I also see flippers underestimate how much Ontario’s freeze-thaw cycle punishes poor sealing choices. A standard acrylic caulk applied in October will crack by March. A polyurethane or STP product applied correctly to a clean, dry surface will still be performing in five years. The material cost difference is minimal. The labour cost of redoing it is not.
Air sealing deserves more attention than it typically gets on flip projects. Air leakage should be treated as a whole-house systems issue, not just a cosmetic one. Sealing one side of a building envelope while leaving the other side open creates pressure imbalances that pull moisture into wall cavities. Work the full perimeter, not just the visible problem areas.
The flippers who get the best results treat exterior sealing as a structural task, not a finishing task. They budget for it early, sequence it correctly, and use professional-grade materials. The properties they sell hold up under inspection and under ownership. That reputation is worth more than the time saved by cutting corners.
— Felix
Get your windows and doors sealed right before listing
If you are preparing a flip for resale and want the sealing done correctly the first time, Kettlecontracting has the resources and the experience to help. Our team specialises in high-performance caulking and exterior sealing across the Greater Toronto Area, with a focus on window and door assemblies that hold up through Ontario winters.

Start with Kettlecontracting’s detailed guide on preparing windows for caulking to understand exactly what surface preparation your project needs before a single bead goes on. For common application errors that cost flippers time and money, the guide on window caulking mistakes is worth reading before you pick up a caulk gun. When you are ready for professional help, contact Kettlecontracting directly for an honest assessment and a clear quote.
FAQ
What is a flip property exterior sealing checklist?
A flip property exterior sealing checklist is a structured guide covering inspection, material selection, and application steps for all exterior sealing tasks before a property is listed for resale. It covers the roof, siding, windows, doors, and foundation in a specific sequence to protect structural integrity and buyer confidence.
Which sealant lasts longest on a flip property?
Bentonite clay and PROSOCO AirDam silyl-terminated polymer sealants offer the longest lifespans, with bentonite lasting 20 or more years and STP products performing comparably on window and door assemblies. Acrylic caulks last only 3 to 5 years and are not recommended for high-movement or high-exposure joints on a resale property.
Should I seal windows before or after painting?
Seal windows after any priming and before the final coat of paint. This allows the paint to bond over the edge of the caulk bead, which improves adhesion and creates a cleaner, more durable finish that resists peeling at the joint.
How much does exterior foundation sealing cost?
Exterior foundation waterproofing typically costs between $4,000 and $8,000 depending on the product type and the extent of the work. That investment protects against post-sale water damage claims and is far less expensive than remediation after a failed inspection.
Can I seal a flip property exterior in cold weather?
Standard acrylic caulks should not be applied below 5°C. Polyurethane and STP sealants like PROSOCO AirDam are formulated for low-temperature application and are the correct choice for autumn and early spring work in Ontario’s climate.