Caulking is a specialised building trade skill, not a finishing task anyone can pick up on a weekend. When applied correctly, sealants protect your building envelope from water infiltration, air leakage, and structural decay. When applied poorly, they fail within months and leave you facing repair bills that far exceed the original job cost. Professional caulking services for residential projects typically cost under $500, while water damage remediation from failed seals can run into thousands. That gap is exactly why caulking is trade-specific work, and why the skill behind it deserves your full attention.
What makes caulking a specialised trade in construction?
Caulking is a performance trade, not a cosmetic one. Failure leads to energy loss and structural decay, not just an unsightly bead. That distinction is what separates a trained caulking tradesperson from someone who picked up a tube at a hardware store.
Material chemistry and compatibility
The first challenge is product selection. Silicone, polyurethane, MS polymer, and latex caulks each behave differently on different substrates. Sealant chemistry compatibility must be tested against the substrate and its thermal expansion rate. Get it wrong and the sealant debonds, cracks, or stains the surface within a season.

Joint design and backer rod sizing
Proper joint design is a technical discipline. Backer rods must be sized 25–30% larger than the joint width so they stay compressed and allow the sealant to flex with building movement. Undersized rods produce three-sided adhesion, where the sealant bonds to the back of the joint as well as both sides. That kills flexibility and causes tearing. Professionals prevent this by pairing correct backer rod sizing with bond-breaker tape, a step most property owners have never heard of.
Timing and environmental conditions
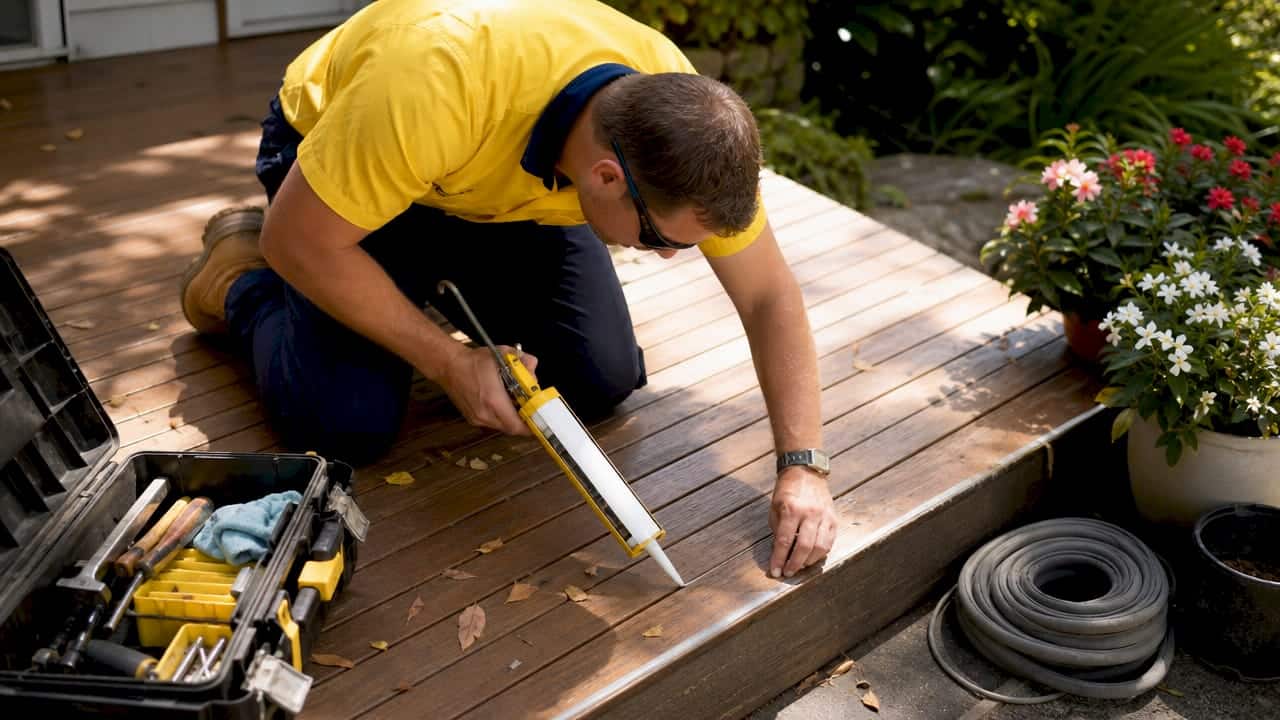
Application timing is not flexible. Neutral silicones must be installed within a 10–15 minute open time, and MS polymers within 15 minutes, for proper adhesion and profile formation before curing begins. Temperature, humidity, and substrate moisture all affect that window. A tradesperson reads those conditions before picking up a gun. An amateur usually does not.
Here are the most common pitfalls that lead to premature sealant failure on DIY attempts:
- Skipping surface preparation, leaving dust, oil, or old sealant residue on the substrate
- Using the wrong product for the substrate or movement class of the joint
- Applying sealant in temperatures outside the product’s rated range
- Failing to tool the bead within the open time, leaving voids and weak adhesion
- Ignoring joint depth ratios, producing a bead that is too thick to flex properly
Pro Tip: Before any caulking job, wipe the substrate with isopropyl alcohol and let it dry fully. Contamination is the single most common cause of adhesion failure, and it costs nothing to prevent.
How professional caulking techniques prevent building damage
Success in caulking depends on diagnostic skill, substrate preparation, product choice, and execution. A clean bead is the last step, not the whole job. Property owners who treat caulking as a finishing task consistently underestimate how much damage a failed seal can cause.
Moisture is the primary threat. Water that gets behind a window frame or into an expansion joint does not stay there. It migrates into wall assemblies, degrades insulation, and promotes mould growth. Kettlecontracting regularly sees remediation jobs where a single failed seal at a window head caused rot extending 600 millimetres into the framing. The original caulking job would have cost a fraction of the repair.
The table below shows how professional application compares to typical amateur results across the factors that matter most to building performance.
| Factor | Professional application | Amateur application |
|---|---|---|
| Sealant lifespan | 15–25 years with correct prep | Often fails within 2–5 years |
| Surface preparation | Full cleaning, priming where required | Typically skipped or incomplete |
| Product selection | Matched to substrate and movement class | Based on price or availability |
| Joint design | Backer rod, bond-breaker tape, correct depth ratio | Rarely applied correctly |
| Moisture protection | Continuous, tested seal | Gaps and voids common |
“Caulking should be viewed as a critical building performance trade rather than a cosmetic finishing step, with direct consequences on energy efficiency and structural integrity.” — industry standard position on sealant trades
Proper surface preparation alone accounts for the majority of sealant failures. Professionals clean substrates, remove all traces of old sealant with mechanical tools where needed, and apply primer on porous materials like concrete or masonry. That preparation work is invisible once the job is done, but it is what makes a seal last two decades instead of two years. You can read more about how caulking prevents water damage in residential buildings to understand the full scope of what a proper seal protects.
Does the building type change what caulking skills are needed?
Yes, significantly. Residential and commercial caulking share the same fundamentals, but the complexity, regulatory requirements, and coordination demands are entirely different at scale.
On a commercial project, caulking requires strict safety planning, specialised access equipment, and compliance with fire and acoustic codes. That level of complexity goes well beyond what a residential tradesperson typically handles. A fire-rated joint in a commercial corridor, for example, requires a specific intumescent sealant installed to a tested system specification. Using the wrong product voids the fire rating, regardless of how clean the bead looks.
Large commercial projects also demand expert coordination of trade sequencing. Caulking must happen after other trades have finished their work on a given surface but before protective coatings or finishes are applied. Getting that sequence wrong means contaminated substrates, damaged seals, or rework that delays the entire project.
Residential work has its own complexity. Here is how the requirements vary by application type:
- Exterior window and door caulking requires UV-stable, paintable sealants rated for Ontario’s freeze-thaw cycles, with correct joint sizing for thermal movement.
- Bathroom and wet-area caulking demands mould-resistant silicone applied to fully dry, clean surfaces, with attention to grout line transitions.
- Expansion joint sealing on masonry or concrete requires high-movement sealants and correct backer rod installation to handle structural flex.
- High-access facade work on multi-storey buildings requires rope access or swing stage certification, adding a safety trade layer on top of the caulking skill set.
Pro Tip: For any exterior caulking job in Ontario, ask your contractor what movement class the sealant is rated for. A joint that moves more than 25% of its width needs a high-movement product. Using a standard sealant on a high-movement joint is one of the most common causes of premature failure on residential facades.
What should property owners look for in a caulking contractor?
Choosing the right contractor is where the importance of caulking skills becomes practical. The lowest quote rarely reflects the full cost of the job, especially when you factor in the likelihood of early failure and remediation.
Here is what to ask and look for before hiring:
- Ask about product specification. A qualified contractor names the product they plan to use and explains why it suits your substrate and joint type. Vague answers about “quality caulk” are a warning sign.
- Ask about surface preparation. Proper prep takes time and adds cost. If a quote seems unusually low, ask specifically what preparation steps are included.
- Check for warranty terms. Reputable contractors stand behind their work with a written warranty. Understand what it covers and for how long.
- Ask about maintenance schedules. Even high-quality sealants benefit from inspection every few years. A contractor who discusses maintenance is thinking about long-term performance, not just the immediate job.
- Look for signs of proper prep on the day. Before sealant goes on, the substrate should be clean, dry, and free of old material. If a crew skips straight to application, that is a problem.
Kettlecontracting’s window caulking maintenance checklist gives property owners a clear framework for evaluating seal condition and knowing when professional attention is needed. Choosing a contractor with documented experience in professional caulking versus DIY also helps you understand the real value difference before you sign anything.
Key takeaways
Trade-specific caulking work requires correct material selection, joint design, surface preparation, and application timing to deliver seals that protect buildings for 15–25 years.
| Point | Details |
|---|---|
| Caulking is a performance trade | Failed seals cause energy loss and structural decay, not just cosmetic issues. |
| Joint design requires training | Backer rod sizing, bond-breaker tape, and depth ratios are technical skills, not common knowledge. |
| Application timing is critical | Sealants must be installed within a 10–15 minute open time for proper adhesion. |
| Commercial work adds regulatory complexity | Fire-rated and acoustic joints require tested system specifications and trade coordination. |
| Contractor selection matters | Ask about product specification, surface prep, and written warranty before hiring. |
Why I stopped calling caulking a simple job
I have been doing this work in Oshawa and across the Greater Toronto Area for 25 years. Early in my career, I took a call from a property manager who had hired the cheapest crew she could find to re-seal the windows on a six-storey residential building. Within 18 months, three units had water damage behind their window frames. The original crew had used an interior latex product on exterior aluminium frames, skipped the backer rod entirely, and applied the sealant in october when temperatures were already dropping below the product’s minimum application threshold. Every mistake was avoidable with basic trade knowledge.
What I have learned is that the misconception about caulking being simple comes from how it looks. A bead of sealant does not look technical. But the decisions that happen before that bead goes on, which product, which prep, which joint design, are where the real skill lives. Ontario’s climate makes this harder than most. We get freeze-thaw cycles that stress joints repeatedly through winter. A sealant that was not specified for that movement fails by spring.
The property owners and facility managers who get the best results are the ones who treat caulking the same way they treat electrical or plumbing work. They ask questions, they expect documentation, and they understand that the cheapest option usually costs more in the end. That mindset protects buildings. It also makes my job easier, because I am not fixing someone else’s shortcuts.
— Felix
Kettlecontracting’s approach to expert caulking work
Kettlecontracting works with property owners and facility managers across the Greater Toronto Area who need caulking done properly the first time. Our team handles windows, doors, expansion joints, and full building envelopes on both residential and commercial properties.

Every project starts with a proper assessment of substrate condition, joint type, and product requirements. We specify sealants matched to your building’s movement class and environmental exposure, and we back our work with clear warranty terms. If you want to understand what proper preparation looks like before work begins, our window preparation guide walks through every step in plain language. For a closer look at what poor caulking actually looks like on a building, our construction defect examples page is a useful reference before you hire anyone.
FAQ
What makes caulking trade-specific work?
Caulking requires knowledge of sealant chemistry, joint design, surface preparation, and application timing that goes well beyond basic DIY skill. Errors in any of these areas lead to premature failure and costly building damage.
How long should professionally applied caulking last?
High-quality sealants, when properly applied by a trained tradesperson, last 15–25 years. Premature failure almost always results from poor product selection or inadequate surface preparation.
Why does caulking fail so quickly on DIY jobs?
The most common causes are skipping surface preparation, using the wrong product for the substrate, and applying sealant outside the product’s rated temperature range. Missing the 10–15 minute open time for proper adhesion is also a frequent issue.
Is commercial caulking more complex than residential?
Yes. Commercial projects require compliance with fire and acoustic codes, specialised access equipment, and precise trade sequencing that residential work does not demand. Using the wrong sealant in a fire-rated joint voids the fire rating entirely.
How do I know if my building’s caulking needs professional attention?
Look for cracking, shrinkage, gaps at the edges of the bead, or discolouration around window and door frames. Any of these signs indicate the seal has failed and water or air infiltration is likely already occurring.