

Coordinating caulking after window installation is the final step that determines whether your new windows actually keep out water, air, and cold. Skip it or rush it, and you’re looking at drafts, moisture damage, and rot inside your wall assembly. Do it right, and a properly sealed window lasts 5–10 years before it needs attention again. The industry term for this process is “post-installation sealing,” and it covers everything from product selection and surface prep to timing, drainage, and the multi-layer approach required by Canadian building standards. This guide walks you through every step, in plain language, so nothing gets missed.
How to coordinate caulking after window installation
Post-installation sealing works as a two-layer system. The interior side uses low-expansion foam to create an air barrier. The exterior side uses caulk to block water intrusion. Missing either layer can void your window warranty and leave your wall assembly exposed to moisture. Both layers need to be planned and applied in the right sequence, not as an afterthought once the window is already trimmed out.
The National Building Code and provincial codes like the BC Building Code require drainage planes, including flashing and membranes, to be in place before the window goes in. Caulk is not a substitute for flashing. It is the final seal over a properly prepared opening. When that preparation is skipped, improper flashing damage can cost $10,000 to $25,000 or more in structural repairs. Caulk alone cannot prevent that outcome.
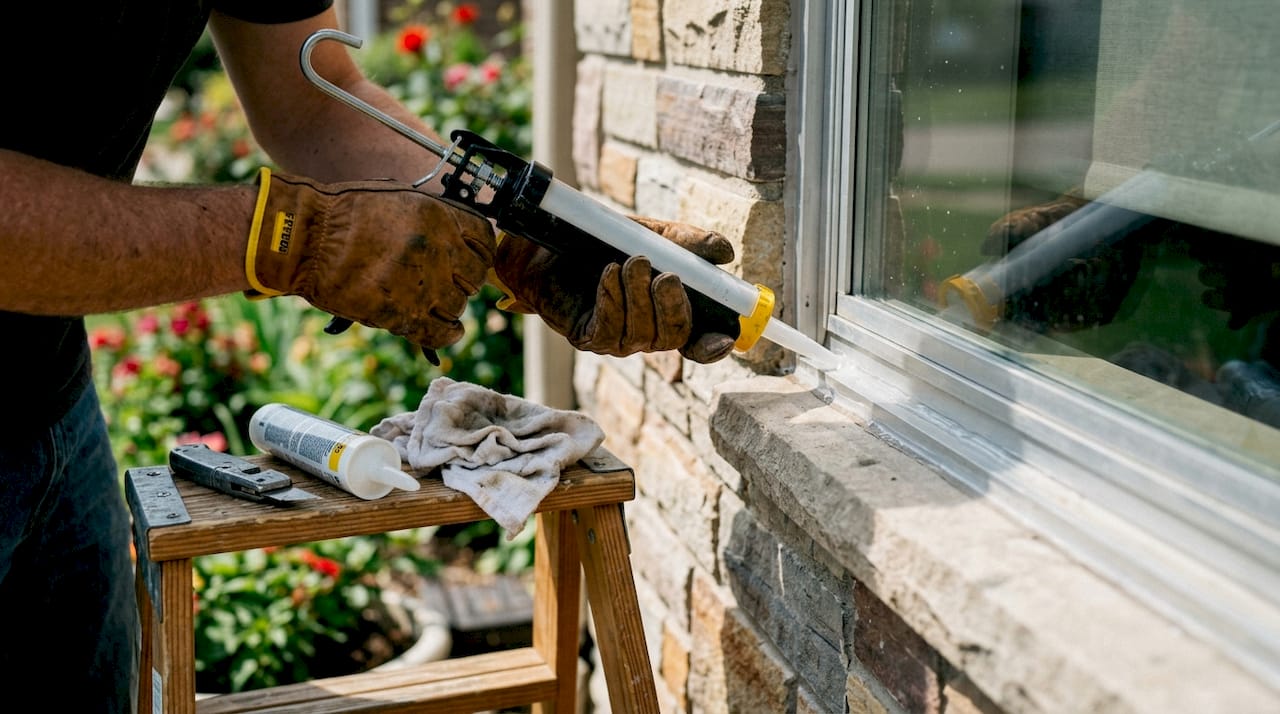
Kettlecontracting treats post-installation sealing as a coordinated process, not a single trade task. That means confirming flashing is complete, surfaces are clean and dry, temperatures are suitable, and the right product is selected for the specific window frame material and exposure.
What materials and tools do you need for post-installation caulking?
Choosing the right sealant is not optional. 100% silicone or high-performance polyurethane are the correct choices for exterior window joints in Canada. Standard latex-acrylic caulk lacks the elasticity to handle Ontario’s freeze-thaw cycles and cracks within one or two seasons.
Your material and tool checklist should include:
- 100% silicone or polyurethane sealant suited for exterior exposure and UV resistance
- Backer rods (closed-cell foam) for any gap wider than 6 mm (¼ inch)
- Caulking gun with a smooth-rod or ratchet mechanism for consistent pressure
- Utility knife and scraper for removing old caulk and debris
- Isopropyl alcohol or a compatible cleaner for surface degreasing
- Caulk-smoothing tool or a wetted finger for tooling the bead
- Safety glasses and gloves for handling solvents and sealants
Window frame material directly affects which sealant you choose. Vinyl, wood, and aluminium all expand and contract at different rates. A sealant that bonds well to vinyl may not adhere properly to an aluminium frame without a primer. Always check the sealant manufacturer’s compatibility data for the specific substrate.
Pro Tip: For wood frames, check Kettlecontracting’s guidance on caulk for wood frames before purchasing. Wood requires a paintable, flexible sealant that handles moisture absorption without losing adhesion.
Temperature matters before you even open the tube. Application below 5°C compromises the sealant’s ability to cure fully, which leads to poor adhesion and early failure. Plan your work for spring or early fall when temperatures are consistently above that threshold.
When and how should you apply caulk after window installation?
Timing is one of the most overlooked factors in post-installation sealing. Apply caulk only when temperatures are consistently above 5°C and the forecast shows no rain for at least 24 hours. In Ontario, that means late spring through early fall is your reliable window. Check the best time to caulk for a full seasonal breakdown.
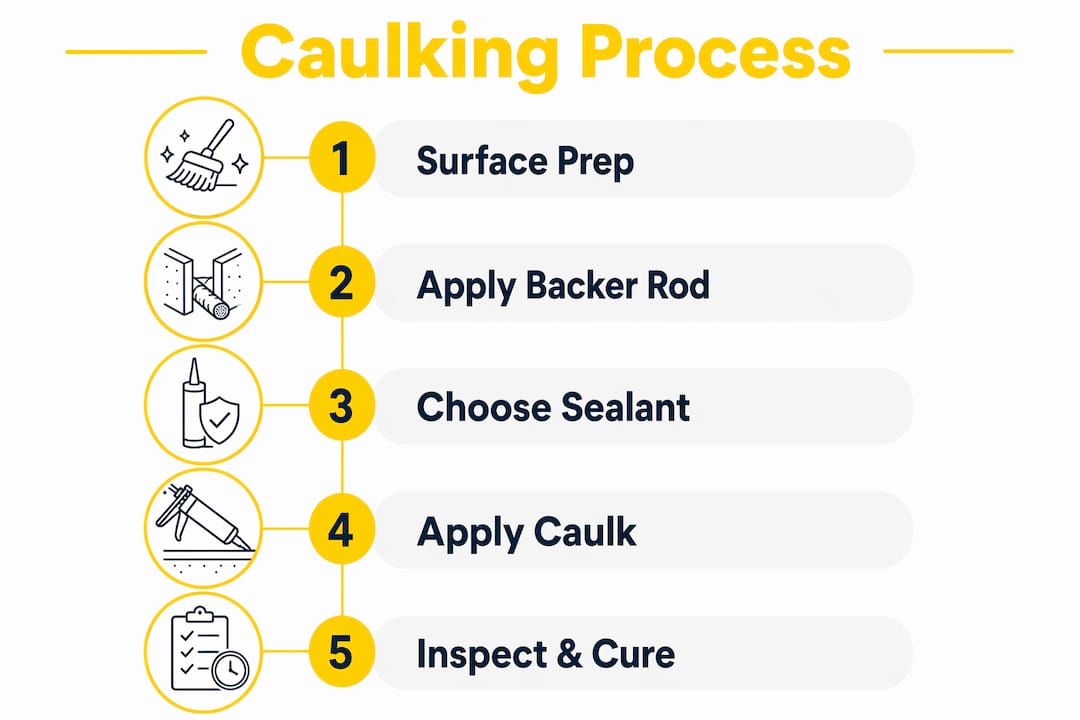
Follow these steps in order for a seal that holds:
- Confirm flashing and drainage are complete. Caulk goes on last, not before the drainage plane is in place.
- Remove all old caulk, paint residue, and debris from the joint using a scraper and utility knife.
- Clean the surface with isopropyl alcohol or a manufacturer-recommended cleaner. Let it dry fully.
- Install backer rods in any gap wider than 6 mm. Backer rods control joint depth and prevent the sealant from bonding to three surfaces, which causes it to tear during thermal movement.
- Cut the caulk tube nozzle at a 45-degree angle to match the joint width.
- Apply a continuous bead around the top and both sides of the window perimeter. Maintain steady gun pressure and move at a consistent pace.
- Leave the bottom sill open. Do not caulk the exterior bottom flange or block any weep holes. This is not optional.
- Tool the bead immediately using a caulk-smoothing tool or a wetted finger. This presses the sealant into the joint and improves adhesion.
- Check drainage paths are clear before calling the job done.
| Step | Action | Why it matters |
|---|---|---|
| Surface prep | Remove old caulk and clean with solvent | Adhesion fails on dirty or oily surfaces |
| Backer rod | Install in gaps wider than 6 mm | Controls depth and prevents three-sided bonding |
| Application | Continuous bead, top and sides only | Maintains drainage at the bottom sill |
| Tooling | Smooth immediately after application | Improves contact and creates a clean finish |
| Drainage check | Confirm weep holes are clear | Prevents trapped water and rot |
Pro Tip: Apply caulk in one continuous pass rather than stopping and restarting. Overlapping starts and stops creates weak points that fail first. If you need to pause, feather the end of the bead so the next pass blends in cleanly.
What common mistakes should you avoid when sealing windows?
Most caulking failures come down to a short list of repeatable errors. Knowing them in advance saves you from redoing the work in two years.
- Caulking over old or dirty caulk. New sealant does not bond to old sealant or contaminated surfaces. The joint will peel within one season.
- Using latex-acrylic caulk on exteriors. It cracks in cold weather and is not rated for the thermal movement that Canadian climates demand.
- Applying caulk in cold or wet conditions. Sealant applied below 5°C or in rain will not cure properly and loses elasticity before the first freeze-thaw cycle.
- Sealing the bottom sill or weep holes. Blocking weep holes traps water inside the wall assembly, causing wood rot, mould, and frame failure. This is one of the most damaging mistakes in window sealing.
- Skipping backer rods on wide gaps. Without a backer rod, the sealant bonds to the back of the joint and tears when the frame moves. It typically fails after one or two winters.
- Caulking before flashing is installed. Caulk applied over an incomplete drainage plane gives a false sense of security while water finds its way in behind the sealant.
- Applying multiple disjointed beads. Patching gaps with short overlapping runs creates seams that open up under thermal stress.
- Ignoring manufacturer and code requirements. Skipping required steps can void your window warranty. Improper sealing is a leading cause of denied warranty claims in Canada.
For a deeper look at errors that shorten caulking lifespan, Kettlecontracting’s guide on common window caulking mistakes covers the full list with photos.
How do you maintain and inspect window caulking after installation?
Exterior caulking is not a permanent fix. Professional-grade sealant lasts 5–10 years in most Canadian climates when applied correctly. That lifespan shortens with poor application, incompatible products, or extreme weather exposure. Annual inspection keeps small problems from becoming expensive ones.
Check your window caulking every year, ideally in spring after the freeze-thaw season and again in fall before temperatures drop. Look for:
- Cracks, gaps, or separation along the bead
- Peeling or lifting at the edges where the sealant meets the frame or cladding
- Discolouration or mould growth, which signals trapped moisture
- Soft or spongy areas in the surrounding wood trim, indicating water has already entered
When you find damage, remove the failed caulk completely before applying new sealant. Patching over cracked caulk does not work. Clean the joint, install a backer rod if needed, and apply fresh sealant under the right temperature conditions.
Pro Tip: Run your hand along the interior window trim on a cold, windy day. If you feel air movement, the exterior seal has failed or was never complete. That’s your signal to inspect the outside joint before the next heating season.
Interior and exterior maintenance differ in one key way. Interior caulk around window trim is primarily cosmetic and handles much less thermal stress. It can be touched up with paintable latex-acrylic. Exterior caulk must always be replaced with a compatible high-performance product. Mixing product types on the same joint causes adhesion failure.
If leaks persist after re-caulking, the problem is likely behind the caulk. Flashing failure, a damaged sill pan, or a failed window seal all require professional assessment. Caulking over a structural drainage problem delays the repair and increases the eventual cost. Kettlecontracting’s resource on how moisture enters home walls explains how to trace the source before applying any new sealant.
Proper window sealing and energy efficiency go hand in hand. A failed exterior seal does not just let in water. It lets in cold air, raises heating costs, and puts stress on your HVAC system through every Ontario winter.
Key takeaways
Coordinating caulking after window installation requires the right product, correct timing above 5°C, a clean substrate, backer rods in wide gaps, and an open bottom sill to preserve drainage.
| Point | Details |
|---|---|
| Use the right sealant | Apply 100% silicone or polyurethane for exterior joints; avoid latex-acrylic in Canadian climates. |
| Respect the temperature threshold | Apply caulk only when temperatures are consistently above 5°C to ensure full cure and elasticity. |
| Never seal the bottom sill | Leave weep holes open to allow drainage and prevent trapped moisture from causing rot. |
| Install backer rods first | Use backer rods in gaps wider than 6 mm to control joint depth and prevent three-sided bonding. |
| Inspect annually | Check for cracks, peeling, and mould every spring and fall; replace failed caulk completely before reapplying. |
What 25 years on the job taught me about post-installation sealing
The most common call I get after a window installation is from someone who noticed a draft or a water stain six months later. Nine times out of ten, the caulk was either the wrong product, applied in the wrong conditions, or the bottom sill was sealed shut. None of those are complicated mistakes. They’re just easy to make when you’re rushing to finish a job before the weather turns.
The detail that surprises most homeowners is the bottom sill rule. People assume that sealing every gap completely is the goal. It isn’t. A window assembly is designed to drain. If water gets past the exterior caulk, and eventually some always does, it needs a path out. Block that path and you’ve turned a minor infiltration event into a rot problem inside your wall.
I’ve also seen contractors apply caulk in october when temperatures are already dropping below 5°C at night. The bead looks fine on day one. By spring, it’s cracked and pulling away from the frame. The sealant never cured properly because the temperature dropped before it had time to set. That’s a full redo, and it was entirely preventable.
The other thing I’d push back on is the idea that this is straightforward DIY work. Surface prep, product selection, backer rod sizing, and drainage verification all require judgment that comes from doing it repeatedly. A homeowner can absolutely do this job well. But they need to go in with the right information, not just a tube of caulk from a hardware store and a YouTube video. The science behind long-lasting caulk is worth understanding before you start.
— Felix
Kettlecontracting’s window sealing services for homeowners and contractors
Kettlecontracting provides professional post-installation caulking for residential and commercial properties across the Greater Toronto Area. Every job includes product selection matched to your window frame material, backer rod installation on wide joints, drainage verification, and weather-timed application.

Our crews follow current Canadian building standards and use only high-performance silicone and polyurethane sealants rated for Ontario’s climate. We confirm flashing is complete before any sealant goes on, and we never seal a bottom sill. If you want to understand why caulking is trade-specific work and what separates a professional seal from a DIY patch, that resource covers it clearly. Contact Kettlecontracting for a site assessment and a straight answer on what your windows actually need.
FAQ
What type of caulk is best for exterior window installation in Canada?
100% silicone or high-performance polyurethane are the correct choices for exterior window joints in Canada. Standard latex-acrylic lacks the elasticity to handle freeze-thaw cycles and cracks quickly.
Should you caulk the bottom of a window frame?
No. The exterior bottom flange and weep holes must stay open to allow drainage. Sealing them traps water inside the wall assembly and causes wood rot and mould.
How long does exterior window caulk last in Canadian climates?
Professional-grade exterior sealant lasts 5–10 years in most Canadian climates when applied correctly and under suitable temperature conditions.
When is the right time to caulk after window installation?
Apply caulk when temperatures are consistently above 5°C and no rain is forecast for at least 24 hours. Late spring through early fall is the most reliable period in Ontario.
Do you need backer rods when caulking windows?
Yes, for any gap wider than 6 mm. Backer rods control joint depth and prevent the sealant from bonding to three surfaces, which causes it to tear during thermal movement.
