

Caulking prevents callback claims when it is applied as the final weather seal after joint function, flashing, and drainage have been confirmed, the substrate is clean and dry, and the product is matched to the substrate and climate. Miss any one of those conditions and the bead will fail, usually within the first freeze-thaw cycle. Before you gun a single bead, run through the three non-negotiables:
- Correct joint function: confirm whether the joint is meant to seal or drain. Sealing a drainage path traps water and causes the exact damage you were hired to prevent.
- Surface prep and adhesion: the substrate must be clean, dry, and above 5°C. Adhesion to a dusty, wet, or cold surface is temporary at best.
- Correct product and cure conditions: match the sealant chemistry to the substrate, the expected movement, and the ambient temperature. Apply it within the manufacturer’s stated temperature window and allow full cure before exposure.
Run the quick decision checklist in Section 3 before any application. It takes five minutes and it is the single most effective callback-prevention habit a crew can build.
Table of Contents
- Why do sealants fail? Root causes of callbacks
- What does the joint actually need? A field decision checklist
- When caulk is not the fix: flashing, drainage, and assembly defects
- How do you choose the right sealant for Canadian jobs?
- Surface prep, weather windows, and application technique
- How do you run a mock-up adhesion test before full application?
- Final inspection and turnover checklist
- Common caulking mistakes that lead to callbacks
- When should you hire a pro? How Kettlecontracting prevents callbacks
- Key takeaways
- What most crews get wrong about callbacks
- Kettlecontracting’s zero-callback approach, applied to your project
- Useful sources and product datasheets (Canada-focused)
- FAQ
Why do sealants fail? Root causes of callbacks
Most callbacks trace back to one of four failure modes, and knowing which one you are looking at changes how you respond.
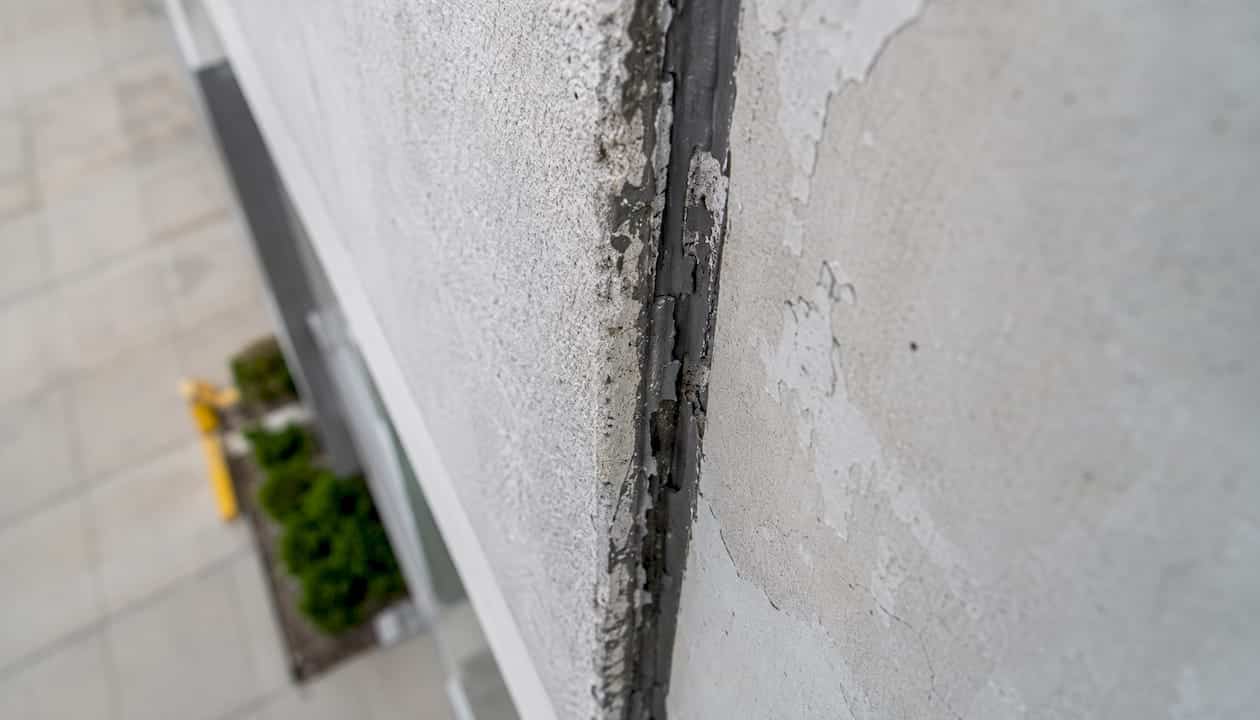
Adhesion failure is when the sealant peels cleanly away from the substrate, leaving the joint surface intact. It usually means the surface was contaminated, wet, or too cold at application, or that a primer was required and skipped. This matters for warranty defence because adhesion failure is almost always an installation error, not a product defect.
Cohesion failure is different. The sealant splits internally while still bonded to both sides. This points to a joint that is moving more than the sealant’s elongation rating allows, or to a product that has aged past its service life. Cyclic movement is the leading factor in sealant degradation, above environmental stresses alone, and in Canada’s cold-dry climates the temperature differentials are among the most severe on the continent.
Drainage mistakes are the third and most preventable cause. Blocking weep holes or sealing a sill shut to stop a visible drip converts a manageable drainage issue into trapped moisture, rot, and structural damage. The fourth is layering incompatible products. Cured silicone and cured polyurethane will not bond to each other; adhesion drops to nearly zero, and the new bead fails within months.
The real lesson from callbacks: the product is rarely the problem. Process errors — contaminated surfaces, wrong joint geometry, sealed drainage paths, and incompatible chemistry — account for the majority of repeat failures. Fix the process and the product performs as specified.
NRC research on joint watertightness shows water entry rates rising under severe simulated conditions, with leakage increasing with crack size and pressure differential. Even a small gap accumulates significant interior moisture over repeated rain events. That is why strict joint tolerances and proper adhesion are not optional on any job.
What does the joint actually need? A field decision checklist
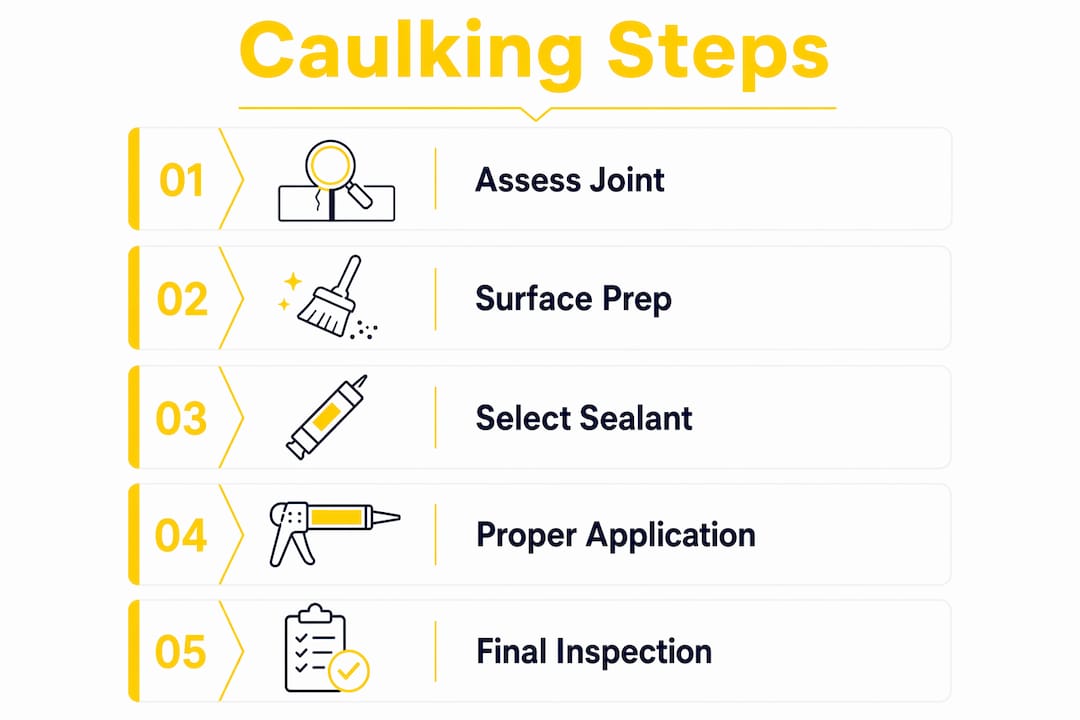
Before applying any sealant, work through this checklist on-site. It takes less time than a callback.
- Identify the joint function. Is this joint designed to seal against air and water, to allow movement, or to drain? If it is a drainage path, do not seal it. Mark it and move on.
- Inspect flashing and weep paths. Lift or probe any flashing to confirm it is seated and directing water outward. Clear weep holes and verify they are open. If flashing is lifted or missing, stop and flag it for repair before sealing.
- Test for standing water or trapped moisture. Press a moisture meter against the substrate. On masonry, look for efflorescence or staining. On wood, probe for soft spots. Sealing over trapped moisture accelerates rot and guarantees adhesion failure.
- Check substrate compatibility. Identify the substrate material and confirm the chosen sealant is listed as compatible on the manufacturer’s technical data sheet (TDS). Note whether a primer is required.
- Confirm ambient and surface temperature. Surface temperature must be above 5°C. Applying sealant below this threshold or on frosted surfaces compromises adhesion and makes premature failure within a freeze-thaw cycle likely.
- Decide: seal, drain, or rebuild? If flashing is defective or drainage is blocked, the correct answer is to fix the assembly first. Caulk applied over a broken assembly will fail and you will be back.
Pro Tip: Use a thin wire probe to clear and confirm weep holes before sealing the frame perimeter. If water runs out when you probe, the drainage path is working. If nothing moves, the weep is blocked and needs clearing before any sealant goes on.
When caulk is not the fix: flashing, drainage, and assembly defects
Caulk is a weather seal. It is not a waterproofing membrane and it is not a substitute for correct flashing.
UBC joint sealant guidelines are direct on this point: “Joint sealants are not to be used as a primary method of waterproofing; construction documents should provide details for flashing and drainage and select sealants accordingly.”
The assembly problems that defeat sealant work most often are: lifted or missing head flashing that allows water to run behind the frame; blocked weep holes at sill level; sill slopes that pitch water inward rather than outward; and gaps in the drainage plane behind cladding. Each of these sends water to a place the sealant cannot reach. No matter how well the bead is tooled, water will find the path.
Persistent leaks after professional sealing almost always indicate a flashing or structural installation problem, not a sealant problem. The correct remediation sequence is: clear and verify drainage, repair or install correct flashing, confirm the assembly sheds water properly, then seal. Skipping to the seal step and hoping for the best is what generates repeat callbacks. You can also review common DIY installation pitfalls that often create the assembly defects crews are asked to seal around after the fact.
How do you choose the right sealant for Canadian jobs?
Product selection comes down to five spec criteria and a few hard rules about chemistry.
Spec checklist
| Criterion | What to look for on the TDS |
|---|---|
| Movement capability (elongation %) | Match to expected joint movement; higher elongation for expansion joints |
| Shore hardness | Softer (lower Shore A) for high-movement joints; harder for low-movement glazing |
| UV resistance | Exterior joints need UV-stable chemistry; silicone outperforms polyurethane in direct sun |
| Service temperature range | Must cover Ontario’s full seasonal range, roughly –40°C to +50°C for exposed joints |
| Primer requirement | Listed by substrate on the TDS; never assume primer-free on porous or contaminated surfaces |
| Recommended bead geometry | Joint width-to-depth ratio and backer rod size specified by manufacturer |
OSI and GE Silicone both offer product lines available across Canada with published TDS documents covering substrate compatibility, primer requirements, and movement ratings. Always pull the current TDS for the specific product and lot, not a generic spec sheet.
A few hard rules:
- Never apply a new bead of one cured chemistry over another cured sealant type. Cured silicone over cured polyurethane produces near-zero adhesion.
- For wet interior areas (showers, tubs, sinks), silicone or silicone-blend caulks are the standard choice for moisture resistance.
- Exterior-grade products with appropriate movement capability and strict adherence to manufacturer cure times are required in harsh Canadian climates. Incorrect product choice reduces service life.
- For cold-climate jobs, check the best window caulk for Canadian winters before specifying.
Surface prep, weather windows, and application technique
Prep determines whether the bead lasts or peels. The product is secondary.
Experienced contractors consistently report that surface cleanliness, substrate homogeneity, and correct backer rod depth determine success more than premium product choice. That is worth repeating on every job briefing.
The prep sequence that prevents rework: remove all old sealant mechanically; clean the joint with a solvent appropriate to the substrate (isopropyl alcohol on most non-porous surfaces); allow full evaporation; inspect for substrate damage; verify surface temperature and dryness; apply primer per TDS if required; install backer rod; apply sealant; tool immediately.
Backer rod and bond-breaker rules: use a closed-cell backer rod sized to compress 25–33% when installed. The joint depth should be roughly half the joint width for most elastomeric sealants. Bond-breaker tape is required at the base of joints where three-sided adhesion would restrict movement and cause cohesion failure.
Temperature and moisture: surface temperature must be above 5°C and the substrate must be dry. In Ontario, the ideal application window runs from May to early October for most exterior sealants. Cold air slows cure chemistry and increases the risk of adhesion failure before the bead sets. Installing sealants at temperatures well above the mean annual temperature also creates risk: the sealant experiences greater tensile strain in winter when it is least elastic, which accelerates crack growth.
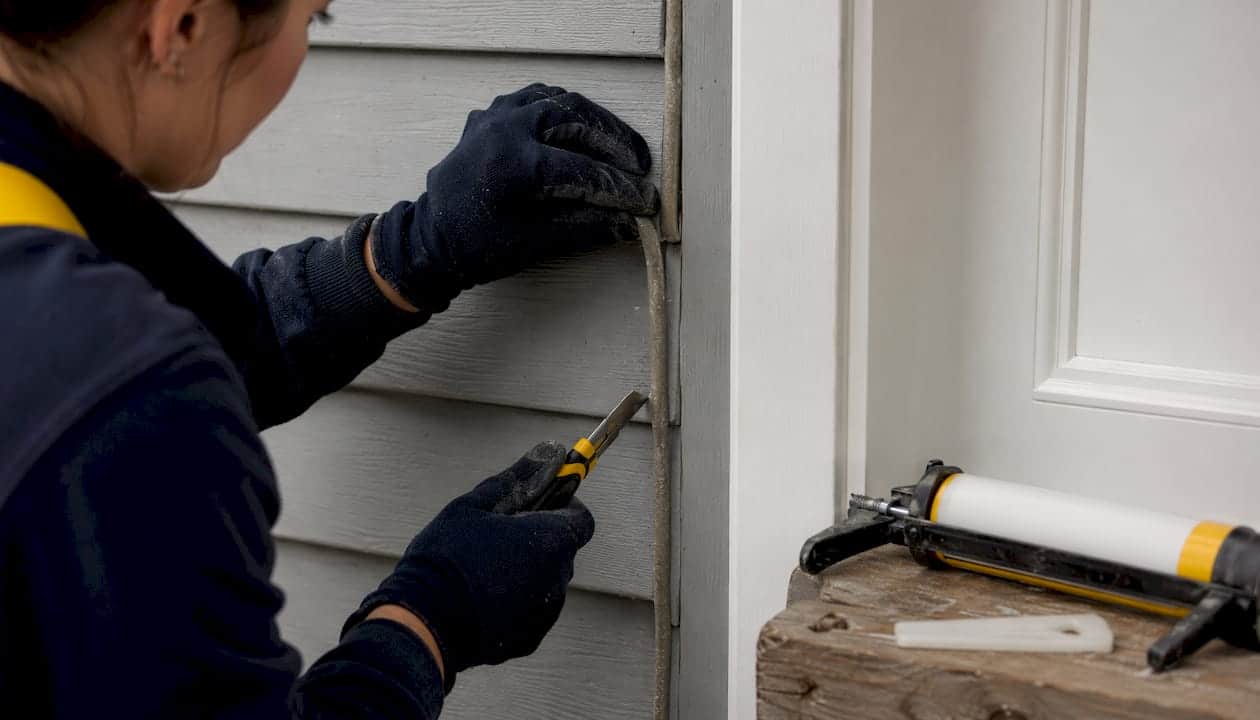
Tooling: tool the bead immediately after application, before a skin forms. A consistent, single-pass tool stroke removes voids, ensures two-sided contact, and produces the concave profile that sheds water. Fish-eyes and voids are almost always caused by tooling too late or over a contaminated surface.
Checking the exterior surface condition before you start prep can flag substrate issues that would otherwise cause adhesion failure after the sealant is applied.
How do you run a mock-up adhesion test before full application?
A mock-up is the lowest-cost, highest-value test you can run on a project. It confirms adhesion, primer need, and product compatibility before you commit to the full scope.
Mock-up protocol
- Prepare a representative substrate area using the same cleaning method, primer, and ambient conditions planned for the full job.
- Apply the chosen sealant with the intended primer and backer rod, at the planned bead geometry.
- Allow full cure per the TDS. Do not rush this step; partial cure produces misleading adhesion results.
- Perform a peel test. Pull the cured bead at 180° from the substrate. Good adhesion is confirmed by cohesive failure — the sealant tears internally before it releases from the surface. Adhesive failure (clean peel from the substrate) means the primer or prep is insufficient.
- Perform a movement test. Compress and extend the cured bead to the joint’s expected movement range. Check for cohesion cracks.
- Document everything: photos of the mock-up, product batch numbers, primer used, ambient and surface temperature at application, cure start date, and test results.
Testing checklist
- Adhesion peel test (cohesive vs. adhesive failure)
- Cohesion check under compression and extension
- Wet/dry cycling if the joint will see repeated wetting (soak the mock-up for 24 hours, then retest adhesion)
- Photo documentation with batch numbers and date
Canadian seasonal note: run the mock-up in conditions representative of the actual installation season. A mock-up done in July does not confirm performance for an October application on a cold substrate. Good adhesion is defined by cohesive failure before adhesive failure; field mock-ups are the lowest-cost, highest-value test to confirm substrate compatibility and primer need.
Final inspection and turnover checklist
Complete this checklist at every job before handing over to the owner or general contractor.
Bead and adhesion checks:
- Bead geometry consistent with specified width and depth
- No voids, fish-eyes, or bridging
- Adhesion confirmed at edges (no lifting or peeling)
- Tooling smooth and continuous
Drainage and assembly confirmation:
- Weep holes open and unobstructed
- Sill slope verified (water runs outward)
- Flashing seated and directing water away from the frame
- No sealant applied over drainage paths
Documentation fields to record:
- Product name and batch number
- Primer used (product and batch)
- Ambient temperature and surface temperature at application
- Applicator name
- Cure start date and expected full-cure date
- Warranty terms and any stated limitations
Communication to owner: tell the owner clearly what the sealant will and will not do. Caulk is a weather seal with a finite service life. It will not correct a flashing defect, and it will need inspection and maintenance on a regular schedule. A caulking season checklist shared at handover sets correct expectations and reduces dispute calls.
Common caulking mistakes that lead to callbacks
Keep this list on the truck. These are the repeat offenders.
- Sealing weep holes or drainage paths. The most common and most damaging mistake. Caulk the top and sides of a frame; leave the bottom weep paths open unless the assembly is specifically designed to drain elsewhere.
- Skipping surface prep. Dust, oil, old sealant residue, and moisture are the top causes of adhesion failure. Clean the joint every time, even on a quick repair.
- Layering incompatible chemistries. Never apply a new bead over a different cured sealant type without full removal of the old material.
- Wrong joint geometry. Too deep a bead restricts movement and causes cohesion failure. Too shallow a bead lacks the cross-section to handle elongation. Follow the TDS geometry.
- Applying in wrong temperatures. Below 5°C surface temperature, adhesion is compromised. Above the mean annual temperature in summer, tensile stress in winter increases crack risk.
- Skipping primer on porous substrates. Concrete, masonry, and some wood substrates require primer for reliable adhesion. Check the TDS.
- Touching up over failed sealant. Applying new sealant over an existing failed bead produces an inferior seal. Remove the old material completely before re-sealing.
For a broader look at mistakes that generate repeat work, the common caulking mistakes resource covers the full list with remediation guidance.
When should you hire a pro? How Kettlecontracting prevents callbacks
Some jobs are straightforward maintenance. Others have assembly defects, substrate compatibility questions, or warranty implications that make professional involvement the right call.
Kettlecontracting’s workflow on every job follows the same sequence: diagnose the assembly first, run a mock-up adhesion test, select approved products matched to the substrate and climate, apply with trained crews, and complete a documented inspection and handover package. That process is what separates a bead that lasts from one that generates a callback six months later.
The field reality after 25 years: the jobs that come back are almost never about the product. They come back because someone sealed a drainage path, skipped prep on a cold morning, or applied new sealant over an incompatible cured bead. The fix is process discipline, not a more expensive tube.
Kettlecontracting serves residential and commercial properties across the Greater Toronto Area, with a documented approach to trade-specific caulking work that covers assembly diagnosis, product selection, and handover documentation. For projects where airtightness testing is required, the airtightness testing implications of sealant placement are part of the pre-application review.
Key takeaways
Correct joint function, confirmed drainage, and matched product chemistry are the three conditions that determine whether caulking prevents callback claims or creates them.
| Point | Details |
|---|---|
| Check joint function first | Confirm seal vs. drain before applying; sealing a drainage path causes more damage than no sealant at all. |
| Surface prep outweighs product choice | Clean, dry substrate above 5°C and correct backer rod depth prevent more callbacks than premium sealant selection. |
| Never layer incompatible chemistries | Cured silicone and cured polyurethane will not bond; always remove old sealant before re-sealing with a different chemistry. |
| Mock-up before full application | A peel test confirming cohesive failure is the only reliable way to verify adhesion before committing to the full scope. |
| Kettlecontracting’s documented workflow | Assembly diagnosis, mock-up testing, approved products, and a signed handover checklist are the standard on every Kettlecontracting job in the Greater Toronto Area. |
What most crews get wrong about callbacks
The conventional wisdom is that callbacks are a product problem. Buy better silicone, use a name brand, and the calls stop. After 25 years on jobs across Ontario, that framing is wrong in most cases.
The callbacks that cost the most money and the most client relationships come from process failures that happen before the tube is even opened. A crew that seals a weep hole on a Friday afternoon because it looks like the source of a drip will generate a callback by spring. A crew that applies sealant at 3°C because the job needs to be done will be back in April. A crew that layers new polyurethane over old silicone because removal takes too long will be back within a year.
What separates crews that do not get callbacks is not the brand of sealant in their truck. It is the habit of stopping to ask whether the joint is ready to be sealed, whether the drainage is confirmed, and whether the product is actually compatible with what is already there. That habit takes five minutes. A callback takes half a day and costs a client relationship.
Training matters here too. A single experienced applicator who understands joint function and adhesion chemistry will outperform a larger crew that treats caulking as a finishing step rather than a technical trade activity. If you are managing applicators, build the decision checklist into the pre-application routine and make mock-up documentation non-negotiable on any project with substrate compatibility questions.
Kettlecontracting’s zero-callback approach, applied to your project
Callbacks from sealant failures are expensive in time, materials, and client trust. Kettlecontracting’s approach cuts that risk by treating every job as a technical trade activity: we diagnose the assembly before touching a tube, run a mock-up adhesion test on representative substrate, select products matched to the substrate and Ontario’s climate, apply with trained crews, and hand over a documented inspection package with batch numbers, temperatures, and warranty terms.

If you are managing a project in the Greater Toronto Area and want a caulking scope done right the first time, start with our guide to why caulking is trade-specific work or go straight to preparing your windows for caulking to understand what the prep process looks like before we arrive. Contact Kettlecontracting to book a site assessment and get a scope that holds.
Useful sources and product datasheets (Canada-focused)
These are the references worth keeping on file when specifying or defending caulking work:
- NRC joint watertightness and failure causes: quantifies water entry rates under simulated conditions; useful for explaining to owners why small joint defects matter.
- NRC sealant adhesion and service life prediction: covers adhesion testing methodology and cohesive vs. adhesive failure definitions; the standard reference for mock-up protocol design.
- NRC overview of sealant durability and service life prediction: broad review of degradation mechanisms, UV, moisture, and cyclic loading; useful for specifying service life expectations.
- UBC joint sealant guidelines: institutional standard requiring flashing and drainage details before sealant selection; cite this when defending a decision not to seal a drainage path.
- BC Housing Maintenance Matters No. 5 — Sealant Maintenance: practical maintenance programme covering inspection, touch-up, repair, and replacement; useful for client handover documentation.
- MDPI study on sealant crack length in Canadian climates: climate-specific crack growth data across Canadian locations; supports product selection and installation temperature decisions.
- Manufacturer TDS (OSI, GE Silicone): always pull the current TDS for movement capability, substrate compatibility list, primer requirements, and application temperature range. Generic spec sheets are not a substitute.
What to look for on a TDS: movement capability (elongation % and joint movement accommodation factor), substrate compatibility list, primer requirements by substrate, application and service temperature range, cure time and conditions, and warranty terms. If any of these fields are missing or vague, contact the manufacturer’s technical support line before specifying.
FAQ
What are the most common caulking mistakes that cause callbacks?
The top repeat offenders are sealing drainage paths or weep holes, skipping surface prep on a cold or wet substrate, layering incompatible sealant chemistries, and applying sealant outside the manufacturer’s temperature window. Each of these is a process error, not a product failure.
What caulk should you use in a bathroom?
Silicone or silicone-blend caulks are the standard recommendation for wet interior areas like showers, tubs, and sinks, because of their moisture resistance and flexibility. Check the product TDS to confirm it is rated for continuous wet exposure.
Can caulk act as an adhesive?
Caulk can hold in limited, low-movement situations, but it is not a structural adhesive and should not be relied on as a permanent load-bearing bond. Its flexibility makes it unsuitable for applications where rigid adhesion is required.
What are the main benefits of correct caulking on a building?
Correct caulking seals the building envelope against water infiltration and air leakage, reduces energy loss, and protects substrate materials from moisture-driven deterioration. It also supports long-term building lifespan when maintained on a regular inspection schedule.
How do you prevent callback claims from sealant failures?
Confirm joint function and drainage before sealing, prep the substrate correctly, match the product to the substrate and climate, run a mock-up adhesion test, and document the handover with batch numbers and temperatures. Kettlecontracting follows this sequence on every job in the Greater Toronto Area.
