
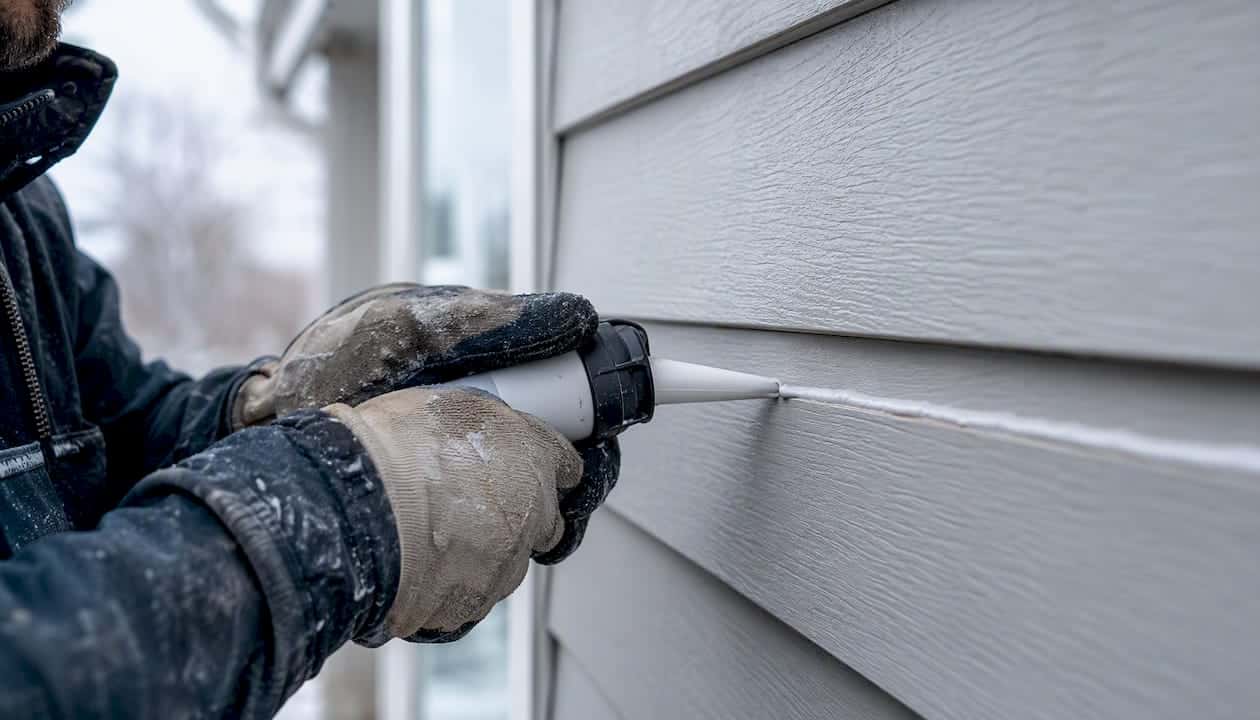
Yes, you should caulk fibre cement siding — but only in the right locations, with the right product. The single rule that covers everything else: use a permanently flexible, ASTM-compliant sealant and follow your siding manufacturer’s system guidance, not a blanket “caulk every seam” approach. Caulking extends your building’s lifespan when it’s applied correctly, but applied in the wrong spots, it can trap water and create the very damage you’re trying to prevent.
The locations that typically require caulking on fibre cement siding are:
- Siding-to-trim interfaces (where planks meet window casings, corner boards, or door frames)
- Non-self-flashing penetrations such as pipe stacks, electrical boxes, and mounting blocks
- Vertical terminations where siding ends at a wall or soffit
- Around windows and doors where proper flashing is not present
The primary exceptions are just as important to know:
- Do not caulk along horizontal flashing lines (window heads, Z-flashing) — water needs to drain freely there
- Do not caulk butt joints where proper flashing or an H-jointer is the correct detail
- Do not caulk exposed nail heads on James Hardie ColorPlus products
Pro Tip: Prioritise flashing and drainage details before reaching for the caulk gun. A well-flashed joint that drains properly will outlast a caulked seam every time, especially through Ontario’s freeze-thaw cycles.
Key takeaways
Fibre cement siding caulking done right means using ASTM-compliant, permanently flexible sealants in the correct locations — and knowing where not to caulk is just as important as knowing where to apply.
| Point | Details |
|---|---|
| Use ASTM-compliant sealant | Specify ASTM C920 Grade NS Class 25 or higher, or ASTM C834 latex, for all exterior fibre cement joints. |
| Caulk the right locations only | Seal siding-to-trim, non-self-flashing penetrations, and vertical terminations; never seal below horizontal flashing. |
| ColorPlus requires special care | Do not caulk exposed nail heads or restricted joints on ColorPlus finishes — differential weathering affects the factory finish. |
| Inspect annually in Ontario | Walk the perimeter each spring and after severe weather; re-caulk any joint showing cracks, lifting, or brittleness. |
| Kettlecontracting for complex jobs | For water intrusion, flashing repairs, or warranty-sensitive work across the Greater Toronto Area, Kettlecontracting provides professional assessment and documented joint treatment. |
Table of Contents
- What caulk should you use on fibre cement siding?
- Where do you caulk fibre cement siding — and where do you not?
- How to caulk fibre cement siding step by step
- Surface prep, gap sizing, and cold-weather application tips
- How often should you inspect and re-caulk fibre cement siding?
- Common mistakes homeowners make with fibre cement siding caulking
- Key James Hardie and Allura rules you must follow in Canada
- When should you call a professional caulking contractor?
- What we see in the field after 25 years
- Kettlecontracting handles the complex caulking jobs on fibre cement siding
- Sources
- FAQ
What caulk should you use on fibre cement siding?
Two ASTM standards govern acceptable sealants for fibre cement siding, and both major manufacturers align on them. James Hardie’s installation guidance specifies an elastomeric joint sealant meeting ASTM C920 Grade NS specification for high-movement joints (or higher), or a latex joint sealant meeting ASTM C834, applied per the sealant manufacturer’s written instructions.
Here is what those labels mean in practice:
- ASTM C920 Grade NS specification for high-movement joints: A non-sag elastomeric sealant that can accommodate joint movement of at least 25% in either direction. This is the standard for most exterior caulking on fibre cement.
- ASTM C834: A latex-based joint sealant — more paintable and easier to apply, but generally suited to lower-movement joints.
Permanent flexibility is the key property for Canadian climates. Ontario’s freeze-thaw cycles and wide seasonal temperature swings cause fibre cement planks to expand and contract. A sealant that hardens over time will crack, lose adhesion, and fail within a few seasons. The sealant must move with the substrate, not fight it.
Product categories available in Canada worth knowing:
- Elastomeric hybrid sealants (polyurethane or silicone-modified): Strong adhesion, high movement capability, UV resistant. Tremco Dymonic FC is a well-regarded example in this class — flexible, weather-resistant, and bonds to a wide range of substrates, making it a practical choice where high movement and UV exposure are concerns.
- Urethane sealants: Paintable, durable, and widely available at Canadian building supply retailers. Good for siding-to-trim joints.
- High-performance paintable silicones: Some formulations are now designed for painted finishes, but always verify compatibility with your specific finish system before applying.
Paintability matters. Most fibre cement siding is painted after installation, so your sealant must accept a topcoat. James Hardie’s care guidance notes that field painting over caulk may produce a sheen difference compared with factory-applied PrimePlus or ColorPlus finishes, and recommends 100% acrylic topcoats following the paint manufacturer’s instructions.
ColorPlus exception: If your James Hardie siding carries a ColorPlus factory finish, the manufacturer advises against caulking in certain locations because caulk and the factory finish weather at different rates, creating visible colour mismatch over time. Always check which finish system you have before selecting a product or deciding where to apply it.
Where do you caulk fibre cement siding — and where do you not?
Getting the locations right matters more than the product you choose. Allura’s installation manual is clear on this: caulk where siding meets trim at non-self-flashing penetrations and vertical terminations, and do not caulk between siding and horizontal flashing at window or door heads.
Locations that require caulking
- Siding-to-trim joints: Where the face of a plank meets a window casing, door casing, or corner board — this is the most common location and the one most likely to fail without a proper bead.
- Non-self-flashing penetrations: Pipes, conduit, hose bibs, dryer vents, and electrical boxes that pass through the siding plane without integrated flashing need to be sealed at the perimeter.
- Vertical terminations: Where siding ends at a wall, soffit, or adjacent cladding material.
- Around windows and doors: Where flashing is not present or is incomplete, a sealant bead at the perimeter prevents water from tracking behind the frame.
Locations where you should not caulk
- Below Z-flashing or window head flashing: CertainTeed’s instructions specifically warn against caulking the bottom edge of a horizontal joint above Z-flashing. Sealing that gap blocks the drainage path and can force water into the wall.
- Butt joints with proper flashing behind them: As noted by JLC Online, where durable flashing is installed behind a butt joint, crews may leave tight joints and rely on the flashing rather than caulk. Caulk alone at a butt joint is not a substitute for a proper drainage detail.
- Exposed nail heads on ColorPlus products: James Hardie advises against caulking these on ColorPlus finishes due to differential weathering.
- Horizontal flashing lines generally: Any location where water is meant to drain away from the building should remain open.
Pro Tip: When in doubt about a specific joint, pull up the installation manual for your siding brand. James Hardie, Allura, and CertainTeed all publish their joint treatment requirements — flashing, caulking, or H-jointer — and following those documents is what keeps your warranty intact.
How to caulk fibre cement siding step by step
The short answer: clean the surface, remove old sealant, apply backer rod where needed, run a continuous bead, and let it cure fully before painting. Here is the full sequence for a durable result.
- Safety first. Cutting or grinding fibre cement generates crystalline silica dust. If you are cutting or removing material, wear an N95 respirator or better, use wet-cutting methods, and keep bystanders clear. This applies to prep work, not just installation.
- Remove old sealant completely. A utility knife and a stiff plastic scraper are usually enough for failed latex beads. Urethane or hybrid sealants may need a sealant remover product. Leaving old material in place prevents proper adhesion of the new bead.
- Clean and dry the substrate. Wipe both surfaces with a clean, dry cloth. Remove dust, chalk, and any solvent residue. The substrate must be fully dry — applying sealant over damp fibre cement is one of the most common causes of early adhesion failure.
- Install backer rod for wider joints. For joints wider than about 6 mm (1/4 inch), use a closed-cell foam backer rod to control the depth of the sealant. The target depth-to-width ratio is roughly 1:2 — a joint 12 mm wide should have sealant about 6 mm deep. Backer rod also gives the sealant the right hourglass shape, which improves flexibility.
- Load the gun and cut the tip correctly. Cut the nozzle at a 45-degree angle to match your joint width. A tip cut too wide deposits too much material; too narrow and you’ll get an underfilled bead.
- Apply a continuous bead. Move the gun at a steady pace, keeping consistent pressure. Stop-and-start application creates voids and weak points. Work from one end of the joint to the other without lifting the gun.
- Tool only when the product allows it. Some modern hybrid sealants specifically state no tooling — check the product data sheet. When tooling is permitted, use a wet finger or a plastic tool within the open time the manufacturer specifies.
- Protect from rain and temperature extremes during cure. Most exterior sealants need at least 24 hours before rain exposure, though cure times vary by product and temperature. Read the data sheet.
Pro Tip: An underfilled bead is worse than no bead at all — it gives the appearance of a sealed joint while leaving gaps at the edges. Run the gun slowly enough that the sealant makes full contact with both sides of the joint before you move forward.
Surface prep, gap sizing, and cold-weather application tips

The technical details that separate a bead that lasts ten years from one that fails in two seasons come down to prep and conditions.
Surface preparation:
- Remove all failed caulk before resealing — never apply new sealant over old. Adhesion to a failed bead is not adhesion to the substrate.
- Avoid solvent-based cleaners on fibre cement; they can leave residue that prevents bonding. A clean, dry cloth is usually sufficient.
- Prime bare or cut edges of fibre cement before caulking if the manufacturer’s instructions call for it.
Gap sizing and backer rod:
- Joints narrower than 6 mm (1/4 inch) generally do not need backer rod, but the sealant must still make full contact with both faces.
- Joints wider than 19 mm (3/4 inch) may need two-stage treatment or a different joint detail — a single bead of caulk is not designed for very wide gaps.
- Backer rod diameter should be about 25% larger than the joint width so it stays in place under compression.
Cold-weather application in Ontario:
- Most exterior sealants have a minimum application temperature of 4°C to 5°C. Check the product data sheet, not just the air temperature — substrate temperature on a north-facing wall in March can be several degrees colder than the ambient reading.
- Fast-curing hybrid sealants perform better in cold conditions than standard latex products, which skin slowly and can be damaged by frost before they cure.
- Avoid applying any sealant to a frost-covered or wet surface. Even a thin film of moisture between the sealant and the substrate will cause adhesion failure.
Tooling guidance:
- Latex and urethane sealants generally accept tooling within their open time.
- Some hybrid and silicone-modified sealants specify no tooling in their data sheets. Tooling these products can disrupt the skin that forms and reduce long-term performance. Always read the product instructions before reaching for the wet finger.
How often should you inspect and re-caulk fibre cement siding?
James Hardie’s care and maintenance guide is direct on this: re-apply caulking when it shows signs of wear, specifically at penetrations, flashings, plank and trim connections, and sometimes between plank joints. That guidance points to an inspection-driven schedule rather than a fixed calendar interval.
A practical inspection schedule for Ontario properties:
- Annual visual walkthrough: Every spring, after the last hard freeze, walk the perimeter and check all caulked joints at eye level and from a ladder where accessible.
- After severe weather: Following an ice storm, a wind-driven rain event, or a freeze-thaw cycle that caused significant temperature swings, check penetrations and flashing terminations specifically.
- After any exterior work: Painting, window replacement, or soffit repairs can disturb existing sealant. Inspect those areas immediately after the work is complete.
Red flags that mean action is needed now:
- Cracks running along the length of a bead, especially at the adhesion line where sealant meets substrate
- Sealant that has pulled away from one or both sides of the joint
- Hard, brittle sealant that no longer flexes when pressed gently
- Visible gaps or daylight through a joint that was previously sealed
- Water stains on interior finishes near exterior walls, or damp insulation found during a renovation
A simple homeowner checklist: photograph each penetration and trim connection during your annual inspection, note the condition (good, cracking, lifted, missing), and schedule re-caulking for any joint rated cracking or worse. This documentation also supports warranty claims if water damage occurs. For a more detailed seasonal approach, the caulking season checklist for Ontario homes covers the full inspection sequence.
Common mistakes homeowners make with fibre cement siding caulking
Most premature caulk failures trace back to one of a handful of errors. Knowing them in advance saves you from redoing the work in two years. For a broader look at these issues, the caulking mistakes homeowners make guide covers the full range.
Wrong product selection:
- Using a non-ASTM interior caulk on an exterior joint. Interior latex caulks are not formulated for UV exposure or freeze-thaw movement and will fail quickly.
- Using a non-paintable silicone where the joint will be painted. Paint does not adhere to standard silicone, and the bead will peel away from the painted surface.
Poor surface preparation:
- Applying new sealant over old, failed material. The new bead will only be as strong as the old one underneath.
- Caulking a damp or cold substrate. Adhesion failure is almost guaranteed.
Caulking where flashing is required:
- Sealing the bottom of a Z-flashing or window head flashing. This is the most consequential mistake because it actively traps water in the wall assembly.
- Treating butt joints with caulk alone when the installation called for flashing behind the joint. Caulk is not a substitute for a drainage detail.
Overcaulking:
- Filling every visible seam regardless of whether the manufacturer’s instructions call for it. On ColorPlus finishes, this creates visible weathering mismatch and can affect your finish warranty.
Quick fix for a failed bead: Score along both edges with a utility knife, peel out the old sealant, clean the substrate, and apply a fresh bead of ASTM-compliant product. If the joint keeps failing after two attempts, the problem is usually a missing or damaged flashing detail behind it — replacing the flashing is the correct fix, not a third bead of caulk.
Key James Hardie and Allura rules you must follow in Canada
Both James Hardie and Allura publish installation manuals that specify exactly how joints must be treated. Following these documents is not optional if you want your warranty to remain valid.
James Hardie Canada requirements:
- Joint treatment options are flashing, caulking, or an H-jointer. You must choose and execute one of these — a bead of caulk alone does not satisfy the requirement if flashing was specified.
- Sealant must comply with ASTM C920 Grade NS specification for high-movement joints (or higher) or ASTM C834, applied per the sealant manufacturer’s written instructions.
- Some caulk manufacturers do not allow tooling — James Hardie’s guidance acknowledges this and defers to the sealant product instructions.
- ColorPlus products: do not caulk exposed nail heads, and avoid caulking in locations where differential weathering between the caulk and the factory finish will be visible.
Allura requirements mirror the same ASTM standards. Allura’s manual directs caulking at siding-to-trim interfaces, non-self-flashing penetrations, and vertical terminations, and prohibits caulking between siding and horizontal flashing at window and door heads.
CertainTeed aligns on ASTM C920 and adds the explicit instruction to avoid caulking below a Z-flashing — consistent with the other manufacturers.
Warranty note: If the installation called for flashing and caulk was substituted, the warranty may not cover resulting water damage. Document your joint treatment method during installation or inspection.
When should you call a professional caulking contractor?
Some fibre cement caulking jobs are straightforward maintenance. Others are signs of a larger problem that a DIY repair will not solve.
Call a professional when you see:
- Large areas of failing sealant across multiple elevations — this suggests a systemic installation problem, not routine wear
- Water staining on interior walls or ceilings near exterior penetrations, even after re-caulking
- Repeated leaks at the same location after two or more DIY repairs
- Siding planks that have swollen, delaminated, or show paint failure at the edges — signs of chronic moisture intrusion
- Any situation where flashing needs to be removed and replaced, which requires disturbing the siding installation
What a professional brings to the job:
- Full removal of failed sealant and substrate cleaning before any new material goes in
- Flange and flashing inspection and repair where needed — addressing the cause, not just the symptom
- Backer rod installation for correct joint geometry
- Product selection matched to the specific finish system, movement requirements, and temperature conditions
- Documentation of the joint treatment method used, which supports warranty compliance
Cost factors to expect: Access (ladder vs. scaffolding), total linear metres of joint, whether flashing replacement is needed, finish compatibility checks, and whether the work requires documentation for a warranty claim all affect the final price. A professional assessment will identify which of these apply to your property. Understanding why caulking is trade-specific work helps you evaluate what you are actually paying for.
What we see in the field after 25 years
The most common failure we encounter on fibre cement siding is not a wrong brand of caulk. It is a drainage detail that was skipped or a flashing that was never installed. The caulk gets blamed because it is the visible failure, but the real problem is behind it.
A simple rule of thumb: if a joint is designed to drain, it should not be caulked. If a joint is designed to seal, it needs a permanently flexible, ASTM-compliant sealant. When you are not sure which category a joint falls into, the manufacturer’s installation manual will tell you — and following it is what protects both the building and the warranty.
When the building envelope has been compromised, whether by water intrusion, failed flashing, or years of deferred maintenance, a professional assessment is the right call. The cost of a proper repair is almost always less than the cost of the water damage it prevents.
Kettlecontracting handles the complex caulking jobs on fibre cement siding
For routine touch-ups on a single joint, this guide gives you what you need. For anything involving water intrusion, multiple failing joints, ColorPlus warranty concerns, or flashing repairs, that is where Kettlecontracting’s professional caulking team makes a real difference.

Kettlecontracting serves residential and commercial properties across the Greater Toronto Area, with a focus on high-performance sealing that holds through Ontario winters. Our services for fibre cement siding include full sealant removal and replacement, flashing inspection and repair, backer rod installation, and product selection matched to your specific finish system. We document our joint treatment approach so your manufacturer warranty stays intact.
If you are managing a multi-unit property or a commercial building with fibre cement cladding, we also offer maintenance contracts that include annual inspections and scheduled re-caulking. Get in touch with Kettlecontracting to book an assessment and get a clear picture of what your building envelope actually needs.
Sources
These are the primary technical documents and resources referenced throughout this article. Consult them directly for the full installation and maintenance requirements that apply to your specific product and finish system.
FAQ
What caulk should you use on fibre cement siding?
Use an elastomeric sealant meeting ASTM C920 Grade NS specification for high-movement joints or higher, or a latex sealant meeting ASTM C834. The sealant must be permanently flexible, exterior-grade, and paintable if the joint will be topcoated.
Should you caulk fibre cement siding at every joint?
No. Caulk only where the manufacturer’s instructions specify — siding-to-trim, non-self-flashing penetrations, and vertical terminations. Horizontal flashing lines and butt joints with proper flashing behind them should not be caulked.
What caulk works best for Hardie siding?
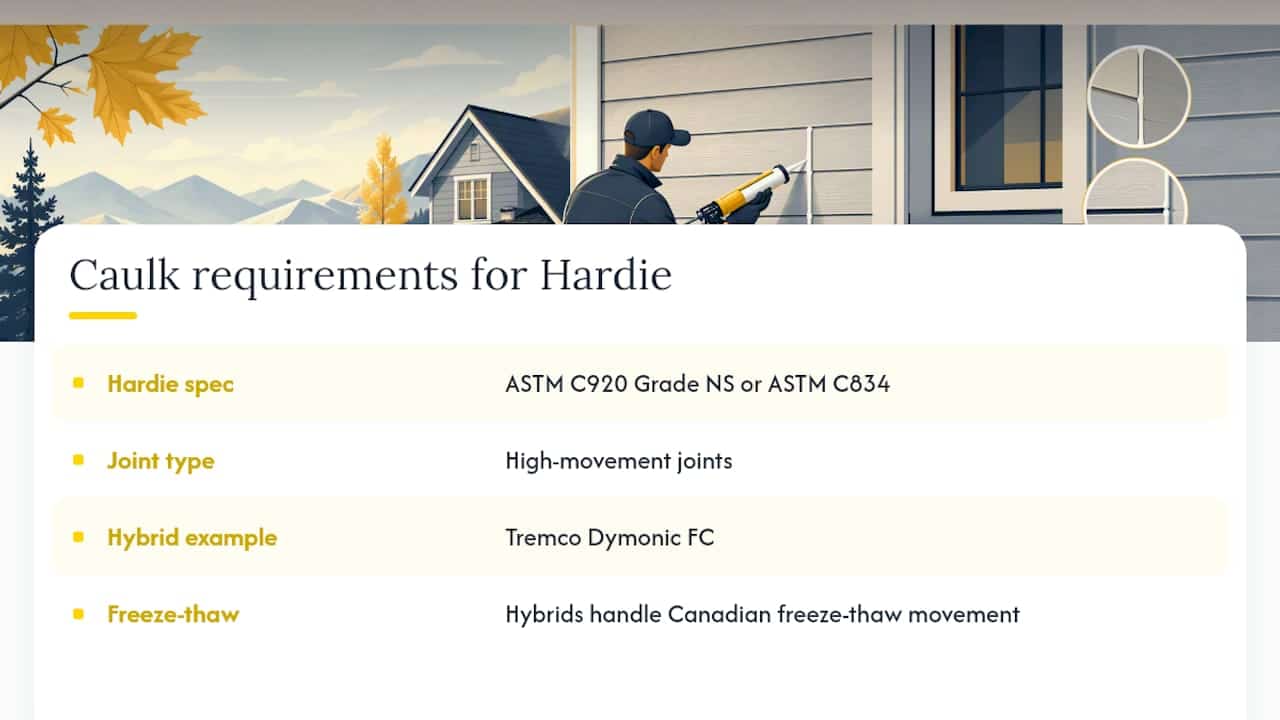
James Hardie specifies ASTM C920 Grade NS specification for high-movement joints (or higher) elastomeric sealants or ASTM C834 latex sealants. High-performance hybrid products such as Tremco Dymonic FC meet these requirements and handle the movement demands of Canadian freeze-thaw conditions well.
Do you caulk between Hardie board planks?
Generally, no — butt joints between planks are typically handled with flashing or an H-jointer, not caulk. Where caulk is used at a butt joint, it supplements rather than replaces a proper drainage detail behind the joint.
How often should fibre cement siding caulking be re-applied?
Inspect annually and re-apply when sealant shows cracks, lifting, or brittleness. James Hardie’s care guide specifically calls for re-caulking at penetrations, flashings, and plank and trim connections whenever wear is visible — there is no fixed calendar interval, but an annual spring inspection is the practical standard for Ontario properties.
