

Yes, you should caulk around aluminium windows. A failing or missing seal is one of the most common causes of aluminum window leaks, drafts, and rising heating bills in Ontario homes. For most aluminium-to-glass or aluminium-to-metal joints, neutral-cure 100% silicone is the right product family. Where the frame meets brick or concrete, polyurethane or a high-performance hybrid sealant handles freeze-thaw movement better. Most ground-level jobs are safe for a careful DIYer. Call a professional when you spot flashing failure, soft framing, recurring leaks, or any work above the first storey.
When DIY is reasonable:
- Ground-level windows with intact flashing and no signs of rot
- Small gaps at the frame perimeter where old caulk has simply shrunk or cracked
- Replacing failed caulk on a single window as part of routine maintenance
When to hire a contractor:
- Flashing is damaged, missing, or improperly lapped
- The sill or framing feels soft or shows water staining inside the wall
- Gaps are large enough to require reconstruction or a sill pan
- Work is above the first storey or requires ladder access on a multi-storey building
- Airtightness testing is required after the work
Key takeaways
Neutral-cure silicone is the correct sealant for aluminium window joints; polyurethane suits masonry transitions; always seal the interior perimeter before the exterior to avoid trapping moisture in the wall.
| Point | Details |
|---|---|
| Match sealant to substrate | Use neutral-cure silicone for aluminium-to-glass joints; use polyurethane or hybrid for frame-to-brick or concrete. |
| Seal interior before exterior | Completing the interior bead first prevents warm moist air from being trapped in the wall cavity. |
| Inspect annually | Check exterior caulking every year; budget acrylics may need replacement every 3–7 years, quality silicones can last 15–20+ years. |
| Never block weep holes | Weep holes must stay clear; blocking them causes water to back up inside the frame and is a leading cause of leaks. |
| Kettlecontracting for complex jobs | For flashing failures, multi-storey access, or rotten framing, Kettlecontracting provides professional inspection, product selection, and warranted installation across the GTA. |
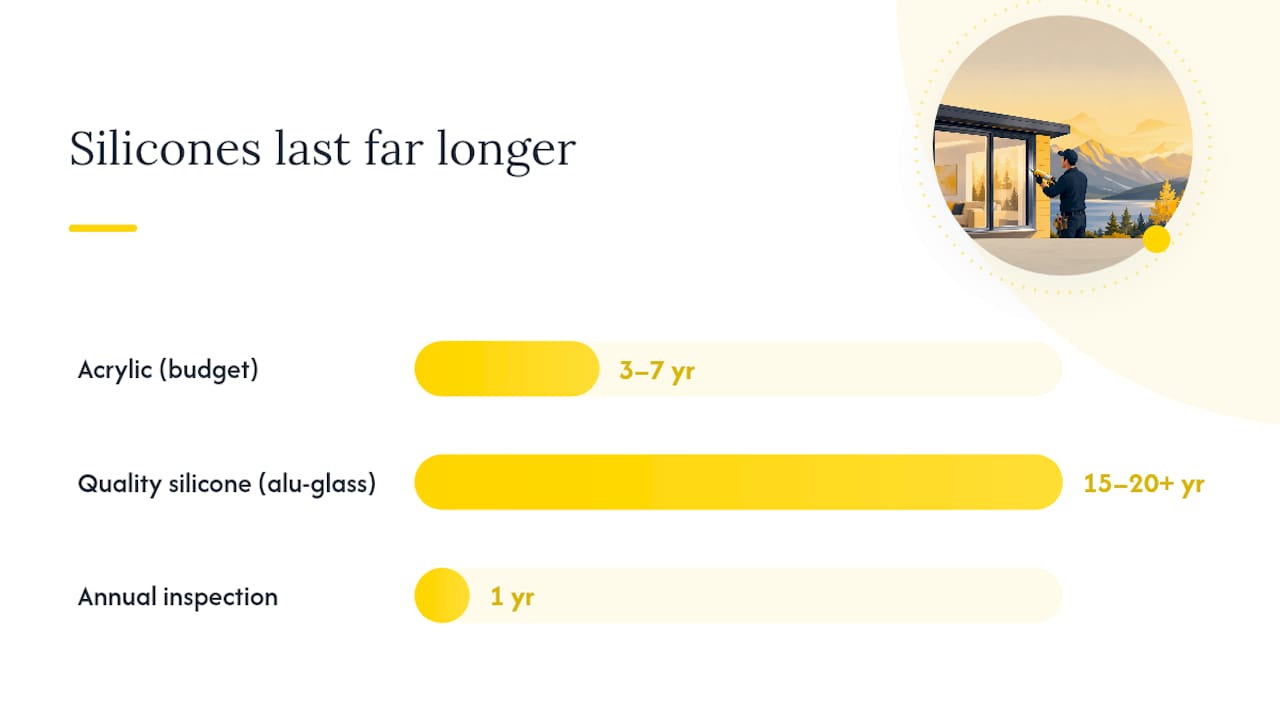
Table of Contents
- Which caulk types work best on aluminium windows
- Where to caulk, how to sequence it, and what the Ontario Building Code says
- How to remove old caulk and re-caulk aluminium windows step by step
- Tools and materials you need before you start
- Common mistakes, how to fix sealant failures, and when to inspect
- When to call a professional and what the work includes
- What 25 years on the job has taught me about window caulking
- Kettlecontracting window caulking services in the GTA
- Sources
- FAQ
Which caulk types work best on aluminium windows
Matching the sealant to the substrate is the single most important decision in any aluminum window caulking project. The wrong product will fail early regardless of how well it is applied.
Neutral-cure silicone is the standard for aluminium-to-glass, aluminium-to-aluminium, and aluminium-to-vinyl joints. The chemistry matters here: acetoxy-cure silicones release acetic acid during cure, which corrodes aluminium and attacks the metal spacer bars in insulating glass units. Neutral-cure silicone avoids that reaction entirely and is the near-universal spec for metal and glass interfaces in Canadian glazing work. When properly applied, quality silicones last 15–20+ years in exterior exposure.
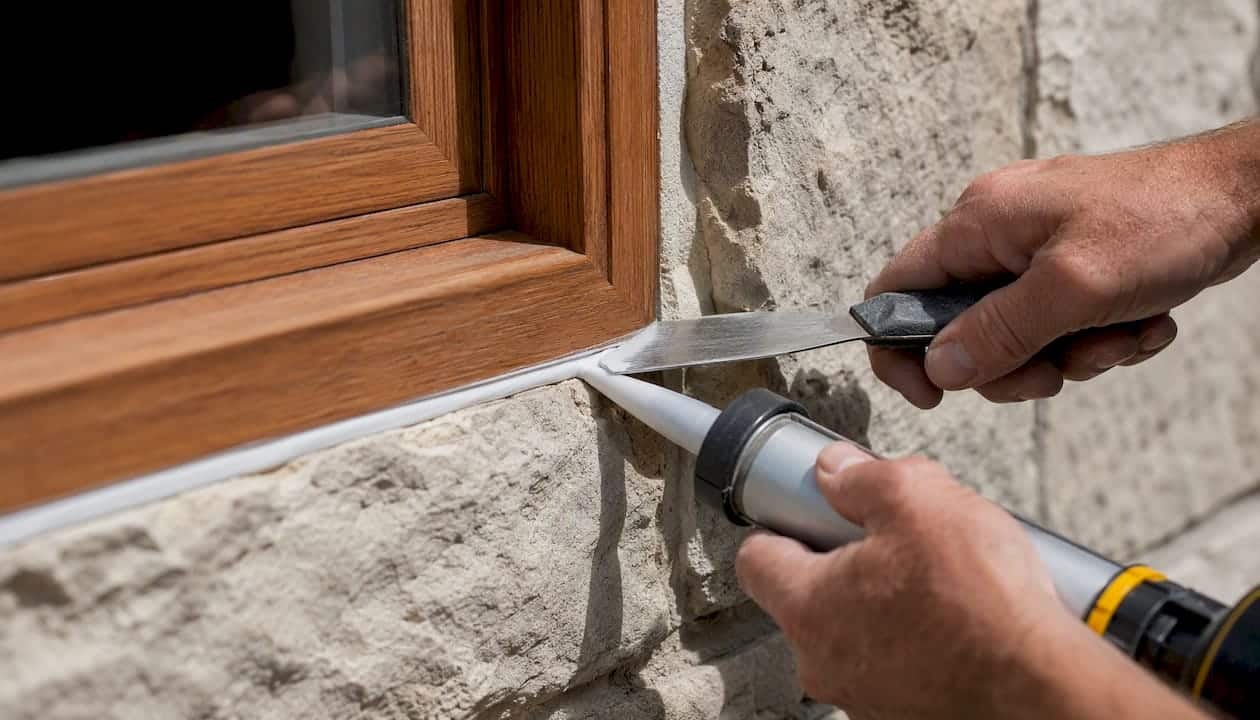
Polyurethane or hybrid sealants are the better choice where an aluminium frame meets brick, concrete block, or stone. Polyurethane bonds into the pores of masonry and resists the compression-and-extension cycle that Ontario’s freeze-thaw winters impose. Silicone generally performs poorly on porous masonry unless the surface is primed or mechanically backed.
Paintable hybrids (such as products in the Tremco Dymonic family or DAP Dynaflex Ultra) suit joints that will be painted, such as trim-to-frame or interior perimeter beads. Richelieu carries glazing accessories and compatible sealant products for trade buyers in Canada. Henry construction sealants and Sikaflex (Sika Canada) polyurethane products are widely available at Canadian building supply outlets and are commonly specified for masonry-to-frame transitions.
| Substrate combination | Recommended sealant family | Paintable | Typical outdoor lifespan |
|---|---|---|---|
| Aluminium frame to glass | Neutral-cure 100% silicone | No | 15–20+ years |
| Aluminium frame to aluminium | Neutral-cure 100% silicone | No | 15–20+ years |
| Aluminium frame to brick/concrete | Polyurethane or hybrid | Yes (some) | 10–15 years |
| Trim to frame (painted finish) | Paintable hybrid or latex-silicone | Yes | 5–10 years |
| Interior perimeter bead | Paintable acrylic or hybrid | Yes | 3–7 years |
Compatibility warnings to keep in mind:
- Never apply new caulk over old failed caulk. The bond will fail at the old layer.
- Never block weep holes. They are designed to drain water from the window frame and must stay clear.
- Choose a paintable product only where painting is actually required. Silicone does not accept paint.
Where to caulk, how to sequence it, and what the Ontario Building Code says
Sequencing is where most DIY caulking jobs go wrong. Natural Resources Canada advises completing interior sealing before exterior caulking because sealing the exterior first can trap warm, moist interior air inside the wall cavity, causing hidden rot and mould. Interior sealing also does more work for air leakage control than exterior caulk, which is primarily a rain defence.
Interior sealing first, exterior last. Exterior caulk is your last line of defence against rain, not your primary air barrier. Seal the interior perimeter continuously before touching the outside of the window. Skipping this order is one of the most common mistakes in window weatherproofing, and it can cause damage that is invisible until the wall is opened.
Critical joint locations to seal:
- Frame-to-cladding perimeter (exterior, all four sides)
- Trim-to-frame joints and mitred trim corners
- Sill perimeter (exterior), sloped to shed water
- Interior perimeter bead at drywall or plaster return
- Weep holes: leave these open at all times
OBC 9.7.6.2 requires sealants between window frames or trim and exterior cladding to be non-hardening, resistant to weathering, and compatible with the substrate. The code references ASTM sealant standards, which means your product selection should align with ASTM C920 movement class ratings and backing material requirements. Where aluminium contacts masonry, an alkali-resistant coating on the metal surface is required to prevent corrosion from the alkaline masonry environment.
How to remove old caulk and re-caulk aluminium windows step by step
You can re-caulk most aluminium windows yourself if the flashing is intact, the framing is solid, and the work is at ground level. Here is the correct sequence.
- Inspect first. Look for soft sills, stained drywall inside, or lifted flashing before you pick up a caulk gun. If you find any of those, stop and call a contractor. Caulking over a flashing failure only hides the problem.
- Remove all old caulk completely. Use a utility knife and a plastic scraper to cut and lift the old bead. A dedicated caulk remover tool speeds this up. Leaving any old material behind compromises adhesion.
- Check weep holes and flashing. Clear any debris from weep holes with a thin pick. Confirm flashing laps correctly over the sill. Blocked weep holes are a leading cause of window leaks and are often mistaken for caulk failure.
- Clean and dry the surfaces. Wipe both substrates with isopropyl alcohol or a manufacturer-approved solvent cleaner. The joint must be completely dry before you apply sealant.
- Install backer rod for gaps wider than 6 mm. Choose a closed-cell polyethylene backer rod with a diameter roughly 25% larger than the joint width. Press it in to leave the correct sealant depth: bead depth should equal approximately half the joint width.
- Apply primer if the manufacturer’s data sheet requires it. Some polyurethane products need a primer on porous masonry for full adhesion. Silicone on clean aluminium or glass generally does not.
- Apply the sealant. Use a smooth, steady pull with the caulk gun. Cut the nozzle at a 45-degree angle, sized to match the joint width. Apply in one continuous pass where possible.
- Tool the bead immediately. Use a wet finger or a finishing tool to press the sealant into the joint and slope the face slightly so water runs away from the frame. Do not leave a concave bead on a horizontal sill.
- Allow full cure before exposure. Neutral-cure silicone typically skins over in 30–60 minutes and reaches full cure in 24–72 hours depending on temperature and humidity. Apply only when surface and air temperatures are between 5°C and 35°C.
Pro Tip: Cut the nozzle smaller than you think you need. A nozzle opening that is too large produces an oversized bead that is harder to tool neatly and wastes product. Start small and widen only if the joint demands it.
Tools and materials you need before you start
Having the right kit on hand before you begin saves a second trip to the store and keeps the job moving.
Essential tools and materials:
- Ratchet or pneumatic caulk gun (a quality ratchet gun is fine for most residential jobs)
- Utility knife and plastic or metal scraper for old caulk removal
- Isopropyl alcohol or solvent cleaner approved by the sealant manufacturer
- Closed-cell polyethylene backer rod in the correct diameter for your joint width
- Primer (check the product data sheet; required for some polyurethanes on masonry)
- Masking tape for clean lines on visible joints
- Finishing tool or nitrile gloves for tooling the bead
- Ladder, non-slip footwear, and appropriate fall protection for any elevated work
Sealant selection checklist:
- Movement capability: confirm ASTM C920 class matches the expected joint movement
- Cure system: neutral-cure for aluminium and glass; acetoxy-cure is not acceptable on metal
- UV resistance: silicone is excellent; some acrylics degrade quickly in south/west exposures
- Paintability: required for trim joints; silicone does not accept paint
- Temperature window: check the product data sheet for minimum application temperature
- Substrate compatibility: confirm the product is rated for both surfaces in the joint
For detailed preparation steps and a full safety checklist before you begin, review the prep guide on the Kettlecontracting site.
Common mistakes, how to fix sealant failures, and when to inspect
The most common installation mistakes:
- Caulking over old, failed sealant instead of removing it completely
- Blocking weep holes with sealant, which causes water to back up inside the frame
- Using acetoxy-cure silicone on aluminium or insulating glass units
- Applying sealant in cold weather below 5°C, which prevents proper adhesion and cure
- Caulking the exterior before the interior is sealed, trapping moisture in the wall
Quick fixes homeowners can do themselves:
- Clear blocked weep holes with a thin pick or compressed air
- Replace a small, cracked exterior bead at ground level with the correct product
- Re-tool a bead that has lifted at one edge if the substrate is still clean and sound
Signs that require a professional:
- Soft or spongy wall material around the window opening
- Water staining on interior drywall or plaster that returns after caulking
- Rotten sill or framing visible when old caulk is removed
- Recurring leaks despite fresh caulk, which usually points to a flashing problem
Inspect your exterior caulking annually, paying extra attention to south- and west-facing windows, which take the most UV and weather exposure. Budget-grade acrylics typically need attention every 3–7 years in a Toronto or GTA freeze-thaw climate. Quality silicones and premium hybrids can last 10–20 years with proper installation. Re-caulking exterior joints is most cost-effective when done as part of a scheduled maintenance cycle rather than waiting for visible failure. Understanding how exterior sealant protects your property long term helps you plan that cycle sensibly.
When to call a professional and what the work includes
Some caulking jobs are straightforward. Others look simple from the outside and turn out to be building-envelope problems that no amount of fresh sealant will fix. Knowing the difference saves you money and prevents hidden damage from getting worse.
Always hire a professional when:
- Flashing is damaged, missing, or not lapping correctly over the sill pan
- The framing or sill feels soft, which indicates water has already reached the structure
- The window is above the first storey or requires ladder access on a multi-storey building
- Gaps are large enough to need reconstruction, foam backing, or a new sill pan
- Airtightness testing is required after the work is complete
What professional window caulking work includes:
- Full removal of all old sealant, not just the visible surface layer
- Inspection and repair of flashing and sill pan conditions before new sealant is applied
- Substrate preparation including cleaning, priming, and alkali-resistant coatings where aluminium contacts masonry
- Product selection matched to substrate, movement, UV exposure, and paintability requirements
- Insurance coverage and a workmanship warranty on the completed seal
What to request in a contractor quote:
- Scope of work (which joints, which products, which access method)
- Product names and cure times
- Safety and access plan for elevated work
- Warranty terms and proof of liability insurance
- References from comparable residential or commercial projects
For homeowners who want a professional assessment, Kettlecontracting’s residential window caulking service covers inspection, product selection, and installation across the GTA. If you are unsure whether your situation calls for a trade professional, the DIY vs. hire-a-pro guide walks through the decision clearly.
What 25 years on the job has taught me about window caulking
After two and a half decades caulking windows across Oshawa and the GTA, the single mistake I see most often is homeowners caulking the exterior before they have dealt with the interior. They spend a Saturday afternoon putting a clean bead around the outside of every window, feel good about the job, and then wonder why the draft is still there in January. The exterior bead is rain defence. The interior bead is your air seal. Get the sequence wrong and you have done half a job at best, and at worst you have trapped moisture inside the wall where it will quietly rot the framing over the next few winters.
The second thing I would tell any homeowner: always check the flashing before you pick up a caulk gun. If the flashing is lifted, cracked, or missing, fresh caulk will not stop water from getting in. It will just delay the moment you discover the damage. A ten-minute inspection before you start is worth more than any product on the shelf.
Kettlecontracting window caulking services in the GTA

Kettlecontracting is a caulking specialist serving homeowners and property managers across the Greater Toronto Area, including Oshawa and surrounding communities. For window sealing work that needs to last through Ontario’s freeze-thaw cycles, the difference between a job that holds and one that fails in two years usually comes down to product selection, sequencing, and surface preparation. Kettlecontracting handles all three: full removal of failed sealant, flashing assessment, correct product matched to your substrate, and a workmanship warranty on every job. If you want a professional inspection and quote, visit the Kettlecontracting window caulking page or reach out directly to book a site visit. No pressure, no guesswork on your end.
Sources
- Keeping the heat: section 8 — upgrading windows and exterior doors | Natural Resources Canada
- How to caulk windows: A step-by-step guide for Canadian homeowners – TotalSeal Windows Blog
- Choosing the Right Caulk: Silicone vs. Polyurethane | Installix
- How often to re-caulk windows in Toronto & GTA | Revitalize Windows and Doors
FAQ
What is the best caulk for aluminium windows?
Neutral-cure 100% silicone is the standard for aluminium-to-glass and aluminium-to-aluminium joints. Where the frame meets brick or concrete, use a polyurethane or high-performance hybrid sealant instead.
Are you supposed to caulk around aluminium windows?
Yes. Caulking the perimeter of aluminium windows controls air leakage, prevents water infiltration, and is required by the Ontario Building Code at the joint between the window frame or trim and exterior cladding.
How do you seal gaps in an aluminium window frame?
Remove all old sealant completely, clean and dry both surfaces, install closed-cell backer rod for any gap wider than 6 mm, then apply neutral-cure silicone or the appropriate polyurethane in one continuous pass and tool the bead to slope water away from the frame.
How often should you recaulk aluminium windows in Ontario?
Inspect annually. Budget acrylics typically need replacement every 3–7 years in a freeze-thaw climate; quality silicones and premium hybrids can last 15–20+ years when correctly specified and applied.
