
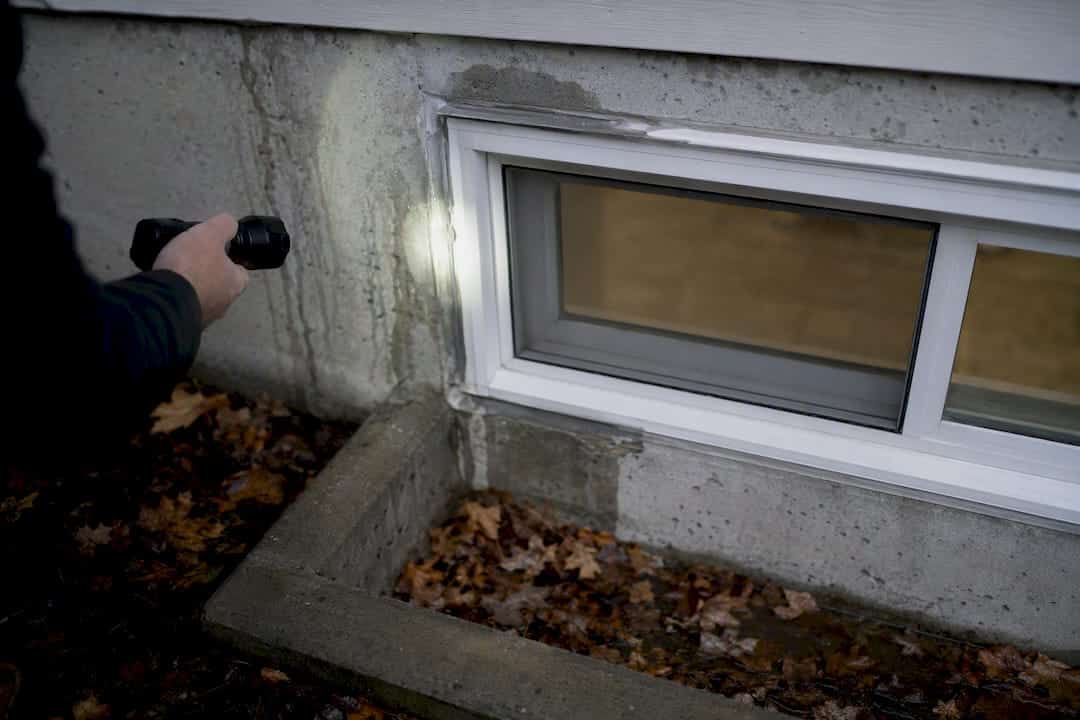
Most basement window leaks trace back to one of four culprits: a clogged window well, failed caulking around the frame, missing sill flashing, or water runoff aimed at the foundation. Before you spend a dime on repairs, clear the debris out of the window well and run a hose test.
Put a garden hose in the well at a moderate trickle and watch it for 10 to 15 minutes. If the water drains steadily and nothing seeps inside, your drain is fine and the leak is coming from the seal or flashing. If water pools in the well or backs up against the glass, you’ve found your problem fast.
- Clear leaves, dirt, and old mulch from the well floor down to the gravel
- Check that the drain (if one exists) isn’t packed with sediment
- Run the hose test and time how long it takes to drain
- Look inside during or right after the test for where moisture actually shows up
Pro Tip: Do the hose test on a dry day, not during an actual storm. You want a controlled result you can trust, not a guess made in a panic with water already on the floor.
If the well drains clean and you’re still getting water inside, or if you see cracks in the foundation wall, consider consulting a contractor.
Key Takeaways
Most basement window leaks come from a clogged well or drain, failed caulk, or missing flashing, and clearing the well plus a hose test identifies the cause before any repair spending happens.
| Point | Details |
|---|---|
| Test before you fix | Run a hose test in the window well and watch drainage for up to two minutes to isolate the cause. |
| Match the repair to the cause | Well clogs need clearing and repacking; frame leaks need fresh polyurethane or hybrid caulk. |
| Never seal weep holes | Flashing must drain outward; blocking weep holes traps water instead of releasing it. |
| Maintain twice a year | Clean gutters, clear wells, and inspect caulking each spring and fall to prevent repeat leaks. |
| Call a pro for repeat failures | Kettlecontracting handles trade-grade caulking, joint prep, and flashing work that outlasts DIY fixes through freeze-thaw seasons. |
Table of Contents
- What causes basement window leaks in the first place
- How to fix a leaking basement window yourself
- Inspection checklist: how to pinpoint where water is getting in
- When basement window leaks need a professional, not a caulk gun
- Preventing basement window leaks year-round
- Why prep and product choice decide how long a repair lasts
- A caulking specialist’s take on basement window leaks
- Get a lasting fix instead of a repeat repair
- Sources
- FAQ
What causes basement window leaks in the first place
Every basement window leak has a mechanical reason behind it, and most of them show themselves once you know where to look.
- Clogged window wells and blocked drains. Leaves, soil, and yard debris settle into the well over years. Once the gravel bed fills with sediment, water has nowhere to go and it sits against the window sill until it finds a way in. This is the most common starting point for a leaking basement window well, and it’s the cheapest one to fix.
- Failed caulking around the frame. Old caulk shrinks, cracks, and pulls away from masonry over a few freeze-thaw seasons. Water tracking down the sides of the frame, rather than pooling at the bottom, usually points here.
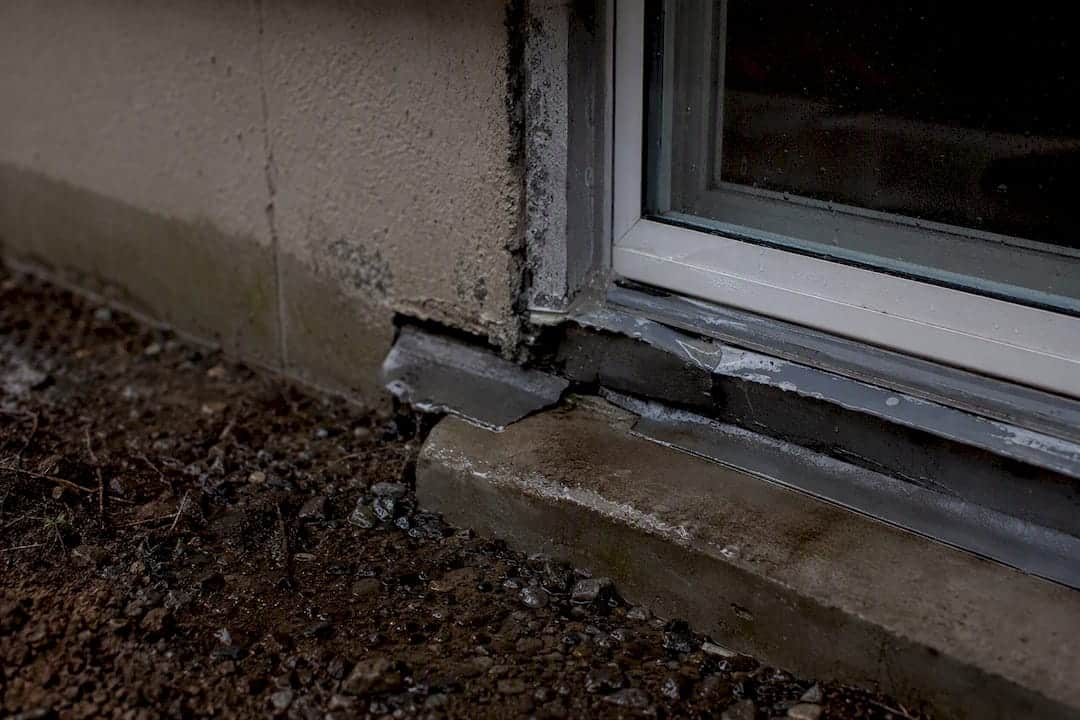
- Missing or damaged sill flashing. Flashing directs water away from the bottom of the frame. Without it, water collects right at the sill and works its way through hairline gaps you’d never see with the naked eye.
- Gutter, downspout, and grading problems. Overflowing gutters and downspouts that dump water within a metre of your foundation send a steady stream toward the exact spot you’re trying to protect.
- Hydrostatic pressure or a high water table. This is the one that surprises people. If your soil stays saturated and pressure builds against the foundation wall, water can push through even sound seals and clean wells. It’s a structural drainage issue, not a caulking one.
How to fix a leaking basement window yourself
Most leaks respond to a straightforward sequence: drain, then seal, then flash. Work through it in order.
- Clear and re-pack the drain. Dig into the gravel at the bottom of the well, remove built-up sediment, and confirm there’s a functioning drain pipe underneath. Repack with clean, coarse gravel so water has somewhere to go instead of sitting against the glass.
- Strip the old caulk completely. Scrape out every bit of the failed bead with a utility knife or caulk removal tool. Caulking over old sealant is one of the most common mistakes homeowners make, and it guarantees an early repeat failure.
- Choose the right sealant and apply it correctly. Polyurethane or a silicone-polyurethane hybrid sealant rated for appropriate below-grade use holds up far better than a basic silicone or latex tube from the hardware store. If the gap is wide, pack in a backer rod first so the caulk has proper depth and doesn’t just skin over.
- Add or repair sill flashing. Flashing should slope away from the window, directing water outward and down. Never seal over weep holes when you’re doing this; they exist to let trapped moisture escape, and blocking them creates a new problem while you’re solving an old one.
- Install a window well cover. A clear, secure cover keeps most direct rainfall out and slows debris buildup, but it doesn’t replace a working drain. Fit one only after you’ve confirmed the well drains properly.
Pro Tip: If you’re prepping a window for new caulk, dry time matters more than most people think. Masonry needs to be fully dry before the bead goes on, or you’ll trap moisture behind a seal that looks fine from the outside.
For the full sealing sequence with product-specific guidance, our page on weatherproofing windows with caulking walks through application in more detail.
Inspection checklist: how to pinpoint where water is getting in
A short, ordered inspection tells you exactly what you’re dealing with before you touch a caulk gun.
- Run the hose-in-well test and confirm the well drains within roughly two minutes; slower than that usually means a clogged or missing drain.
- Check inside the basement during the test: water at the sill points to flashing, water along the sides points to caulk failure, and water seeping up from below the frame often means grading or hydrostatic pressure.
- Dig a small test hole in the well gravel to see if a drain pipe actually exists and where it leads.
- Walk the gutter line and downspouts, checking for clogs, sagging sections, and outlets that dump within a metre or two of the foundation.
- Stand back and eyeball the grade around the house; soil should slope away from the foundation, not toward it.
If the well drains fine, the caulk and flashing look intact, and you’re still getting water after heavy rain, the issue is likely deeper drainage or a high water table rather than anything at the window itself. That’s a different repair entirely, and it’s worth knowing before you start replacing parts that were never the problem.
When basement window leaks need a professional, not a caulk gun
Some signs mean you should stop DIY-ing and get a contractor’s eyes on the problem.
- Water keeps pooling in the well even after you’ve cleared the drain and repacked the gravel
- You notice cracks in the foundation wall, especially horizontal ones or cracks wider than a few millimetres
- Mould or a persistent musty smell shows up near the window even between rain events
- You’ve re-caulked the same window more than once and it’s still leaking
A window that leaks again within a season of fresh caulking almost always means the underlying drainage problem was never fixed. Caulk buys you time; it doesn’t correct a foundation that’s sitting in saturated soil.
A reliable contractor inspection should check the well, drain, grading, and interior moisture pattern together, not just slap new sealant on the frame. From there, the fix might involve exterior membrane work, re-routing drainage away from the foundation, sump pump installation, or a proper caulking scope with correct joint prep. Our breakdown of why caulking is trade-specific work covers what that scope should actually include.
Preventing basement window leaks year-round
A few scheduled tasks do more to prevent basement leaks than any single repair.
- Clean gutters in spring and fall, and extend downspouts a safe distance from the foundation so runoff doesn’t concentrate at the walls.
- Clear window wells and check drains before the rainy season hits and again before the first freeze, when clogs turn into ice dams.
- Keep the grade sloping away from the foundation at an appropriate incline to redirect runoff, and avoid piling soil, mulch, or garden beds against the walls.
- Inspect caulking and flashing twice a year and replace failing sealant with trade-grade product before it fails completely, not after.
- Consider a physical flood shield for wells in higher-risk areas, and avoid storing valuables directly on basement floors near vulnerable windows.
Our window caulking maintenance checklist lays out this schedule in more detail if you want something to follow month by month. And if grading or surface drainage is part of your problem, a site drainage guide for homeowners is a solid companion resource for understanding how water should move around your property.
Why prep and product choice decide how long a repair lasts
Twenty-five years of sealing joints in this climate teaches you one thing fast: the caulk itself is rarely what fails first. It’s the prep.
- Surface has to be clean, dry, and free of old sealant residue before anything new goes on
- Backer rod goes in for any gap over 3/8 inch, full stop
- Product needs to be rated for below-grade masonry and freeze-thaw movement, not a general-purpose tube
- Cure time has to be respected before the joint faces its first real rain or frost
Polyurethane and silicone-polyurethane hybrids flex with the joint as temperatures swing through an Ontario winter, where consumer-grade acrylic caulk turns brittle and cracks within a season or two. If you’re getting quotes for a repair, ask what’s in the scope: surface prep method, backer rod use, the exact product spec, and expected cure time before the area gets wet again. Our guide on preparing windows for caulking breaks down what proper prep actually looks like.
Pro Tip: Ask any contractor what sealant brand and type they’re using, and how they’re prepping the surface. A vague answer on either one usually means a short-lived repair.
A caulking specialist’s take on basement window leaks
Most articles on this topic treat caulk as the whole fix. It isn’t, and treating it that way is why so many homeowners re-caulk the same window every couple of years and wonder why it keeps failing.
Caulk seals a gap. It doesn’t fix a window well that never drained properly, and it doesn’t stop water that’s being pushed toward your foundation by a downspout aimed at the wrong spot. The diagnostic sequence matters more than the repair itself: test the drain, check the grading, look at the gutters, and only then decide whether the fix is a bead of sealant or something bigger.

What gets underestimated is prep time. A rushed caulking job on a damp or dirty surface looks fine for a season and fails right when the freeze-thaw cycle hits it hardest. If you’re going to spend money on a repair, spend it on the surface prep and the right product rated for below-grade movement, not just the fastest tube on the shelf.
Fix the water’s path first. Seal the gap second.
Get a lasting fix instead of a repeat repair
If you’ve worked through the diagnosis above and landed on failed caulking, missing flashing, or a joint that keeps letting water through no matter how many tubes of sealant you buy, that’s exactly the gap Kettlecontracting fills. Homeowners across the Greater Toronto Area call us after a second or third DIY caulking attempt hasn’t held through a winter, and the difference usually comes down to proper surface prep, backer rod sizing, and a below-grade sealant rated for freeze-thaw movement rather than a general-purpose product.

We handle the full scope: stripping old failed caulk, prepping the masonry properly, fitting backer rod where the gap calls for it, and applying a trade-grade polyurethane or hybrid sealant built to move with your foundation through Ontario winters. If your basement window has leaked more than once, request a caulking assessment and we’ll tell you straight whether it’s a sealant fix or something that needs a drainage contractor first.
Sources
- How to Fix a Leaking Basement Window: Window Wells, Caulking, and Sill Flashing (2026)
- Insurance Bureau of Canada — Flood and water protection guidance
- RBC Insurance — Water damage: what am I covered for? (2026)
FAQ
Will insurance cover a window leak?
It depends on the water source: burst pipes are typically covered, but sewer backup and overland or groundwater seepage usually require separate endorsements and slow seepage is often treated as a maintenance issue rather than a covered claim.
Why is my window leaking water inside when it rains?
Rain-triggered leaks almost always point to a surface issue: a clogged window well holding water against the glass, failed caulking along the frame sides, or missing sill flashing letting water collect at the bottom.
How do I stop water from coming through a basement window?
Clear and repack the window well drain, strip and replace failed caulking with a polyurethane or hybrid sealant rated for below-grade use, and confirm flashing directs water away from the sill; add a well cover once the drain is confirmed working.
Why would a window leak from the bottom?
Water at the bottom of the frame usually means missing or damaged sill flashing, since flashing is what’s supposed to carry water away from that exact point instead of letting it pool against the sill.
When should I call a professional instead of fixing it myself?
Call a contractor if water keeps pooling after you’ve cleared the well and drain, if you see foundation cracks or mould, or if the same window has leaked again after a fresh caulking job; Kettlecontracting inspects the well, drain, and seal together before recommending a repair scope.
