
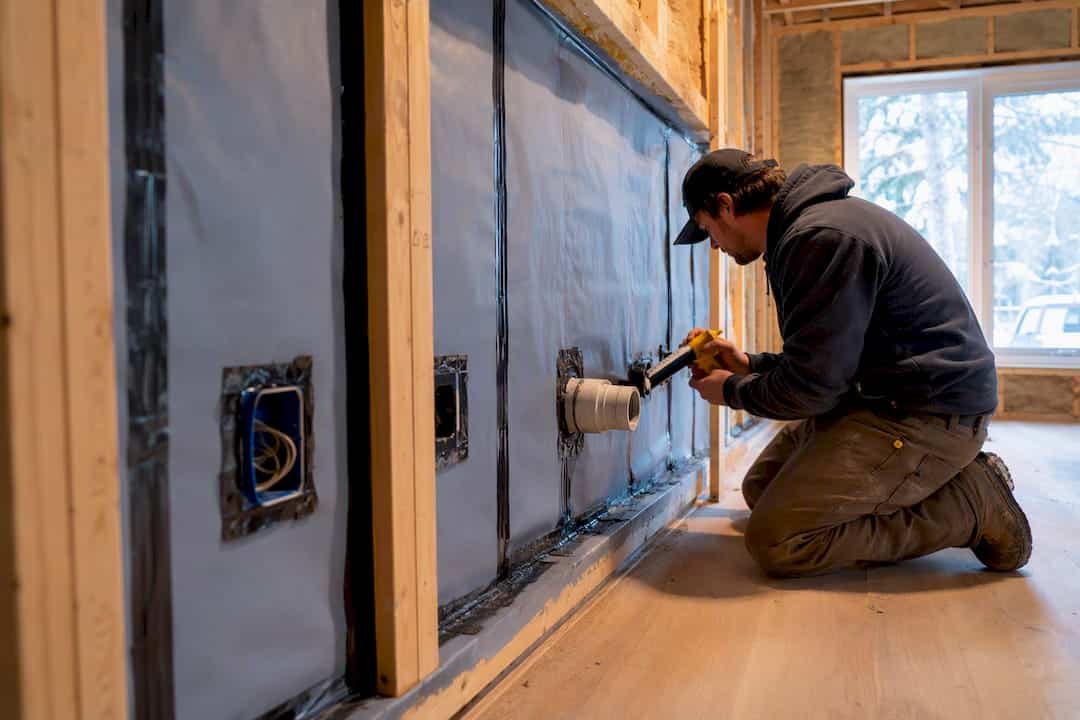
Building envelope sealing is the systematic sealing of a building’s airtight boundary to cut uncontrolled heat loss, stop moisture migration, and protect the structure long term. Done right, it lowers heating and cooling bills, reduces condensation risk behind walls, and slows the wear that freeze-thaw cycles cause. Getting there properly means diagnostics first, usually a blower door test, before anyone touches a caulking gun.
TL;DR:
- Sealing transitions between the roof, foundation, and around penetrations is crucial, as these are common failure points that limit airtightness.
- Proper diagnostics, especially blower door tests, should precede sealant application to accurately locate leaks and prevent unnecessary or ineffective repairs.
- High-movement sealants paired with backer rods are essential for tackling wide gaps, especially in climates with significant seasonal expansion and contraction.
- Sealing must be combined with adjusted ventilation and vapor control strategies to prevent moisture buildup and indoor air quality issues.
- Professional testing and documentation are necessary to ensure compliance with building codes and verify that sealing efforts effectively reduce air leakage.
Table of Contents
- What building envelope sealing actually covers
- Why sealing is the retrofit that actually moves the needle
- Materials and methods: what goes into a seal built to last
- How pros find the leaks before fixing anything
- A practical sealing sequence you can follow or expect from a contractor
- Sealing without trapping moisture inside your walls
- When to call a professional and what proper work includes
- Building envelope sealing and code compliance
- What twenty-five years of caulking guns has taught me about this trade
- Ready to get your building’s envelope properly sealed?
- Sources
- FAQ
What building envelope sealing actually covers
The envelope is every surface separating conditioned space from the outdoors: the roof, foundation, and all four exterior walls, plus every window, door, vent, and pipe punched through them. When we talk about building envelope sealing, we mean making that whole boundary airtight, not just caulking a few drafty windows and calling it done.
Three layers do different jobs, and homeowners mix them up constantly:
- Air barrier: stops air from moving through gaps, cracks, and penetrations. This is what a caulking crew is primarily building or repairing.
- Vapour retarder: controls how much water vapour diffuses through the wall assembly. Sometimes the same material does both jobs; often it doesn’t.
- Thermal barrier: your insulation. It slows heat transfer but does nothing to stop air movement, which is why a well-insulated house can still leak like a sieve.
The real failure point isn’t usually the flat wall sections. It’s the transitions: where the wall meets the roof, where the foundation meets the framing, around every window and door rough opening, and at every pipe, wire, and vent penetration. An air barrier is only as good as its weakest joint, and those junctions are where continuity breaks down if nobody’s paying attention to detail.
Why sealing is the retrofit that actually moves the needle
Natural Resources Canada puts comprehensive air leakage control at the top of the retrofit priority list, ahead of insulation upgrades. That’s not a minor technical opinion. It’s the sequencing logic behind every energy retrofit that actually delivers results instead of just looking good on paper.
Why sequence matters: Insulation slows heat transfer through solid material, but it does nothing about air moving straight through gaps and cracks. Adding insulation to a leaky envelope is like putting on a thicker sweater over a jacket that won’t zip up. Seal first, then insulate, and the insulation you add actually performs the way it’s rated to.
Beyond energy costs, tighter envelopes mean fewer cold spots near windows and exterior walls, which means your furnace or heat pump stops working overtime to compensate. That translates directly into lower HVAC operating costs over a heating season.
There’s a durability angle too, and it’s the one people underestimate. Uncontrolled air leakage carries warm, moist indoor air into wall cavities and attics where it hits cold surfaces and condenses. That moisture sits inside your framing, feeding rot and mould long before anyone notices a problem from inside the house. Sealing the envelope properly, alongside sensible ventilation, keeps that moisture where it belongs: outside.
Materials and methods: what goes into a seal built to last
Not every sealant belongs on every job, and this is where a lot of DIY sealing goes sideways fast. Here’s how the main product families break down:
- Caulking (sealants): for joints and gaps under about half an inch, especially around window and door frames, trim, and small penetrations.
- Backer rod plus sealant: for wider gaps and high-movement joints, where the rod controls sealant depth and lets it flex properly instead of tearing.
- Weatherstripping and gaskets: for moving parts like operable windows and doors, where a rigid sealant would crack, the first time it’s used.
- Specialty tapes and membranes: for sheathing seams, window flanges, and transition details where a fluid-applied sealant isn’t practical.
- Spray foam: for irregular gaps around pipes, wiring, and framing penetrations, particularly in attics and rim joists.
The selection question that matters most in this climate is movement capacity. NRCan’s materials guidance is blunt about this: not every sealant tolerates the expansion and contraction that comes with an Ontario winter turning into an Ontario summer. Cheap, rigid caulk is a common DIY failure we see. It bonds fine in July, then cracks straight down the middle by February because it has zero flexibility to accommodate movement.
That’s why premium, high-movement sealants paired with backer rod are the standard for anything wider than a hairline gap. The backer rod isn’t optional filler. It controls the sealant’s shape (an hourglass profile, not a flat one) so it can stretch and compress instead of tearing at the bond line.
Installation habits matter just as much as product choice:
- Surfaces need to be clean, dry, and free of old sealant residue before anything new goes on.
- Priming certain substrates, like porous masonry, improves adhesion dramatically.
- Tooling the joint properly gives full contact with both surfaces, not just a bead sitting on top.
Pro Tip: If you can see daylight through a gap or fit more than a finger into it, it needs backer rod before sealant goes anywhere near it. Skipping that step is the number one reason we get called back to redo someone else’s caulking job within two years.
How pros find the leaks before fixing anything
You can’t seal what you can’t find, and guessing at leak locations wastes both time and material. Professional diagnostics follow a fairly consistent sequence:
- Blower door testing: a calibrated fan depressurizes the whole building, and the airflow needed to hold that pressure difference tells you exactly how leaky the envelope is. Québec’s Renoclimat program uses this as the standard method for both diagnosing leakage paths and confirming improvement after work is done.
- Smoke pencils or theatrical smoke: while the building is depressurized, visible smoke gets pulled directly toward leak points, showing crews precisely where air is entering.
- Infrared thermography: a thermal camera picks up temperature differences at leak sites, particularly useful for spotting missing insulation combined with air movement.
- Visual and sectional inspection: physically checking known weak points, especially where materials meet at odd angles or ages.
Targets vary depending on what you’re trying to achieve. A minor retrofit and a Passive House aspiration call for very different airtightness numbers, and Passivhaus Trust’s guidance is clear that whatever the target, you need a documented baseline and a follow-up test to prove the work actually changed anything. Skipping verification means you’re taking someone’s word for it.
A practical sealing sequence you can follow or expect from a contractor
Good sealing work follows an order, and skipping steps is how homeowners end up with problems that show up two winters later.
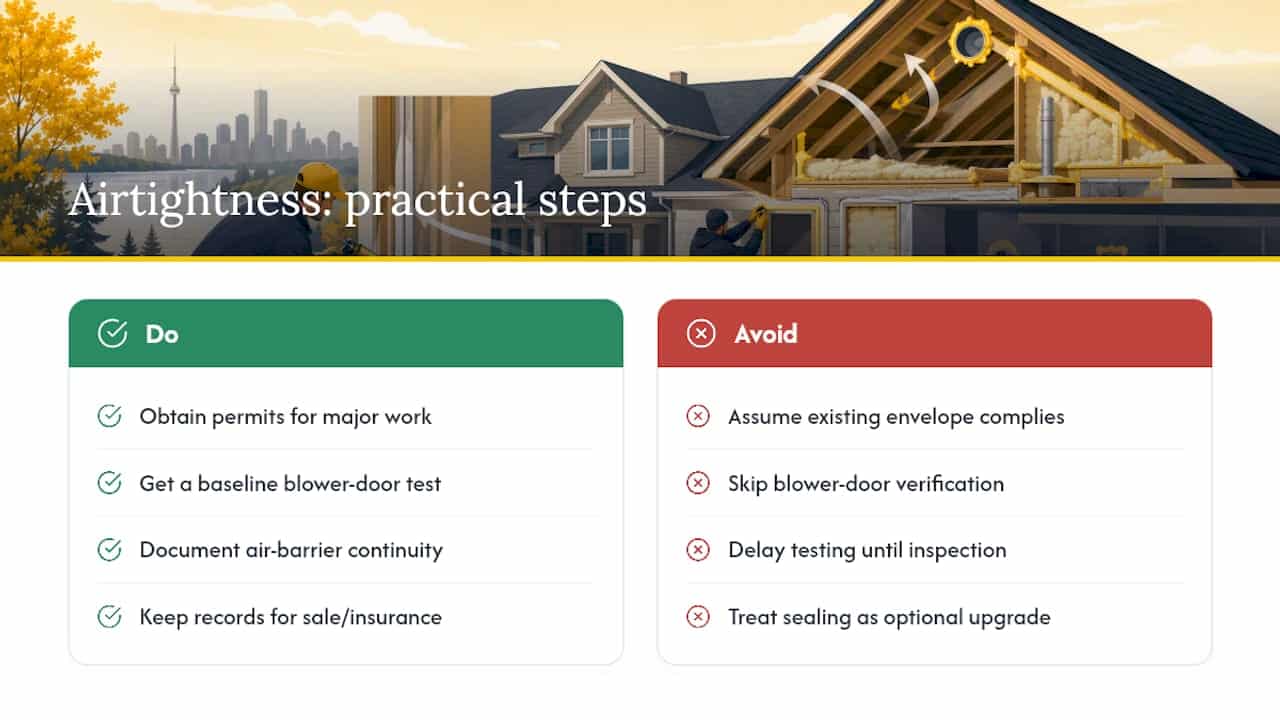
- Test first. A blower door test establishes your baseline and often reveals leak locations that aren’t visible or intuitive from inside the house.
- Prioritize by impact. Windows, doors, vents, plumbing and electrical penetrations, and wall-to-roof or wall-to-foundation transitions are consistently the biggest offenders. Fix those before chasing smaller gaps.
- Prep every surface. Remove failed caulk, clean the joint, and let it dry completely. Sealing over old, cracked material just buries the problem.
- Match material to the joint. High-movement sealant and backer rod for wide gaps, weatherstripping for moving parts, foam for irregular penetrations. Using the wrong product here is where most sealing jobs shorten their own lifespan.
- Address the attic hatch and top-plate penetrations. These leak more heat than most homeowners expect, since warm air rises straight into an unsealed attic.
- Retest. Confirm the work actually reduced air leakage rather than just assuming it did.
- Document and schedule maintenance. Note what was done, when, and set a reminder to inspect seals every couple of years, since even good sealant has a service life.
Pro Tip: Attic hatches get skipped constantly because they’re out of sight. That single gap, often uninsulated and barely sealed, can leak as much air as several window frames combined. Check it before you spend money anywhere else.
Homeowners handling window prep themselves before a caulking job should walk through a proper window preparation checklist first, since surface prep decides whether the finished seal lasts five years or fifteen.
Sealing without trapping moisture inside your walls
Here’s the part conventional advice glosses over: sealing an envelope changes how moisture moves through it, and getting that wrong creates problems you didn’t have before. Building science guidance from the EPA is direct about this. Tightening a building without matching vapour control and ventilation increases condensation risk rather than reducing it.
A few rules keep this from going sideways:
- In most cold-climate assemblies, the air barrier sits on the warm side of the insulation, keeping interior moisture from migrating into cold wall cavities where it condenses.
- Adding exterior insulation during a retrofit can shift where that warm side actually is, which sometimes forces a full reassessment of your vapour control strategy rather than a simple add-on.
- Watch for musty smells, visible condensation on interior surfaces, or peeling paint near exterior walls. These are early signals that moisture is getting trapped somewhere it shouldn’t be.
- Mechanical ventilation isn’t optional once a building gets significantly tighter. Stale, moist air needs somewhere controlled to go.
Interactions between sealing and ductwork or HVAC ventilation deserve attention too, since tightening the envelope without adjusting mechanical ventilation can quietly degrade indoor air quality even as it improves comfort and energy performance.
When to call a professional and what proper work includes
Some sealing tasks are reasonable for a handy homeowner: a fresh bead of caulk around a bathroom window trim, say. Bigger jobs are a different story, and here’s where we draw the line:
- Whole-building or multi-unit envelope work where consistency across dozens of joints actually matters.
- Anything involving exterior insulation retrofits, since barrier placement decisions have real consequences if they’re wrong.
- Commercial expansion joints and curtain wall systems, where the movement tolerances are unforgiving.
- Situations where you’ve already seen moisture damage and need someone to diagnose the cause, not just cover the symptom.
Professional deliverables should include a proper diagnostic (usually a blower door test), materials matched to the specific joint and climate exposure, a documented before-and-after airtightness result, and a warranty on the work. How caulking changes actual airtightness test outcomes is worth understanding before you hire, so you know what a legitimate result looks like versus a sales pitch. This is trade-specific work, and the difference between a five-year seal and a fifteen-year seal usually comes down to who’s holding the gun.
Building envelope sealing and code compliance
Building codes increasingly treat airtightness as a measurable performance requirement, not a vague expectation. Energy codes across Canada reference airtightness targets tied to building type and climate zone, and some jurisdictions now require blower door verification as part of occupancy sign-off on new construction, not just as an optional energy audit.
For renovations and additions, sealing work often falls under the same code scrutiny as new builds once walls are opened up, meaning inspectors may expect documented air barrier continuity at penetrations and transitions. That’s a meaningful shift from a decade ago, when air sealing was treated as a nice-to-have energy upgrade rather than a compliance item.
The practical takeaway for homeowners and property managers: if you’re pulling permits for a significant renovation, don’t assume your existing envelope passes muster just because the walls look fine. Airtightness metrics differ by standard, whether that’s air changes per hour at 50 pascals or litres per second per square metre, and which one applies depends on your local code and the scope of your project. Getting a baseline test before you start construction, rather than discovering a compliance gap at inspection, saves both time and money. It also means any sealing work you do gets documented properly, which matters if you ever sell the property or need proof of upgrades for insurance purposes.
What twenty-five years of caulking guns has taught me about this trade
The conventional advice on air sealing treats it like a checklist: caulk the windows, foam the gaps, done. That’s how you end up with a house that’s technically tighter and still has a mould problem behind the drywall two years later. The research backs this up plainly. Air control and moisture control aren’t two separate projects; they’re the same project looked at from different angles, and NRCan’s own sequencing guidance exists precisely because people keep getting this backwards.
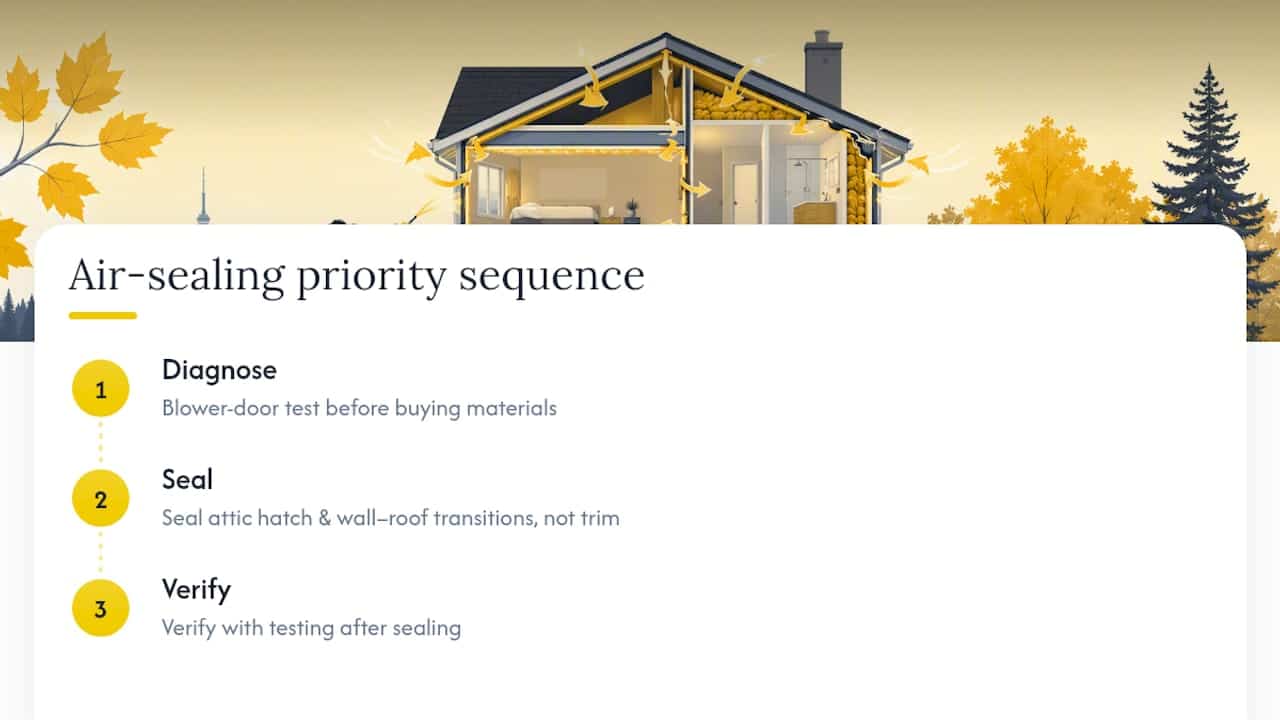
What gets overlooked most is the attic hatch and the transitions, not the obvious stuff like window trim. Everybody notices a drafty window. Almost nobody thinks about the wall-to-roof junction until infrared shows a heat signature shaped like a chimney going straight through their attic insulation.
If I had one priority to hand a homeowner, it’s this: get a blower door test before you spend a dollar on materials. Guessing at leak locations wastes money on the wrong fixes while the real problem sits untouched. Diagnose first, seal second, verify third. Skip that order and you’re just hoping.
— Felix
Ready to get your building’s envelope properly sealed?
If you’ve read this far, you already know DIY caulk from the hardware store isn’t the same as a professionally diagnosed and installed air barrier, and that gap is exactly where Kettlecontracting comes in. We’re a Greater Toronto Area caulking specialist that pairs blower door thinking with high-movement sealants, backer rod, and installation practices built specifically for Ontario’s freeze-thaw cycles, not generic weather.

Whether you’re dealing with a drafty older home, a multi-unit property with recurring water intrusion, or a commercial building that needs its expansion joints redone properly, our crews handle the diagnostics and the materials selection so you’re not guessing at what your building actually needs. We’ve documented the common caulking mistakes that shorten a seal’s life, and we build every job to avoid them from day one. If you’re ready to get a proper assessment of your building’s envelope and a quote based on what your property actually needs, reach out to book an inspection and we’ll walk you through what the work involves before anyone picks up a caulking gun.
Sources
- Keeping the heat in — Section 4: Comprehensive air leakage control in your home | Natural Resources Canada
- Blower door test information — Québec government Renoclimat
- Good practice guide to airtightness | Passivhaus Trust
FAQ
What can I use to seal an envelope?
Professionals use a combination of high-movement caulking, backer rod for wider joints, weatherstripping and gaskets for moving parts, specialty tapes for sheathing seams, and spray foam for irregular penetrations. Which one fits depends entirely on the joint’s width and how much seasonal movement it needs to handle.
What is a building envelope air leakage test?
It’s a blower door test: a calibrated fan depressurizes the building, and the airflow required to hold that pressure tells you how leaky the envelope is. Renoclimat uses this method both to diagnose leaks and to confirm improvement after sealing work is complete.
What are the different types of envelope sealing?
Envelope sealing covers caulking and sealants for narrow joints, backer rod and sealant for wider gaps, weatherstripping for operable doors and windows, membranes and tapes at sheathing transitions, and spray foam around irregular penetrations like pipes and wiring.
Should I seal my building before or after adding insulation?
Seal first. NRCan’s retrofit guidance ranks comprehensive air leakage control as the top retrofit priority, ahead of insulation, because insulation performs as rated only once uncontrolled air movement is addressed.
Can sealing a building too tightly cause problems?
Yes, if ventilation and vapour control aren’t adjusted alongside it. A tighter envelope without proper mechanical ventilation can trap moist air indoors, increasing condensation risk inside wall cavities and attics.
