
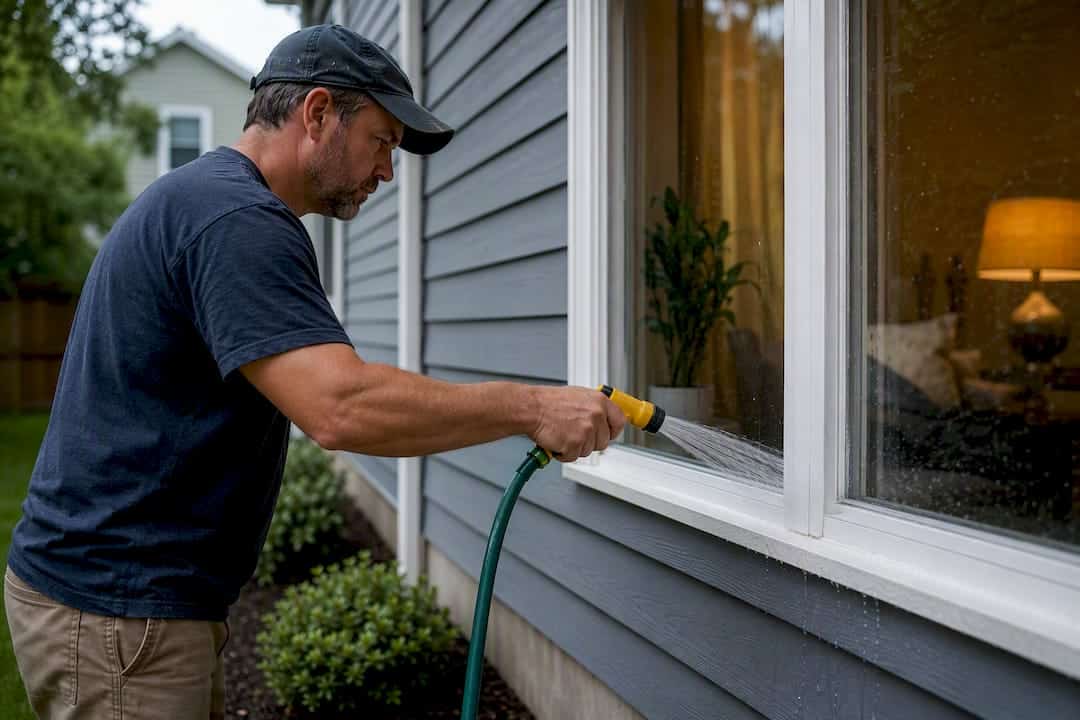
If your windows are leaking, run a bottom-up zone hose test yourself before you touch a caulking gun. Wet the sill first, wait, then work upward in stages toward the header. If the leak keeps coming back, spans a big commercial wall, or you need documentation for a warranty claim, that is when you bring in an accredited tester running ASTM E1105 or AAMA 501.2.
TL;DR:
- DIY hose testing identifies leak locations but cannot determine if the window will withstand winter freeze-thaw cycles or long-term performance.
- Accredited ASTM E1105 testing uses calibrated chambers and pressure differentials to provide a compliance or forensic report for whole-assembly leaks.
- AAMA 501.2 focuses on sealed joint performance with a nozzle test at a specified pressure, mainly for non-operable joints in sealed windows.
- Proper test sequencing from bottom to top, with waiting periods, is essential to avoid false positives and accurately locate leaks inside wall cavities.
- Call professionals when leaks persist after resealing, interior damage appears, or official documentation is needed for warranty or legal purposes.
Table of Contents
- What’s the difference between ASTM E1105, AAMA 501.2, and a hose test?
- How do you run a DIY window water test with a garden hose?
- What does a professional field water test involve?
- How do you tell if the window or the wall is leaking?
- What mistakes make a window water test unreliable?
- When should you call in an accredited tester or a repair pro?
- Field checklist Kettle Contracting uses on a leak diagnosis
- What actually matters when you’re diagnosing a window leak
- Sources
- FAQ
What’s the difference between ASTM E1105, AAMA 501.2, and a hose test?
Each of these three tools answers a different question, and mixing them up is where most misdiagnoses start.
ASTM E1105 is the industry benchmark for assembly-level performance. It uses a spray rack and a sealed chamber to create an air-pressure differential across the window, either in Procedure A (uniform static pressure) or Procedure B (cyclic pressure that mimics wind gusts). This is the standard field method engineers and building inspectors rely on for compliance sign-off or forensic investigation after a claim.
AAMA 501.2 is narrower. It’s a calibrated hose and nozzle diagnostic built for permanently sealed, non-operable joints. It’s not chasing whole-assembly performance. It’s checking one sealed joint at a time, with a nozzle held roughly 12 inches away at about 30 to 35 psi.
The homeowner hose/zone test is the cheap, practical cousin of both. Low pressure, ordinary garden hose, no chamber, no compliance value. It’s a detective tool for locating a leak, not a certificate for anyone.
| Method | Tests | Equipment | Who runs it | Pass/fail means |
|---|---|---|---|---|
| ASTM E1105 | Whole assembly | Spray rack, chamber, manometer | Accredited FTA | Compliance/forensic verdict |
| AAMA 501.2 | Sealed joints | Calibrated nozzle, hose | Accredited FTA or trained tech | Joint-level leak confirmation |
| Homeowner hose test | Leak location | Garden hose, bucket, flashlight | Homeowner or contractor | Points to problem zone |
AAMA 502 sits alongside these as a field-quality specification for new construction. It leans on ASTM E1105 and related air-infiltration testing rather than defining its own water method, which is why you’ll see all three names mentioned together in specs and inspection reports.
How do you run a DIY window water test with a garden hose?
You don’t need a spray rack to find most leaks. You need patience, a helper, and the discipline to work bottom-up instead of blasting the whole window at once.
Before you start:
- Pick a calm, dry day. Wind pushes water sideways and ruins your read.
- Set a ladder on stable, level ground if you’re testing anything above reach, and have someone hold it or spot you.
- Clear furniture, rugs, and electronics from the interior wall below the window.
- Grab a garden hose (never a pressure washer), a bucket, a flashlight, some towels, and a notepad or phone for photos.
The sequence matters more than almost anything else here. Work from the bottom up:
- Wet the sill for two to three minutes at low pressure and watch inside.
- Move to the corners and side jambs for two to three minutes each.
- Test the sash-to-frame joint where glass meets frame.
- Test the header above the window.
- Finally, wet the wall surface above the window opening.
Wait a few minutes between each zone before moving on, since water travels inside wall cavities and can show up on your interior wall well after you’ve stopped spraying. This staged approach is the standard sequence recommended for locating a window leak without guessing.
Watch for staining, drips, blistering paint, or a musty smell, and log which zone triggered it along with the time and duration. If the sill or a bottom corner is the culprit and weep holes are packed with debris or dead insects, clear them and see if that alone solves it. A small perimeter gap can sometimes be dried out and resealed as a stopgap, but treat that as temporary until you know the full extent of the repair needed.
Pro Tip: Keep your phone recording video during each zone instead of just watching. If a drip shows up 90 seconds after you’ve moved to the next zone, you’ll have proof of exactly which stage caused it instead of relying on memory.
What does a professional field water test involve?
An accredited tester isn’t just spraying harder. They’re running a documented, repeatable procedure with equipment calibrated to a standard, and that difference shows up the moment there’s a dispute over who pays for the fix.
A typical ASTM E1105 setup includes:
- A portable test chamber sealed against the interior face of the window
- A calibrated spray rack delivering a fixed rate (roughly 5 gallons per hour per square foot)
- A manometer or blower to hold a set air-pressure differential across the assembly
- A choice between Procedure A, which applies steady uniform pressure, and Procedure B, which cycles pressure to simulate gusting wind
For sealed, non-operable joints, testers may instead run AAMA 501.2’s nozzle test at its specified pressure and distance rather than the full chamber setup. During either test, the tester documents exactly where water appears inside, how long it took, and under what pressure, then issues a pass/fail report tied to the standard’s thresholds.
That documentation is the reason to hire an accredited Field Testing Agency rather than a general contractor with a hose. AAMA FTA accreditation means the equipment is calibrated and the technician has been trained to the standard, which matters if the report ever ends up in a warranty claim or a construction defect dispute.
How do you tell if the window or the wall is leaking?
Finding water inside doesn’t automatically mean the window failed. This is where most homeowners, and honestly a fair number of contractors, get it wrong.
If water only shows up after you wet the wall above the window, and every zone on the window itself stayed dry, the window probably isn’t your problem. Suspect the flashing or the wall assembly instead, since water travelling behind cladding can surface well below where it actually got in.
- Sill or bottom-corner drips, blocked weeps — likely drainage/weep issue, often a DIY fix once cleared.
- Corner or jamb staining, no wall involvement — sealant failure at the joint, a realistic DIY reseal for small gaps.
- Only appears after wall-above test — flashing or wall defect, not a window problem, needs a wall specialist.
- Fogging or persistent haze inside the glass — failed insulating glass unit seal, requires glass replacement, not caulking.
Concealed drainage paths and gravity make this trickier than it sounds. Water can enter at the head, travel down inside the wall cavity, and only pool at a spot several feet below the actual entry point, which is exactly why sequencing your test zones and waiting between them beats spraying everything at once and guessing.
What mistakes make a window water test unreliable?
The two most common errors: spraying from the top first, and using too much pressure. Both wreck your ability to pinpoint the real source.
- Testing top-down floods lower zones with water that actually came from higher up, making you think the sill leaks when it doesn’t.
- A pressure washer or garden hose set to full blast can force water through joints that would never leak under real rain conditions, creating a false failure.
- Running AAMA 501.2’s nozzle test on an operable or drained window (like most sliders) will often fail even a sound unit, since that method wasn’t designed for systems with intentional drainage paths.
- DIY hose tests carry zero weight for code compliance or warranty documentation. Only accredited testing does.
Industry guidance on field testing points to five recurring failure modes: ad hoc methods, wrong test selection, improper prep, improper application, and unrepresentative test areas. Every one of those shows up regularly on residential jobs, not just commercial ones.
Timing matters too. Testing before interior finishes go up makes leak paths far easier to see and cheaper to fix, which is why new-construction quality assurance testing is usually scheduled pre-drywall rather than after move-in.
When should you call in an accredited tester or a repair pro?
A few situations tell you it’s time to stop testing yourself and start dialing:
- The leak keeps returning after you’ve cleared weeps and resealed the obvious gaps.
- You’re seeing interior water stains, warped trim, or a musty smell that suggests damage behind the wall.
- The window is on a curtain wall, above the second storey, or otherwise unsafe to test from a ladder.
- You need a documented pass/fail report for a warranty claim, insurance dispute, or new-build deficiency list.
An accredited tester will hand you a written report showing exactly which zone failed, at what pressure, and what corrective work is recommended, ideally witnessed by the installer or owner so everyone agrees on the fix before work starts. From there, remediation usually means clearing drainage, re-bedding glazing, or resealing the perimeter, followed by a retest to confirm the fix held.
Before you call anyone, collect your own notes: which zones you tested, how long, what you saw inside, and photos or video timestamped to each stage. That record saves a tester time and saves you money.
Field checklist Kettle Contracting uses on a leak diagnosis
On a real job, we’re not just watching for drips. We’re running through a short mental checklist every time: are the weep holes actually open, is the joint profile right for the gap width, is the existing sealant type compatible with what we’re about to apply, and does the backer rod match the joint size so the new bead has proper depth.
We lean toward neutral-cure silicone or a trade-grade polyurethane for most exterior joints, since both hold up to movement without breaking their bond to masonry, aluminum, or vinyl framing. Avoid cheap acrylic caulks outdoors. They shrink and crack within a season or two.
Freeze-thaw cycling is the real test every Ontario sealant faces, not a hose. Sealant applied to a damp or dirty substrate will fail its first winter, which is why proper joint prep matters more than the tube you buy.
Three checks you can run safely before hiring anyone: clear visible weep holes with a thin wire, press on existing caulk to check if it’s still flexible or crumbling, and feel for drafts along the interior frame on a windy day.
What actually matters when you’re diagnosing a window leak
Most guides treat the hose test and the ASTM standard as competing methods, and that framing misses the point. They’re not competitors. They answer different questions at different stages, and the real skill is knowing which question you’re actually asking.
The conventional advice oversells DIY testing as a fix rather than what it really is: a locator. A hose test tells you where water gets in. It tells you nothing about whether your repair will survive a February freeze-thaw cycle, and that’s the part homeowners consistently underestimate. I’ve seen more callbacks caused by rushed resealing after a “successful” DIY diagnosis than by the leak itself.
Prioritize sequencing over speed. Test bottom-up, wait between zones, and write down what you see before you touch a caulking gun. If the pattern doesn’t make sense, especially wall-above symptoms with a dry window, stop guessing and bring in someone who tests to a standard. The $60 cost of a garden hose and an afternoon beats a wrong repair that fails again next winter.
— Felix
Sources
- ASTM E1105-15: Field Determination of Water Penetration of Installed Exterior Windows, Skylights, Doors, and Curtain Walls
- A breakdown of water penetration testing in LEED v5 BD+C
- Window leak repair guide — top-down versus bottom-up spray test and common sources
- A quick guide to field testing — five common mistakes and how to avoid them
FAQ
What are the signs that my windows are leaking water?
Watch for interior staining below the sill, blistering or peeling paint on trim, a musty smell near the frame, or condensation between glass panes suggesting a failed seal. Drafts on a windy day and soft, spongy drywall near the frame are also common warning signs.
What is AAMA 501.2 testing used for?
AAMA 501.2 is a calibrated hose and nozzle test for permanently sealed, non-operable joints, using a fixed nozzle pressure and distance to check whether a specific sealed joint holds against water. It’s not appropriate for operable or intentionally drained windows, where it can produce false failures.
What is ASTM E1105?
ASTM E1105 is the standard field method for determining whether an installed window, skylight, door, or curtain wall resists water penetration under an air-pressure differential, using a spray rack and either steady (Procedure A) or cyclic (Procedure B) pressure. It’s the method used for compliance verification and forensic leak investigations.
How do I find a window leak that isn’t visible from outside?
Run a bottom-up zone hose test, spraying the sill first, then corners, sash joins, header, and finally the wall above, waiting a few minutes between each zone. Water often travels inside the wall cavity before it appears, so patience and correct sequencing matter more than water pressure.
