
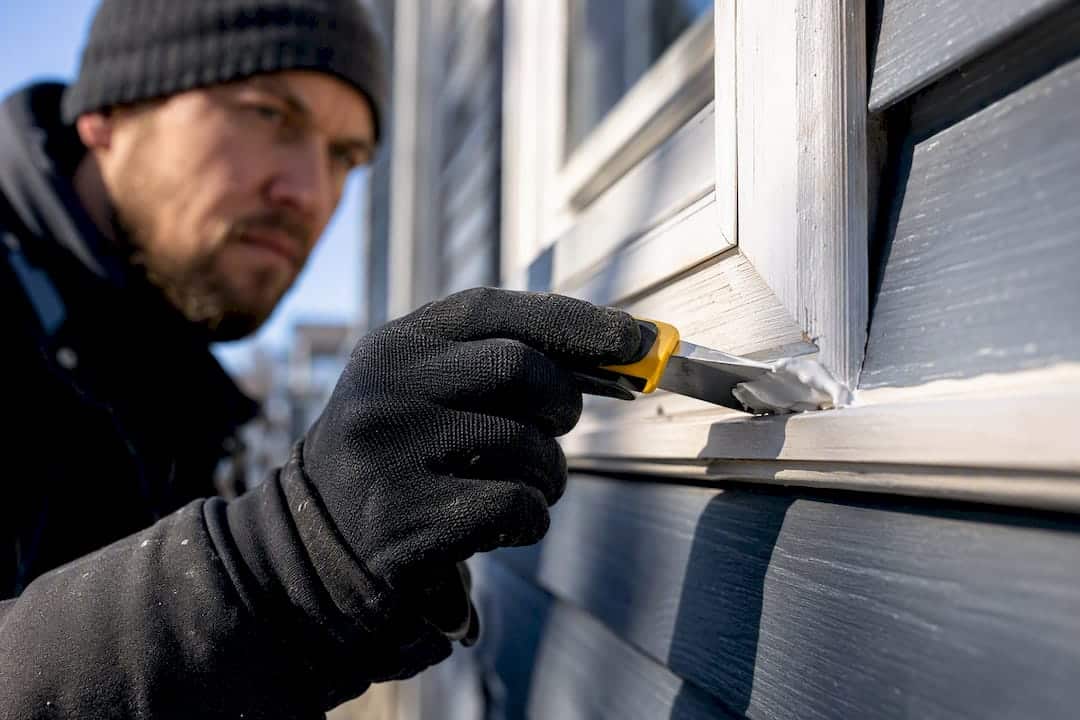
Exterior trim caulking works when you match the sealant chemistry to the materials at the joint, not just grab whatever tube is cheapest at the hardware store. For most trim-to-siding joints, a paintable siliconized acrylic or hybrid is recommended for most trim-to-siding joints. Save 100% silicone for glass and metal contacts, and reach for polyurethane or hybrid where masonry is involved. Before any of that, inspect for cracking and dig out failed beads. If you’re seeing repeat leaks or can’t tell what’s causing the damage, call in a pro like Kettle Contracting before it gets worse.
TL;DR:
- Proper substrate identification is crucial, as silicone bonds best to non-porous surfaces while polyurethane is ideal for porous materials like masonry.
- Focus caulking efforts on high-risk joints such as window perimeters, siding-to-masonry transitions, and penetrations, especially below grade or near window sills where water damage occurs fastest.
- Use sealants that meet ASTM C920 standards and have a low-temperature flexibility of at least minus 20°C to ensure durability in cold climates.
- Carefully remove old caulk by softening, cutting, scraping, and cleaning the joint to maximize adhesion and lifespan of new sealant applications.
- When in doubt or dealing with complex issues like rot or flashing problems, hire a professional for proper diagnosis, substrate preparation, and lasting repairs.
Table of Contents
- Where exterior trim caulking matters most
- Which caulk should you use for exterior trim?
- How do you remove old caulk before re-caulking?
- How do you apply caulk correctly on exterior trim?
- When is the best time to caulk exterior trim?
- How often should you inspect and maintain exterior caulking?
- When should you call a professional instead of DIYing it?
- What actually matters in exterior trim caulking
- Get a professional assessment for your exterior trim
- Sources
- FAQ
Where exterior trim caulking matters most
Not every gap on your house needs a bead of caulk, and treating them all the same way is how homeowners end up with bigger problems than they started with. After 25 years of climbing ladders in Oshawa and across the GTA, I can tell you the failures cluster in the same handful of spots, year after year.
Here’s where to focus your inspection walk:
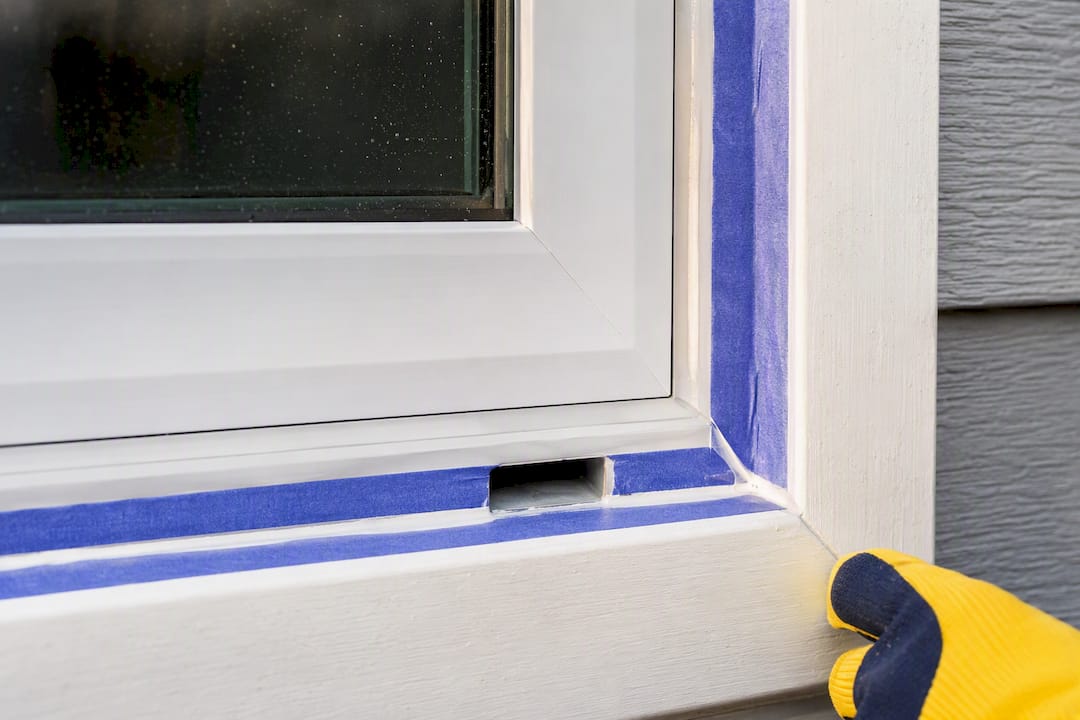
- Window and door perimeters — the seam between the outer frame and the siding is the classic trouble spot, but be careful around the bottom of window frames and door thresholds. Many units have weep holes designed to drain moisture that gets behind the cladding, and sealing those shut traps water instead of releasing it.
- Trim board butt joints, corner boards, and J-channel interfaces — anywhere two pieces of trim meet end-to-end or where vinyl J-channel wraps around a window, expect movement and gapping over time, especially on south and west-facing walls that see the most sun and temperature swing.
- Siding-to-foundation and siding-to-masonry transitions — this is where wood or vinyl cladding lands on brick, block, or poured concrete. It is one of the most overlooked joints on a house, and one of the most damaging when it fails, because water tracks straight down into the foundation area.
- Penetrations — vents, plumbing stacks, electrical conduit, and light fixture boxes all punch through your building envelope. Each one is a potential entry point, and each one needs a sealant bead sized to the actual gap, not just a smear.
- Roofline transitions, step flashing, and siding offsets — where a lower roof meets a wall, or where siding steps out over a bay window, flashing is doing the heavy lifting. Caulk supplements flashing here; it never replaces it.
Prioritize joints below grade transitions and anything near window sills first. That’s where water damage shows up fastest, and where a $10 tube of the wrong caulk can cost you thousands in rot repair down the line. If you want a full walk-through of window-specific zones, our caulking checklist breaks it down room by room.
Which caulk should you use for exterior trim?
Picking the right chemistry is the single biggest factor in whether your caulking job lasts two years or twenty. Get this wrong and it doesn’t matter how carefully you tooled the bead.
100% silicone bonds best to non-porous surfaces: glass, vinyl, and aluminium. It flexes well through freeze-thaw cycles and resists UV degradation better than almost anything else on the shelf. The catch is paintability. Standard silicone will not accept paint, so if you need a finished look that matches your trim colour, it’s the wrong pick for a painted wood joint.
Polyurethane is built for porous substrates. It grips into masonry, brick, and concrete in a way silicone simply can’t, because it mechanically keys into the pores rather than just surface-bonding. It’s also paintable once cured, which makes it a solid choice where a window frame meets a brick veneer. One caveat: unshaded, unpainted polyurethane degrades faster in direct sun, so plan to paint or shade it for long-term performance, according to Canadian Woodworking’s breakdown of caulking chemistries.
Siliconized acrylic (hybrid) is the workhorse for painted wood trim and general exterior joints. It balances flexibility, ease of tooling, and paintability, which is why professional painters lean on it for repaint prep and standard trim work more than any other product. It won’t outlast silicone on a non-porous joint, but for the majority of trim-to-siding seams on a typical house, it’s the right call.
Plain acrylic latex without silicone additives is the weakest of the four. It shrinks, cracks sooner, and has the shortest service life of anything discussed here. I’d skip it entirely for exterior trim unless you’re doing a genuinely low-stakes interior-adjacent touch-up.
Quick substrate matching guide:
| Substrate or joint type | Recommended chemistry | Paintable? |
|---|---|---|
| Vinyl siding to trim | 100% silicone | No |
| Glass to window frame | 100% silicone | No |
| Aluminium flashing or trim | 100% silicone | No |
| Brick, block, or concrete | Polyurethane or hybrid | Yes (poly) |
| Painted wood trim | Siliconized acrylic | Yes |
| General trim-to-siding | Siliconized acrylic or hybrid | Yes |
Building codes reference specific performance standards for a reason. Code guidance on sealants and flashing points to ASTM C920 as the benchmark exterior sealants should meet, covering movement capability, adhesion, and weathering resistance. When you’re shopping, check the technical data sheet on the tube for its ASTM C920 classification and its low-temperature flexibility rating. A sealant rated to stay flexible at minus 20°C is going to handle an Oshawa February a lot better than one rated only to zero.
Buy Canadian-available products where you can find the full technical data sheet online, and check whether the substrate needs a primer. Concrete and some sealed masonry surfaces often do, and skipping that step is one of the more common reasons a otherwise-good sealant fails early. For a deeper dive on window-specific product picks, see our guide on which caulk works best for exterior windows.
How do you remove old caulk before re-caulking?
Surface prep, not the price tag on the tube, is what usually determines how long a joint lasts. I’ve seen premium silicone fail in under two years because it went over dirty, flaking old material, and I’ve seen budget hybrid outlast it by a decade because the joint was prepped properly first.
- Soften the old bead if it’s stubborn. A heat gun on low, or a commercial caulk softener, makes brittle old sealant easier to pull without gouging the substrate underneath.
- Cut both edges of the old bead with a sharp utility knife or a dedicated caulk removal tool, running the blade along where the caulk meets each surface.
- Pull the bead free in one motion where possible. A stiff putty knife or plastic scraper helps lift stubborn sections without scratching vinyl or wood.
- Scrape remaining residue down to bare substrate. Any old material left behind becomes a weak bond point for the new bead.
- Clean the joint with a stiff brush to remove dust and debris, then wipe with isopropyl alcohol and let it dry fully. Masonry needs extra attention here since dust clings to the porous surface.
Removing old caulk properly before applying anything new is the step most DIYers rush, and it’s the one that determines adhesion more than anything else in the process.
For gaps wider than about a quarter inch, install backer rod before you caulk. The rule of thumb is a rod diameter about 25% larger than the gap width, compressed into place, giving you a depth-to-width ratio close to one-to-two. This keeps the caulk bead from sinking into a deep void and gives it something to bond against on two sides instead of three, which improves flexibility as the joint moves.
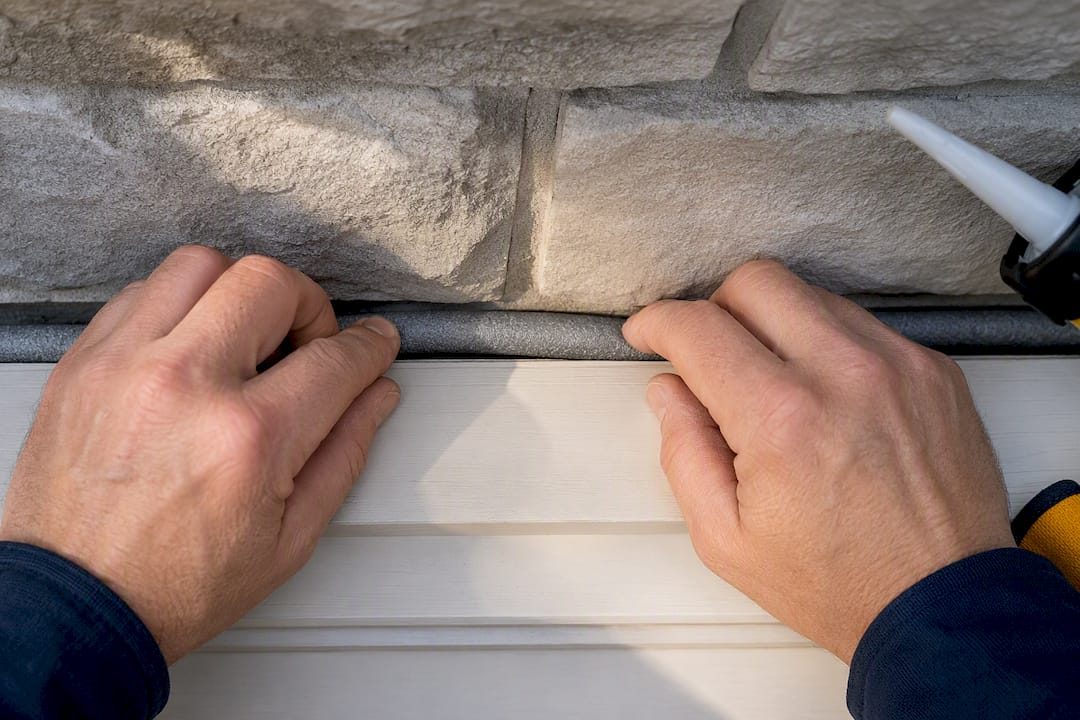
On smooth or sealed concrete and on some metals, a primer matters more than people expect. Skipping it on a slick surface is a common reason polyurethane or hybrid sealants lift within a season.
Pro Tip: Run painter’s tape along both edges of the joint before you caulk, especially near weep holes or drainage gaps. Pull the tape immediately after tooling the bead and you get a razor-clean line without accidentally bridging a drainage path you need to keep open.
How do you apply caulk correctly on exterior trim?
Application technique is where a lot of good product choices go to waste. The gun angle, bead size, and tooling window all matter more than most people assume.
- Cut the nozzle at a 45° angle, sizing the opening to match the joint width. A narrow cut for hairline gaps, a wider cut for anything approaching a quarter inch or more.
- Hold the gun at roughly 45° to the joint and push the bead ahead of the tip rather than dragging it, which packs the sealant into the gap instead of laying it on top.
- Tool the bead into a slight concave profile using a caulking tool or a gloved, wetted finger, working within the product’s skin time. Silicone skins fast, often within 15 to 30 minutes. Polyurethane and hybrids give you a bit more working time, but don’t wait around.
- Clean up immediately. Acrylic and hybrid caulks clean up with soap and water while wet. Silicone and polyurethane need mineral spirits or acetone, and that cleanup has to happen before the material cures, or you’re stuck scraping it off later.
Common mistakes I see on almost every callback job: overfilling a joint so it bulges instead of sitting flush, sealing over weep holes that were designed to drain, applying on a damp or cold surface that never really lets the sealant grip, and painting over silicone, which simply won’t hold paint no matter how long you wait.
Pro Tip: If you’re doing more than a window or two, a smooth-rod dripless caulking gun earns its cost back in control alone. For a whole-house job, a battery-powered gun saves your hand and gives you steadier pressure across a long bead, which shows up as a cleaner, more even finish.
Wear gloves and eye protection, particularly with solvent-based cleanup on silicone and polyurethane. Work in a ventilated area if you’re using acetone or mineral spirits in any enclosed space, like under a porch overhang. For the full walkthrough with photos of technique, check our step-by-step application guide.
When is the best time to caulk exterior trim?
Timing gets overlooked constantly, and it’s one of the fastest ways to waste a good product on a bad application window.
- Apply above +5°C surface temperature for most chemistries, and treat masonry differently. Brick and concrete can sit noticeably colder than the air around them well into spring, so a +10°C surface temperature is the safer threshold before applying polyurethane to masonry.
- Late spring through early fall is the sweet spot in most of Ontario. Early spring feels tempting once the snow’s gone, but cold, damp masonry risks adhesion failure even when the air temperature looks fine on a weather app.
- Avoid rain during the cure window. Most sealants need at least a few hours of dry weather to skin over properly, and manufacturers list exact cure times on the tube.
- Coastal or high-humidity exposures need extra dry time before you trust the joint. Humidity slows skinning even when temperatures look ideal.
Our guide on seasonal timing for window caulking covers regional variations if you’re planning a bigger project around the calendar.
How often should you inspect and maintain exterior caulking?
Walk your exterior trim twice a year, spring and fall, and add a check after any major storm. Caulking fails gradually, then all at once, and catching it early is the difference between a $10 tube of sealant and a rot repair.
Watch for these signs:
- Cracking or splitting along the bead, especially at corners where movement concentrates
- Adhesion loss, where the caulk has pulled away from one side of the joint
- Chalking or a powdery surface texture, common on older acrylic
- Paint failure directly over a caulked seam
- Debris or sealant blocking a weep hole that should be draining freely
Service life varies a lot by chemistry and exposure. On non-porous surfaces, 100% silicone can run 20 years or more, while polyurethane on masonry typically holds up 5 to 15 years depending on sun exposure and whether it’s painted. Plain acrylic sits at the low end, often needing attention within 3 to 5 years.
A spot repair is fine when the failure is localized, like one cracked section on an otherwise sound bead. Full replacement makes sense once you’re seeing failure along most of the run, or if you find soft wood, staining, or a musty smell behind the trim, which points to rot or a flashing problem that caulk alone won’t fix.
When should you call a professional instead of DIYing it?
Some jobs are genuinely fine for a Saturday afternoon with a caulking gun. Others aren’t, and knowing the difference saves you money and prevents bigger damage.
Call a pro when you’re dealing with:
- Rot or soft wood behind the trim, which means water already got in and the fix goes deeper than sealant
- Repeated leaks in the same spot after you’ve re-caulked it, a sign the actual problem is flashing or drainage, not the bead
- Complex flashing details, like roofline transitions or step flashing around a chimney or dormer
- Second-storey or difficult access where a ladder isn’t a safe or practical option
- Whole-house re-caulking, where consistency across dozens of joints matters and the labour adds up fast
- Warranty requirements, since some window and siding manufacturers specify professional installation to keep coverage valid
A contractor brings building-envelope diagnosis skills that go beyond “which tube do I buy.” That means identifying whether a leak is a caulking issue or a flashing issue, using trade-rated sealants that meet ASTM C920 specifications, handling substrate repair before sealing, and setting up safe access for second-storey work. A written scope and a warranty on the work matter too, especially compared to a quick fix that looks fine for one season and fails the next.
When you’re comparing quotes, ask specifically about the materials being used, whether primer is included where the substrate calls for it, expected cure times before the next rainfall, and whether any flashing repair is part of the scope. Cheap quotes that skip these details are usually cheap because they’re skipping steps, not because the contractor found a better price on caulk. Trade-specific caulking work requires judgment calls that come from having seen hundreds of these joints fail and knowing why.
What actually matters in exterior trim caulking
The industry spends a lot of energy arguing about premium versus budget caulk, and honestly, that’s the wrong argument. I’ve torn out plenty of expensive silicone that failed in two years because it went over dirty, wet substrate, and I’ve seen a $6 tube of hybrid last a decade because someone took the time to prep the joint properly first.
The conventional advice you’ll find online tends to skip the substrate-matching step almost entirely, treating caulk like a one-size-fits-all product. It isn’t. Silicone on painted wood trim is a mismatch waiting to peel. Acrylic on brick is a mismatch waiting to crack. Get the chemistry wrong and no amount of careful tooling saves you.
If I had to tell a homeowner one thing to prioritize, it’s this: identify what the joint is actually made of on both sides before you buy anything. That five-minute decision determines whether you’re doing this job again next year or not touching it again for a decade. Everything else, bead width, tooling technique, cure timing, matters, but it’s secondary to getting the chemistry right for the substrate in front of you.
— Felix
Get a professional assessment for your exterior trim
If you’ve read through all of this and you’re still not sure whether that gap near your foundation is a five-minute fix or a sign of something worse, that’s exactly the kind of call Kettle Contracting makes every day across the Greater Toronto Area. Kettle Contracting is the trade alternative to guessing your way through a hardware store aisle. We diagnose the joint first, match the sealant to the actual substrate, and stand behind the work with proper prep and trade-rated materials, rather than a quick bead that looks fine until next winter.

A typical assessment involves walking your exterior trim, windows, and masonry transitions to flag active leaks, failed beads, and anything that points to rot or flashing damage underneath. You’ll get a clear picture of what’s a caulking fix and what needs deeper repair, in plain language, before any work starts. If you’re ready to get a professional set of eyes on your home, request an estimate for your exterior caulking project and we’ll walk you through what your house actually needs.
Sources
This article draws on the BASC/PNNL DIY guide to caulking exterior walls, Canadian Woodworking’s caulking and sealants overview, building code sealant and flashing requirements referencing ASTM C920, and Window Force’s homeowner caulking guide. For regional trade services beyond caulking, Calder Contracting offers renovation expertise in the Newmarket area.
- Caulk exterior walls (BASC / PNNL DIY guide)
- Caulking and sealants – Canadian Woodworking
- Code excerpt: sealant and flashing requirements (codeindex)
FAQ
What type of caulk should I use for exterior trim?
Use siliconized acrylic or a paintable hybrid for most painted wood trim joints. Switch to 100% silicone where the joint touches glass, vinyl, or aluminium, and use polyurethane or hybrid where masonry is involved.
Do you caulk the trim on the exterior?
Yes, exterior trim needs caulking at every joint where two materials meet, including window and door perimeters, corner boards, and siding-to-masonry transitions, to block water intrusion and air leaks.
What type of caulk sealant is best for exterior use overall?
There’s no single best option across every surface. Silicone wins on non-porous materials like glass and vinyl, polyurethane wins on masonry, and siliconized acrylic is the practical middle ground for painted trim where paintability matters.
Where should you not caulk outside?
Never caulk over weep holes or active drainage paths, since sealing them traps water behind the cladding and accelerates rot. Skip caulk entirely where you find soft wood or active leaks. That points to a repair issue, not a sealing one, and is a good reason to have a professional inspect the area before you seal anything over it.
