
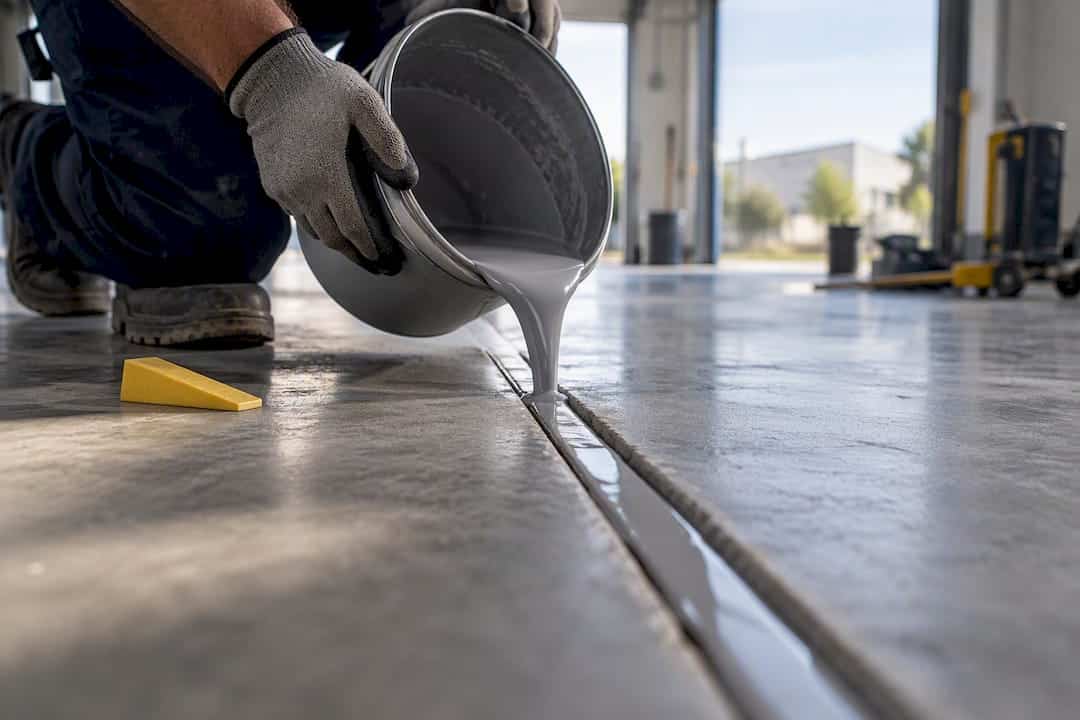
Use a self-leveling sealant for horizontal concrete joints and control joints where a pourable, smooth finish and minimal tooling matter most. It flows on its own to fill driveways, sidewalks, and patio joints efficiently. It has no business on a vertical wall crack. That’s a job for a non-sag product. And whichever one you pick, the sealant’s lifespan comes down to joint design and prep, not the label on the tube.
TL;DR:
- Proper joint design and thorough surface prep are more critical to sealant longevity than the specific brand or chemistry used.
- Self-leveling sealant must be applied only on horizontal joints with a 2:1 width-to-depth ratio, avoiding vertical or overhead cracks.
- The lifespan of self-leveling sealant ranges from 5 to 15 years, influenced by traffic, UV exposure, and joint maintenance, with regular inspections recommended.
- Accurate joint measurement, clean surfaces, and correct backer rod placement are essential for successful application and durability.
- Larger, irregular, or heavily trafficked joints are better handled by professionals, especially when substrate repairs or complex geometries are involved.
Table of Contents
- What is self-leveling sealant and where does it belong?
- What should you check on a technical data sheet?
- Self-leveling vs non-sag: which one does your joint need?
- How do you prep and size the joint before pouring?
- How do you apply and cure self-leveling sealant correctly?
- How long does self-leveling sealant last, and when do you inspect it?
- What field experience tells you about tricky sealing jobs
- Why joint prep beats brand loyalty every time
- When it’s time to call in a sealing contractor
- Where these specs and standards come from
- Sources
- FAQ
What is self-leveling sealant and where does it belong?
Self-leveling sealant is a pourable joint sealant designed to settle flat under its own weight, which is exactly why it only works on horizontal surfaces. Tip it onto a wall joint and it will sag and run before it ever cures. That’s not a flaw. It’s chemistry doing what it’s supposed to do, and it’s why self-leveling and non-sag products are formulated differently from the start.
You’ll find self-leveling sealant based on polyurethane, advanced polymer, polyurea, or silicone chemistries, each with distinct trade-offs. They are commonly used on driveways, sidewalks, patios, pool decks, garage floors, and warehouse expansion joints.
The advantage is efficient application that flows and levels itself; however, durability varies with chemistry, with some formulas better resisting abrasion and UV exposure than others.
What should you check on a technical data sheet?
Before you buy anything, pull up the manufacturer’s technical data sheet (TDS) and check three things: the standard it’s rated to, the joint dimensions it’s built for, and the cure schedule. Skip this step and you’re guessing.
Look for a rating against ASTM C920, the standard classification for elastomeric joint sealants, along with any reference to Federal Specification TT-S-00230C or, where listed, CSA CAN/CGSB 19.13-M87. These aren’t marketing badges. They tell you the product has been tested for movement capability and adhesion under real conditions.
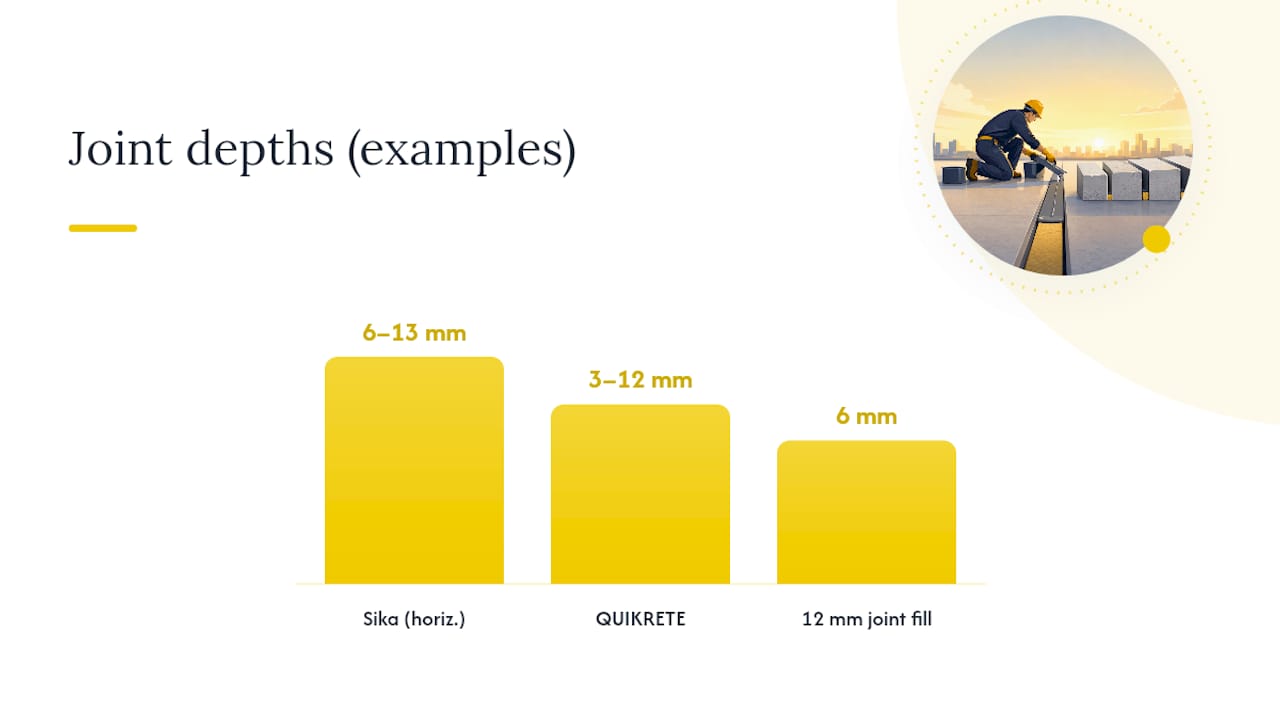
Joint geometry follows a consistent rule across manufacturers: a 2:1 width-to-depth ratio, meaning a 12 mm wide joint gets filled to roughly 6 mm deep. Sika’s guidance sets a 6 mm minimum width and a 13 mm maximum depth for horizontal joints, and QUIKRETE’s data sheet lands in a similar 3 to 12 mm depth range depending on the formula.
Key numbers to compare across products:
- Movement capability, typically around ±25% for quality polyurethane and hybrid formulas
- Tack-free time, often a few hours, and full cure ranging from several days to two weeks
- Minimum application temperature, since most self-levelers won’t cure properly below a certain threshold in cold weather
Quick spec check: if a TDS doesn’t state a joint depth range, a cure schedule, and a movement rating, that’s a product to skip. Reputable manufacturers publish all three because proper joint design and application determine ultimate performance far more than which brand name is on the label.
Self-leveling vs non-sag: which one does your joint need?
The orientation of the joint decides this for you, not personal preference. Self-leveling flows to fill horizontal gaps; non-sag holds its shape against gravity on vertical and overhead joints. Mix them up and you’ll either get runoff on a wall or a lumpy, uneven pour on a floor.
Work through this before you buy:
- Check the orientation. Flat and horizontal means self-leveling. Vertical or overhead means non-sag.
- Assess the gap consistency. A uniform joint pours evenly. An irregular or long joint needs containment first.
- Weigh the traffic load. Foot traffic is forgiving. Vehicle traffic and de-icing salt exposure call for a tougher chemistry, sometimes polyurea.
- Decide if damming is needed. Long runs, corners, or gaps with voids underneath will leak sealant if you pour straight into them.
That last point matters more than most homeowners realize. The fix is to lay a bead of non-sag sealant or set temporary edge dams first, let it skin over, then pour the self-leveling product on top. This damming technique stops material loss into voids and keeps your finished joint looking clean instead of sunken at the ends.
How do you prep and size the joint before pouring?
Joint prep is where most sealant jobs succeed or fail, and it happens well before the sealant ever touches the joint.
Start with geometry. A 12 mm wide joint fills to about 6 mm deep, following the 2:1 width-to-depth rule. Stay above a 6 mm minimum width and do not exceed roughly 13 mm of depth on standard horizontal joints. Too shallow and the sealant tears under movement; too deep and it never fully cures through the middle.
Surface prep steps, in order:
- Remove all old sealant, loose debris, oils, grease, and any curing compounds left on the concrete
- Mechanically clean the joint with a wire brush, grinder, or shot-blaster to expose sound substrate, since surfaces must be clean, dry, and frost-free for the sealant to bond properly
- Confirm the joint is fully dry, since trapped moisture undermines adhesion even on a warm day
- Run a small adhesion test on a scrap section if you’re unsure how the sealant behaves on that specific substrate
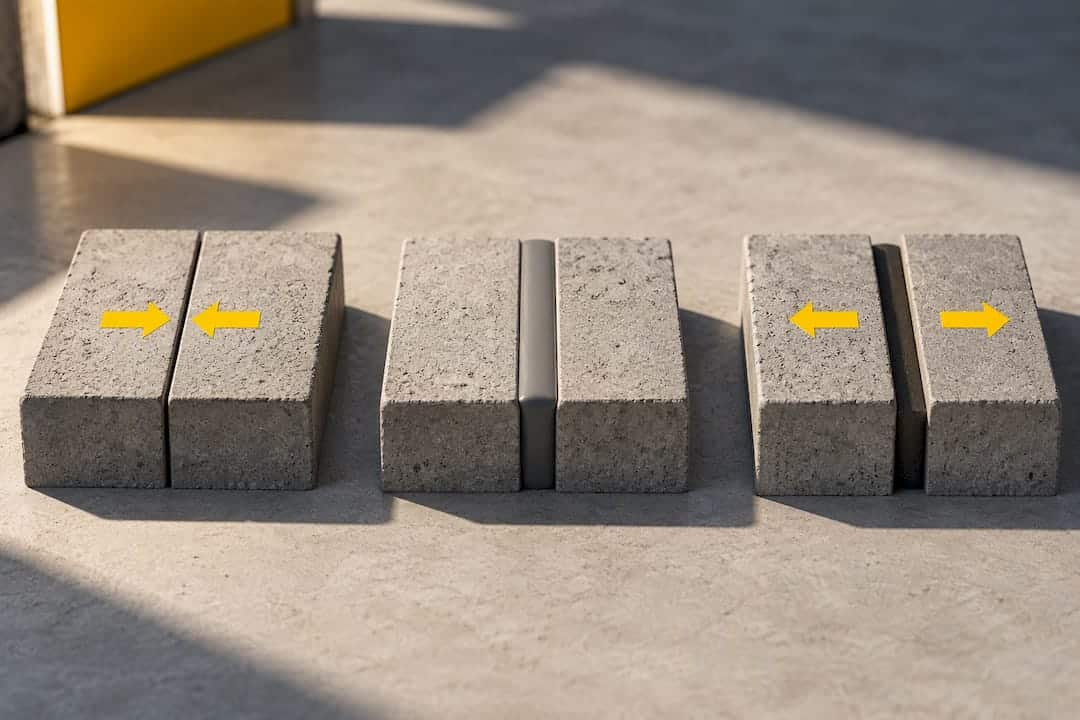
Next comes the backer rod. Install a closed-cell backer rod or bond-breaker tape at the base of the joint before pouring. This isn’t optional detailing. Without it, the sealant bonds to three sides of the joint instead of two, and that three-sided adhesion tears the sealant apart the first time the joint expands or contracts. Size your backer rod about 25% larger than the joint width so it compresses snugly and gives you a rounded surface to control pour depth.
Pro Tip: Time your pour for the mid-point of the joint’s seasonal movement, not the coldest or hottest day of the year. Applying sealant when the joint is at its widest or narrowest extreme sets it up for maximum strain the moment temperatures swing back.
If you’re dealing with cracked or spelled concrete around the joint edges rather than a clean gap, that’s a repair job first. A masonry repair specialist can fix the substrate before any sealant goes near it.
How do you apply and cure self-leveling sealant correctly?
Once the joint is prepped, dammed where needed, and dry, the pour itself is fairly forgiving, provided you don’t rush it.
- Gear up. Wear gloves and eye protection, and work in a ventilated area, since most formulas carry solvent odours during application.
- Pour in a continuous stream. Fill the joint from one end to the other without stopping, which limits air entrapment and keeps the surface level.
- Tool minimally. Self-leveling sealant needs little to no tooling. Overworking it can pull air bubbles to the surface or disturb the flat finish.
- Clean as you go. Wipe excess sealant immediately with the manufacturer’s recommended solvent before it skins over.
- Respect the cure schedule. Tack-free time is often a few hours, but foot traffic typically waits longer, and vehicle traffic waits longer still.
Don’t let the joint sit in standing water or face immersion until the manufacturer’s full cure window has passed, often ranging from several days to two weeks depending on temperature and formula. Pouring on a cold October evening in Ontario and expecting a rainstorm-ready seal by morning is how a fresh joint fails within its first season.
How long does self-leveling sealant last, and when do you inspect it?
Expect a service life of roughly 5 to 15 years, depending on the chemistry, traffic load, and UV exposure. A shaded control joint on a residential walkway will outlast a sun-baked commercial driveway joint carrying delivery trucks every day.
Walk your joints once a year, ideally in spring after freeze-thaw cycling has had its chance to stress them. Look for:
- Gaps or pulling away from either edge, a sign of adhesion loss
- Sealant that’s extruded upward or squeezed out of the joint
- Surface crazing or cracking across the bead
- Any staining or dampness nearby, which points to water getting underneath
Most sealant failures trace back to poor joint design, weak surface prep, or unaccounted-for movement, not simple age. A short section showing early adhesion loss can often get a spot repair. Widespread cracking, extrusion along the whole run, or water actively getting through calls for a full reseal before winter, not a patch job that buys you one more season on borrowed time.
What field experience tells you about tricky sealing jobs
After enough seasons watching sealant fail in this climate, a few patterns repeat themselves. Long or irregular joints without a dam almost always show leakage at the low points first. Heavily trafficked or salt-exposed decks chew through DIY-grade sealant faster than homeowners expect, especially where plow salt sits against the joint all winter.
Call a contractor when the substrate needs repair before sealing, when the joint is deep or irregular enough that backer rod sizing gets tricky, or when the surface carries a builder’s warranty that a DIY pour could void. High-value surfaces like a commercial entrance or a shared driveway on a multi-unit property aren’t the place to learn joint prep by trial and error.
Pro Tip: If you’re staring at a joint that’s wider at one end than the other, don’t force a single backer rod size through the whole run. Step up the rod size where the gap widens, or bring in a pro who carries a full range of diameters on the truck.
Why joint prep beats brand loyalty every time
Homeowners spend a lot of time comparing sealant brands and not nearly enough time thinking about the joint itself. That’s backwards. A mid-grade polyurethane sealant installed over a properly sized backer rod, on a clean and frost-free joint, will outlast a premium silicone poured into a badly cut, damp, or oversized gap.
The conventional advice on retailer pages leans hard on chemistry comparisons: polyurethane versus polyurea versus silicone, UV resistance charts, movement percentages. All useful, none of it decisive if the joint underneath was never cut to a proper 2:1 ratio or left without a bond-breaker. Three-sided adhesion failure is the single most preventable cause of early sealant tearing, and it rarely makes it onto a product comparison chart.
If there’s one thing worth prioritizing first, it’s this: get the joint geometry and prep right before you even open the tube. In a climate that puts every exterior joint through repeated freeze-thaw cycling, that groundwork decides whether you’re resealing in five years or fifteen.
— Felix
When it’s time to call in a sealing contractor
Some jobs are genuinely DIY friendly: a straight, uniform control joint on a garage floor with good access. Others aren’t, and pretending otherwise usually means resealing sooner than planned. Some sealing contractors handle the harder cases, including irregular joint widths, cracked substrate, or high-value surfaces where a redo isn’t cheap.

If you’re dealing with driveway or patio joints, expansion joint sealing covers exactly this kind of horizontal work, done with proper joint design instead of a rushed retail-tube fix. For broader building envelope concerns tied into the same water infiltration issues, building envelope sealing addresses the bigger picture beyond a single joint. And if the trouble starts at brick expansion joints rather than concrete, brick expansion joint resealing is a separate but related fix worth asking about.
Before you reach out, have a few photos of the joints, rough width measurements, and an estimate of linear footage on hand. It speeds up the quote and gives our team a clear read on the job before anyone shows up on-site. Reach out through the expansion joint caulking page to book an inspection or request a quote.
Where these specs and standards come from
The joint design ratios, cure schedules, and material limits referenced throughout come from manufacturer technical data sheets and standards bodies, not marketing copy. The Sika Sikaflex Self-Leveling Sealant TDS supports joint design and prep guidance, while the QUIKRETE Advanced Polymer TDS backs the chemistry comparison for abrasion and UV performance.
Sources
- Sikaflex® Self Leveling Sealant | Sealants | Sika Canada
- Product Data Sheet: Sikaflex Self-Leveling Sealant (TDS)
- QUIKRETE® Polyurethane Self-Leveling Sealant data sheet
- The difference between self-leveling and non-sag concrete expansion joint sealant
FAQ
What is self-leveling sealant used for?
Self-leveling sealant fills horizontal concrete joints and cracks on driveways, sidewalks, patios, and garage floors, flowing into place without heavy tooling. It’s built for horizontal surfaces only, since it will sag or run on vertical joints, where you’d need a non-sag product instead.
How long does self-leveling sealant last?
Most quality self-leveling sealants last 5 to 15 years, depending on the chemistry chosen and how much traffic, UV, and salt exposure the joint faces. A shaded, low-traffic joint lands at the higher end of that range, while a sun-exposed driveway joint carrying vehicle loads wears faster.
What is the best sealant for self-leveling concrete work?
There’s no single best chemistry across every situation. Polyurethane and advanced polymer formulas suit general driveway and patio use, polyurea handles heavy or fast-turnaround traffic well, and silicone resists UV and temperature swings better but can be mechanically weaker under abrasion, according to QUIKRETE’s technical guidance. The right pick depends on your traffic load and exposure, and a professional contractor can help match the product to the joint.
What are the disadvantages of self-leveling concrete sealant?
It’s limited to horizontal joints only, so it won’t work on walls or vertical cracks. It also depends heavily on correct joint depth, backer rod installation, and surface prep. Skip any of those steps and even a premium sealant can fail early through tearing or poor adhesion.
How do I know if my joint needs a contractor instead of a DIY fix?
Irregular joint widths, cracked or spalled substrate, and high-value or heavily trafficked surfaces are the situations where DIY sealant work tends to fail early. If the joint runs long, needs damming, or sits on a surface with a builder’s warranty, it’s worth requesting a quote from a contractor before pouring anything yourself.
