
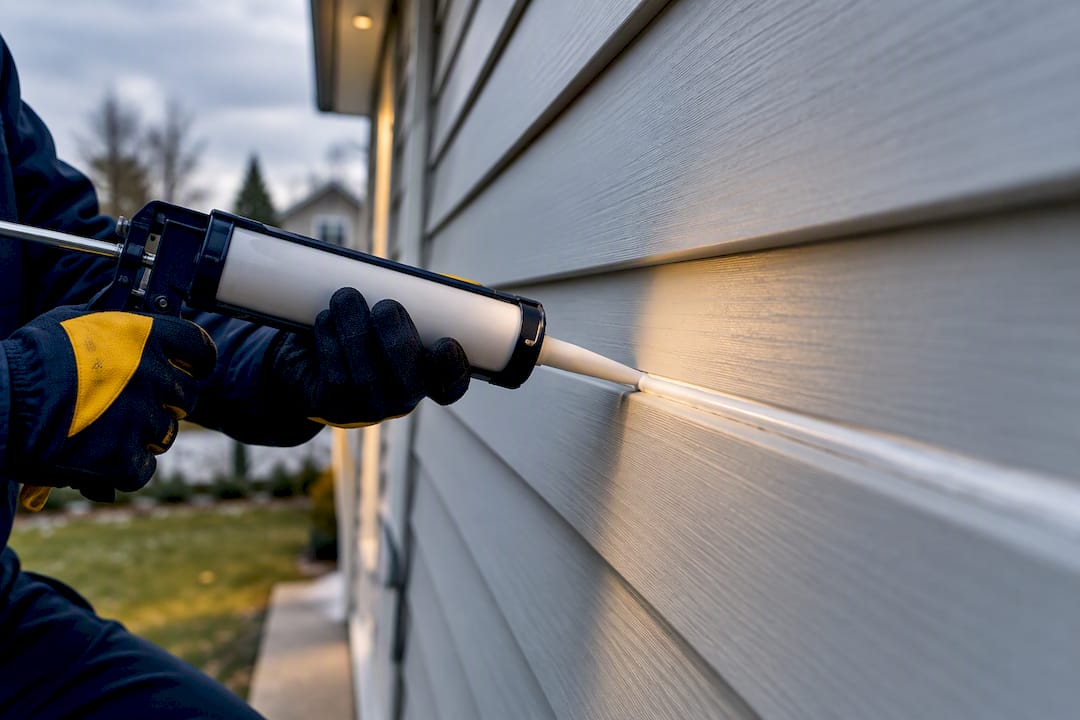
For aluminum siding, the best general choice is a paintable, flexible neutral-cure hybrid or a professional-grade low-modulus sealant that bonds directly to metal, not a 100% acetoxy silicone that will reject paint. Small, well-defined joints around trim and penetrations are good candidates for caulk. Wide gaps, damaged panels, or joints showing repeated failure need replacement or professional attention, which is where a professional contracting crew earns its keep.
TL;DR:
- Use a paintable, flexible hybrid or low-modulus sealant that bonds strongly to aluminum and accommodates its expansion and contraction.
- Caulk small gaps around trim and penetrations but avoid sealing exposed panel faces or long, horizontal seams that rely on siding design to shed water.
- Proper surface preparation involves cleaning the aluminum thoroughly with solvent and using a backer rod to ensure the sealant bonds on three sides and avoids premature tearing.
- Remove old caulk carefully with a soft tool and follow curing and surface prep steps before applying new sealant or paint to prevent failures.
- Repeated joint failure often indicates underlying installation issues, not just wrong sealant, and may require repair or replacement instead of recaulking.
Table of Contents
- Which caulk types work on aluminum siding
- When you should caulk aluminum siding, and when you shouldn’t
- Getting aluminum ready for a bond that actually holds
- Removing old caulk and preparing siding for repainting
- Step-by-step application: a contractor-grade workflow
- Troubleshooting and maintenance for caulked aluminum siding
- Pro perspective from Kettle Contracting
- How Kettle Contracting helps with aluminum siding caulking
- Key data sheets, manufacturer guides, and codes
- Sources
- FAQ
Which caulk types work on aluminum siding
Not every sealant on the shelf belongs on your siding. Aluminum expands and contracts more than most building materials, so the chemistry you pick has to flex with it and actually stick to bare or painted metal.
- Neutral-cure silicone (Spectrem-style): excellent adhesion to metal, high movement capability, but many formulations aren’t paintable, so check the label before you commit to a finish.
- Hybrid or silane-modified polymers: bond well to aluminum and many accept paint, making them a strong middle ground for trim work you plan to repaint.
- Thermoplastic rubber and butyl sealants (Mulco-style): built for cold-climate service and extreme flexibility, with some variants rated for application down to very low surface temperatures.
- Acrylic latex: paintable and easy to tool, but it has limited movement capacity and tends to underperform on wide or high-movement joints.
- 100% silicone (non-paintable): strong adhesion and weatherability, but paint won’t hold to it, so reserve it for beads that stay exposed permanently.
The Spectrem 1 data sheet lists peel strength to aluminum of roughly 30 pli (5.2 kN/m), which is one reason contractors reach for it on window perimeters and curtain wall joints where movement is constant. Mulco’s professional sealant lineup, sold through Gentek’s distributor network, claims elongation up to 1,400% and cold-temperature service down to -40°C, with a butyl variant meeting CGSB 19-GP-14M. That kind of flexibility matters once winter sets in and your siding starts working against the caulk line every day.
The selection rule is simple: match the modulus to the movement you expect, and if the finished look needs paint, confirm paintability before you buy. Our comparison of silicone and acrylic caulk goes deeper into how these chemistries perform side by side on exterior trim.
When you should caulk aluminum siding, and when you shouldn’t
Caulk is a finishing tool, not a repair for bad installation. Used correctly, it closes small, specific gaps. Used as a blanket fix, it hides problems that come back within a season or two.
- Caulk trim perimeters, accessory penetrations, and flashing joints where a small, controlled bead does the job.
- Skip caulking exposed panel faces or long horizontal seams, since aluminum siding is engineered to shed water through its lap design, not through sealant.
- Never fill a gap wider than the product’s listed joint width, typically no more than about 1/8 to 1/4 inch without backer rod, since exceeding that range invites early failure.
- Avoid caulking inside J-channel as a general sealing method. The Gentek installation guide specifically warns against relying on caulk there, since it traps moisture instead of letting the channel do its job.
If a joint keeps failing no matter what you put in it, that’s usually a sign the underlying installation needs attention, not another tube of sealant.
Getting aluminum ready for a bond that actually holds
Sealant only performs as well as the surface underneath it. Aluminum siding often carries chalky oxidation, old caulk residue, or a film of grease from years of weather, and none of that gives a new bead anything to grab onto.
- Scrape away all old caulk with a plastic or wooden tool that won’t gouge the panel.
- Wipe the joint with isopropyl alcohol or a manufacturer-recommended solvent to remove oxidation and residue.
- Let the surface dry completely before tooling, since trapped moisture undermines adhesion from day one.
- Prime only when the manufacturer’s data sheet calls for it on that substrate. Skip it otherwise, since an unnecessary primer layer can weaken adhesion rather than help it.
- Run a small test patch on an inconspicuous section and check it after 24 to 48 hours before committing to the full run.
- Size backer rod so it sits roughly 25% larger than the joint width, which keeps it compressed and prevents the sealant from bonding to the back of the joint. That third point of contact, known as three-sided adhesion, is one of the most common causes of premature tearing.
Pro Tip: Press the bead firmly into the joint with your tool so it contacts both faces fully. A bead that skims the surface without full contact looks fine on day one and fails within a year.
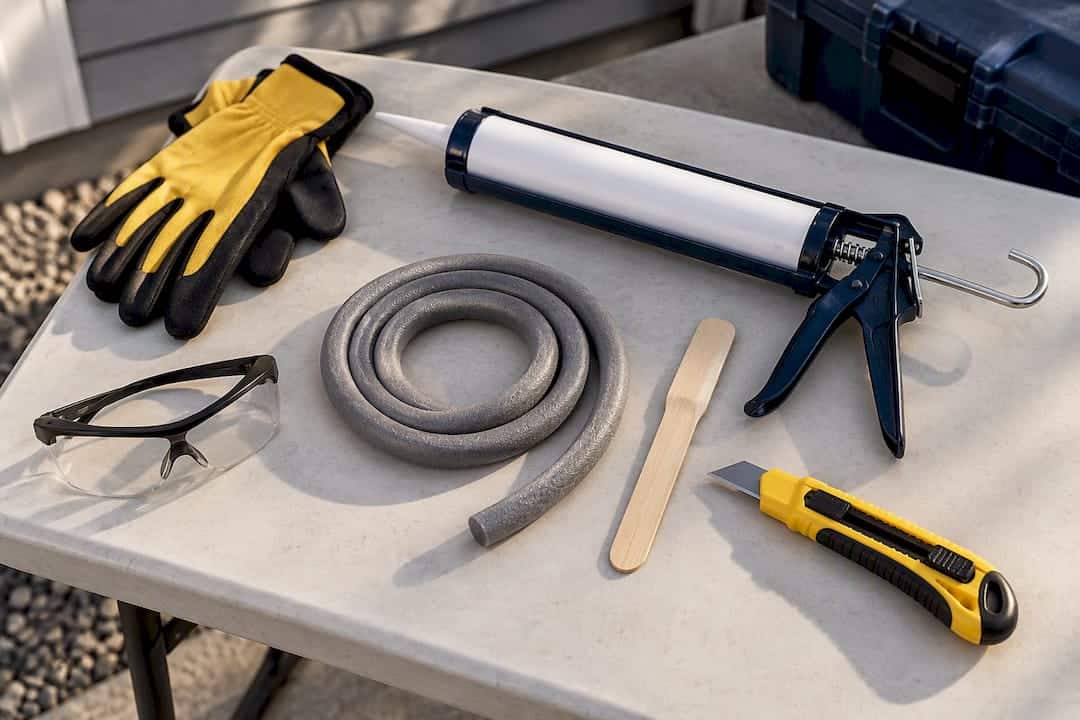
A caulking gun with a smooth trigger action, a sharp utility knife for a clean nozzle cut, a foam backer rod in the right diameter, and a tooling stick or gloved finger cover most jobs. Wear gloves and eye protection when using solvents or heat guns, and keep the work area ventilated.
Removing old caulk and preparing siding for repainting
Old, cracked caulk has to come out before new sealant or paint goes on, and rushing this step is where a lot of DIY jobs go sideways.
- Score along both edges of the old bead with a utility knife, then work a folding scraper underneath to lift it without digging into the panel.
- Use a caulk softener or a controlled heat gun on stubborn sections rather than forcing a blade, since aggressive scraping gouges soft aluminum and creates new problems.
- Avoid harsh chemical paint strippers on aluminum unless a manufacturer’s data sheet specifically clears them for that substrate. Follow whatever removal guidance the product’s technical sheet provides.
- Clean the joint with a solvent wipe, let it dry fully, and run a fresh adhesion test patch before committing to the whole run.
- Respect the new sealant’s cure window before painting. Cure times are chemistry-specific, so check the product’s data sheet rather than assuming a standard 24-hour rule applies across the board.
If you’re filling small holes or surface defects rather than sealing a moving joint, an exterior filler like DAP Platinum Patch is designed to bond to aluminum, sand smooth, and accept paint. It’s not built for joints that expand and contract, so save it for dents and holes, not perimeter seams.
Step-by-step application: a contractor-grade workflow
Getting a bead that lasts through a Canadian winter isn’t complicated, but it does reward patience over speed.
- Check the forecast and surface temperature before you start. Most sealants need a dry window and a minimum surface temperature, and applying below that range shortens service life regardless of how good the product is.
- Mask adjacent painted surfaces and trim edges with painter’s tape for a clean line.
- Cut the nozzle at a 45-degree angle sized to the joint width, then load the gun and purge air from the tube before your first pass.
- Apply a continuous bead in one steady motion rather than stopping and restarting, which leaves weak points where the sealant hasn’t fused together.
- Tool the bead immediately with a wet finger or tooling stick to press it fully into the joint and against both faces, eliminating air pockets.
- Set backer rod first on any joint wider than about 1/4 inch so the bead maintains proper depth-to-width proportion instead of ballooning into a thick, crack-prone mass.
- Remove masking tape while the bead is still slightly tacky for the cleanest edge.
- Let the sealant cure fully before painting or exposing it to heavy rain, checking the specific product’s data sheet for that window.
Pro tip aside: the Spectrem 1 data sheet documents movement accommodation figures alongside its adhesion numbers, and matching those figures to your joint’s expected movement is what separates a bead that lasts from one that splits by spring.
A quick field test once the bead has cured: press a fingernail gently into the surface. It should feel firm with slight give, not tacky, and it shouldn’t pull away from either edge when flexed.
Troubleshooting and maintenance for caulked aluminum siding
Most caulk failures fall into a handful of predictable patterns, and knowing which one you’re looking at tells you whether a quick repair will hold or whether the whole joint needs to come out.
- Adhesive failure shows as the bead pulling cleanly away from the aluminum, usually pointing to poor surface prep or a chemistry mismatch.
- Cohesive failure shows as cracking through the middle of the bead itself, often from movement that exceeded the product’s rated capacity.
- UV degradation appears as chalking or brittleness on sun-exposed runs, which shortens service life regardless of how well it was installed.
- Joint movement beyond the product’s limits causes repeated splitting no matter how many times you recaulk the same spot.
Small cracks in an otherwise sound bead can often be spot-repaired. Widespread cracking, pulling, or a bead older than its expected service life calls for full removal and replacement rather than layering new sealant over old.
Pro Tip: If you’re recaulking the same joint every year or two, the problem usually isn’t the caulk. It’s the joint design or the installation underneath it, and that’s worth a second look before you buy another tube.
Pro perspective from Kettle Contracting
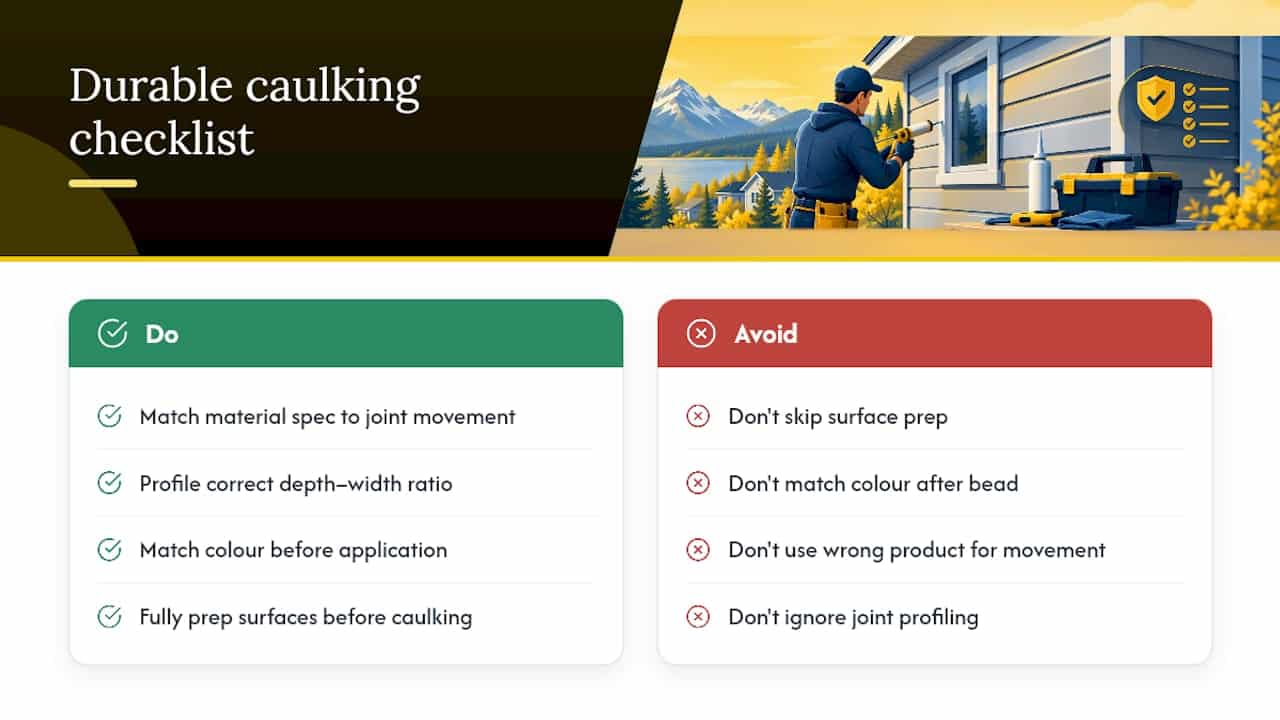
On a job site, the checklist is short but non-negotiable: confirm the material spec matches the movement and paint requirements of that joint, profile the joint to the right depth-to-width ratio, match colour before the bead goes in rather than after, and never skip surface prep to save time. Those four things separate a bead that lasts through a decade of freeze-thaw cycles from one that needs premature replacement.
When getting quotes, ask what product will be used and why, the cure and paint windows, and about any warranty or follow-up inspection. A contractor who can’t answer clearly may not be specifying the job carefully. Sometimes the honest answer is that caulk isn’t the fix. Bent panels, corroded trim, or repeatedly failing joints often require replacement.
How Kettle Contracting helps with aluminum siding caulking

You don’t need to guess which sealant belongs on your siding or spend a Saturday fighting old caulk with a putty knife. Kettle Contracting handles the material selection, the prep work, and the tooling, so the bead you get is matched to your joint’s movement and finish needs from the start, not patched together with whatever was on the truck.
- Residential exterior caulking for trim, penetrations, and perimeter joints around your siding.
- Building envelope sealing for larger properties or homes showing signs of water infiltration beyond a single joint.
- Window and door perimeter sealing, since siding failures often trace back to the openings they surround.
At inspection, we walk the property, spec the right material for each joint, run a sample patch when needed, and give you a written quote before any work starts. Book a look at your Residential Window Caulking options, or browse our full service list to see what fits your property.
Key data sheets, manufacturer guides, and codes
For readers who want to verify the specifics: the Spectrem 1 data sheet covers adhesion and movement figures, Mulco’s product listing covers elongation and cold-weather ratings, DAP’s technical bulletin covers filler adhesion and cure limits, and the Gentek installation guide covers bead depth and J-channel guidance.
Sources
- SPECTREM 1
- Mulco Professional Sealants | Pro Materials
- DAP ® PLATINUM PATCH TM Advanced Exterior Filler — Technical Data
FAQ
What type of caulk is best for aluminum siding?
A paintable hybrid or a professional low-modulus silicone bonds well to aluminum and handles the metal’s expansion and contraction. Products like Spectrem 1 are built for exactly this kind of movement on metal substrates. Avoid 100% acetoxy silicone if you plan to paint over the bead.
What is the best filler for aluminum siding?
For holes and dents rather than moving joints, a sandable exterior filler such as DAP Platinum Patch bonds to metal and accepts paint once cured. It isn’t rated for joints that expand and contract, so use a flexible sealant there instead.
Will caulking stick to aluminum?
Yes, but only when the surface is clean, dry, and free of oxidation, grease, and old caulk residue. Chemistry matters too. Neutral-cure silicones and hybrids formulated for metal substrates adhere far better than general-purpose acrylic latex.
How do I seal holes in aluminum siding?
Small holes and surface defects are best filled with a sandable exterior filler rather than caulk, since filler sands smooth and holds paint. For gaps at seams or trim where movement occurs, use a flexible sealant sized to the joint with backer rod if the gap exceeds about 1/4 inch.
