
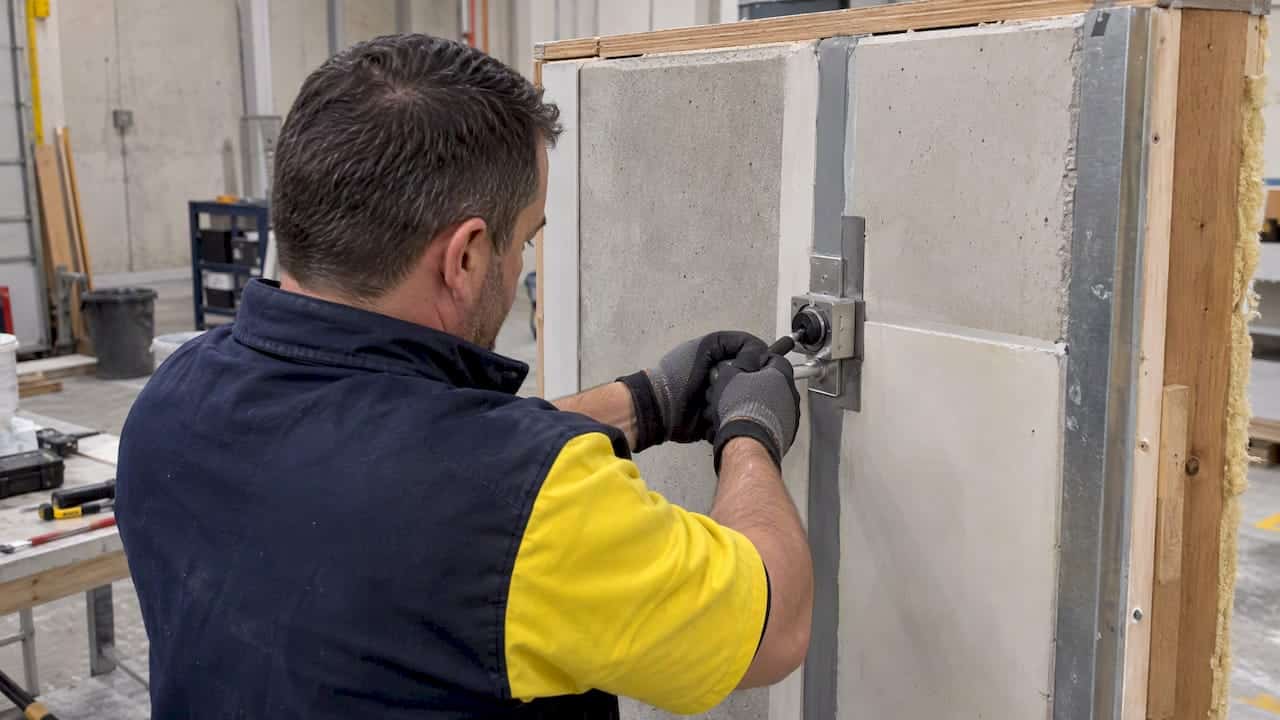
For on-site adhesion verification, use the ASTM C1521 field adhesion (hand pull) test. Lab methods come into play when you need quantitative data or you’re dealing with an unusual substrate, run peel, direct tensile, or blister testing instead. Either way, a mock-up and field verification need to happen before anyone picks up a caulking gun for production work.
TL;DR:
- Field adhesion tests involve hand pull methods that must be performed after the sealant reaches full cure and on representative joint locations.
- ASTM C1521 is specifically designed for evaluating adhesion of installed weatherproofing sealants, using both destructive and nondestructive pull procedures.
- Laboratory tests like adhesion-in-peel or direct tensile testing quantify bond strength, especially useful for troubleshooting recurring failures or testing new substrates.
- Proper surface preparation, including cleaning and verifying primer compatibility with mock-ups, is critical to achieve reliable adhesion results.
- Failures due to contamination, improper primer use, or overheating are mostly avoidable; addressing these causes promptly ensures long-lasting sealant bonds.
Table of Contents
- Standards that govern sealant adhesion evaluation
- Field adhesion testing: step-by-step hand pull procedure
- Laboratory and specialized adhesion tests
- Preparing substrates and running mock-up protocols that actually predict performance
- Interpreting results and deciding what to do next
- Troubleshooting common causes of adhesion loss
- Our checklist and field tips for reliable adhesion testing
- Why field verification still matters
- How we support mock-ups, pull testing, and remediation
- FAQ
- Sources
Standards that govern sealant adhesion evaluation
If you’ve spent any time on a job site, you’ve heard C920 and C1521 used like they’re interchangeable. They’re not, and mixing them up is how specs get written wrong.
ASTM C1521 is the practice for evaluating adhesion on installed weatherproofing sealant joints, meaning joints that are already in the wall, already cured, and need checking before you move on to the next floor or the next building. It covers both destructive and nondestructive hand pull procedures.
ASTM C920, on the other hand, is a product specification. It classifies elastomeric sealants and sets performance requirements, including adhesion-in-peel and cohesion under cyclic movement, but it qualifies the product itself, not your installed joint. A sealant can pass C920 in the lab and still fail on your substrate if prep was off.
For other references, ISO 4624 covers tensile adhesion testing for coatings, and ASTM C794 and C719 deal with peel adhesion and durability under cyclic movement. Keep those in your back pocket for specialty applications.
Field adhesion testing: step-by-step hand pull procedure
Before you cut into anything, confirm the sealant has reached full cure per the manufacturer’s data sheet, pick locations that represent the actual joint conditions (not just the easy ones), and have your repair kit and safety gear staged.
Non-destructive procedure:
- Select a test area on the installed joint, away from corners or splices.
- Grip the sealant with your fingers and pull it away from one substrate face at roughly a 90-degree angle.
- Apply steady tension without cutting, watching for strain in the bead.
- If the sealant stretches and returns without separating from the substrate, it passes. No repair needed.
Destructive procedure, when quantitative confirmation matters:
- Cut a tab into the sealant bead with a utility knife, isolating a small test section.
- Pull the tab away from the substrate at a steady angle until failure occurs.
- Observe and photograph the failure mode immediately.
- Reseal the cut area right away. Per the practice, this is a requirement, not a suggestion, since an open test cut is a new path for water.
Document every pull with a location ID, photos of the failure surface, the failure type you observed, and the remedy you performed. That record is what protects you if adhesion questions come up months later.
Laboratory and specialized adhesion tests
Field pulls tell you pass or fail. Lab testing tells you by how much, and that distinction matters when you’re troubleshooting a pattern of failures rather than a one-off.
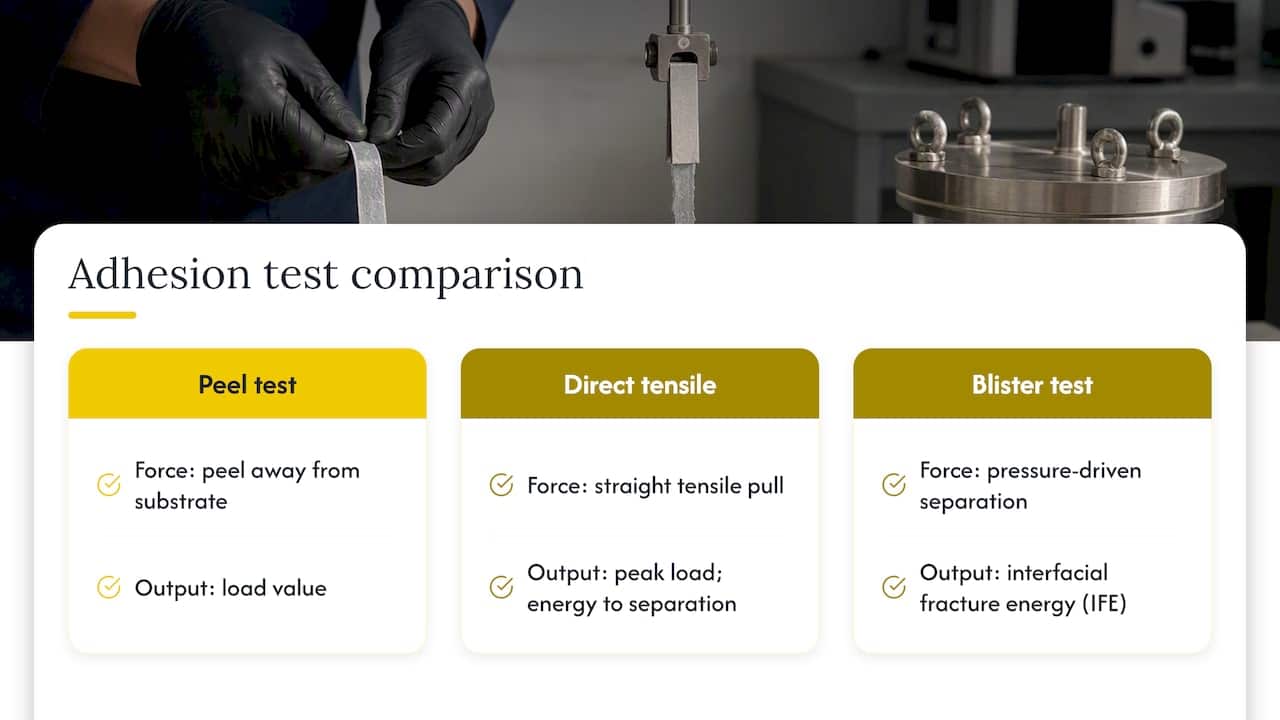
Adhesion-in-peel testing measures the force needed to peel a cured sealant bead from a substrate, producing a quantifiable load value. Direct tensile testing (DTT) pulls a sample straight off the substrate and reports peak load (Pmax) and energy to separation. Blister testing uses pressure to separate sealant from substrate and calculates interfacial fracture energy (IFE), a metric useful for comparing bond strength across substrate types. The NRC paper on hot-poured crack sealants walks through all three and how they inform installation temperature and annealing decisions.
Send samples to a lab when you’ve got repeated field failures with no obvious cause, an unusual or new substrate, or a formal product qualification to complete. Give the lab everything they need to make sense of the numbers: substrate type, cure time, ambient and substrate temperature at installation, and which primer was used.
Preparing substrates and running mock-up protocols that actually predict performance
A mock-up is only useful if it mirrors what’s going to happen on the real wall. Skip a step here and you’re just testing a different job.
Surface prep checklist:
- Remove dust, dirt, and loose debris from the joint before any sealant goes down.
- Solvent-clean the substrate per the manufacturer’s recommendation, never substitute whatever’s in the truck.
- Avoid excessive heat during prep. NRC research found that heat treatment during substrate preparation can meaningfully degrade bond strength.
- Strip old sealant and any release agents completely. Residue is one of the most common causes of adhesion failure we see.
On primers, don’t assume compatibility from the data sheet alone. The DOWSIL technical manual recommends verifying primer effectiveness on-site with mock-ups, since dwell time and substrate condition vary job to job. Run a primer-versus-no-primer comparison if there’s any doubt.
For the mock-up itself, apply the full system (substrate, primer if used, sealant) on actual job materials, let it cure on the manufacturer’s schedule, and pull test at multiple locations before you sign off. Spell out your acceptance criteria before you start, not after you see the results.
Pro Tip: Run your mock-up on the worst substrate condition you expect to encounter on site, not the cleanest one. If it passes there, production will too.
Interpreting results and deciding what to do next
The failure mode tells you almost everything. Cohesive failure, where the sealant itself tears, means the bond to the substrate held and the adhesion is sound. Adhesive failure, a clean peel off the substrate face with no sealant residue left behind, means the bond failed and something in your prep or product selection needs fixing.
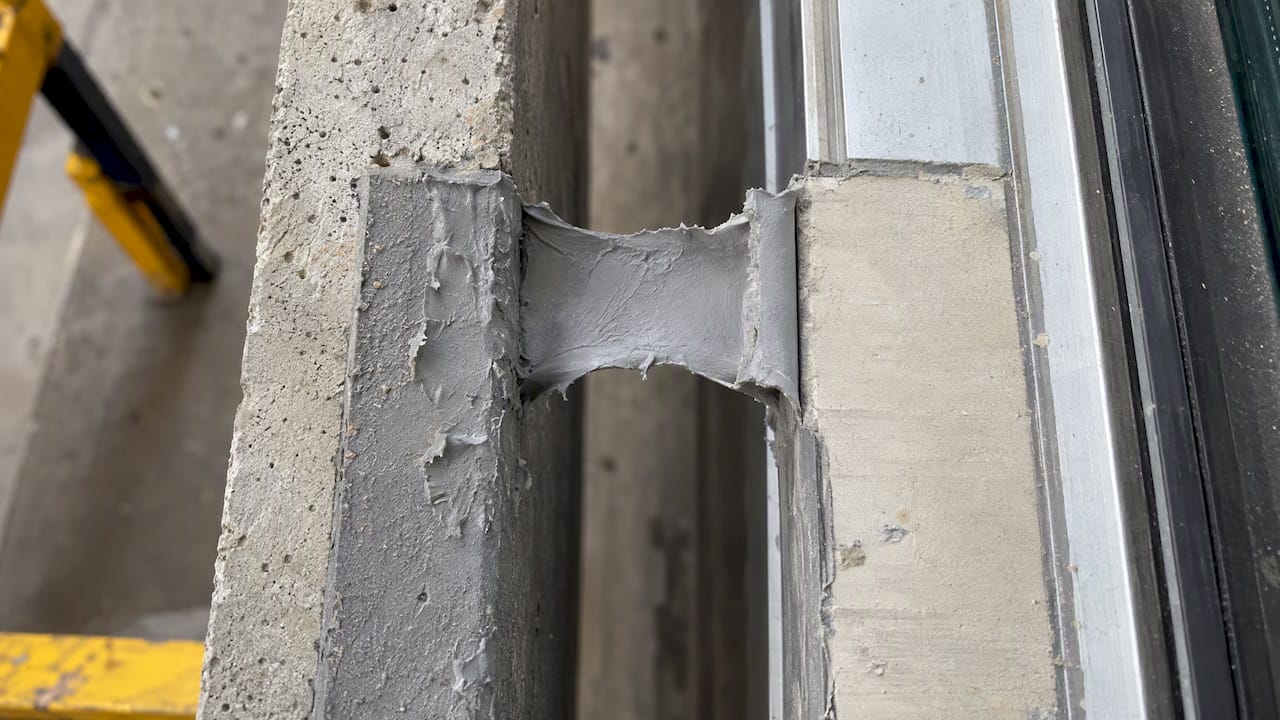
After any destructive test, repair immediately: clean the cut area, reprime if required, and reseal before moving on. Give the repair its full cure time before you consider retesting that location.
When you’re writing the spec, set your pass/fail threshold around cohesive failure as the acceptance standard, and build in a testing frequency, not just a one-time mock-up, so you catch drift in workmanship or substrate conditions as the job progresses.
Troubleshooting common causes of adhesion loss
Most adhesion failures trace back to one of a handful of causes, and most of them are preventable.
- Surface contamination, dust, oil, or old sealant residue, calls for substrate rework and a full re-clean before resealing.
- Incompatible coatings or substrates often need a different primer or a different sealant chemistry entirely.
- Moisture in the joint means you wait for the substrate to dry and verify with a moisture meter before proceeding.
- Wrong primer or no primer where one was needed gets corrected and the location retested on a fresh mock-up.
- Overheating during prep, per NRC findings, degrades bond strength and means changing your prep method, not just redoing the same steps.
- Workmanship issues, like inadequate tooling or rushed application, call for retraining and closer QC on the next mock-up.
When a cause isn’t obvious after checking all of the above, loop in the sealant manufacturer or a building-envelope consultant before committing to full production.
Our checklist and field tips for reliable adhesion testing
Over years of building-envelope work, we’ve settled on a mock-up checklist that covers materials, test locations across multiple elevations, cure windows, and documentation for every pull. It’s the same list whether we’re on a custom home or a commercial tower.
Three things we tell every crew: never rush prep with excessive heat, respect the primer’s dwell time exactly as specified, and always sample more than one substrate or elevation since conditions shift across a building. Put mock-ups and periodic pull tests into the project spec itself, not just the field notes, so they’re enforceable.
Why field verification still matters
Lab numbers are useful, but the wall doesn’t read a data sheet. Site conditions, temperature, substrate age, workmanship, decide real-world adhesion. A mock-up that passes before production starts has saved more rework than any lab certificate ever has.
— Felix
How we support mock-ups, pull testing, and remediation
We provide mock-ups, field pull testing, and professional resealing services on residential and commercial projects across the building envelope, with documentation at every stage.

- We diagnose adhesion issues on-site rather than guessing from a spec sheet.
- We reseal and repair immediately after any destructive test, per the practice.
- We document every test location, photo, and outcome for your project records.
Hiring a contractor for your mock-up and testing phase means faster diagnosis and repair work designed to last through Ontario’s freeze-thaw cycles. If you’re planning a sealing programme and want it tested right from the start, see our building envelope sealing services.
FAQ
What is the ASTM standard for cross cut adhesion testing?
Cross cut testing for coatings typically falls under different ASTM methods than sealant joint evaluation. For installed sealant joints specifically, the relevant practice is ASTM C1521, which covers hand pull adhesion testing rather than cross cut procedures.
What are the requirements for ASTM C920 testing?
ASTM C920 is a product specification for elastomeric joint sealants, setting performance requirements including adhesion-in-peel and cohesion under cyclic movement. It qualifies the sealant product itself and is not used to evaluate adhesion on an already-installed joint.
How do you do an adhesion test on a sealant joint?
The standard field method is the hand pull test described in ASTM C1521: you grip the cured sealant, pull it away from the substrate at roughly 90 degrees, and check whether it tears (cohesive failure, a pass) or peels cleanly off the substrate (adhesive failure, a problem). Destructive versions use a tab cut and require immediate resealing after the test.
What is the ISO standard for adhesion testing?
ISO 4624 is the relevant international standard, a tensile adhesion test originally developed for coatings. It’s useful when you need a quantitative measurement of adhesion rather than the pass or fail result a field hand pull test gives you.
Sources
- C1521 Standard Practice for Evaluating Adhesion of Installed Weatherproofing Sealant Joints
- C920 Standard Specification for Elastomeric Joint Sealants
- Adhesion testing procedure for hot-poured crack sealants (NRC)
- Dow / DOWSIL technical manual (primer and adhesion recommendations)
