
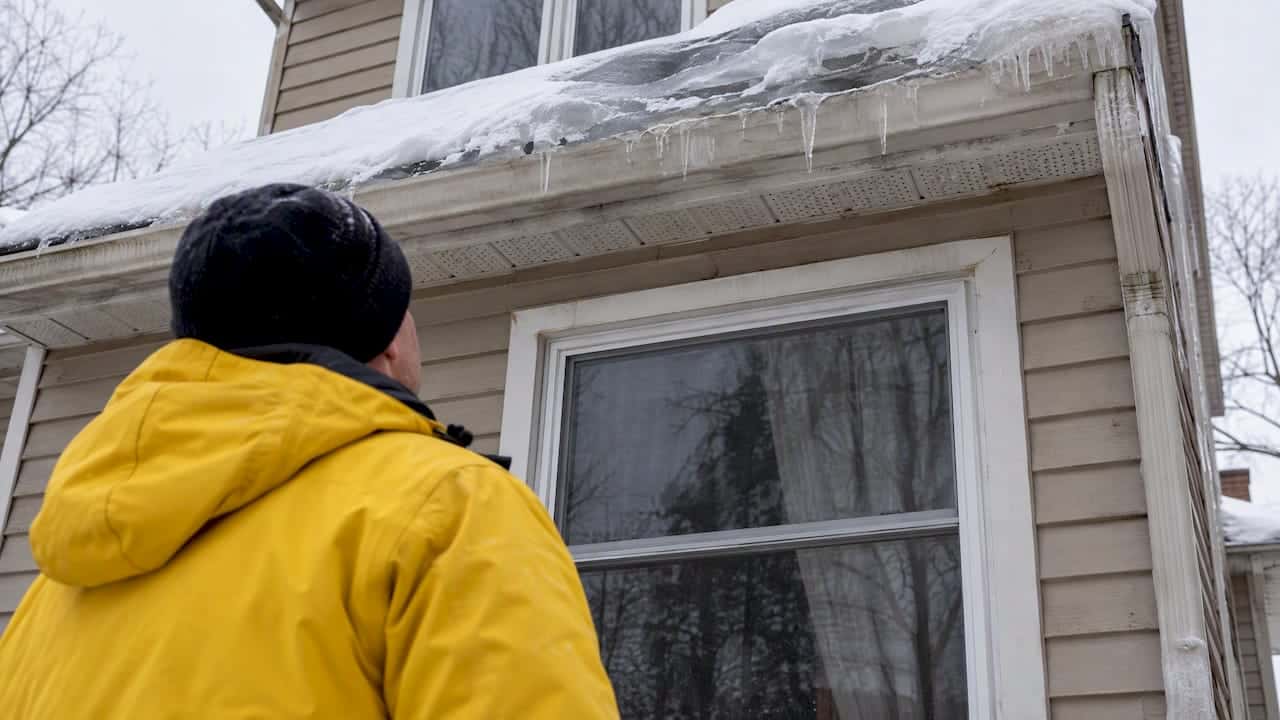
If water is dripping around a window in the middle of winter, the window may not be the problem. Often it is an ice dam on the roof above it, pushing meltwater back under the shingles and down into the wall until it shows up at the window frame. The short-term fix is to stop the water and document the damage. The long-term fix is to keep heat out of the attic, and to make sure the sealing around the window is not giving that water an easy way in.
I have spent 25 years on job sites around Oshawa and the GTA, and this is a call we get every January and February. Here is how to tell what you are dealing with and what to do about it.
TL;DR
- Water above or beside a window in winter is often an ice dam on the roof edge, not a failed window. Check the eaves for thick ice and large icicles first.
- Ice dams are mainly an attic heat and air-leakage problem. Roof raking helps in the short term, but sealing and insulating is what stops them.
- Failing caulk, open joints and poor flashing give that backed-up water a path in. Sealing them properly is part of the fix, but caulk alone will not stop an ice dam.
- Call your insurer as soon as you see interior water. Coverage usually depends on the damage being sudden, not the result of long neglect.
- Stay off icy roofs and ladders. Do not chip ice with axes or picks.
Table of Contents
- How an ice dam ends up leaking at your window
- Is it an ice dam or a failed window seal?
- What to do the day you see water
- Does insurance cover ice dam leaks?
- The real fix: stop the heat, then seal the openings
- Why the quick fix does not last in Ontario
- Basement windows and window wells
- Our perspective: what 25 years of winter calls have taught us
- Who to call for what
- Get the sealing around your windows checked
- A pre-winter checklist for homeowners and property managers
- FAQ
- Sources
How an ice dam ends up leaking at your window
An ice dam starts with heat. Warm air leaks from the living space into the attic, warms the roof deck, and melts the snow sitting on it. That water runs down to the eaves, which are cold because they hang past the heated walls, and it refreezes there. Ice dams are ridges of ice that typically form at the roof edge or in the eavestroughs, and they show up most after freeze-thaw cycles.
Once the ridge builds, meltwater has nowhere to go. It pools behind the ice and backs up under the shingles. From there it can run down inside the wall, along the sheathing and behind the siding or brick. Windows sit in that path. The water follows gravity until it meets a head flashing, a gap in the trim or a joint in the frame, and then it comes out inside.
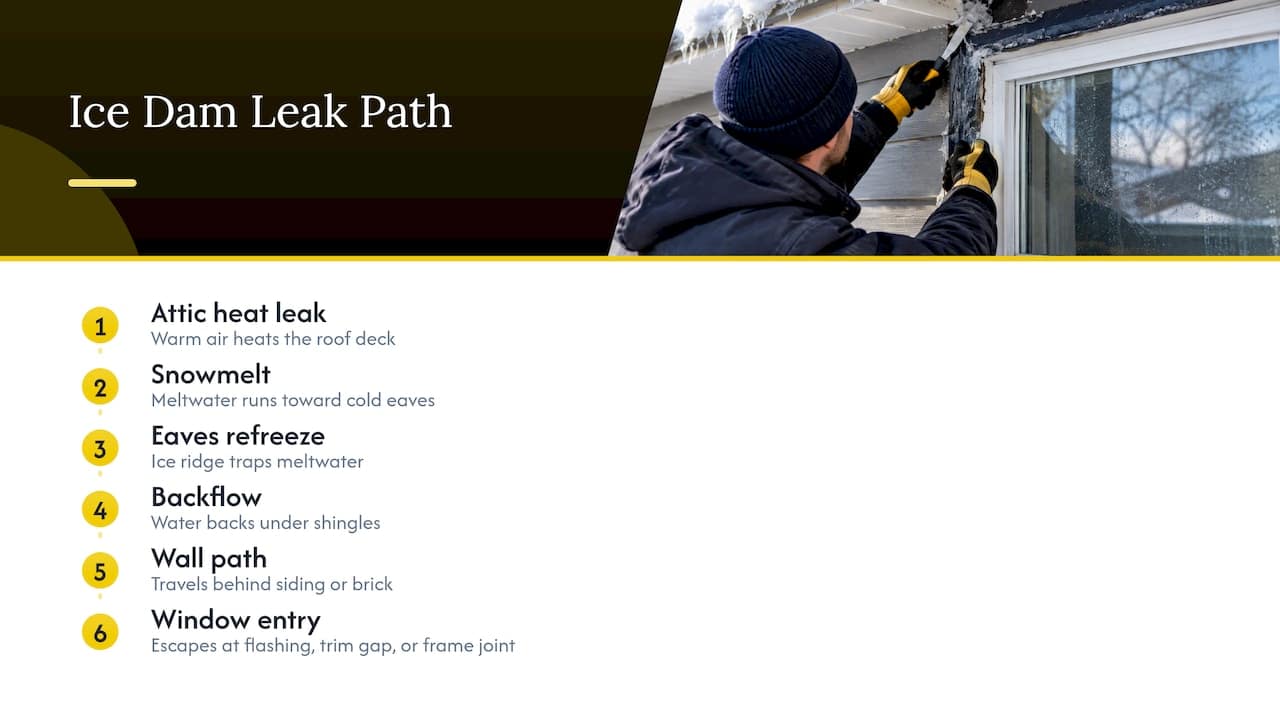
That is why the stain often appears above or beside the window rather than on the ceiling. Homeowners then reasonably blame the window, call a window company, and the leak returns with the next thaw.
Is it an ice dam or a failed window seal?
Before anyone touches a tube of caulk, work out where the water is coming from. These clues help.
Signs that point to an ice dam
- Timing. The leak shows up during a thaw or sunny day after heavy snow, and stops when it freezes hard. A window with failed seals tends to leak in rain too.
- Ice at the eaves. Look for a thick ridge of ice along the roof edge and long icicles. Those are the usual signs, along with water stains on ceilings and walls.
- Location. The window is on the floor directly below a roof edge, a valley, or a dormer, or the water comes in at the top of the frame.
- Uneven snow melt. Bare patches on the roof while the rest is snow-covered point to heat escaping from the attic below.
Signs that point to the window or its sealing
- The window leaks in summer storms or wind-driven rain, not only in winter.
- You can see cracked, shrunken or peeling caulk at the trim, brick moulding or sill.
- Water appears at the bottom corners of the frame, which usually means a sill or flashing problem.
- Condensation or frost forms inside on cold days. That is humidity and glass temperature, not an ice dam. It is a separate issue, though air leakage around the frame can make it worse.
Often it is both
Here is the part most articles skip. An ice dam can push water against a wall at a pressure it never sees in normal rain. Roofing and restoration pros note that existing cracks and leaks around windows and doors can worsen under that pressure. A window with sound caulking may hold up. One with a split joint or dried-out sealant will not. So the ice dam is the cause, and the weak sealing is the way in.
If you want to confirm a summer leak path, our five-minute hose test for window leaks after rain shows you how to isolate the spot without guessing. For leaks near the top of a brick opening, see our note on the leaking window lintel test.
What to do the day you see water
Take these steps in order.
- Protect the room. Move furniture, put down towels and a bucket, and pull back drapes. If a ceiling is bulging with water, do not poke it yourself unless you can do so safely from the floor, and keep clear of any light fixtures nearby.
- Take photos and video. Capture the ice at the eaves, the stain, and any dripping. Date everything.
- Call your insurer or broker. The Insurance Bureau of Canada advises contacting your provider right away so the incident is documented and the claim started before secondary damage spreads. More on coverage below.
- Reduce what you can from the ground. A roof rake used from the ground can lower snow load near the edge. Federal guidance suggests keeping roof snow depth to about 15 to 30 cm (6 to 12 in.). Pull snow down gently, and do not scrape the shingles.
- Do not chip at the ice. Axes and ice picks can shorten shingle life and are hazardous. If the dam is large, hire a professional who does safe removal, such as low-pressure steam. Falls from ladders and icy roofs are the bigger risk.
- Open the wall early if needed. If the stain keeps spreading or the drywall stays damp, ask a restoration contractor to check for wet insulation. Trapped moisture is what turns a leak into rot or mould.
If you are a property manager, treat this as urgent for another reason. In Ontario, maintenance standards require roofs and exterior structures to be kept in good condition, and the City of Toronto’s rules also say roofs must be kept clear of dangerous accumulations. Check your own municipality’s bylaw. A written inspection schedule for eaves and roof edges during freeze-thaw weeks protects you and your tenants.
Does insurance cover ice dam leaks?
Often yes, but not always, and it depends on your policy. According to the IBC, coverage tends to hinge on whether the damage was sudden and accidental, as opposed to the result of long-term neglect or poor maintenance. An Ontario broker also notes that interior damage from a sudden leak is commonly covered, while worn roofing or maintenance issues are usually excluded.
What that means in practice:
- A first-time leak after a heavy snowfall is easier to defend than a repeat leak in the same spot.
- Repeat damage can be treated as a maintenance issue. If you have already had one leak, fix the cause before the next winter.
- Basic policies may not include every water peril. Ask your broker which endorsements you have.
- Keep receipts for any emergency work, and keep the damaged materials until the adjuster has seen them if you can.
I am not an insurance adviser. Your broker or insurer is the right person to tell you what your own policy says.
The real fix: stop the heat, then seal the openings
Heat and air leakage in the attic
There is a common belief that ice dams are a roofing problem. Building science points the other way: if the roof stays cold, ice dams cannot form. Natural Resources Canada’s guidance on roofs and attics covers insulation and air sealing in the attic, and the usual leak points are attic hatches, vents, wiring and plumbing penetrations, and wall-to-ceiling intersections.
A simple way to find trouble spots is to look at the roof after a light snow. Areas where snow melts faster than the rest show where heat is escaping. Those are where insulation needs to be added or air sealing done.
This work is usually done by an insulation or air-sealing specialist, and it is worth doing before you spend money on cosmetic repairs. Our guide on caulking and home insulation for GTA homes explains how sealing gaps and insulation work together. For larger buildings, air sealing can also cut HVAC costs.
Roof edge and drainage
Eavestroughs packed with ice, missing drip edge, and poor flashing at the roof-to-wall joints all make leaks more likely. A roofer should look at these. Kettle Contracting does not replace roofs. We handle the exterior sealing that sits around windows, doors, brick and joints, which is where the water finally gets in.
Sealing around the window
With the cause managed, the window needs to resist what gets through. The checklist we use on site:
- Perimeter caulking. Check the joint between frame and cladding or brick. Look for gaps, hardened sealant that has pulled away, and splits at the corners.
- Sill and brick moulding. Water that gets behind the sill will rot trim. If the trim is soft, it needs repair, not just fresh caulk.
- Brick openings. Open mortar joints and failed sealant at brick-to-frame joints let water in behind the masonry. Our guide on caulking for brick homes goes through product choice.
- Flashing. A properly installed flashing detail should direct water that gets into the wall back out at the sill. If the flashing is missing or wrong, caulk is a bandage. A window installer or envelope specialist should look at it.
Caulking will not stop an ice dam. What it does is reduce how many entry points the water has. Our article on whether caulking can fix window leaks covers when it is enough and when it is not.
Why the quick fix does not last in Ontario
The failure I see most is a tube of caulk applied over wet, dirty or old sealant in February. It looks fine for a week. Then the cold snap hits, the joint moves, and the new bead lets go of the surface.
Ontario’s freeze-thaw cycles move materials constantly. Wood trim, vinyl, aluminum, brick and sealant all expand and contract at different rates. A joint has to be clean and dry, the old sealant removed, the backing and depth right, and the product suited to cold-climate movement. That is why repairs done in the middle of an active leak are usually temporary. In an emergency, a temporary seal is fine, but plan to redo it properly once the weather allows.
Most exterior sealants also have a minimum application temperature, so check the manufacturer’s data sheet. If you need a permanent repair in January, expect the contractor to either schedule it for a milder window or use a product rated for it.
Basement windows and window wells
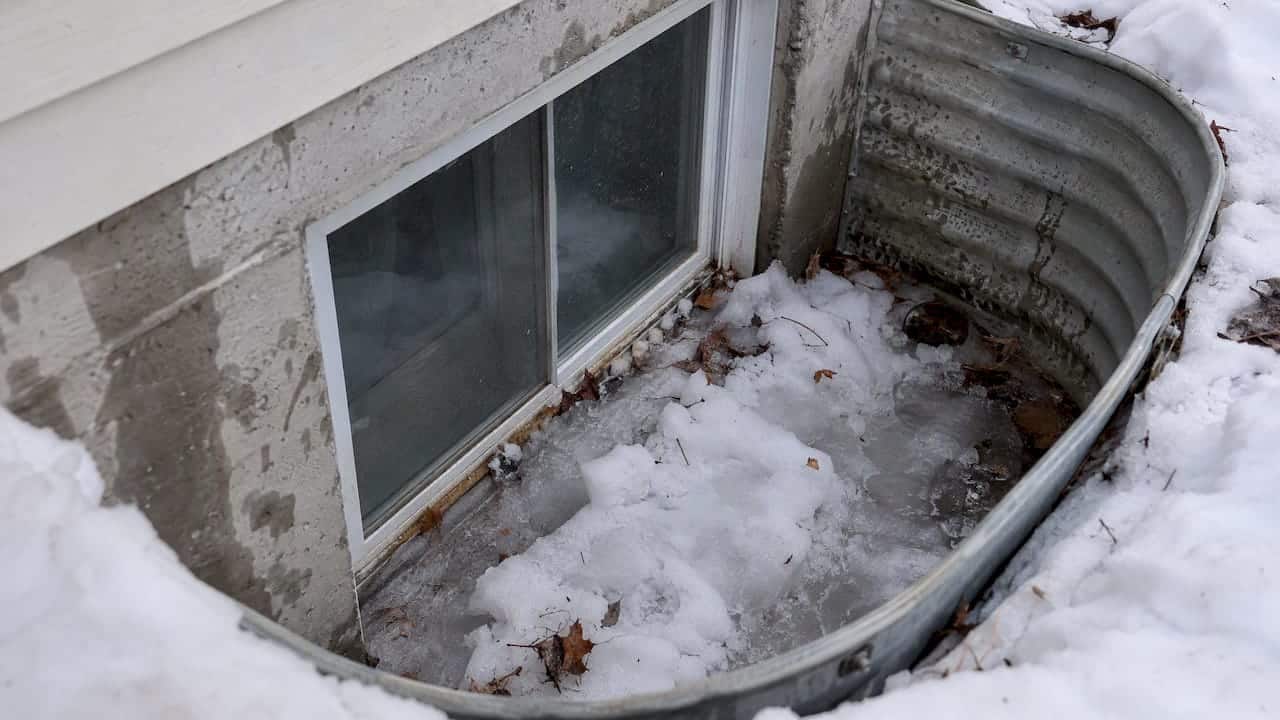
If your leak is at a basement window, melting snow may be the issue rather than an ice dam. Window wells can fill with snow, ice and debris, and then meltwater has a direct path to the frame. Government guidance recommends sealing visible cracks and keeping the well clear, and a properly fitted cover helps prevent build-up. Our page on basement window leaks goes into the causes and when to call a professional.
Our perspective: what 25 years of winter calls have taught us
We do not treat an ice dam leak as a caulking job, and we will tell you so. If heat is pouring into your attic, no sealant at the window is going to solve the problem. We would rather you fix the attic, then bring us in to seal what the water used to find.
Here is how we look at a call like this:
- We start by asking when the leak happens. A winter-only leak that follows a thaw points us to the roof edge. A leak that shows up in rain points us to the window.
- We check the exterior joints around the opening: caulking, brick moulding, sill, mortar and flashing where we can see it.
- We tell you what is outside our scope. If the roof, insulation or eavestroughs need attention, you are better off hearing that now.
- We do the sealing in a way that holds through freeze-thaw cycles, with proper joint prep and materials suited to the Canadian climate, not a quick bead over the old one.
The most common mistake is sealing everything in sight while the cause stays untouched. The second most common is waiting. Water that keeps getting into a wall cavity turns a small repair into rotten trim, wet insulation and, eventually, mould.
— Felix
Who to call for what
A leak like this can involve several trades, and the right order saves money.
| Problem | Who typically handles it |
|---|---|
| Heat loss, thin insulation, attic air leaks | Insulation or air-sealing contractor |
| Ice build-up at eaves, flashing at roof edge, drip edge | Roofer |
| Large ice dam removal | Professional ice removal service |
| Failed caulking, open exterior joints, brick-to-frame gaps | Caulking and sealing specialist |
| Rotten trim or sill | Carpenter or exterior sealing contractor |
| Wet drywall or insulation | Restoration contractor |
Whichever trade you hire, check that they are insured and, where required, licensed. This explainer on why licensed, insured contractors matter is written from a Vancouver point of view, but the liability reasoning applies in Ontario too: ask for proof of insurance before anyone goes on your roof or ladder.
Get the sealing around your windows checked
If you have had a leak at a window this winter, or you want to fix the weak points before the next one, we can inspect the exterior sealing and tell you plainly what we see. See our residential window caulking service, or for apartment buildings and commercial properties, our building envelope sealing. We work with homeowners, property managers and contractors across Oshawa, Whitby, Ajax, Pickering, Bowmanville, Cobourg and the wider GTA. You can reach us through kettlecontracting.com.
A pre-winter checklist for homeowners and property managers
Do this in October or November, before the first real snowfall.
- Walk the perimeter and look for cracked or shrunken caulking around windows, doors and brick joints.
- Clean out eavestroughs and check that downspouts carry water well away from the house.
- Look in the attic for compressed insulation, bare spots, open hatches and light coming through from the living space.
- Put a roof rake where you can find it, and learn what snow depth your roof can carry.
- Clear and cover window wells.
- Note any past stains around windows and have them checked before the cold arrives, not after.
- For multi-unit buildings, write down your inspection schedule for eaves and roof edges, and keep records.
FAQ
Can ice dams cause leaks around windows?
Yes. When an ice dam backs water up under the shingles, that water can travel down inside the wall and come out at a window frame, usually above or beside it. Existing cracks and weak sealing make it worse. Find out whether the water is coming from the roof edge before you replace the window.
Can I remove ice dams myself?
You can use a roof rake from the ground to lower snow load. Do not climb up with an axe or ice pick, because they damage shingles and the fall risk is serious. For an existing dam, the IBC recommends professional removal.
Is ice damming covered by insurance in Ontario?
Often, when the water damage is sudden and accidental, though repeated damage may be treated as a maintenance issue and excluded. Policies differ, so call your broker or insurer as soon as you notice a leak and document everything.
Will caulking my windows stop ice dam leaks?
Not by itself. Caulking closes entry points for water, but the ice dam is caused by heat escaping into the attic. Fix the insulation and air sealing to stop the dams, and keep the window sealing in good shape so any water that does arrive cannot get in.
How do I stop ice forming on the inside of my windows?
That is usually condensation freezing, which comes from indoor humidity meeting cold glass, not an ice dam. Lower indoor humidity, use exhaust fans, and have air leaks around the frame sealed. If frost keeps returning on a newer window, have the unit and installation checked.
Sources
- Stay protected: Understanding and helping prevent ice dams, Insurance Bureau of Canada
- Clear snow and ice, Canada.ca
- Keeping the Heat In, Section 5: Roofs and attics, Natural Resources Canada
- Basement window maintenance, Canada.ca
- O. Reg. 517/06 Maintenance Standards, ontario.ca
- Property Standards, City of Toronto
- Does Home Insurance Cover Ice Dams and Roof Damage in Ontario?, RJ Insurance