
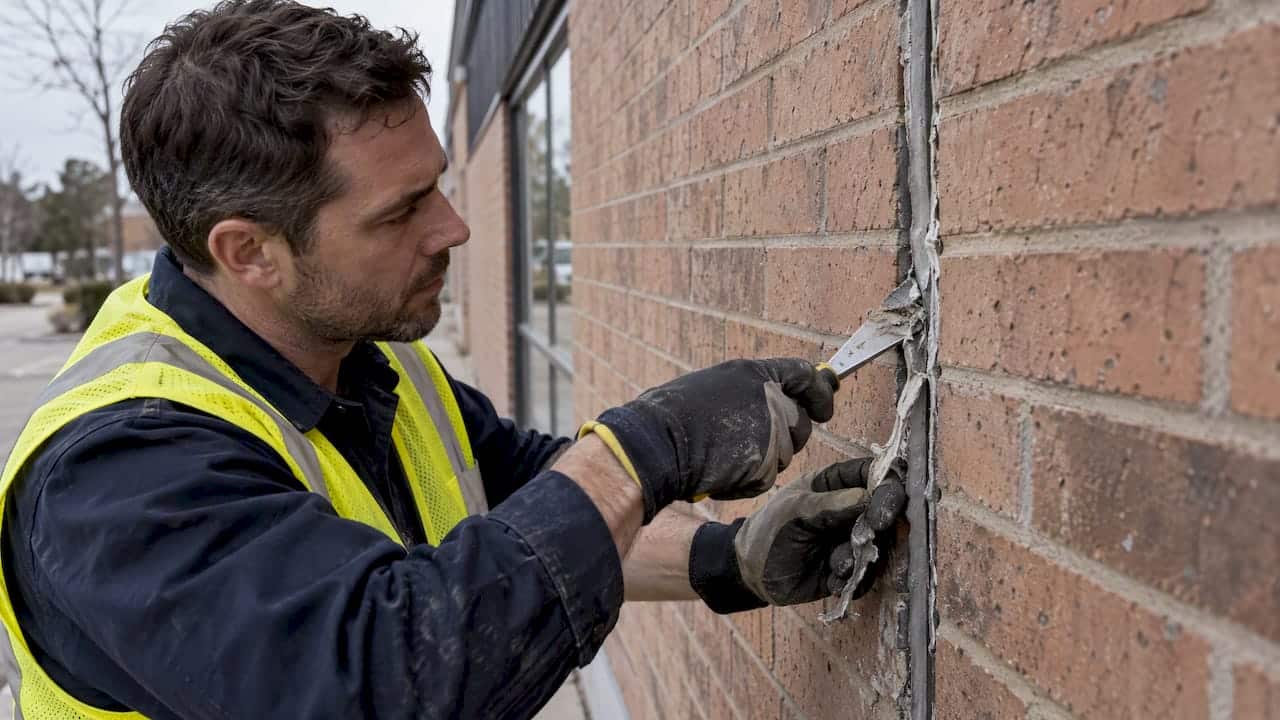
Joint surface preparation is everything you do to the two faces of a joint before any sealant goes in: removing old material, cleaning, drying, checking the temperature, sizing the joint and fitting backer rod. Most caulking that fails early fails because of what happened (or didn’t) in this stage, not because of the product. In Ontario, where joints open and close through every freeze-thaw cycle, the prep decides whether a seal lasts a few months or several years.
This guide is about sealant joints in buildings: windows, doors, brick and concrete expansion joints. If you landed here looking for welding joint prep or the anatomy of a bone joint, this isn’t that page.
TL;DR
- Take every bit of old sealant out. New caulk over failed caulk is a temporary fix at best.
- Both joint faces must be clean, dry, sound and frost-free before you start. Invisible frost is enough to stop a bond.
- Size the joint properly: about 2:1 width to depth, with backer rod controlling depth so the sealant sticks to two sides only.
- Check the product data sheet for temperature range, primer requirements and compatibility with your surface.
- Prep is slow, unglamorous work. It is also the part worth paying a professional for.
Table of Contents
- Why prep matters more than the sealant
- The five stages of joint prep
- Step 1: Remove the old sealant completely
- Step 2: Clean and inspect the joint faces
- Step 3: Dry, frost-free and in the right temperature range
- Step 4: Size the joint and set the backer rod
- Step 5: Prime, mask, then seal
- Common prep mistakes we see
- Prep for different jobs
- Our perspective
- Can you do this yourself?
- Let us handle the prep
- FAQ
- Sources
Why prep matters more than the sealant
After 25 years of caulking in and around Oshawa, I can tell you the same story repeats. A homeowner or property manager buys a good sealant, applies it carefully, and sees it peel away from the brick or window frame within a season. They blame the tube. Nine times out of ten, the tube was fine.
The National Research Council of Canada says much the same. Its research on sealed joints points out that many premature failures can be avoided by paying proper attention to design and installation details. A sealant has to keep a watertight barrier while the surrounding building elements push and pull on it. If it isn’t bonded properly to clean, sound surfaces, it can’t do that.
Another NRC publication notes that adhesion varies with the type of sealant, its formulation and the substrate, and that surface properties can differ even within the same type of material. In plain words: the same caulk can stick well to one window frame and poorly to the next. Prep is how you take that guesswork out.
The five stages of joint prep
Think of it as a sequence. Skip a stage and the later ones can’t make up for it.
- Remove the old material.
- Clean and inspect the joint faces.
- Make sure the surface is dry, frost-free and in the right temperature range.
- Size the joint and set the backer rod.
- Prime, mask and only then seal.
We’ll go through each.
Step 1: Remove the old sealant completely
This is where most do-it-yourself jobs and rushed contractor jobs go wrong. Old caulk is cracked and pulling away, so someone runs a fresh bead right over the top. It looks fine for a week.
The problem is that the new sealant bonds to the old sealant, and the old sealant is no longer bonded to the building. The whole stack peels off together. Manufacturer guidance, such as the technical data sheet for a Canadian mortar joint sealant, calls for the joint recess to be cleared of debris, loose material and old adhesive residue, using mechanical methods such as wire brushes or grinding tools.
In practice that means:
- Cut and pull. Use a utility knife or a purpose-made removal tool to slice the old bead away from both faces, then pull it out in strips.
- Scrape the residue. What’s left on the faces is the part that causes trouble. A scraper, a stiff brush or a grinder (on masonry) gets it off.
- Look at what you find. Removal tells you things. Is the old bead clean on the back side, meaning it lost adhesion? Is the material behind it soft or rotted? Is there water staining or mould? Those are signs the problem goes deeper than caulk.
If you see damp, soft wood around a window, stop and deal with that first. Our guide to repairing old caulking around home windows covers what to check before you re-seal.
Step 2: Clean and inspect the joint faces
Once the old sealant is gone, the faces need to be clean and sound. “Sound” matters as much as “clean”. Sealant can only hold as well as the surface underneath it.
The same data sheet describes a substrate that is clean, frost-free and sound, free of oils, greases and incompatible coatings such as water repellents or curing compounds, and recommends mechanical cleaning such as wire brushing or grinding. For non-porous surfaces like metal or glass, it adds a final solvent wipe to take off dust and traces of oil.
Here is how that plays out on the surfaces we see most often around the Durham Region:
| Surface | What to do | Watch for |
|---|---|---|
| Brick and mortar | Wire brush or grind out loose mortar and debris, then vacuum or brush away dust | Crumbling mortar, spalling brick, efflorescence (white salts) |
| Concrete | Remove laitance and loose material, vacuum the joint | Curing compounds or sealers that block adhesion |
| Aluminum and vinyl window frames | Wipe with a recommended cleaner or solvent, let it flash off fully | Silicone residue, oxidation, chalking paint |
| Wood trim | Scrape back to sound wood, sand lightly, remove dust | Rot, flaking paint, moisture |
| Glass | Solvent wipe on the edges | Fingerprints, glazing residue |
Two cautions. First, don’t wipe the joint with a general household cleaner and call it done. Many leave a film that hurts adhesion. Second, solvents differ in what they are safe on. Check the sealant’s data sheet and the surface material before you choose one, and follow the product’s safety instructions for ventilation and handling.
One more thing on sound surfaces: if brick edges are crumbling or a mortar joint is falling apart, caulk won’t hold there. That needs masonry repair first. We cover that in our guide to spalling brick repair for Ontario homeowners.
Step 3: Dry, frost-free and in the right temperature range
This is the Canadian part of the story, and the part that surprises people.
NRC guidance is clear that sealant manufacturers specify a temperature range for application, and that a cold, frosted or damp surface is a poor base for bonding. A thin layer of frost can be invisible to the eye, yet it acts as a bond breaker. You can get a bead that looks perfect on the day and lets go the first time the building moves. The NRC guide to sealed joint design is a good place to read about how substrate conditions affect adhesion.
What I check on site:
- Is the surface dry? Not just dry to the touch. After rain or a heavy morning dew, brick holds moisture longer than you’d think.
- Is there frost? On a spring or fall morning, north-facing walls can still have it when the air feels mild.
- What does the data sheet say? Every product lists the temperature range for application. Stay inside it for both the air and the surface.
- What’s the sealant’s own temperature? A tube kept in a cold truck overnight doesn’t behave like one at room temperature.
Surface temperature is often different from air temperature, and sun on one wall can make it very different from the shade side. The same idea applies to other exterior sealing work. For example, this explainer on how pavement temperature affects driveway sealing shows how surface conditions, not just the weather forecast, decide whether a sealing job will take.
If conditions aren’t right, wait. A day’s delay costs nothing. A failed bead costs you the whole job again, plus the labour of removing it.
For more on seasonal timing, see our guide to caulking for extreme weather.
Step 4: Size the joint and set the backer rod
A clean joint can still fail if it’s the wrong shape. Sealant is not meant to be a plug. It’s meant to stretch and compress as a flexible bridge between two surfaces.
The rule of thumb in the Canadian product literature is a width-to-depth ratio of about 2:1, with working depth generally kept to around 13 mm (1/2 inch). Always confirm the exact limits for the product you use, because they vary.
A few examples of what that looks like:
| Joint width | Typical sealant depth (about 2:1) |
|---|---|
| 12 mm | about 6 mm |
| 20 mm | about 10 mm |
| 26 mm | about 13 mm (upper limit) |
These are illustrations of the ratio, not a substitute for the data sheet.
Why does depth matter? If the bead is too deep, it is overstressed as the joint moves and can tear within itself. If it is too shallow, there isn’t enough material to absorb the movement. Most people assume more sealant means a better seal. It usually means the opposite.
Backer rod and three-sided adhesion
Backer rod is the foam cord that goes into the joint before the sealant. It does two jobs: it sets the depth, and it stops the sealant from bonding to the back of the joint.
That second job is the one people miss. The NRC’s research on sealant performance describes the goal as having the sealant bridge only the two sides of the joint. Sealants must accommodate movement, often 20% or more, as materials expand and contract. When the sealant sticks to the back as well (three-sided adhesion), it can’t stretch freely. Stress concentrates and the bead tears.
Some tips from the field:
- Choose rod about 25% wider than the joint so it sits snug without being forced.
- Push it in to the correct depth with a blunt tool. Don’t puncture it.
- Use closed-cell rod where the manufacturer calls for it.
- Where the joint is too shallow for rod, a bond-breaker tape does the same job.
Step 5: Prime, mask, then seal
Primer isn’t needed on every surface, and it isn’t a fix for a dirty joint. Where the data sheet requires it (often on porous materials like concrete or some masonry), follow the instructions exactly: apply to clean, dry faces, and wait the stated time before sealing. Over-applying primer, or letting it puddle, can cause its own problems.
Masking tape along both edges gives a crisp line and keeps sealant off the surrounding brick or siding. Pull it while the bead is still workable.
Now tool the sealant firmly into the joint so it wets both faces. That contact is the whole point of everything you did in the earlier steps. If you want to see how finishing works, read our tips for smooth and even caulk application.
Common prep mistakes we see
- Caulking over old caulk.
- Sealing a damp or frosty joint because the weather looked good.
- Cleaning only the surface that’s easy to reach, not the full depth of both faces.
- Using no backer rod, or using it at the wrong depth.
- Picking a sealant that doesn’t suit the surface (see which type of caulk is best for exterior windows).
- Sealing over a problem, like rot or failing mortar, that needs repair first.
We’ve written more about this in the biggest mistakes people make when caulking windows and achieving the perfect seal.
Prep for different jobs
The stages are the same everywhere, but the emphasis shifts.
Windows. Perimeter joints are narrow, and the frame material matters. Vinyl, aluminum and wood each need their own cleaning approach. See preparing your windows for caulking.
Brick and expansion joints. These are wider and move more. Depth control and backer rod matter most here, along with fully clearing old material from deep joints.
New builds. Joints need to be sealed at the right point in the schedule, after trades have finished and surfaces are clean. Our builder’s guide to caulking phasing explains why.
Multi-unit and commercial buildings. The volume of joints makes consistency the challenge. A written prep standard, followed on every elevation, beats a good crew having a good day.
Our perspective
We’ve spent a long time looking at failed caulking, and the pattern is boring: the failure was almost always decided before the sealant came out of the tube. A bead that was applied over old material, onto a damp face or without proper depth control was always going to let go, usually within a freeze-thaw cycle or two.
That’s why we spend most of our time on a job on removal, cleaning and joint setup, and why a quote that skips these steps worries us. It looks cheaper on paper. It usually isn’t once you pay for the redo.
What we’d tell any homeowner or property manager: ask how the old sealant will be removed, what the contractor does about backer rod and what they do when the weather isn’t right. A straight answer tells you a lot. If the answer is “we just caulk over it,” keep looking.
And if the prep reveals something bigger, like rot, failing mortar or a window that has moved, we’d rather say so than bury it under a fresh bead.
— Felix
Can you do this yourself?
Some of it, yes. Scraping out a small bead of old caulk from an interior window is within reach of most people. But exterior joints at height, deep brick joints, and any job where hidden damage might turn up call for experience. We lay out the trade-offs in DIY or hire a pro: caulking your exterior windows.
Let us handle the prep
If you’re in Oshawa, Whitby, Ajax, Pickering, Bowmanville, Cobourg or elsewhere in the GTA, we do this work every day. We remove old sealant fully, prepare the joints properly and seal them with materials suited to the Canadian climate. Start with our residential window caulking, look at expansion joint sealing for larger joints, or get in touch through our main site to talk about your property.
FAQ
What does joint surface preparation mean for caulking?
It means getting the two faces of the joint ready for sealant: removing old material, cleaning off dust, oil and loose debris, making sure the surface is dry and frost-free, and setting the correct joint depth with backer rod. A sealant can only bond as well as the surface beneath it.
Can I caulk over old caulk?
Not if you want it to last. The new bead bonds to the old one, which has already lost its grip on the building. Manufacturer guidance calls for old sealant and residue to be removed from the joint recess using mechanical methods. Take it all out first.
Do I need backer rod?
In most joints deeper than the sealant should be, yes. It controls depth and keeps the sealant from bonding to the back of the joint, which is what causes three-sided adhesion and early tearing. Check the product data sheet for your joint size.
Can I caulk in cold weather?
Only if both the surface and the sealant are within the manufacturer’s stated temperature range and the joint is completely dry and frost-free. NRC guidance warns that cold, frosted or damp surfaces prevent a good bond. If in doubt, wait for better conditions.
Sources
- Bomix Advanced Polymer Mortar Joint Sealant technical data sheet
- National Research Council of Canada: sealed joint design guide
- National Research Council of Canada: sealant performance and joint movement
- National Research Council of Canada: sealant design and installation details