
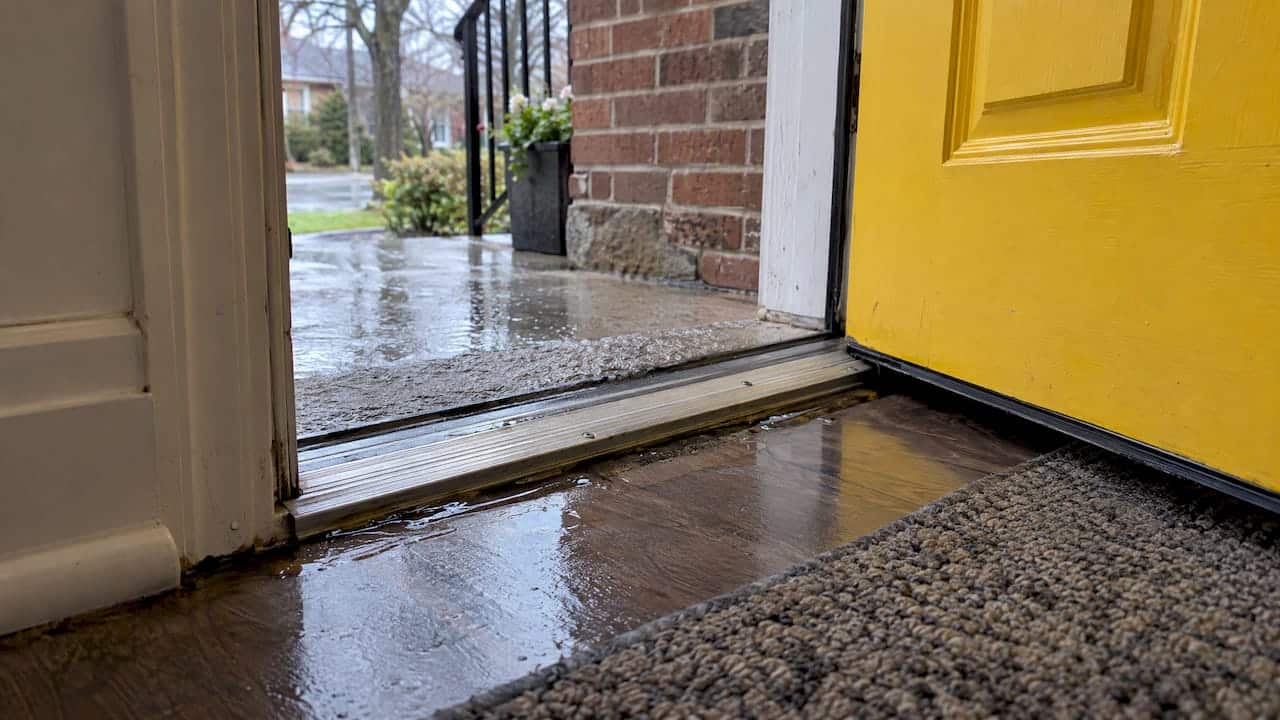
If water is getting in around your exterior door, the cause is usually one of four things: a failed threshold or bottom seal, worn weatherstripping, cracked caulking at the frame, or flashing above or below the door that was never right. The first three are visible and fixable. The fourth hides inside the wall, and it is the one people most often miss.
We have spent about 25 years on Ontario job sites, and the pattern repeats. Someone sees water, grabs a tube of caulk, and seals the outside of the frame. A few months later the water is back, and now it is trapped. This guide shows you how to work out where the water is really coming from, what a proper fix looks like, and when it is time to call a contractor.
TL;DR
- Where the water shows up tells you the likely cause: at the floor points to the threshold or sill, at the sides to the frame and caulking, and from above the door often to flashing or the wall, not the door itself.
- Flashing and sill slope are the most common root cause of door leaks. Failing caulking is usually a secondary contributor.
- Adding more caulk or thicker weatherstripping to a door that is out of square makes things worse, not better.
- Sealing the outside of a frame without fixing the drainage path can trap water in the wall and speed up rot.
- A hose test and a careful look at the seals will tell you most of what you need before anyone opens a wall.
Table of Contents
- Start with where the water appears
- The causes, from most to least common
- How to find the source yourself
- Why sealing everything is the wrong first move
- What a lasting repair looks like
- Ontario’s freeze-thaw cycle is the real test
- Perspective: what 25 years of door leaks have taught us
- When to call a professional
- How Kettle Contracting can help
- FAQ
- Sources
Start with where the water appears
Before you touch a tool, note exactly where the water shows up and when. Does it happen only in wind-driven rain? During snowmelt? After a long, steady rain? These details matter more than the door’s age or brand.
| Where you see water | Most likely cause | First thing to check |
|---|---|---|
| Puddle at the bottom of the door, in the middle | Worn bottom sweep or door shoe, or a threshold that no longer meets the door | Look for flattened, cracked or gapped rubber along the bottom |
| Water at the corners of the threshold | Failed seal where the threshold meets the frame, or a sill with poor slope | Check the corners and the joint between threshold and jamb |
| Water running down the side jambs | Cracked caulking, gaps in the frame perimeter, or water getting in higher up | Inspect the exterior caulk line and the brick moulding |
| Water dripping from the top of the frame or the wall above | Missing or faulty head flashing, roof or wall leak | Look above the door at the lintel, siding or brick, and the roofline |
| Damp drywall or stained trim beside the door | Water inside the wall, travelling from elsewhere | Check outside at the height of the stain and above it |
Water inside the house is often not where it entered. Water from a roof or wall leak can travel a long way before it shows up inside, and it commonly drains out at the door opening because that is the easiest path. That is why a door can look like the culprit when it is only the exit.
The causes, from most to least common
Flashing and sill slope
A Canada Mortgage and Housing Corporation (CMHC) study of residential envelope problems found that the most common cause of water getting in at door openings is faulty or missing flashing at the head and the bottom of the door, along with poor slope on the sill. The same document notes that cracked or failing caulking is a frequent contributor, but a secondary one.
That matches what we see in the field. Flashing is the metal or membrane that catches water behind the cladding and directs it out. Above a door, it sits over the lintel. At the bottom, it sits under the threshold and should slope outward so water leaves the building. If that layer is missing, lapped the wrong way, or sloped toward the house, the door will leak no matter how good the seals are.
If your leak is at the top of the door or worse after heavy rain, flashing is the first suspect. We cover the same principle for windows in our guide to window sill flashing leaks in Ontario, and the logic carries over: water should always have a clear path out.
A threshold that has worn, shifted or lost its seal
The threshold takes foot traffic, snow, road salt and meltwater. Over the years the sealant under it dries out, the cap wears, and the adjustable height can drift so the door no longer compresses the bottom seal evenly. Water then pushes underneath, particularly in wind-driven rain.
Sills and thresholds are their own specialty. For a look at how commercial installers think about sealing the base of a door, see this piece on door threshold and saddle panning. The setting is commercial and in the U.S., but the principle of directing water out and away from the opening applies to houses too.
Worn weatherstripping
Weatherstripping seals the gap between a moving door and a fixed frame. It blocks air, water, dust and insects, but only if it still compresses. Look for seals that are flattened, cracked, torn, or no longer touching the door at the corners.
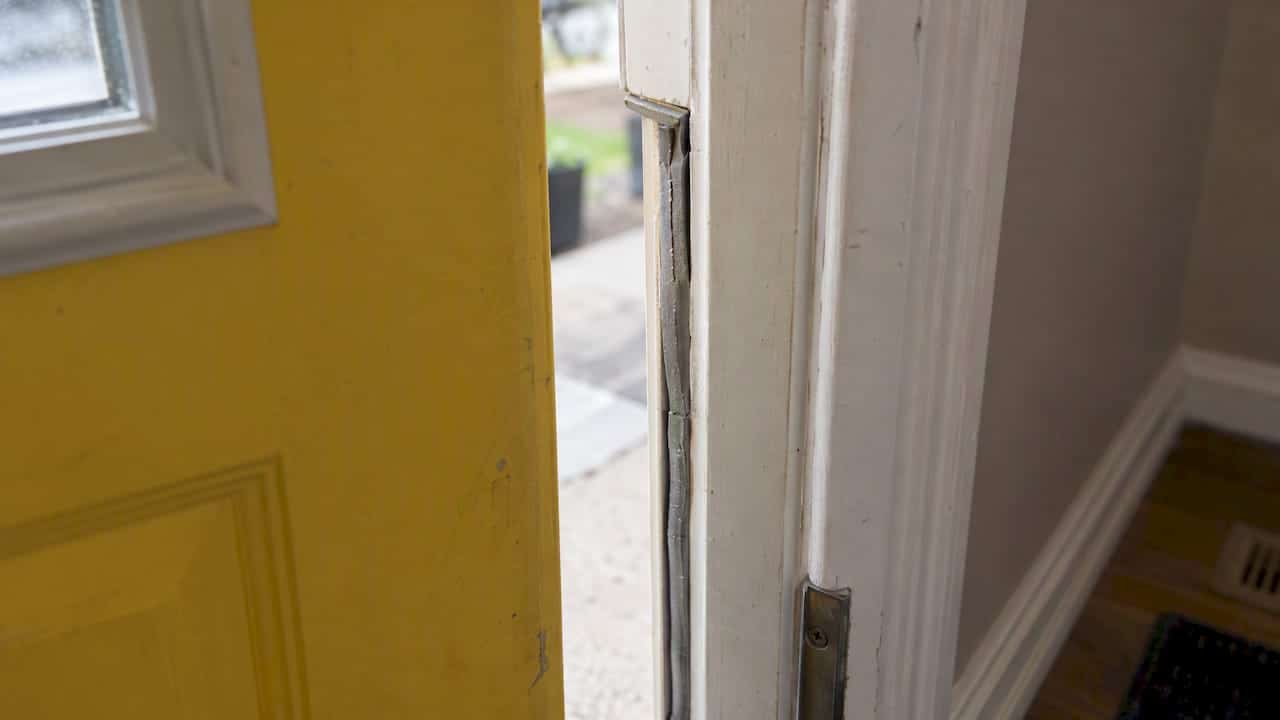
Material matters here. Cheap foam tape goes brittle and stops compressing properly, sometimes within a single season. Flexible profiles such as V-seals or spring-loaded designs can keep sealing through gap changes of up to 5 mm, which is realistic in the GTA where temperatures swing hard and wood moves.
Cracked or missing caulking around the frame
Caulk closes the joint between the door frame and the cladding, whether that is brick, siding or stucco. When it shrinks, splits or pulls away from either surface, rain gets behind the frame. This is the cause people jump to, and it is a real one, just not the most common one. If you can slide a fingernail or a thin blade into the joint, or see daylight, the caulking has failed.
We have several short guides on this if you want to go deeper: how to spot bad door caulking, whether you should caulk around exterior doors, and the mistakes people make when caulking doors.
A door that is out of square
If the door has sagged on its hinges or the frame has moved, the gap is uneven. You will see a tight spot at one corner and a wide gap at another. Adding thicker seals to a door that is not square only makes it stick and puts more stress on the frame and hardware, without fixing the leak. The right move is to re-hang or adjust the door first, then choose a seal that suits the corrected gap.
How to find the source yourself
You do not need to open a wall to narrow things down. Work in this order.
- Dry it and look. Wipe the area dry on a dry day. Check the bottom seal, the threshold corners, the weatherstripping on all three sides, and the caulk line on the outside.
- Do the paper test. Close the door on a strip of paper at several points around the frame. If it slides out easily, the seal is not making contact there.
- Look up. Check the head of the door, the lintel, the soffit and the roofline. Stains or peeling paint above the door point away from the door itself.
- Run a hose test. With a helper inside, wet the area in stages: first the threshold and bottom of the door, then the sides, then the wall above the door. Give each stage a few minutes. Start low and work up so you can tell which stage brings water in. We describe the same method for windows in our hose test guide.
- Check the framing. Press a screwdriver gently into the bottom of the frame and the sill area. Soft or crumbly wood means water has been getting in for some time.
If a hose test on the lower section brings water in, you are dealing with the threshold, bottom seal or sill. If water only appears when you wet the wall above the door, the problem is flashing or the wall assembly.
Why sealing everything is the wrong first move
It is tempting to run a thick bead of caulk around the whole frame. Don’t, at least not before you know where the water is going.
Building science treats moisture control as four jobs: deflection, drainage, drying and durability. Deflection, such as proper flashing and overhangs, matters most, because once water gets into the wall, drainage and drying are much harder. If water is entering above the door and draining out near the threshold, sealing the perimeter can trap it inside. The result is rot in the framing that you cannot see until it is serious.
This is the most common thing we correct on service calls. The caulk is fresh, the door is still leaking, and the wall behind it is damp. A good repair opens the drainage path first and seals second.
What a lasting repair looks like
The right fix depends on the cause. Here is what we would expect on each.
- Worn seals: Replace the bottom sweep, door shoe and weatherstripping with flexible, compression-friendly profiles. Make sure the door sits square first.
- Threshold problems: Re-set or adjust the threshold so the door compresses the seal evenly. Reseal the threshold ends and the joint to the jamb. If the sill slopes toward the house or the wood is soft, it needs more than sealant.
- Frame caulking: Remove the old caulk completely, clean and dry the joint, and apply a flexible exterior-grade sealant that can handle movement. Our guide on removing old caulking around doors covers the prep, which is where most failures begin.
- Flashing: Add or correct head flashing, and make sure the sill pan or sill flashing drains outward. This may mean removing some cladding.
- Rot or structural movement: Repair the framing and sill. If the frame has moved because of settlement, sealing alone will not hold.
It is also worth knowing that replacement is not always needed. Most door leaks can be handled with targeted repair of flashing, threshold adjustment and proper weatherstripping. Replacement makes sense with extensive rot, structural failure, or heavy air leakage that persists even after new weatherstripping.
Ontario’s freeze-thaw cycle is the real test
A repair that looks fine in October can open up by March. Water that gets into a joint freezes, expands, and pushes the sealant away from the surface. Then it thaws and the cycle repeats. That is why material choice and joint prep matter more here than in milder climates.
A few practical points:
- Sealant needs a clean, dry, sound surface. Caulk applied over old caulk or dirt peels early.
- Joints need the right depth and a backer where appropriate, so the sealant can stretch and recover instead of tearing.
- Seasonal movement is normal. A door that sticks in humid weather is often a normal response to humidity, but gaps that open gradually or sudden water entry suggest foundation settlement or hinge failure, not just worn seals.
Perspective: what 25 years of door leaks have taught us
We get called for “caulking jobs” that turn out to be something else. A homeowner says the caulk around the door has failed. We look, and the caulk is tired but the water is coming from a missing flashing above the lintel, or from a threshold that has been sloping the wrong way since the day it was installed.
So our first job on any door leak is diagnosis, not a tube of caulk. We look at where the water shows up, then we work backwards. We check the head, the sides, the sill and the wall above. Only then do we decide what to seal, what to adjust and what to rebuild.

The second thing we have learned is that quick fixes cost more. A bead of caulk over a failing joint buys a season. A properly prepared joint with the right sealant can last years, even through Ontario winters. We would rather tell you the real cause and do it once than come back in the spring.
And we will tell you when you do not need us. A worn bottom sweep is a straightforward swap. If you are handy and the leak is clearly just the seal, do that. If the sill is soft, the flashing is wrong, or the door does not sit square, that is when to bring in someone who does this every week.
— Felix
When to call a professional
Call in help if any of these apply:
- Water is coming in from above the door or only in heavy storms.
- The wood at the sill or frame is soft, dark or crumbling.
- You have already caulked and the leak returned.
- The door is visibly out of square, or gaps are widening over time.
- You see mould or staining on the wall or floor beside the door. Persistent moisture and mould are a health and building concern, so have the source found and fixed rather than cleaning the symptom.
If you rent in Ontario, note that the maintenance standards regulation requires landlords to keep walls, roofs and exterior openings weathertight and interior surfaces free from mould and leaks. Report a leaking door to your landlord in writing. If you are a landlord or property manager, fixing the source early is far cheaper than dealing with damage in a unit later.
How Kettle Contracting can help
We are a caulking and sealing specialist serving homeowners, property managers and commercial owners across the Greater Toronto Area, including Oshawa, Whitby, Ajax, Pickering, Bowmanville and Cobourg. For door leaks, we start by finding the cause, then repair the joints and seals that are failing. See our door caulking and weather sealing services for what we do at the frame and threshold.
If the leak points to a wider problem, such as brick, sills or the wall around the opening, our building envelope sealing and window and door installation and masonry repair services cover that work as well. We are fully insured, and we use premium materials suited to the Canadian climate. Contact us through kettlecontracting.com and tell us where and when you see water. That detail helps us come prepared.
For a quick, practical read before you call, see our guide on how to seal a door from rain.
FAQ
Why is rain coming through my door frame?
Most often it is failed caulking at the frame, worn weatherstripping, or flashing that is missing or wrong above or below the door. Wind-driven rain exposes these weaknesses first. A hose test, working from the bottom up, shows which part of the opening lets water in.
Why does my door leak at the threshold?
The bottom seal may be worn, the threshold may not be making even contact with the door, or the sealant under the threshold may have dried out. A sill that slopes toward the house, or one that has settled, will also send water inward. Check the corners of the threshold first, since that is where water usually enters.
Can I fix a leaking door with caulk alone?
Only if the caulk line is the actual problem. If water is entering through the flashing, the threshold or the door seals, caulk will not stop it and may trap water in the wall. Find the source first, and fix the drainage path before sealing.
Do I need to replace the door?
Usually not. Most leaks are handled by repairing flashing, adjusting the threshold and renewing the weatherstripping. Replacement is worth considering when the frame is rotted, the structure has moved, or the door is old and still leaks air after new seals.
Sources
- CMHC: residential building envelope problem survey (NH17-249-1992)
- CMHC: Wood-Frame Envelopes in the Coastal Climate of British Columbia
- Door Weatherstripping Replacement Toronto, Ontario Door Repair
- Door Replacement Cost Ontario 2026, Custom Contracting
- O. Reg. 198/98 Maintenance Standards, ontario.ca