
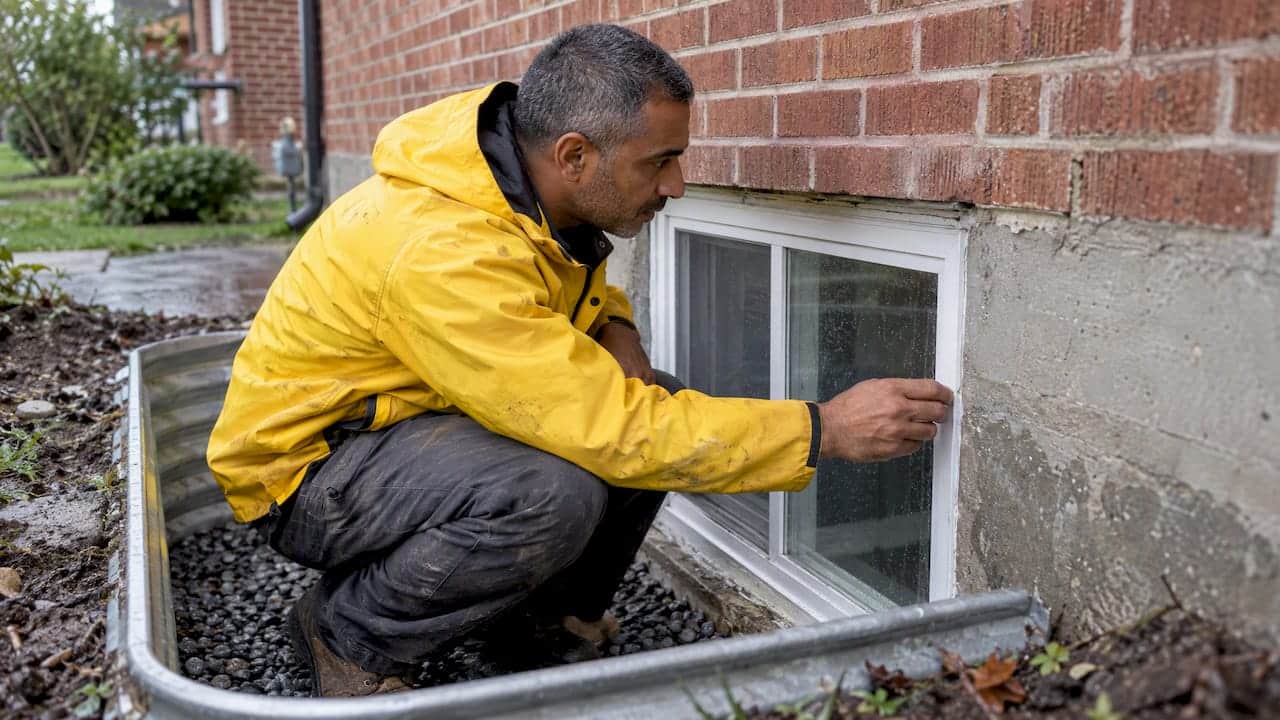
Window well waterproofing comes down to four things: water that drains out of the well, a well that sits snug against the foundation, sealed joints around the window frame, and a cover or regular clean-out that keeps debris from blocking the drain. Get those four right and a window well stays a light source. Get one wrong and it becomes a bucket pressed against your basement wall.
We have spent about 25 years sealing windows across Oshawa, Whitby, Ajax and the rest of the GTA. Wet basement windows are among the most common calls we get in spring and late fall. Most of them trace back to something simple and fixable.
TL;DR
- A window well is a low spot in your yard. Water collects there unless the gravel and drain carry it away.
- Clear debris, remove ice and snow, and check that the well edges sit snug against the foundation. Check more often in spring and fall.
- Seal cracks around the window frame and well with exterior-grade caulking. The federal guidance suggests professional repair for cracks of 5 cm (2 in.) or larger.
- Fall is the best time to recaulk and test drainage, before the ground freezes.
- Slow dampness, staining or a musty smell along the lower basement wall means it is time for a proper assessment.
Table of Contents
- How a window well works, and why it fills with water
- Why Ontario winters make it worse
- Step 1: Fix the water you are sending into the well
- Step 2: Gravel and drainage
- Step 3: Check the well itself
- Step 4: Seal the window frame
- Should basement window wells be covered?
- A seasonal routine that works
- Signs you need a professional assessment
- Our view from 25 years on site
- When to hire us
- FAQ
- Sources
How a window well works, and why it fills with water
A window well is a dug-out space around a window that sits at or below ground level. According to Canada.ca’s basement window maintenance guidance, the space is filled with gravel to promote drainage and ideally connects to the home’s perimeter drain. The same page notes that rain, ice and snow can collect in wells because they are low spots in the ground.
That is the whole problem in one sentence. You have a hole next to your foundation, and everything that falls from the sky wants to run into it. Wells are still necessary: the same guidance says they are needed for below-grade windows, letting light in and helping drain excess rainwater away from the foundation. Some wells also serve as an emergency exit.
If the well drains, water never gets deep enough to bother the window. If it does not drain, you get one of three things:
- Standing water that sits against the window frame and finds any gap.
- Hydrostatic pressure from water pooling against the glass, frame and the foundation wall behind it.
- Ice that forms in the well, expands, and pushes against the wall and frame.
Why Ontario winters make it worse
Freeze-thaw is what separates a window well in Oshawa from one in a warmer climate. One Burlington waterproofing blog describes how melting snow can collect in a poorly maintained well and refreeze, forcing moisture against the foundation wall and the window frame.
We see the results on the inside of the house. Old caulking at the frame cracks as it moves through repeated freezing and thawing. Then a mild afternoon sends meltwater into the well, it cannot drain, and it finds the crack. The leak is small at first, so people blame condensation or humidity for a season or two.
That slow pattern is common. The same source notes that seepage can be gradual, with dampness, staining or musty odours appearing along the lower part of the wall. If you notice any of those near a basement window, look at the well first. Our guide on basement window leaks, their causes and when to call a pro covers the interior side of the same problem.
Step 1: Fix the water you are sending into the well
Before touching the well itself, look up. A lot of window well trouble starts on the roof.
One Halton-area fall maintenance guide says downspout extensions should direct water at least 1.5 to 2 metres from the foundation, and that downspouts should not discharge against the foundation or into a window well. That matches what we see on site. A downspout emptying next to a window well will overwhelm even a good drain during a heavy rain.
A quick checklist:
- Walk the house during rain and watch where each downspout lands.
- Extend any that drop near a well or the foundation.
- Check the grade. The ground around the well should slope away from the house, not toward it.
- Keep gutters clear so they do not overflow right above the well.
Clogged gutters are one of the biggest sources of debris and overflow. Guards help, and this overview of gutter guard types shows how different designs keep debris out of the system. Less debris in the gutters means fewer leaves ending up in your wells.
Step 2: Gravel and drainage
How much gravel
The usual answer to “should I put gravel in my window well?” is yes, in moderation. Guidance published by Bob Vila suggests a 4 to 6 inch layer at the bottom of the well, finishing about an inch below the window sill. Square One’s window well guide likewise describes a well that is partially filled with gravel, not packed full.
The reason to stop short of the sill is simple. Gravel piled up to the frame holds moisture against it, and it leaves no room for the water to sit briefly during a downpour without touching the window.
The drain
Gravel alone only works if the soil beneath is free-draining, and most of the clay soils across Durham Region are not. A well with a proper drain connects to the home’s perimeter drain, so water has somewhere to go. Installing or repairing that connection means digging down to the footing, which is excavation work rather than a caulking job. We do not do that part ourselves, and it is worth hiring a drainage or waterproofing contractor for it.
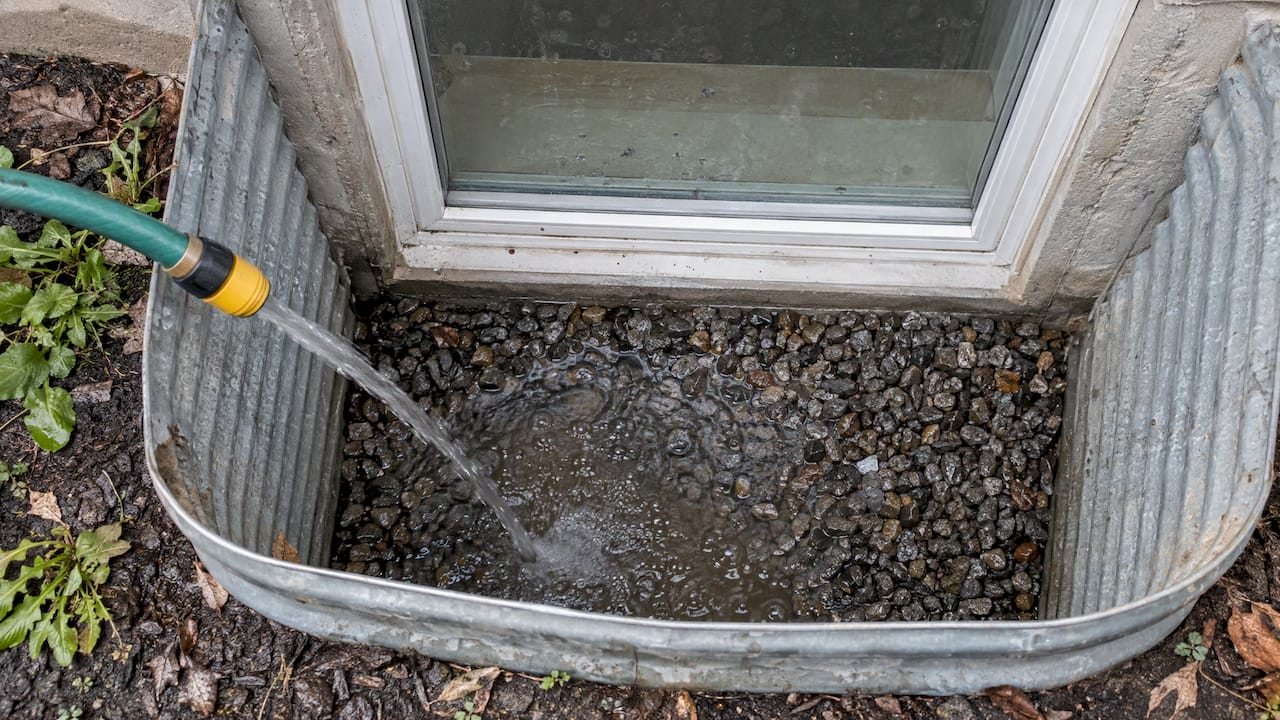
What you can do yourself, safely, is test what you already have. Square One recommends running a hose into the well. The water may rise above the base, but it should not approach the bottom of the window. If it climbs steadily, the drain is blocked or missing.
Step 3: Check the well itself
The well is a physical structure, usually galvanized steel, corrugated metal, plastic or concrete. It needs to do its job against the foundation. Canada.ca advises checking that the well edges are snug against the foundation. A gap behind the well lets soil and water slip between the well and the wall, where nobody is looking.
What we look for:
- Gaps behind the well where it has pulled away from the wall.
- Rust or holes in steel wells, especially at the bottom.
- Tilting, usually from settled soil, which sends water toward the house.
- Cracks in concrete or masonry wells.
On the seal between well and wall, the federal guidance says to use caulking or expanding foam to seal cracks around the window well. It also says to consider professional repairs for large cracks of 5 cm (2 in.) or if you are concerned. We agree with that cutoff. A hairline crack is a maintenance job. A gap you can fit a finger into is a sign something has moved.
Step 4: Seal the window frame
A well can drain perfectly and still have a leaking window. The frame is where the exterior wall meets the window, and every joint there is a possible way in.
The guidance from Canada.ca calls for exterior caulking around window-frame cracks and narrow gaps. A few points from our experience on Ontario houses:
- Use the right sealant for the surface. Brick, vinyl, aluminum and wood each behave differently. Our page on the best window caulking for brick homes explains the choices.
- Remove old caulking first. New caulk over cracked, loose material fails quickly. See how to prepare windows for caulking.
- Caulk every joint that needs it. The areas people miss are listed in which areas around the window should be caulked.
- Do it before freezing weather. Sealant needs to cure properly. A job done in a cold snap often does not last.
Caulking is not a cure for everything. If water is running through a failed window unit or a cracked foundation wall, a bead of sealant will not hold it back. Our article on whether caulking can fix window leaks is honest about where the limits are.
Should basement window wells be covered?
In most cases, yes. Canada.ca states that window well covers provide a barrier to water and debris and make maintenance easier. A cover keeps rain, snow and leaves from piling in, so there is less to clear and less to freeze.
Cost matters here too. One window well supplier points out that a $100 cover is inexpensive compared with the cost of a basement flood. Prices vary by size and material, so treat that as a ballpark.
A few practical notes on choosing one:
| Consideration | What to look for |
|---|---|
| Fit | Sized to the well, with no gaps at the edges |
| Material | Clear polycarbonate lets light in; metal grates let air and water through |
| Egress | If the window is an emergency exit, the cover must open easily from the inside |
| Maintenance | Lifts off for cleaning without tools |
A cover does not replace a drain. It reduces how much water gets in. It also should not trap damp air against the window, so choose a design that lets the well breathe.
A seasonal routine that works
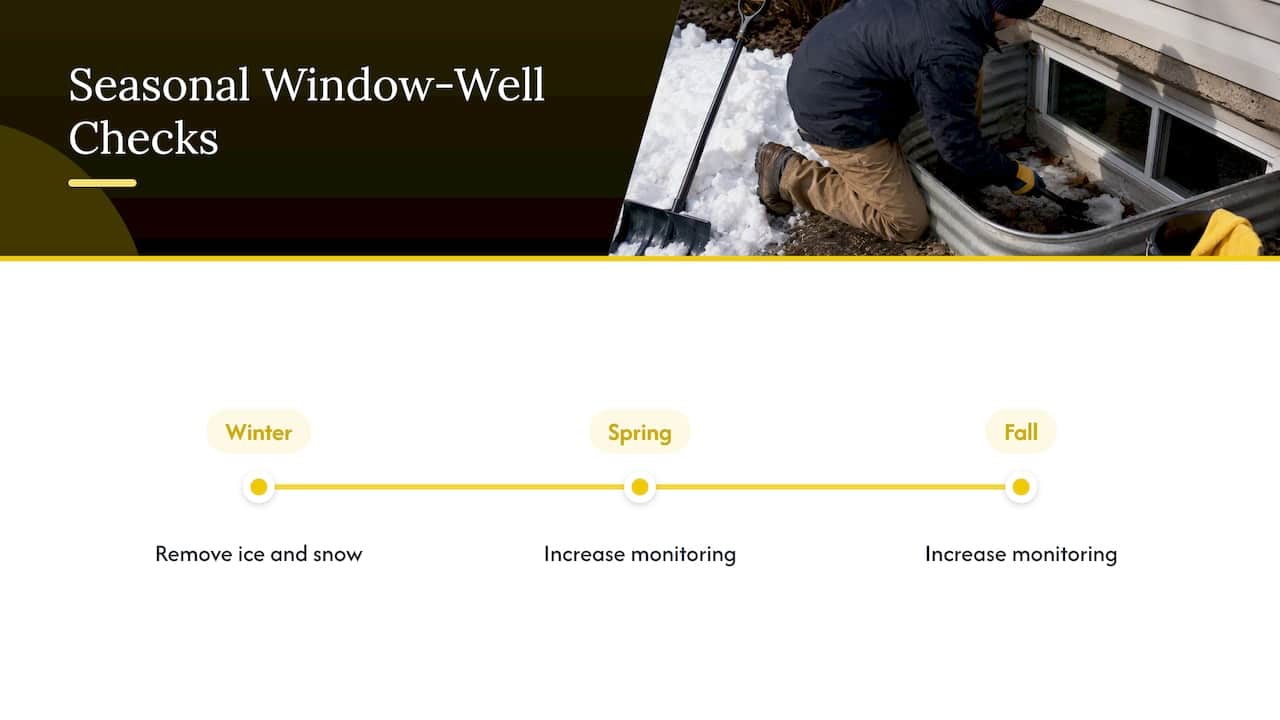
The federal guidance says to check for cracks and leaks around basement windows at least annually, and to monitor window wells and remove debris as needed. It adds that you should increase monitoring in spring and fall and remove ice and snow during cold seasons.
Here is how that looks over a year on an Ontario house.
Fall
This is the big one. Leaves, pine needles and sticks are a leading cause of window-well drain clogs, according to the supplier mentioned above, so a thorough clean-out matters. The Halton guide adds that fall is the right time to replace weatherstripping, recaulk window frames and verify window well drainage before the ground freezes.
- Clear all debris and any silt from the bottom of the well.
- Run the hose test.
- Inspect caulking on the frame and where the well meets the wall.
- Fit the cover if you use one.
Winter
Remove ice and snow from the well after storms, gently. Do not chip at ice against the window glass or the frame. Keep snow from being shovelled or ploughed into the well.
Spring
As snow melts, check each well after the first heavy thaw and rain. Look inside the basement for new damp patches below windows.
Summer
A quick look after heavy storms is enough. Also check that nothing has changed in the grading, such as a new garden bed or patio sloping the wrong way.
If you are bundling this with a broader review, our window caulking maintenance checklist works well alongside it.
Signs you need a professional assessment
Some window well problems are a Saturday job. Others are not. Call someone in when you see:
- Water coming in during heavy rain despite a clear drain and sealed frame.
- Cracks around the well or foundation of 5 cm (2 in.) or more, which is the point where Canada.ca suggests considering professional repair.
- A well that tilts, has pulled from the wall, or is visibly rusted through.
- Persistent dampness, staining or a musty smell on the lower wall, after you have cleaned and sealed.
- A hose test where the water keeps rising.
Who you call depends on the cause. A blocked or missing drain, or a cracked foundation, calls for a drainage or waterproofing contractor or a foundation specialist. A failing seal around the window frame, joints and surrounding brick is our territory. A good contractor will tell you which one you have, even when it is not the job they sell.
Our view from 25 years on site
We get asked to “waterproof the window well” fairly often. What the homeowner usually wants is a dry basement, and the well is the most visible suspect. Sometimes it really is the problem. More often, it is a chain: a downspout dumping next to the well, a drain clogged with leaf mush, and caulking that has been splitting for five winters.
Three things we have learned:
- Quick fixes fail in freeze-thaw. A bead of cheap caulk squeezed into a wet, dirty joint will look fine in October and be open by February. Prep and the right material matter more than the brand name on the tube.
- Sealing the frame is the cheapest layer of protection. It will not fix drainage, but it takes pressure off everything else. A sealed frame can turn a wet-well event from a leak into a non-event.
- Do the whole circuit. Fix the water source, the drain, the well and the frame together. Fixing one and skipping the rest is how the same call comes back next spring.
We would rather you spend an hour with a hose and a flashlight this fall than call us in a panic in March.
— Felix
When to hire us
If you have found cracked, shrunken or missing caulking around basement windows, or where the well meets the wall, that is the part we handle. Kettle Contracting seals residential and commercial windows across the GTA, including residential window caulking for homeowners and commercial window caulking for property managers. If the surrounding brick or sill is damaged, we also cover masonry repairs and brick window sill replacement, listed on our services page.
Tell us what you are seeing, and we will say plainly whether sealing will solve it or whether you need a drainage contractor first. You can reach us through kettlecontracting.com.
For multi-unit buildings, the same principle applies at scale. Our guide to assessing window sealing in aging apartment buildings is a good starting point for property managers.
FAQ
Should basement window wells be covered?
Usually, yes. Canada.ca notes that covers provide a barrier to water and debris and make maintenance easier. Choose one that fits the well closely, and if the window is an emergency exit, make sure it opens easily from the inside.
Should I put gravel in my window well?
Yes, a partial layer. A common recommendation is 4 to 6 inches at the bottom, finishing about an inch below the sill. Gravel on its own will not drain a well sitting in clay, so it works best with a connection to the perimeter drain.
Do all basement windows need window wells?
Any window that sits at or below ground level needs one. Canada.ca says wells are necessary for below-grade windows, letting in light and helping drain rainwater away from the foundation. Some also provide emergency egress, which is a separate requirement to check for bedrooms.
How do I know if my window well drain works?
Run a garden hose into the well. Water may rise above the base, but it should not approach the bottom of the window, and it should go down again. If it keeps climbing, the drain is blocked or was never connected.
Can caulking waterproof a window well?
Caulking seals the cracks around the frame and between the well and the wall, which stops a lot of seepage. It does not replace drainage. Large cracks of 5 cm (2 in.) or more are better assessed by a professional.
Sources
- Basement window maintenance, Canada.ca
- Window Wells: How They Work, Maintenance, and More, Square One
- Ways to Stop Water Leaking Into the Basement After Heavy Rain, Bob Vila
- Winterizing Basement Window Wells to Stop Cold-Weather Seepage
- Fall Home Prep Guide for Burlington and Halton Homeowners
- The Importance of Fall and Winter Window Well Maintenance