
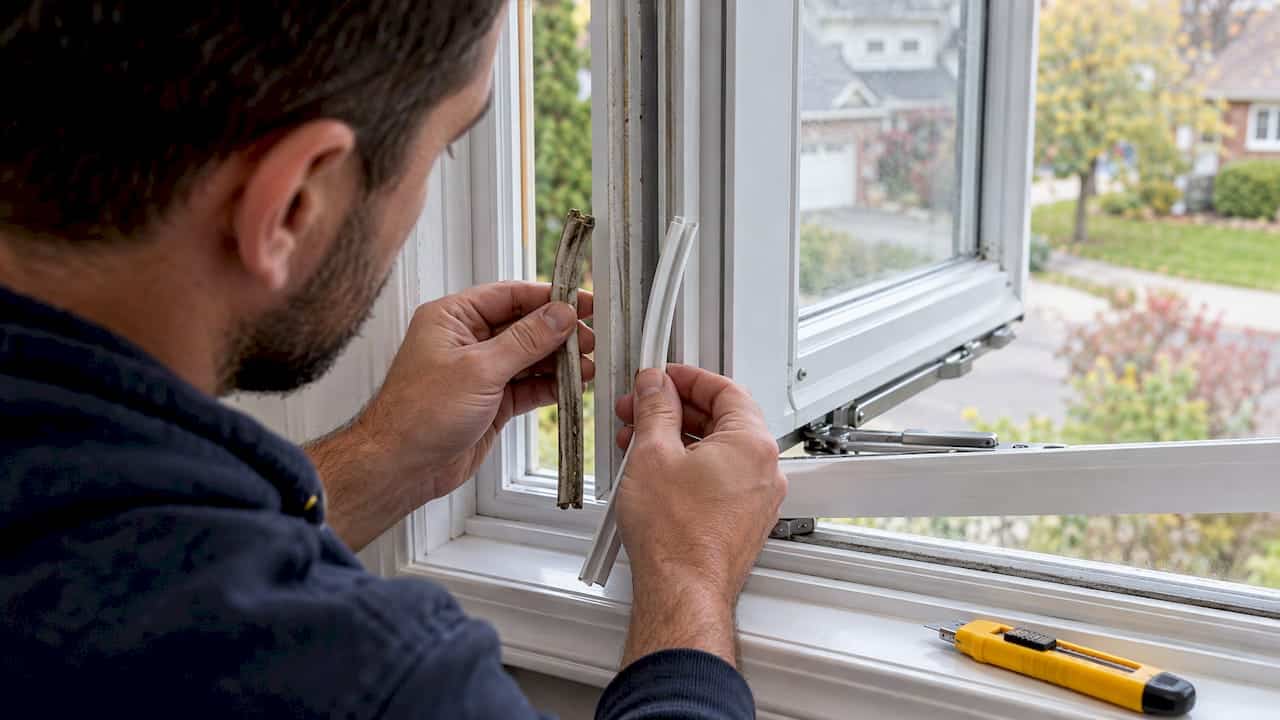
Casement window weatherstripping is the seal between the sash and the frame. When it is worn, you get drafts, rattling and cold corners. Replacing it is often a straightforward job, but only if the seal is the real problem and the new strip matches the old profile. A new seal on a sash that doesn’t close square won’t fix anything.
After 25 years working on Ontario homes, we have seen both outcomes many times. This guide shows you how to confirm the cause, match the strip, replace it, and test the result.
TL;DR
- Test for air leaks on a cold or windy day before you buy anything. Uneven gaps, a stiff lock or a sash that sits crooked point to hardware or frame trouble, not just a tired seal.
- Casement windows usually use compression seals, often with a V-strip, so match the profile (bulb size and mounting type) rather than buying a generic roll.
- Thicker is not better. The crank and latch have fixed travel, and an oversized bulb strains the hardware.
- Close the window slowly after installing. It should lock without forcing, and a paper test at several points should show even pressure.
- If drafts continue after new weatherstripping and caulking, the frame or sash is probably distorted and needs a professional assessment.
Table of Contents
- How casement window seals work
- Is it the seal, or something else?
- Finding the right replacement strip
- Replacing the weatherstripping, step by step
- Testing the new seal
- Perspective
- When to repair or replace the window instead
- Need a hand with the seals around your windows?
- FAQ
- Sources
How casement window seals work
A casement sash swings out on hinges and closes against the frame. Weatherstripping sits in the gap between the two. It blocks rain and dust and limits air leakage, as Natural Resources Canada explains. The same guide says casement windows typically use compression seals for the best airtightness, and that they usually combine V-strip and compression weatherstripping. Sliding windows, by contrast, typically use brush seals.
In practice that means two things:
- Compression seal: a soft bulb or gasket that squeezes flat when the sash is cranked shut. This is the main seal on most casements.
- V-strip: a folded strip, sprung to push outward against the closing surface. It fills a gap along an edge.
The crank pulls the sash tight against the seal, and the locking handle holds it there. That’s why a casement can seal so well when everything is working. It’s also why the seal depends on the hardware being in good shape.
If you want the wider picture of how windows leak, our guide on finding and fixing window air leakage covers the perimeter, the glass and the frame as well.
Is it the seal, or something else?
Before you pull a single strip, find out where the air is actually coming in. We see people replace weatherstripping twice and still feel the draft, because the problem was elsewhere.
The simple draft test
Pick a cold or windy day. Hold a thin strip of plastic, such as a piece of light film, near the sash edges and the joints around the frame, and watch for movement. Ready Home Canada notes that frost or condensation are signs to investigate, not proof of air coming in. Condensation is often a humidity or glass issue, not a seal issue.
A hand held close works too. If you feel air moving along the sash perimeter, the seal is a likely suspect.
Signs the seal itself has failed
Look at the strip all the way around, with the sash open. You are looking for:
- Compression loss: the bulb stays flat and doesn’t spring back
- Tears, cracks or shrinkage, often leaving gaps at the corners
- Loose corners where the strip has pulled out of its channel
- Paint or dirt built up on the seal, so it can’t compress evenly
These are the same things Forge Windows lists when inspecting a casement before replacement. If you see them, and the draft test showed air at the sash edge, replacement is the right fix.
Signs it’s the hardware or frame
The same inspection guide points out that uneven gaps around the perimeter, a lock that is hard to engage, or a sash that looks misaligned suggest repair or adjustment first. Check for:
- Loose or worn hinges
- A sash that has sagged and sits low on the latch side
- Debris in the track or hinge area
- A handle or operator that doesn’t pull the sash fully closed
Natural Resources Canada says the same thing from a different angle: windows that are out of alignment must be squared or adjusted before new weatherstripping goes on. A new gasket can’t fix a sash that never reaches its closed position.
Finding the right replacement strip
This is where most DIY replacements go wrong. The profile has to match. The wrong shape either leaves a gap or crushes against the hardware.
Identify what you have
Pull out an inch or so of the old gasket. Draft & Door suggests checking two things: the bulb diameter, commonly 1/4 inch or 5/16 inch, and the mounting type, either a kerf (a thin flange pressed into a slot) or a T-slot. Photograph the strip in place before you take it out, and note where on the sash or frame it sits.

Keep a short, intact piece of the old strip. Natural Resources Canada recommends taking a sample of the existing weatherstripping to the window manufacturer or a supplier for an exact match. It also notes that cheaper products are often less durable and effective. If the window is under warranty, ask the manufacturer before you cut anything from it.
Don’t layer new over old
On most vinyl, aluminum and fibreglass windows from recent decades, the right move is to replace the worn factory seal with a matching profile, as DG Floors advises, not to stick a new product over it. Layered foam tape changes how the sash closes and tends to peel by the next winter.
Why bigger isn’t better
A casement latch has a fixed range of travel. Scooter M. at Draft & Door cautions that an oversized bulb can load the operator and lead to hardware failure, while an undersized one won’t seal. We see the first mistake often. Someone assumes a fatter seal is a better seal, then cranks the window shut against it for a year until the operator gives out.
How much to buy
Ontario’s Save on Energy program suggests allowing 5 to 10 per cent extra material for waste, applying products to clean, dry surfaces, and following the packaging instructions. It also advises choosing a product that seals when the window is closed but doesn’t stop it opening easily.
Replacing the weatherstripping, step by step
Exact steps depend on the manufacturer and the kind of seal. The sequence below is the general pattern. For a specific brand, check its service guide. Andersen, for example, publishes a replacement guide for its A-Series windows.
- Photograph and measure. Take pictures of the corners and where the strip begins and ends. Measure each side before cutting.
- Support the sash. Andersen’s guide says to support the sash throughout. Open it fully and make sure it can’t swing or drop while you work.
- Remove only the defective strip. Start at a corner and pull gradually. Take care not to damage the adjacent weatherstripping.
- Clean the channel. Clear out old adhesive, paint and dirt. A plastic scraper is gentler than a metal blade on vinyl or painted aluminum. Let the surface dry fully.
- Cut the new strip to length. Don’t stretch it as you measure or install, because it will shrink back and open a gap at the corner. Leave a little extra and trim gradually.
- Use the original corner treatment. If the old strip was mitred or notched at the corners, copy that.
- Seat the strip. For a kerf-type strip, Andersen’s A-Series guide has you cut the end at 45 degrees with the bulb side longest, put a small bead of sealant at each end of the kerf, insert the strip fully, and slide it tight to the corner before pressing it into the jamb. Press evenly along the whole length.
- Keep the old piece until you have tested the new one, in case you need to compare.
The work is not complicated, but it is fiddly. Corners are where most seals fail, so take your time there.
Testing the new seal
A seal that leaks and a seal that is too tight both cause trouble. Check for both.
- Open and close it several times. The sash should move without binding, the lock should engage fully, and no corners should pull loose, as Window Hardware Direct recommends.
- Close slowly. It should lock without excessive force. A little extra resistance is normal with a fresh seal.
- Do the paper test. Close a strip of paper in the window at several points around the perimeter. If it slides out easily, the pressure is too low in that spot.
- Look for continuity. The seal should run unbroken, with no lifted corners.
If the sash won’t close properly, the profile is probably too thick or sitting in the wrong place. Take it back out and compare it to the photos and the saved sample. Forcing the handle shut will only damage the operator.
Run the draft test again on the next cold day. If you still feel air, look at the caulking around the outside of the frame, which is a separate seal. Our guide to signs your window caulk needs replacing shows what to look for.
Perspective
Most of the casement calls we get start with “I replaced the weatherstripping and it’s still drafty.” The seal wasn’t the whole story.
On this job, the order matters. First find where the air is moving. Then check the hinges, the sash and the latch. Only then replace the strip, with the same profile the window was built with. Doing that in sequence is what separates a repair that lasts from one you redo every second winter.
Ontario’s freeze-thaw cycles are hard on everything around a window. Seals compress and relax, frames expand and contract, and the caulking outside takes the weather. That’s why we look at the weatherstripping and the exterior caulking together. They work as a pair, and fixing one while ignoring the other leaves a path for air and water.
Our approach is to do the job right the first time, with materials suited to the Canadian climate, and to follow up so the result holds. If you’d rather not spend a Saturday on your knees with a tape measure, that’s what we’re here for.
Felix
When to repair or replace the window instead
Sometimes new weatherstripping isn’t the answer. Window Force, a Canadian source, says to seek a professional assessment if the frame is warped, the sash is distorted, the sealed glass unit is fogged, or drafts persist after weatherstripping and caulking. Depending on the frame’s condition, the glass unit or the whole window may need replacing. If weatherstripping and caulking have both been replaced and drafts remain, the problem is likely structural.
The signs that the window itself is nearing the end are fairly consistent: a sash that no longer sits square, a frame that has moved, fog between the panes, or a window that never seals no matter what you fit. For a fuller checklist, see our list of five signs your windows need replacing. A general overview of the signs it’s time to replace windows is also worth a read before you decide.
One more option from Natural Resources Canada: if a window doesn’t need to open and isn’t an emergency exit, it can be locked and caulked. Don’t do this on a bedroom window or any window needed for escape.
Need a hand with the seals around your windows?
We’re a Canadian caulking specialist serving homeowners, property managers and commercial owners across the Greater Toronto Area, including Oshawa, Whitby, Ajax, Pickering, Bowmanville and Cobourg. We handle the exterior sealing that works alongside your weatherstripping, and we also do window and door installation and brick window sill replacement. Our work is fully insured, and we aim for clear communication and honest pricing.
See our residential window caulking service, or get in touch through our main site to talk through what your windows need.

For doors, we also offer door caulking and weather sealing. For a commercial building, see commercial window caulking.
FAQ
How often should casement window weatherstripping be replaced?
There’s no fixed schedule, because it depends on the material, sun exposure and how often the window is used. Replace it when you see compression loss, tears, shrinkage or loose corners, or when a draft test shows air at the sash edge. Inspect it each fall before the heating season.
Can I use adhesive foam tape on a casement window?
On most modern windows, replacing the worn factory seal with a matching profile is a better route than layering tape over it. Foam tape can change how the sash closes and strain the crank and latch. If you can’t find the original profile, take a sample to a window supplier or the manufacturer.
Why does my casement window still leak after new weatherstripping?
The usual causes are the wrong profile, a misaligned sash, worn hinges or a distorted frame. A new seal can’t correct a sash that doesn’t reach its closed position. Check the alignment and hardware, and look at the exterior caulking. If drafts persist after both, have the window assessed by a professional.
What size weatherstripping does a casement window need?
The bulb diameter is commonly 1/4 inch or 5/16 inch, and the strip mounts in either a kerf or a T-slot. The only reliable method is to measure and match the existing strip, ideally by taking a sample to a supplier. Avoid going thicker than the original, because the latch has a fixed travel.
Sources
- Natural Resources Canada: Keeping the Heat In, Section 8: Upgrading windows and exterior doors
- Save on Energy: Weather strip your windows and doors
- Andersen: Weatherstrip Replacement Guide for A-Series windows
- Ready Home Canada: Weather Stripping and Draft Stoppers
- Draft & Door: Best Weather Stripping for Casement Windows
- DG Floors: Weatherstripping for Windows
- Forge Windows: Casement Window Weatherstrip Inspection
- Window Hardware Direct: How to Replace Weatherstripping on a Window or Door
- Window Force: Drafty Windows, Common Causes
- Complete Property: When to Replace Windows