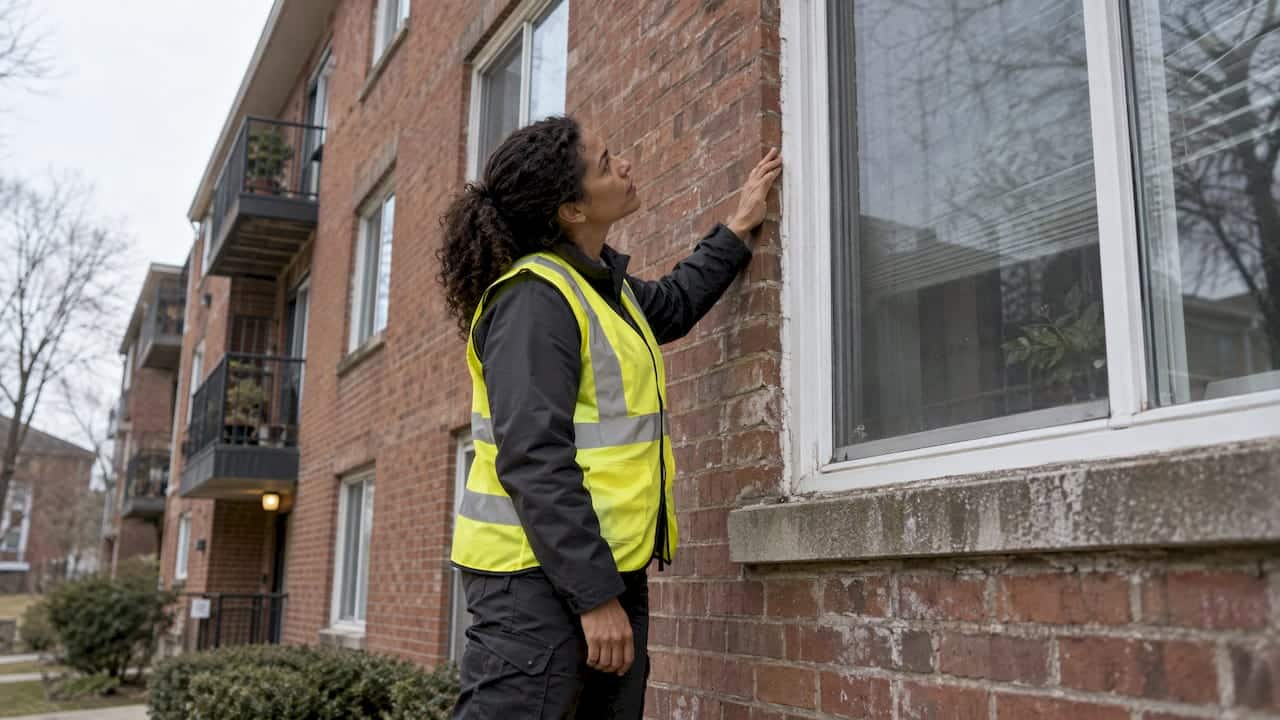
A building envelope audit is a structured look at everything that separates the inside of your building from the weather: roof, walls, windows, doors, foundation and the joints between them. It finds where heat, air, water and moisture are getting through, ranks what is failing, and gives you a repair order. For most owners in Durham Region and the GTA, the repairs that come out of it are sealant and joint work, and that is where an audit pays for itself or gets wasted.
I have spent 25 years on Ontario buildings, and the pattern is the same. Owners who audit on a schedule fix a failing joint for the price of a sealing job. Owners who wait fix the drywall, insulation and framing that the joint ruined.
TL;DR
- An envelope audit covers exterior walls, windows and doors, roofs, and foundation walls and slab, and looks for weak points in how the building controls heat, air, water and moisture.
- “Audit”, “assessment” and “condition assessment” are used almost interchangeably. An energy audit is a different job with a different goal.
- The core is a document review, a photographed walk-through with a checklist, and spot tests such as thermal imaging where they are warranted.
- Inspect twice a year (spring and fall) and after severe storms, because freeze-thaw cycles are what wear out sealants in this climate.
- The useful output is a ranked list: what to fix now, what to fix within a few years, what to watch.
Table of Contents
- What a building envelope audit actually is
- When to audit, and how often
- How the audit is carried out
- Building envelope inspection checklist
- Why Ontario’s climate drives the schedule
- What the report should contain
- Turning findings into repairs
- Different readers, different priorities
- Perspective
- Where we come in
- FAQ
- Sources
What a building envelope audit actually is
The envelope is the building’s skin. The National Research Council of Canada (NRC) protocols for building condition assessment say the envelope audit must identify areas of apparent weakness or failure in the envelope’s ability to control the flow of heat, air, water and moisture, and check that what was built matches the design and code requirements. The components it looks at are exterior walls, windows and doors, roofs, and foundation walls and slab.
That last point, comparing what was built to what was designed, matters most on new builds and recent renovations. If you are a builder or developer, it is the part that catches workmanship problems before the warranty period runs out.
Audit, assessment, inspection: the terms
You will see three names for overlapping work:
- Building envelope audit or assessment: a focused review of the skin only.
- Building condition assessment: the whole property, with the envelope as one part. A co-operative housing guide describes it as a snapshot of condition at a specific time that should be updated every three to five years.
- Energy audit: measures where a building wastes energy. It overlaps with the envelope because leaks waste heat, but its goal is energy use, not water damage or component life.
If your concern is leaks, stained walls, failing sealant, drafts or condensation, you want the envelope audit. If your concern is only the utility bill, an energy audit is the narrower tool.
When to audit, and how often
The Manitoba building owners’ association (BOMA Manitoba) publishes a 2026 maintenance guidebook with a schedule that suits Ontario weather just as well. It recommends a general envelope inspection twice a year, in spring and fall, roof inspections twice a year and after major weather events, window and door inspections annually or after a draft or leak complaint, and cladding inspections annually and after severe storms or freeze-thaw cycles.
That is a routine check. A fuller audit makes sense when:
- You are buying, selling or preparing a property for lease. Our flip property exterior sealing checklist covers the exterior items resale buyers and inspectors notice.
- You manage an older multi-unit building and are getting repeat complaints about drafts, damp or condensation. See how we assess window sealing in aging apartment buildings.
- You have just had a hard winter, an ice dam, or a leak that came back after a patch.
- A new build or renovation is nearing handover and you want the envelope verified.
In some cities an assessment is a legal requirement. In Calgary, for example, buildings of five storeys or more must complete a Building Exterior Visual Assessment under Bylaw 33M2016 by a qualified person. That rule is Calgary’s, not Ontario’s, but it shows the sensible order: visual first, and intrusive investigation only if the visual findings call for it.
How the audit is carried out
The NRC protocols describe a staged process. Each stage has a purpose, and skipping one is how audits miss things.
- Document review. Design drawings first, then the building’s history: inspection reports, complaint logs, maintenance and energy records. Past complaints point you to the problem areas before you climb a ladder.
- Walk-through inspection. A photographed visual survey using a checklist, covering every elevation, the roof, and the interior at windows, doors and exterior walls.
- Spot tests. Non-intrusive tests where the walk-through raises questions. Thermal imaging is the usual one, and it has conditions: exterior walls and windows need calm wind and a significant indoor-outdoor temperature difference, while roof scans are done after sunset in warm weather. In Ontario that means winter for walls and a warm evening for roofs, so timing matters.
- Report. More on this below.
A word on the walk-through: it is cheaper than people expect and finds more than they expect. Most failed sealant, cracked joints and dripping flashings can be seen. Thermal imaging then shows what you cannot, such as air moving behind a wall.
Building envelope inspection checklist
Here is a working checklist drawn from Canadian sources, with the sealing points I look at first.
Roofs
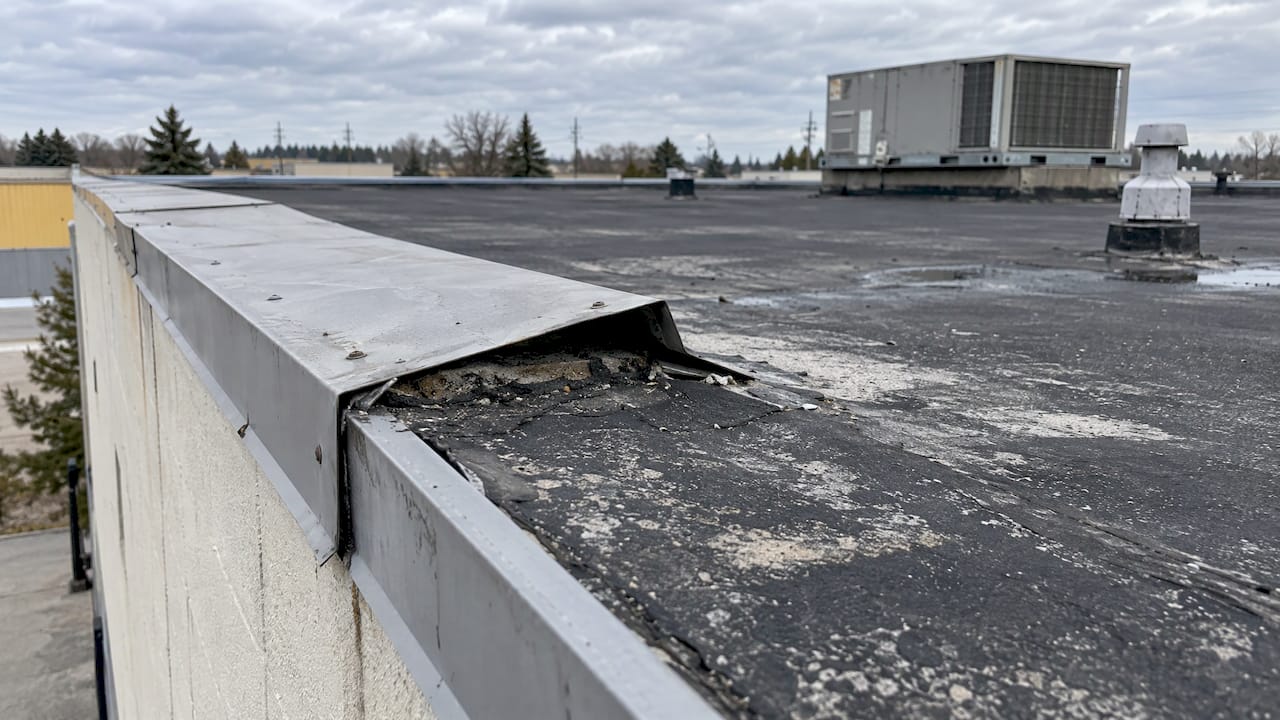
BOMA Manitoba’s checklist for flat roofs lists the exposed membrane, asphalt balling, alligator cracking, tenting near perimeters or rooftop units, flashings, scuppers and roof access devices. For sloped roofs it adds missing, weathered or damaged shingles, ponding and drains.
The Calgary exterior assessment guideline directs inspectors to check seals around all penetrations and flashings, along with membrane wear, tearing, blistering, ponding and vent deterioration.
The Manitoba government’s heritage building manual makes a point I agree with: a visual check after a storm is helpful, but only an up-close roof inspection proves a roof is weather-tight. Binoculars from the ground will not catch a lifted flashing.
In winter, snow load is a safety issue too. BOMA notes that a cubic foot of snow can weigh up to 30 pounds, so snow beyond safe structural limits has to come off. Roof work in winter belongs to people equipped for it.
Walls and cladding
Look for water staining, cracking, missing sections, impact damage, and, most important, the joints, sealants and transition points. A transition is anywhere two materials meet: brick to window frame, siding to trim, wall to roof. The CSA home inspection standard, A770-16, asks for exterior walls to be checked for rot, damage, and deficiencies in securement and weathertightness.
On brick buildings, check mortar joints, sills and expansion joints. Expansion joints are deliberate gaps that let masonry move with temperature. When the sealant in them splits, water goes straight into the wall. Our guide to exterior joint sealing types explains the options.
Windows and doors
Check for air or water leakage, condensation or fogging between panes, and how the unit operates. The CSA standard also covers weathertightness, security and operation of exterior doors and windows. What I look at on site:
- Sealant that has shrunk, cracked, split from the frame or hardened to a chalky finish.
- Gaps where the frame meets brick, siding or stucco.
- Stains or soft wood on interior sills and trim, which mean water has already been getting in.
- Daylight or a draft at door edges and thresholds, and worn weatherstripping.
- Frost or moisture patterns on the inside of glass in winter.
If you are chasing drafts, how to find and fix window air leakage goes through it in more detail.
Insulation, air barrier and vapour barrier
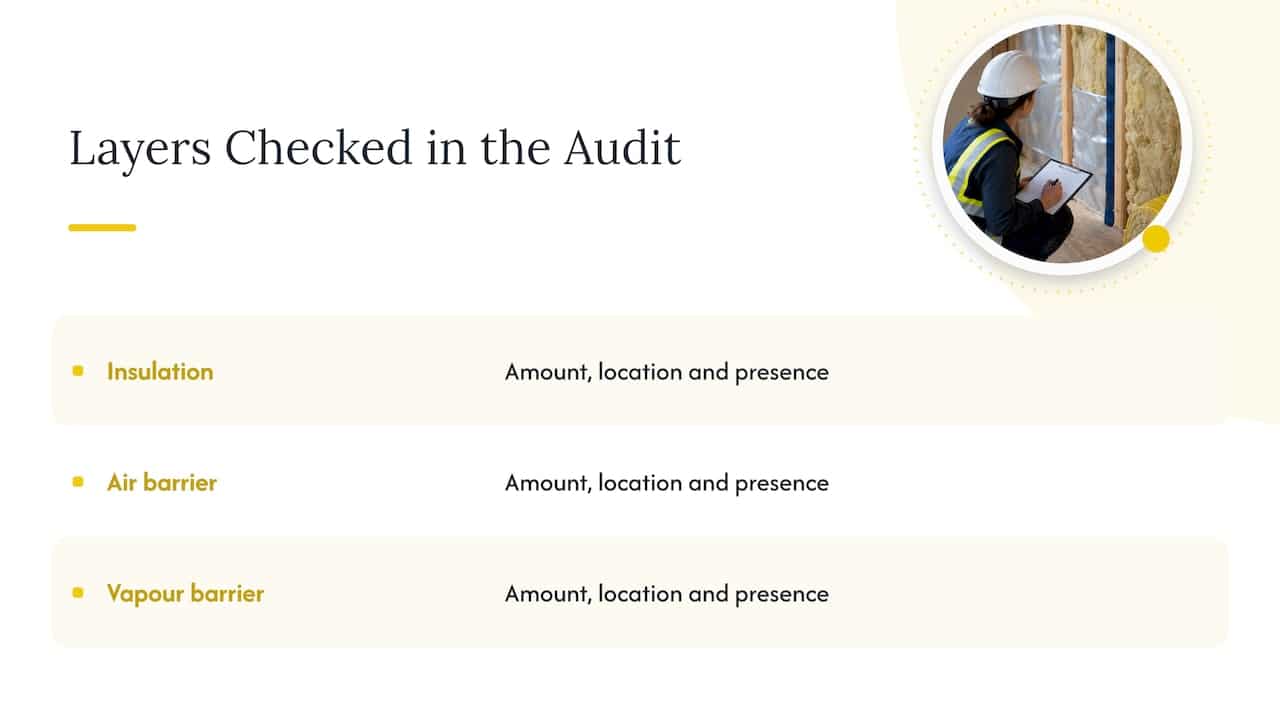
The CSA standard requires checking insulation, air barrier and vapour barrier for deficiencies in amount, location and presence. In an audit, thermal imaging is how most of these get confirmed without opening walls.
Expansion joints, garages and below grade
Parking garage slab joints, balcony and podium joints, and brick control joints take a beating from salt and freeze-thaw. They are often missed because nobody walks past them. See what we have learned about garage expansion joint seals over 25 years of Ontario work.
Quick reference
| Component | What to check | Frequency |
|---|---|---|
| Roof | Membrane or shingles, flashings, penetrations, drains, ponding | Spring, fall and after major weather |
| Cladding and brick | Cracks, staining, joints, sealant, transitions | Annually and after severe storms |
| Windows and doors | Perimeter sealant, drafts, fogging, operation | Annually, or after a draft or leak complaint |
| Expansion joints | Sealant adhesion, splits, debris, movement | Annually |
| Gutters and downspouts | Clogs, discharge away from walls | Twice a year |
The frequencies come from BOMA Manitoba’s preventive maintenance guidebook.
Why Ontario’s climate drives the schedule
BOMA’s guidebook ties inspection frequency to weather: temperature swings, precipitation and freeze-thaw cycles. It lists freeze-thaw cracking of cladding and sealants, ice dams, wind-driven moisture around doors and windows, and condensation from rapid temperature changes as the main risks. Those are written for Manitoba, but anyone who has watched a February thaw and a hard overnight freeze in Oshawa knows the same cycle applies here.
Sealants move every day. Joints open in cold, close in heat, and each cycle stresses the bond. Water gets in during a thaw, freezes, and widens the gap. That is why spring and fall checks matter: spring shows what winter did, and fall is your last chance to seal before it repeats. Our notes on the best time of year for exterior window caulking and the caulking season checklist for Ontario homes cover timing.
Ice dams are a good example of an envelope fault showing up as a window leak. Heat escaping through the roof melts snow, the water refreezes at the eaves, and it backs up under the roofing and runs down inside walls. The leak appears around the window, but the cause is higher up. Read more in ice dam leaks around windows.
What the report should contain
An audit is only as good as its paper trail. According to the NRC protocols, the report should include a component condition summary, key deficiencies with location, severity, type, frequency and probable causes, recommended repair or replacement strategies with costing and timing, and changes to the maintenance schedule.
Two more standards help you judge a report:
- The CSA A770-16 standard says photographs should be individually identified with the item, location, concern and date, and the report should be understandable to the client.
- Calgary’s guideline uses a four-point rating for each item: not applicable, fully functional, needs maintenance or replacement before failure, or needs repair in the near future because it could fail. It recommends owners review the assessment annually to confirm repairs were done.
The BOMA Field Guide for Sustainable Buildings goes a step further for commercial owners: it asks the envelope assessment to list all components including exterior sealant and caulking and flag those needing replacement within the next 10 years. That 10-year view is what turns an audit into a capital plan.
Turning findings into repairs
Here is how I sort a list of findings, whether it is a semi-detached in Whitby or a 60-unit building in Pickering.
Fix now: active water entry. Failed sealant at window perimeters, open expansion joints, cracked flashings, leaking skylights. These get worse every freeze-thaw cycle, and the damage behind the wall costs far more than the sealing.
Fix within a year or two: sealant near end of life. Joints that are hardening, shrinking or losing adhesion but not yet leaking. This is the cheapest window to act, and it can be scheduled around the season instead of an emergency.
Watch and re-check: cosmetic or minor items. Surface cracking, faded paint, weatherstripping wear. Photograph them and look again at the next inspection.
Refer: structural or hidden problems. CSA A770-16 says reports should flag anything suspected to need further investigation by a qualified person, such as structural sufficiency, mould inside walls or asbestos. If your audit raises any of those, bring in a structural engineer or the appropriate specialist before anyone starts sealing over it. Sealing a wall that is already wet traps the moisture.
Notice what is on the first two lists: mostly sealant, joints and window and door perimeters. That is the work that does the most for the least money, and it is where workmanship matters. A joint sealed over dirty or damp surfaces, with the wrong sealant or no backer rod, can fail in a season. Our piece on why caulking is trade-specific work explains what owners should know, and construction defect caulking examples shows what poor sealing looks like on site.
The other half of the job is not patching. If a joint keeps failing, find out why before resealing. Our guide to expansion joint sealant failure walks through diagnosing first.
Different readers, different priorities
- Homeowners: a spring and fall walk around the house with a camera covers most of it. Check window and door sealant, brick sills, and the roof edge. Keep dated photos.
- Property managers and landlords: log complaints by unit and elevation. A cluster of draft or damp complaints on one side of a building is the best audit lead you will get.
- Commercial owners and facility managers: add expansion joints, curtain wall interfaces and flat roof penetrations to the annual list, and ask for the 10-year component view.
- Builders and developers: audit before handover. Defects found at that point are cheaper to fix and easier to assign.
- Investors: an exterior audit before listing or leasing lets you fix visible sealant problems before a buyer’s inspector writes them up.
Perspective
After 25 years sealing buildings across Oshawa, Durham and the wider GTA, my view is simple: most envelope damage I get called to started as a small sealant failure that nobody looked at.
An audit is worth doing because it puts the small failures on a list while they are still cheap. But the list only matters if the work that follows is done right the first time. We build our work around Ontario’s freeze-thaw cycles, with premium materials suited to the Canadian climate, proper joint preparation, and follow-up attention to make sure the result lasts.
If your audit points to windows, doors, expansion joints or the wider envelope, that is the work we do every day, for homes, multi-unit buildings and commercial properties. Quick fixes that will not survive a winter cost you twice.
Felix
Where we come in
Once your audit has told you where the envelope is failing, we handle the sealing: residential window caulking, commercial window caulking, door caulking and weather sealing, expansion joint sealing, and full building envelope sealing. We are fully insured, and we price honestly and communicate clearly.

Have your findings, or just a building you are worried about? Get in touch through Kettle Contracting and tell us which joints, windows or doors concern you.
FAQ
How long does a building envelope audit take?
It depends on the size of the building and the depth of the review. A house can be walked and photographed in a few hours, while a large multi-unit or commercial property takes longer because of roof access, multiple elevations and any thermal imaging. The report follows after that.
What is the difference between a building envelope audit and an energy audit?
An envelope audit looks at how the building’s skin controls heat, air, water and moisture, and at component condition. An energy audit measures where energy is wasted. They overlap on air leaks and insulation, but only the envelope audit tells you which joints, sealants and flashings are failing.
How often should I audit my building’s envelope?
A general check twice a year, in spring and fall, plus after severe storms, is the schedule BOMA Manitoba recommends. A fuller condition assessment is typically refreshed every three to five years.
Do I need thermal imaging?
Not always. A visual walk-through finds most sealant and flashing problems. Thermal imaging is useful when you suspect hidden air leakage or missing insulation, and it needs the right conditions, such as a real temperature difference between inside and outside.
What should I do first after an audit?
Sort findings by urgency. Active water entry and failed joints come first, sealant near end of life second, minor items last. Anything suspected to be structural or moisture-damaged inside the wall should go to the right qualified specialist before sealing.
Sources
- Protocols for building condition assessment (NRC)
- Building condition assessments and reserve fund studies
- Building Exterior Visual Assessment (BEVA) guidelines, City of Calgary
- Preventive Maintenance guidebook 2026, BOMA Manitoba
- Heritage Building Maintenance Manual, Government of Manitoba
- CAN/CSA-A770-16 home inspection standard
- E1.2 Envelope Assessment, BOMA Field Guide for Sustainable Buildings