
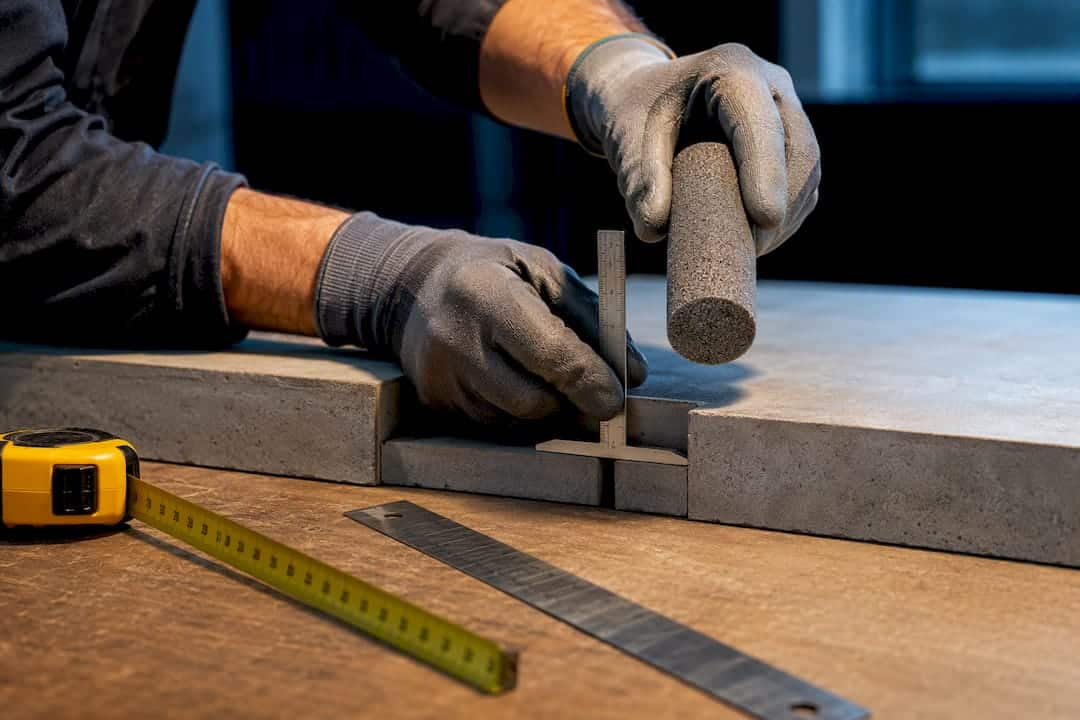
For most exterior joints, a hybrid or bi-cellular backer rod is the safest call, with closed-cell reserved for horizontal joints that see standing water and open-cell kept to dry interior verticals. Whatever type you land on, size it about 25% larger than the joint width and set the depth to hit a 2:1 width-to-depth ratio. That single ratio, more than brand or price, determines whether the sealant bead actually moves with the building instead of tearing.
TL;DR:
- Choose hybrid or closed-cell backer rods for joints exposed to water or unpredictable conditions, and size them about 25% larger than the joint width.
- Use a 2:1 width-to-depth ratio to create an hourglass sealant profile that allows movement without tearing the bead.
- Proper installation, including clean, dry substrates and careful rod placement without puncturing or overstretching, is crucial to prevent sealant failure.
- Verify sealant compatibility with backer rod material and opt for bond-breaker tape only when a joint is too shallow for standard backer rod.
- Protect stored backer rod from moisture, UV, and cold to ensure longevity, and remember that most failures stem from installation errors rather than material flaws.
Table of Contents
- Backer rod types: closed-cell, open-cell, and hybrid explained
- How do you size backer rod for the right shape factor?
- Installation technique: what causes most backer rod failures
- Which sealant chemistries need compatibility checks with backer rod?
- Field-tested tips that cut down on reseals
- Storing backer rod correctly before it goes in the joint
- How long does backer rod actually last once it’s installed?
- What do you do with a joint that’s not a clean, uniform gap?
- A tradesperson’s take on why this matters
- Sources
- FAQ
Backer rod types: closed-cell, open-cell, and hybrid explained
Backer rod isn’t just a foam filler you shove into a gap before caulking. It’s a bond breaker and depth control tool, and the cell structure you choose changes how the sealant behaves for the next fifteen years. Get the type wrong and you’re not looking at a minor cosmetic issue. You’re looking at a callback.
Closed-cell rod has a skin that resists water, which makes it the right pick for horizontal joints, plaza decks, and anywhere ponding is a realistic possibility. The catch: if you nick that skin during install, trapped air and moisture inside the cells can outgas and push bubbles right up through your fresh sealant. Kool-Rod’s technical notes are blunt about this. Once bubbles form, there’s no patching your way out of it. You strip it and reseal.
Open-cell rod compresses easily and lets moisture pass through, which actually helps single-component sealants cure of the back side. That’s a real advantage in dry, vertical interior joints. Put it in a horizontal joint that collects rain or snowmelt, though, and it soaks up water like a sponge and holds it against your sealant indefinitely.
Hybrid, or bi-cellular, rod gives you a closed skin wrapped around an open-cell interior. You get the compressibility of open-cell with meaningfully better moisture resistance than the straight open-cell version, which is why industry guidance increasingly points to hybrid rod as the default for unpredictable field conditions.
Typical applications break down like this:
- Expansion joints in concrete and masonry: hybrid or closed-cell, depending on drainage
- Window and door perimeters: hybrid works well where exposure varies around the frame
- Horizontal traffic and plaza joints: closed-cell, full stop
- EIFS and cladding joints: hybrid, chosen with the sealant manufacturer’s compatibility notes in hand
How do you size backer rod for the right shape factor?
Sizing backer rod isn’t guesswork, and it isn’t “whatever’s in the truck.” There’s a ratio behind it, and skipping it is how joints end up cracking at the surface within a couple of winters.
The rule that matters most is the 2:1 width-to-depth ratio. For a joint that’s 1 inch wide, you want a sealant bead roughly 1/2 inch deep. That proportion creates what’s known as an hourglass profile, where the sealant is thinner in the middle and thicker at the bond lines. SYNC’s joint sealant guidance backs this up: the hourglass shape lets the sealant stretch and compress with seasonal movement without tearing at the edges, which is exactly what a straight rectangular bead can’t do.
To get there on site:
- Measure the joint width at several points along the run, not just once at the start.
- Select a rod diameter about 25% larger than that measured width so it seats under compression instead of floating loosely.
- Set the rod depth to leave the correct sealant depth for a 2:1 ratio (half the width, roughly).
- Recheck depth after inserting the rod, since compression can shift it deeper than intended.
- For irregular sections, measure the widest points and size conservatively, packing gaps with foam where the joint gets erratic.
R. Meadows notes reduces how often you’re swapping diameters mid-run.
Pro Tip: Keep a simple depth gauge or a cut piece of dowel in your tool bag. Press it to the bond line before you tool the sealant. It takes ten seconds and it’s the cheapest insurance against a bead that’s too thin to survive a freeze-thaw cycle.
Installation technique: what causes most backer rod failures
The type and size can be perfect and the joint can still fail if the installation is sloppy. In our experience, most sealant failures trace back to three or four repeatable mistakes, not exotic material problems.
Start with prep. The joint needs to be clean, dry, and primed where the sealant manufacturer calls for it, because backer rod does nothing to fix a substrate that’s dusty or damp. From there, roll the rod into the joint rather than stretching it. Stretched rod wants to relax back to its original length, and when it does, it pulls away from the joint sides and leaves gaps behind. Compress it to depth using a blunt tool only. A screwdriver or a putty knife edge will puncture closed-cell rod, and once that skin’s broken, outgassing bubbles can show up hours later, long after you’ve packed up and left the site.
Once the rod’s set, tool the sealant firmly against both bond lines so it wets out properly and holds that hourglass shape.
The recurring mistakes worth flagging on every crew:
- Puncturing closed-cell rod with a sharp tool, triggering outgassing
- Setting rod too shallow (bead too thick, restricts movement) or too deep (bead too thin, tears early)
- Using open-cell rod in a horizontal joint that sees standing water
- Stretching the rod during install so it pulls loose within a season
Field reports and manufacturer notes point to timing as an underrated factor too. Installing during extreme temperature swings, right as a joint is at its widest or narrowest point in its seasonal cycle, sets the sealant up for stress it doesn’t need to carry from day one.
Which sealant chemistries need compatibility checks with backer rod?
This is the part a lot of crews skip, and it’s the part that causes staining and cure failures months down the road. Some backer rod materials aren’t chemically neutral against every sealant, and running the wrong combination can inhibit cure or cause discolouration that shows up right at the bond line.
ASTM C1330 classifies backing materials, and ASTM C1193 lays out design and installation recommendations for joint sealants, including when and how to verify compatibility before you commit to a product combination on a job.
Before you seal:
- Pull the sealant’s technical data sheet and check its listed compatible backing materials
- Call the sealant manufacturer directly if the joint involves an unusual substrate or a specialty sealant
- Run a small mock-up test when you’re not certain, rather than finding out on the finished job
- Pair rod choice against the sealant chemistry you’re actually using, since high-movement joints often demand a different backing approach than static ones
If a joint is too shallow to accept backer rod at all, bond-breaker tape is the correct substitute. It stops the sealant from bonding to the back of the joint, which prevents the three-sided adhesion that tears a bead apart under movement.
Field-tested tips that cut down on reseals
Twenty-five years on Ontario roofs and building envelopes teaches you that most failed joints didn’t fail because of the rod itself. They failed because someone rushed the check before sealing.
Before you tool anything, confirm the substrate is genuinely dry, not just dry-looking, check for contamination like old sealant residue or dust, and make sure primer’s gone on where it’s specified. Watch for rod that’s shifted or popped up during handling, too. In freeze-thaw climates, timing your install for a stable temperature window matters more than most crews give it credit for. A joint sealed at its narrowest winter width has nowhere to go come July.
Pro Tip: If a joint shows repeated cracking at the same spot, or the substrate itself is crumbling, that’s not a resealing problem anymore, and it needs a professional concrete expansion joint repair assessment before any backer rod goes in. That’s a structural repair, and it needs an assessment before any backer rod goes in.
Storing backer rod correctly before it goes in the joint
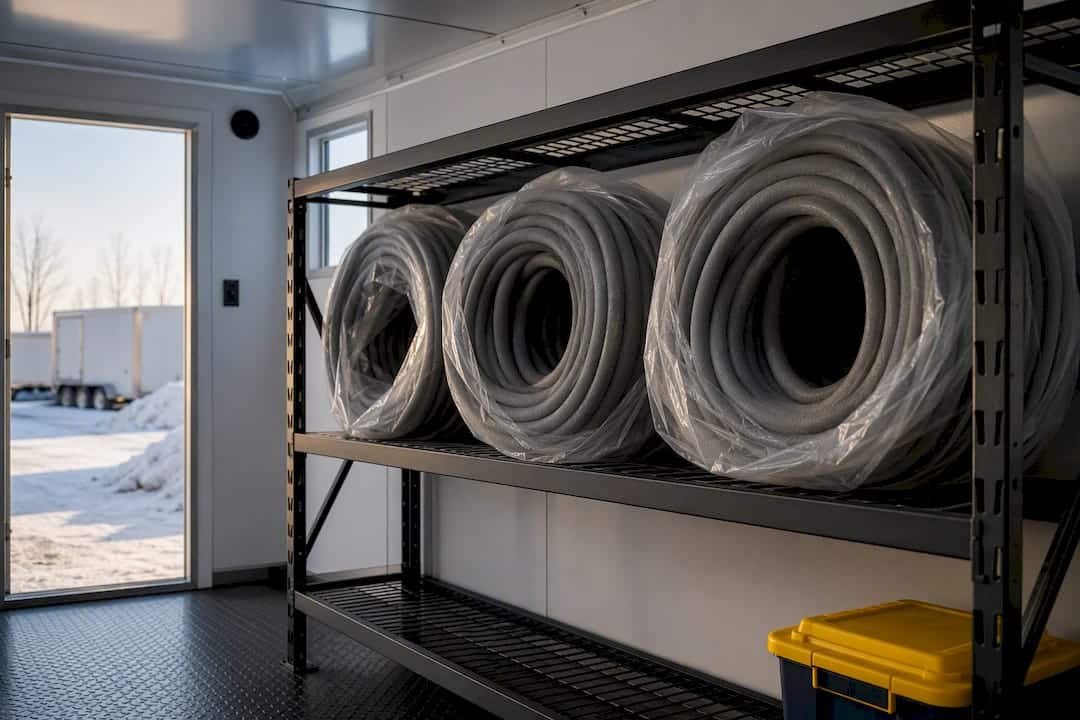
Backer rod that’s been sitting wrong on a job site can cause problems before it’s even installed. Keep rolls and coils off bare ground and away from standing water, since open-cell and hybrid types will absorb moisture right through their packaging if it’s been compromised. A dry rack or shelving in a site trailer works better than a pallet left out under a tarp.
UV exposure matters too. Rod left uncovered in direct sun for extended stretches, especially through a full summer, can degrade the outer skin on closed-cell types before it ever sees a joint. Keep stock in its original packaging or under cover until it’s needed.
Temperature swings on their own generally aren’t a storage concern for the rod material, but extreme cold can make some foam stiffer and harder to compress evenly on install day. If you’re pulling rod out of an unheated trailer in January, give it time to acclimatize before forcing it into a tight joint. Trying to compress cold, stiff rod often leads to uneven seating and gaps you won’t notice until spring thaw shows you where they are.
Rotate stock so older rolls get used first, and keep different diameters and types clearly labelled. Nothing slows a crew down faster than digging through mixed bins trying to find the right size by feel.
How long does backer rod actually last once it’s installed?
Once backer rod is sealed behind sealant and protected from UV and direct weather, it’s essentially doing a passive job for as long as the sealant itself holds up, which typically runs well beyond a decade for a properly installed joint.
Closed-cell rod tends to hold its shape and resistance to moisture longest, since its skin isn’t exposed to the elements once the sealant’s tooled over it. Open-cell rod, protected the same way, holds up reasonably well too, though its greater permeability means any water that does reach it through a failed sealant bond will sit there longer than it would against closed-cell.
Hybrid rod splits the difference and tends to perform consistently across both dry and occasionally damp conditions, which is part of why it’s become the practical default for exterior work with variable exposure.
The material’s lifespan almost never turns out to be the limiting factor in a joint’s performance. It’s the sealant bond and the installation quality around the rod that fail first. A rod punctured during install or set at the wrong depth will contribute to premature failure regardless of how durable that specific foam is rated. Choosing the right type matters less for its own longevity and more for how well it lets the sealant around it do its job over the years.
What do you do with a joint that’s not a clean, uniform gap?
Real joints on real buildings rarely come in tidy, consistent widths. Masonry settles, old expansion joints get patched unevenly, and window perimeters can have gaps that widen and narrow along a single run.
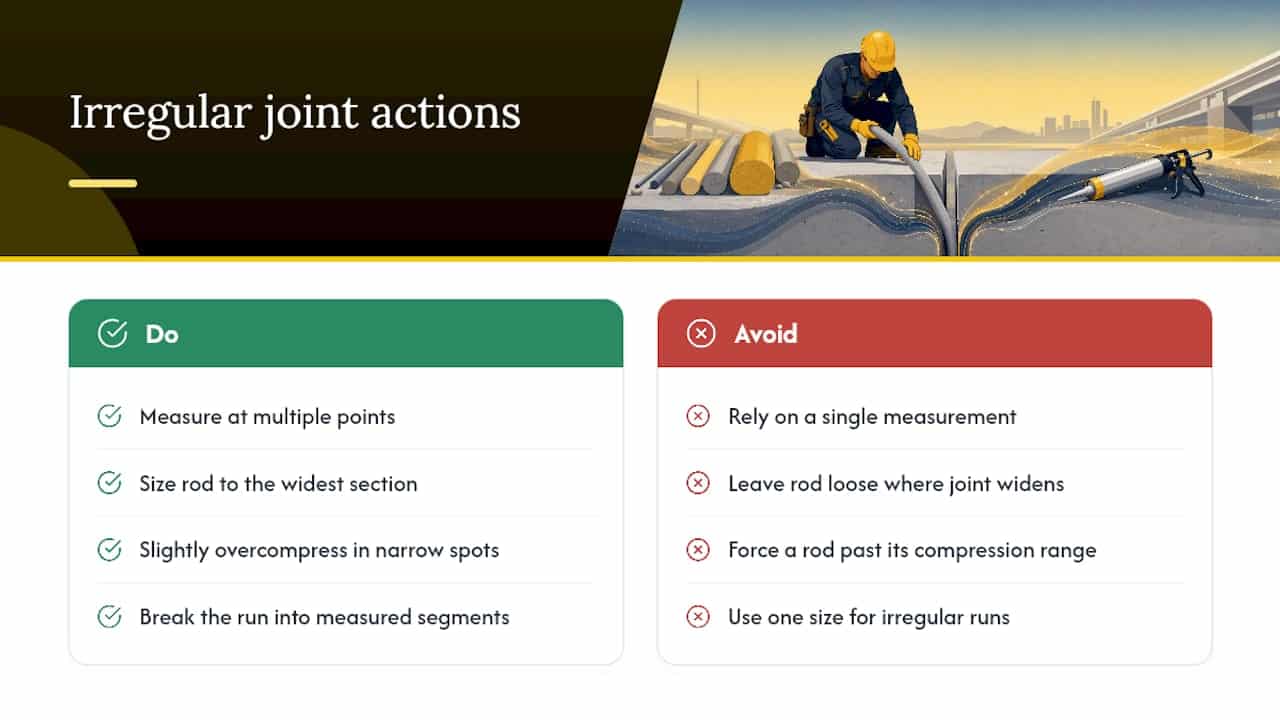
Measure at multiple points rather than trusting one reading, and size your rod to the widest section you find, not the average. It’s better to slightly overcompress rod in a narrow stretch than to leave it loose where the joint opens up, since a loose rod won’t hold depth or support the sealant’s shape factor.
For genuinely deep or wide joints, sometimes a single rod diameter can’t bridge the gap on its own. In those cases, layering foam backing or using a larger diameter rod designed for the depth, rather than trying to force a standard size to compress far beyond its rated range, keeps the shape factor closer to correct. A rod pushed past its usable compression range stops behaving predictably, and you lose the hourglass profile that gives the sealant room to move.
Where a joint’s shape is genuinely irregular, curving, tapering, or interrupted by hardware, it often makes more sense to break the run into segments and treat each on its own measurements rather than forcing one rod size across the whole length. It’s more time at the measuring stage, but it’s far less time spent coming back to fix a section that never sealed properly in the first place.
A tradesperson’s take on why this matters
Bad backer rod selection doesn’t show up as a failure on day one. It shows up eighteen months later as a water stain, a cracked bead, or a callback you have to eat the cost of. Following the sizing rule and checking compatibility instead of relying on habit is the cheapest insurance in the trade.
— Felix
Sources
For formal specification work, ASTM C1193 covers design and testing guidance, while manufacturer bulletins like Tremco’s backer rod selection guide focus on hands-on installation best practices.
- Tremco — sealant backing material selection guide (technical bulletin PDF)
- Kool-Rod® (W. R. Meadows — Canada)
- ASTM C1193 — Guide for use of joint sealants
FAQ
How do I determine what size backer rod to use?
Measure the joint width at several points, then select a rod diameter roughly 25% larger than that width so it seats firmly under compression. Set the installed depth to achieve a 2:1 width-to-depth ratio for the sealant bead.
What are the most common mistakes when using backer rod?
The biggest ones are puncturing closed-cell rod with a sharp tool, setting it too shallow or too deep, using open-cell rod in joints that collect water, and stretching the rod during installation so it pulls loose later.
What is the recommended thickness for backer rod?
There’s no single fixed thickness. The correct diameter is about 25% larger than the measured joint width, and the installed depth should leave a sealant bead at a 2:1 width-to-depth ratio.
How far down should backer rod go in a joint?
Depth is set to leave the correct sealant bead thickness for a 2:1 width-to-depth ratio, generally half the joint’s width. A rod set too deep leaves a bead too thin to handle movement; too shallow and the bead is too thick and restricts the hourglass shape the sealant needs.
When should I use bond-breaker tape instead of backer rod?
Bond-breaker tape is the right call when a joint is too shallow to accept backer rod at all. It stops the sealant from bonding to the back of the joint and prevents three-sided adhesion failure.
If a joint’s beyond a straightforward reseal, whether it’s structural cracking, deep water damage, or a full building envelope issue, that’s the point to bring in a professional rather than pushing a DIY fix. Kettlecontracting handles exactly this kind of trade-specific caulking and sealing work across residential and commercial properties, and knowing when a joint needs more than a rod and a tube of sealant is half the job.
