
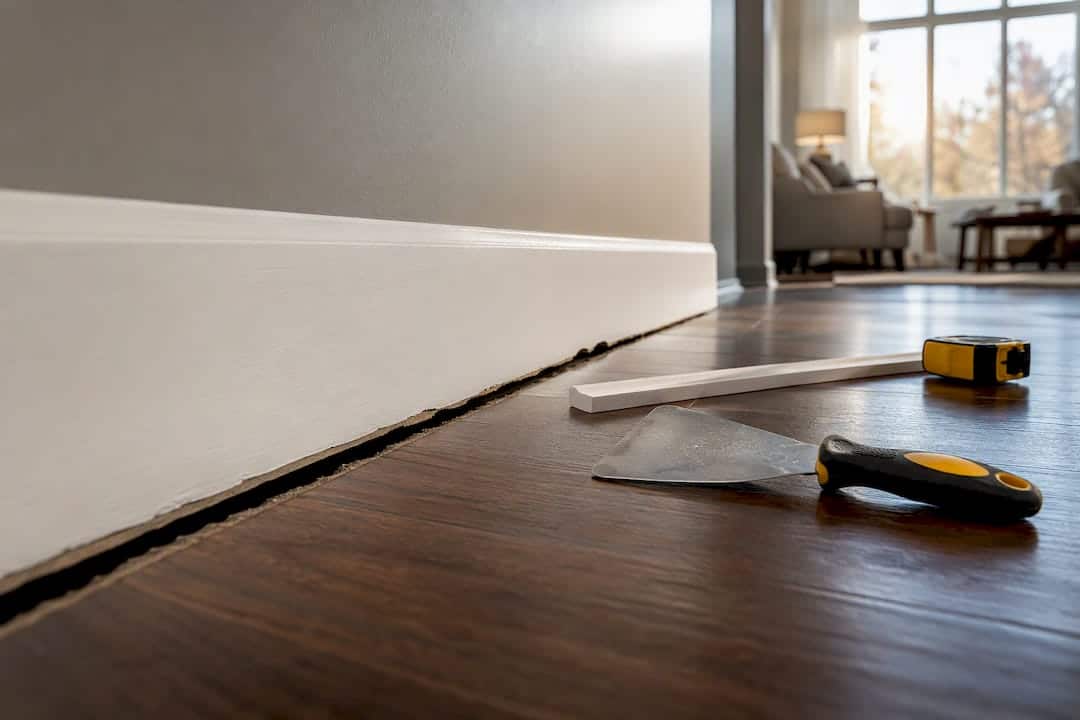
Hairline gaps under 1/8 inch just need a bead of paintable caulk. Gaps up to about a quarter inch usually call for shoe moulding or quarter round nailed into the baseboard. Anything wider, uneven, or growing from season to season means pulling the trim and shimming or replacing it. If the gap is wider than about three-eighths of an inch, changes shape quickly, or shows moisture staining or soft wood, stop and get a professional inspection before you touch it.
TL;DR:
- Gaps under 1/8 inch are best sealed with paintable caulk, while larger gaps require shoe moulding, quarter round, or structural fixes depending on width.
- Seasonal wood movement and house settling cause most gaps, with moisture issues and uneven subfloors presenting signs of deeper structural problems.
- Proper caulking involves thorough cleaning, backing rods for wider gaps, and immediate tape removal to ensure longevity and a seamless finish.
- Nail moulding into the baseboard, not the floor, prevents future separation caused by seasonal expansion and contraction of the flooring.
- Professionals should be called when gaps exceed 3/8 inch, especially if signs of moisture or floor instability are apparent, to avoid masking underlying issues.
Table of Contents
- What causes baseboard floor gaps in the first place?
- Which fix matches your gap size?
- How do you caulk a small baseboard gap correctly?
- How do you install shoe moulding to cover a gap?
- When do you need to lower, shim, or replace baseboards?
- When should you call a professional instead of DIYing it?
- How do you prevent baseboard gaps from coming back?
- Why quick fixes on baseboard gaps don’t last
- Need a trade-grade fix instead of a repeat repair?
- Sources
- FAQ
What causes baseboard floor gaps in the first place?
Most gaps trace back to one of five things: normal house settling, a flooring swap that changed the finished floor height, seasonal humidity swings, sloppy trim installation, or an uneven subfloor that was never levelled properly. Each cause tends to leave a different signature.
- Settling usually produces small, fairly even gaps along a wall, often worse near corners.
- Flooring changes (old carpet pulled up, new laminate or hardwood installed) create a consistent gap because the new floor sits lower than the old one did, a pattern well documented in flooring and trim guides.
- Seasonal movement shows up as gaps that open in winter (dry indoor air, wood shrinks) and tighten in summer.
- Installation errors show as gaps that vary wildly from one end of a wall to the other.
- Uneven subfloors create gaps that get progressively wider or narrower along the same run of baseboard.
Run a 4 foot straightedge or level along the floor next to the baseboard. If the gap changes by more than a card’s thickness over that span, you’re dealing with an uneven subfloor, not simple settling. And before you pick a fix, look closely at the baseboard itself. Soft, spongy wood, dark staining, or a musty smell means you’re not looking at a cosmetic issue anymore. That points to moisture intrusion, and no amount of caulk or trim is going to solve it.
Which fix matches your gap size?
Once you know roughly how wide the gap is and why it’s there, the decision gets simple; for expert repainting and finishing after baseboard repairs, consider interior painting in King City services to achieve a flawless look. Here’s the order most trades work through:
- Hairline gaps (under 1/8 inch): Paintable caulk is the right call. It’s a finishing touch, not a structural repair, and it only works reliably at this size, according to Angi’s guidance on baseboard gaps.
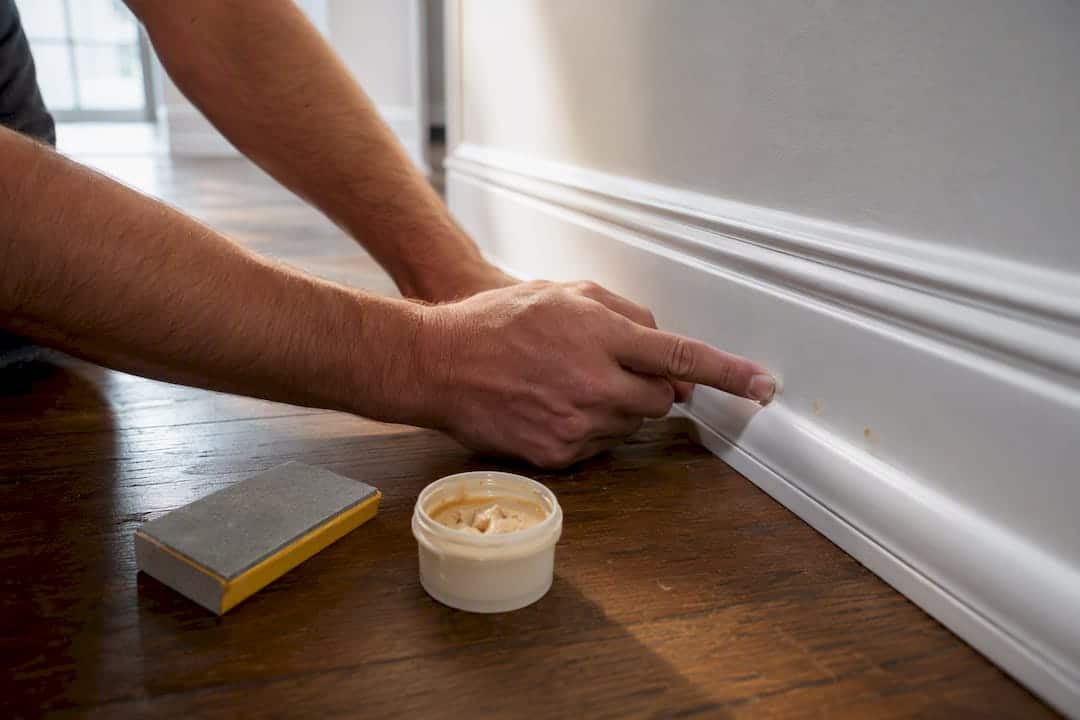
- Small gaps (1/8 to 3/16 inch): Caulk still works if the trim is painted. If the baseboard is stained wood, caulk will show as a visible line, so a tinted wood filler or a very thin strip of quarter round looks better.
- Medium gaps (up to about 1/4 to 3/8 inch): Shoe moulding or quarter round is the standard fix, especially after a flooring change dropped the floor height. This is the most common and cost-effective repair homeowners reach for, and it holds up well when installed correctly.
- Large or uneven gaps (over 3/8 inch, or wildly inconsistent along the wall): Lowering, shimming, or fully replacing the baseboard is the only durable option. Trim moulding can’t bridge a structural problem.
One thing that trips people up: matching the finish. Caulk disappears nicely on painted trim but stands out on stained wood, where the colour difference is obvious once it dries. If your baseboards are stained and the gap is more than hairline, you’re usually better off with a trim solution than a tube of caulk.
Watch for the case where a cosmetic cover won’t hold: gaps that aren’t consistent width, floors that feel soft or bouncy underfoot, or a gap that’s noticeably wider than it was six months ago. Those are structural signals, not decorating problems.
How do you caulk a small baseboard gap correctly?
Caulk gets a bad reputation because most people rush the prep. Done right, on the right size of gap, it holds for years. Here’s the sequence I use on site:
- Clean the gap. Vacuum out dust and old caulk residue. Caulk won’t stick to a dirty edge.
- Tape off both sides of the gap with painter’s tape for a clean line.
- For gaps pushing toward 3/8 inch, pack in a foam backer rod first. Caulk needs something to grip against; without backing, it just sinks in and cracks.
- Run a steady bead of paintable acrylic latex caulk (siliconized is a good middle ground for flexibility) along the gap.
- Tool the bead with a wet finger or a caulking tool before it skins over.
- Pull the tape immediately, while the caulk is still wet, for a sharp edge.
- Let it cure fully before painting. In an unheated basement or during an Ontario winter cold snap, give it extra time. Cold, dry air slows the cure more than most people expect.
- Paint to match once cured.
Pro Tip: Most caulk failures aren’t a bad product, they’re bad prep. If the surface is dusty, damp, or still has old caulk clinging to it, the new bead will peel within a season no matter how good the tube is. Clean and dry beats expensive every time. You’ll find the same prep principles in our guide to caulking around door thresholds, which covers surfaces that see similar wear.
How do you install shoe moulding to cover a gap?
Shoe moulding (a small, rounded strip) and quarter round (a simple 90 degree profile) both do the same job: hide a gap the caulk can’t handle. Base shoe sits flush against the baseboard and tends to look cleaner against modern flat trim. Quarter round has a slightly bulkier profile that suits older or more traditional baseboard styles.
- Measure each wall run and cut mitres at inside and outside corners, or cope the joint where two pieces meet inside a corner for a tighter fit.
- Dry fit every piece before you nail anything. Adjust cuts now, not after glue and paint.
- Fasten with a brad nailer using 1 to 1.5 inch nails, spaced every 12 to 16 inches, angled slightly downward.
Here’s the part that separates a repair that lasts from one that pops loose by next winter: nail into the baseboard, not the floor. Flooring expands and contracts with the seasons, and if your moulding is nailed to the floor, it gets dragged along and eventually pries itself loose or splits, a failure pattern Angi specifically flags in their trim guidance. Fastening to the baseboard lets the floor move freely underneath.
Fill nail holes with matching wood filler, sand lightly, then paint or stain to match the existing trim.
When do you need to lower, shim, or replace baseboards?
If the gap is wide, uneven, or the moulding trick would look obviously patched, you’re past the cosmetic stage. Three options, depending on severity:
- Lowering the baseboard works when the trim itself is fine but was installed too high. Pull it carefully with a flat bar, protecting the wall finish.
- Shimming behind the baseboard corrects for a wall that isn’t quite flat, giving the trim something solid to sit against before you re-nail it.
- Full replacement is the right call when the old trim is damaged, warped, or too short to lower any further.
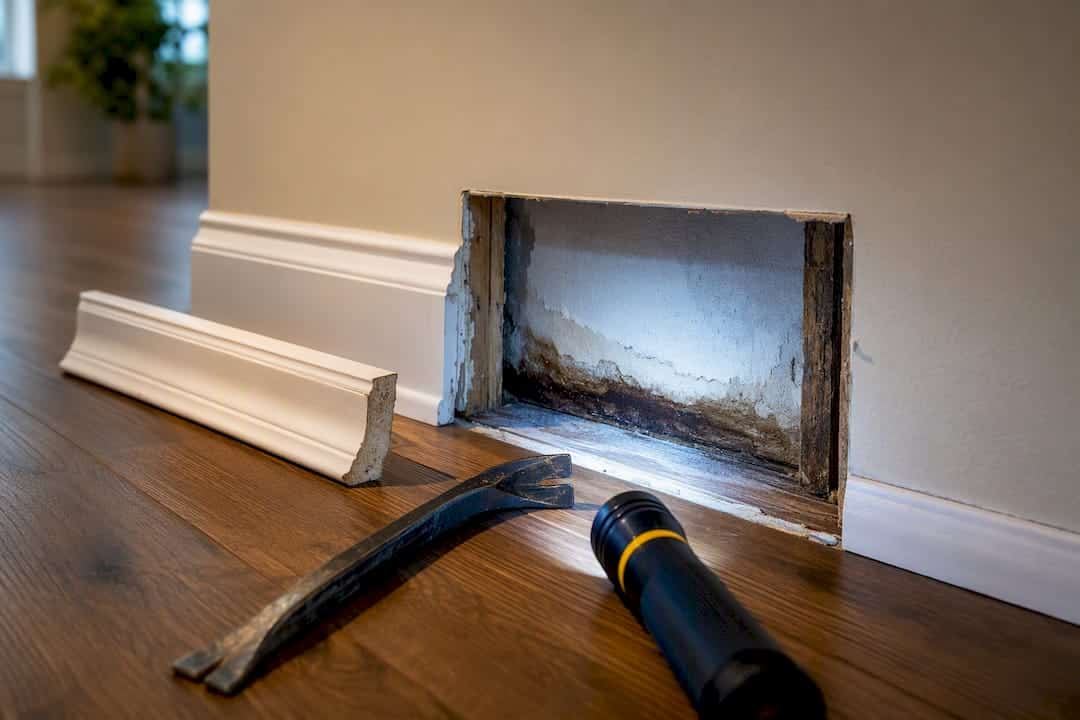
Once removed, check the wall and subfloor for damage before reinstalling anything. Shim gaps in the wall framing where needed, then refasten with finish nails into the studs. Caulk the top seam where baseboard meets wall, fill every nail hole, sand, and repaint or restain to match.
Red flag: if you pull the baseboard and find soft drywall, water staining, or a subfloor that flexes underfoot, stop the DIY repair there. That’s a moisture or structural issue, and covering it back up just hides the problem for someone else to find later.
When should you call a professional instead of DIYing it?
Some gaps are a weekend project. Others aren’t, and pretending otherwise usually costs more later. Call a pro when you see:
- A gap wider than 3/8 inch, or one that’s clearly grown over the past few months.
- Any sign of moisture: staining, a musty smell, or wood that feels soft to the touch.
- Floors that bounce or flex when you walk near the baseboard.
- Gaps that vary dramatically along the same wall, suggesting a subfloor problem.
A qualified contractor will check the subfloor for level and moisture, replace or reinstall trim properly, and apply trade-grade caulking designed to move with the building through freeze-thaw cycles rather than crack. When you’re hiring, ask about their experience with trim and sealing work specifically, whether they warranty the repair, and whether they’ll give you a clear written scope before starting. Professional contractors handle exactly this kind of work in the Greater Toronto Area, so it’s worth having on your shortlist if the job has grown past a caulking gun.
How do you prevent baseboard gaps from coming back?
Prevention is cheaper than any repair on this list. A few habits go a long way:
- Keep indoor humidity between roughly 30 and 50 percent year round. Ontario’s dry winters and humid summers are exactly what drive seasonal wood movement.
- Let new flooring acclimate to the room for the manufacturer’s recommended period before installing or final-fitting trim, since fitting baseboards after the floor is down and settled is the cheapest way to avoid this problem entirely.
- Walk your baseboards each fall and spring, looking for new gaps or soft spots.
- Touch up caulk lines annually before they crack, rather than after.
Why quick fixes on baseboard gaps don’t last
I’ve reworked plenty of “already fixed” baseboard gaps that failed within a year, and it’s almost always the same two mistakes: nailing moulding straight into the floor, or slapping caulk over a gap that was really a trim replacement job. Neither survives a full freeze-thaw cycle. Before you patch anything, check for moisture or a soft subfloor first. Covering a structural problem with a nice paint job just delays the real fix.
— Felix
Need a trade-grade fix instead of a repeat repair?
If you’ve read through the DIY steps above and you’re staring at a gap that’s uneven, growing, or smells a little damp when you get close, that’s your sign this isn’t a weekend project anymore. Experienced contractors handle the jobs where cosmetic fixes won’t hold: subfloor and moisture checks, proper trim reinstallation, and sealant work built to move with Ontario’s freeze-thaw cycles instead of cracking every winter.

Before you call for a quote, take a few photos of the gap along the wall, note whether it’s gotten wider recently, and check for any staining or soft spots nearby. That gives a contractor everything needed to scope the job accurately on the first visit. If you’re weighing whether this is a caulking fix or something bigger, our breakdown of common caulking mistakes homeowners make is a good place to check your work first. When you’re ready to get it done properly, book a consultation with Kettle Contracting and get a clear scope before any work starts.
Sources
- How to Fix Gaps Between Baseboards and Floors – The Moulding Company
- How to Fill Gaps Between the Floor and the Baseboards of Your Home – Angi
- Fix Baseboard Gaps in 20 Minutes: A Simple DIY Guide | Fix It Right Way
FAQ
Is there supposed to be a gap between the floor and baseboard?
A small gap, generally under 1/8 inch, is normal and accounts for seasonal wood movement. Anything wider or inconsistent usually points to a flooring change, settling, or an uneven subfloor.
How can I fix a gap between my baseboard and flooring?
Match the fix to the size: paintable caulk for hairline gaps, shoe moulding or quarter round for medium gaps, and lowering, shimming, or replacing the baseboard for large or uneven ones.
What is the 7% rule for baseboards?
There’s no standard industry rule by that name for baseboard gaps. If you’ve seen the figure elsewhere, treat it cautiously since it isn’t tied to any recognized trade or building guideline.
Why is my baseboard separating from the floor?
The most common causes are seasonal humidity swings, house settling, a flooring swap that changed floor height, or an uneven subfloor. Widening or inconsistent separation, especially with staining nearby, can signal moisture damage worth a professional look.
