

A compliant basement egress window must provide an unobstructed clear opening of at least 0.35 m², with no single dimension measuring less than 380 mm (15 in). That is the baseline set by the Ontario Building Code and the National Building Code of Canada, and it applies to any bedroom or sleeping area in a basement suite that lacks a second exterior exit.
Three checks you can do right now:
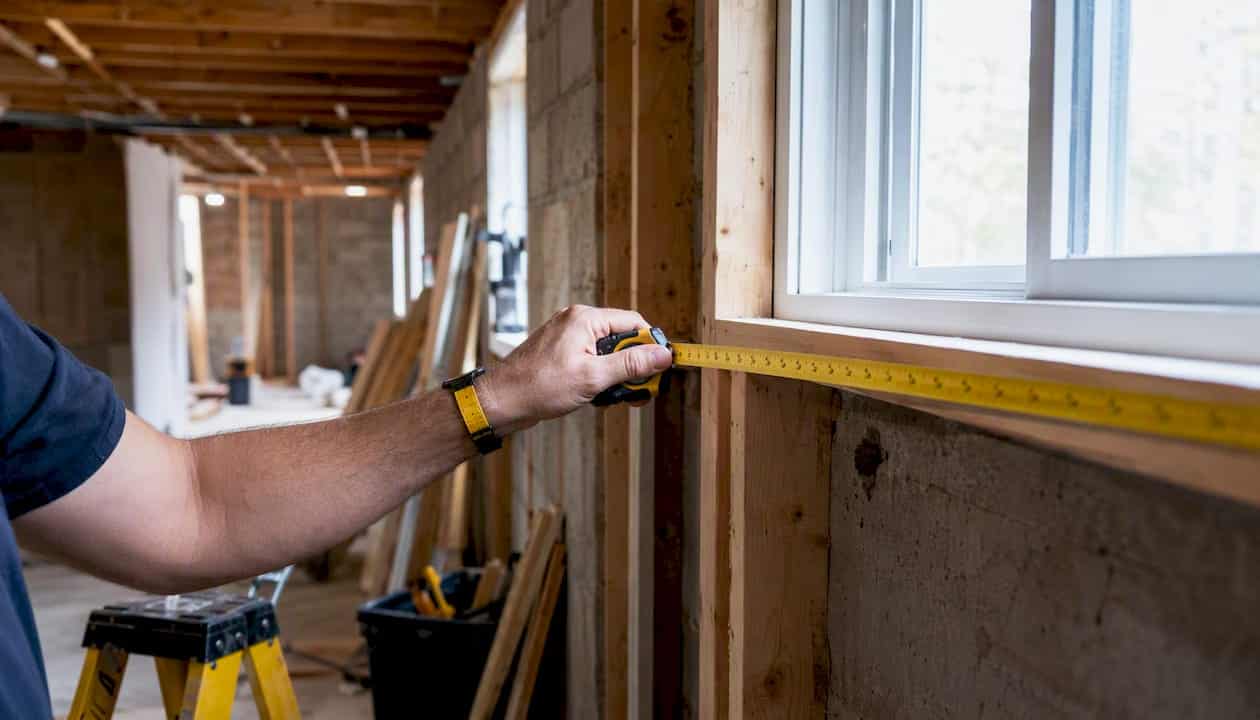
- Measure the clear opening, not the frame. Open the window fully and measure the unobstructed gap: clear width edge-to-edge and clear height top-to-bottom. Multiply those two numbers to confirm you reach 0.35 m².
- Check sill height above the finished floor. A sill placed too high makes escape difficult and can trigger additional code scrutiny during a permit review.
- Confirm window-well clearance. If the window opens into a below-grade well, the well must allow unobstructed escape. Measure the depth and width of the well before assuming the window passes.
The window must also open from the inside without keys, tools, or special knowledge, and it must hold the required opening on its own without a prop or brace. Grilles, security bars, and covers that require a key to remove are not permitted on egress windows. When you speak to a building inspector or permit clerk, reference OBC Section 9.9.10.1 and NBC Part 9 Division B. Provincial and municipal rules can be stricter, so always confirm with your local building department before ordering a replacement unit.
Table of Contents
- What do common basement window sizes actually give you?
- What does the OBC actually require for egress windows?
- How to measure the clear opening correctly
- Window wells: clearance, access, covers, and drainage
- Which basement window styles typically meet egress?
- When a basement window is only for light and ventilation
- Installation checklist and sealing best practices
- Actionable next steps: measure, confirm code, plan the retrofit
- Thermal performance for basement windows in Canada’s climate
- Materials and glazing options that meet energy and safety codes
- Common installation challenges in existing foundations
- Maintenance tips for window wells and drainage
- Key takeaways
- What we actually see on site
- How Kettlecontracting can help with your basement windows
- Useful sources
- FAQ
What do common basement window sizes actually give you?
Frame size and clear opening are not the same thing. A window marketed as 600 mm × 900 mm may deliver a clear opening of only 520 mm × 820 mm once you subtract the sash frame, weatherstripping, and any hardware. The table below shows typical marketed frame sizes and whether they tend to produce a compliant clear opening under normal installation conditions.
| Frame size (metric) | Frame size (imperial) | Typical clear opening area | Usually meets 0.35 m² egress? |
|---|---|---|---|
| 600 × 900 mm | — | — | Often no |
| 600 × 1200 mm | — | — | Usually yes |
| 900 × 900 mm | ~36 × 36 in | — | Usually yes |
| 900 × 1200 mm | ~36 × 48 in | — | Yes |
| 900 mm | — | — | No |
Conversion note: To convert mm to metres, divide by 1,000. To convert m² to ft², multiply by 10.764. So 0.35 m² × 10.764 = 3.77 ft².
Manufacturers advertise overall frame dimensions, not the operable clear opening. When you pull a spec sheet, look specifically for “operable opening” or “clear opening” dimensions. If those numbers are not listed, ask the supplier directly before purchasing.
Pro Tip: On a sliding window, only the operable sash counts toward the clear opening area. A 900 × 900 mm slider typically gives you a clear opening of roughly 420 × 820 mm on the moving half, which may fall short of 0.35 m². Always check the spec sheet’s operable portion, not the overall glass area.
What does the OBC actually require for egress windows?
The Ontario Building Code Section 9.9.10.1 sets three non-negotiable conditions for a basement egress window:
- The unobstructed open portion must be at least 0.35 m².
- No dimension of that opening may be less than 380 mm (15 in).
- The window must open from the inside without tools, keys, or special knowledge, and must maintain the opening without props.
The National Building Code of Canada 2020 carries the same requirements in Part 9. For a detailed illustrated breakdown, the NRC’s Illustrated User’s Guide to NBC 2020 Part 9 is the most thorough reference available and includes worked examples.
Sill height is a related consideration. While the OBC does not set a universal maximum sill height for all basement windows, inspectors and local codes often flag sills placed higher than 1,000 mm above the finished floor as a practical egress concern. Some municipalities set their own maximum. Check with your local building department.
Window-well clearance is where many retrofits fail. When the window opens into a below-grade well, the well must provide enough room for the sash to swing open fully and for a person to climb out. Common guidance references a minimum clearance of 550 mm in front of the window, measured from the face of the window to the well wall. Some jurisdictions reference 760 mm where the sill sits significantly below grade. For outward-opening casements, the open sash itself needs clearance beyond the window face, so the well must be sized accordingly.
Permit checklist for egress window work:
- Measured clear opening (width × height in mm, and calculated area in m²)
- Photo of the window in its fully open position
- Well dimensions (depth, width, clearance from window face to well wall)
- Proposed replacement or retrofit details (window style, manufacturer, model)
- Confirmation that the window-well cover, if present, is removable from inside without tools
Pro Tip: Local municipalities in Ontario can enforce rules that are stricter than the OBC. The City of Toronto, for example, has its own zoning and building bylaw interpretations that affect basement suite approvals. Always call your municipal building department before ordering a window, not after.
How to measure the clear opening correctly
The single most common mistake on a basement egress project is measuring the frame instead of the opening. Here is the correct method.
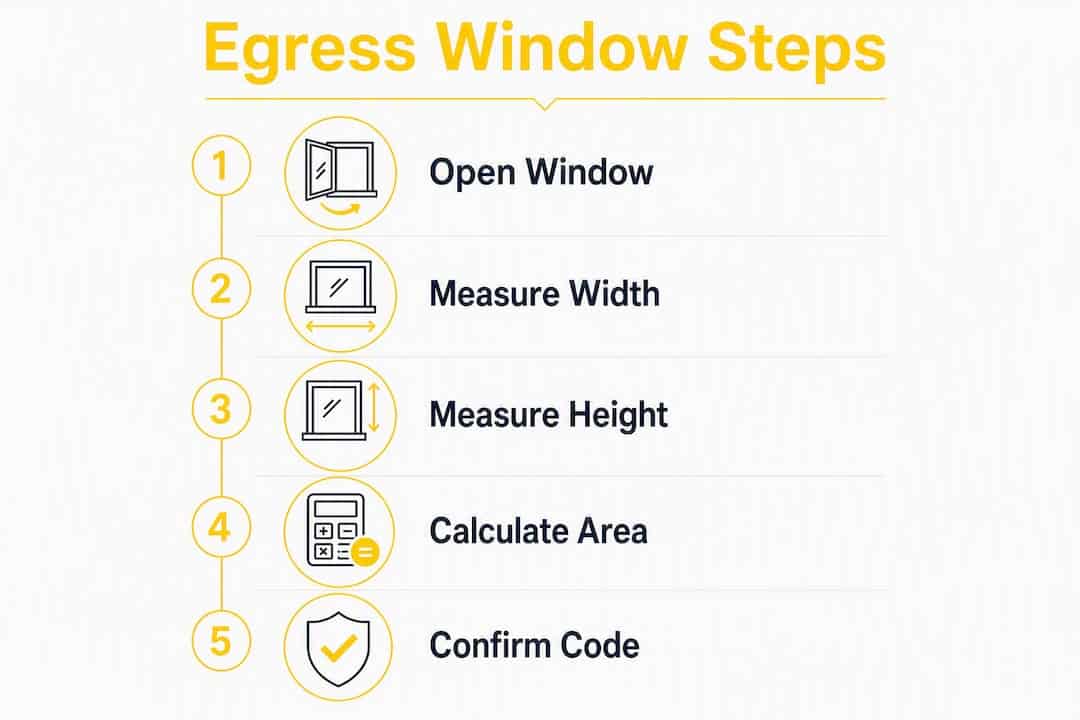
Step 1: Open the window fully. For a casement, swing it to its maximum open position. For a slider, push the operable sash as far as it travels. For an awning, prop it at its maximum angle.
Step 2: Measure clear width. Place your tape measure at the inside edge of one side of the opening (not the frame, not the glass) and measure across to the inside edge of the opposite side. This is the unobstructed clear width.
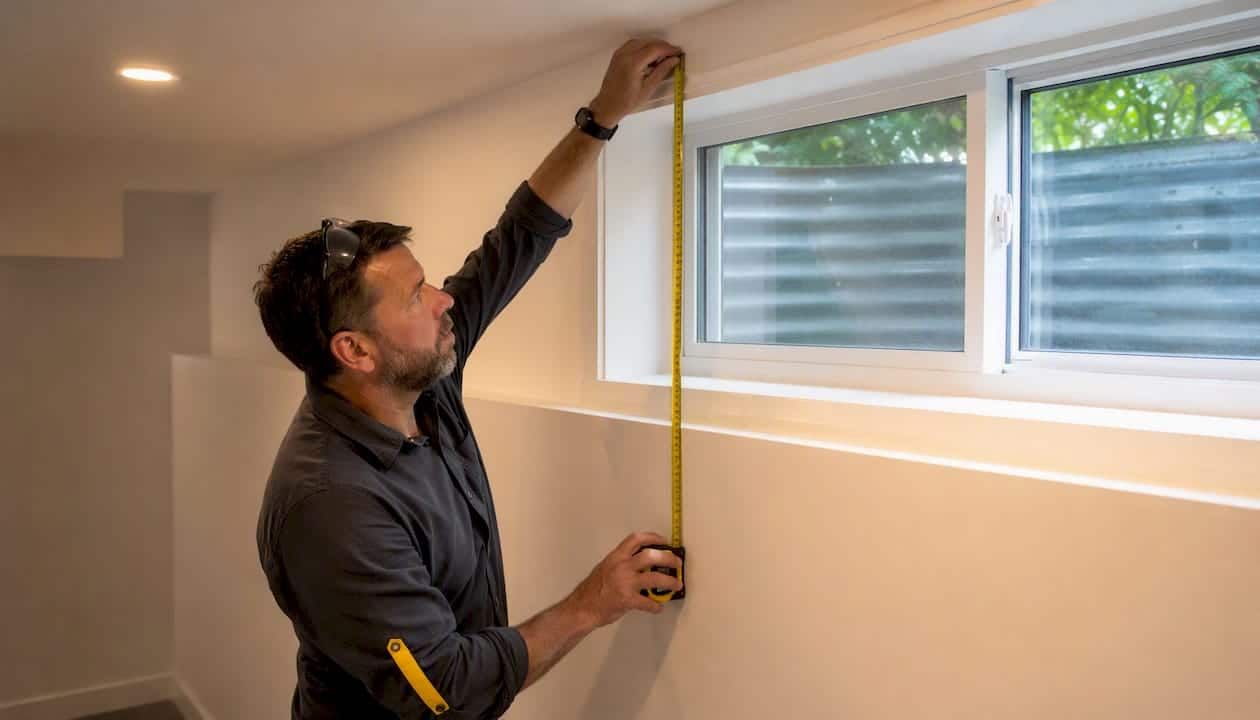
Step 3: Measure clear height. Measure from the bottom of the opening to the top of the unobstructed gap. On a slider, this is the full height of the operable sash opening. On an awning, it is the vertical gap at the widest point.
Step 4: Calculate the area. Multiply clear width (in metres) by clear height (in metres).
Sample calculation: Clear width = 900 mm = 0.900 m. Clear height = 390 mm = 0.390 m. Area = 0.900 × 0.390 = 0.351 m². This just clears the 0.35 m² minimum. In imperial: 35.4 in × 15.4 in = 545 in², which equals approximately 3.78 ft². Compliant, but with almost no margin.
Common measuring errors to avoid:
- Measuring the glass pane rather than the open gap
- Forgetting that divided lites and thick sashes reduce the clear opening significantly
- Counting the full frame width on a slider instead of only the operable half
- Measuring with the window partially open rather than fully open
The single number to validate is 0.35 m². If your measured clear width × clear height does not reach that figure, the window does not meet egress requirements regardless of how large the frame looks.
Measurement checklist:
- Window fully open before measuring
- Clear width measured inside edge to inside edge
- Clear height measured bottom to top of unobstructed gap
- Area calculated in m² (width in metres × height in metres)
- Both dimensions confirmed ≥ 380 mm (0.380 m)
- Measurement recorded with photo for permit submission
Window wells: clearance, access, covers, and drainage
A window well that is too shallow or too narrow can make an otherwise compliant window useless in an emergency. The well is part of the egress system, not just a cosmetic feature.
Clearance requirements:
- The well must provide at least 550 mm of clear space between the face of the window and the well wall, measured when the window is fully open.
- For casement windows that swing outward, the open sash adds to the required clearance. Size the well to accommodate the sash in its fully open position plus enough room for a person to stand and climb.
- Width should be at least as wide as the window opening, and ideally wider to allow lateral movement.
Ladder and step requirements:
- Wells deeper than approximately 1.2 m typically require a permanently affixed ladder or steps to allow occupants to climb out.
- The ladder must not obstruct the window opening or reduce the clear space in front of the window.
- Steps should be positioned to one side of the window, not directly in front of it.
Covers and grates:
- Well covers must be openable from the inside without tools or special knowledge. A cover that requires a key, a latch mechanism that is difficult to operate, or one that can only be removed from outside is a safety hazard.
- Transparent polycarbonate covers are common and allow light in while keeping debris and water out. They are acceptable as long as they open freely from inside.
Drainage checklist:
- Connect the well base to the property’s weeping tile or drainage system where possible.
- If a drain connection is not feasible, use a gravel bed at the base of the well (minimum 150 mm deep) to allow water to percolate rather than pool.
- Maintain at least 150 mm of clearance between the finished grade outside and the rough opening of the window.
- Grade the soil around the well to slope away from the foundation, not toward it.
Pro Tip: An improperly drained well is one of the most common causes of basement water problems we see on site. Before replacing a window, inspect the well base for standing water, rust staining on the wall, or efflorescence on the concrete. Those are signs the drainage is failing, and installing a new window without fixing the well first will not solve the water problem.
Which basement window styles typically meet egress?
Not every window style is equally suited to egress. The style determines how much of the frame actually opens, and that directly affects whether you can reach 0.35 m².
Casement windows are the most reliable choice for egress in a basement. The entire sash swings open, so the clear opening is close to the full glass area. A 600 × 900 mm casement can typically deliver a clear opening that meets or approaches the minimum, and a 600 × 1200 mm unit clears it comfortably. The trade-off is that the outward swing requires adequate window-well clearance.
Sliding windows only count the operable half toward the clear opening. A 900 × 900 mm slider gives you roughly 420 × 820 mm of clear opening on the moving sash, which is just below the 0.35 m² minimum required for egress. That falls just short. You generally need a 1200 mm wide slider to reliably meet egress, because the operable half then provides approximately 560 × 820 mm = 0.459 m².
Awning windows hinge at the top and swing outward at the bottom. They can meet egress if the frame is tall enough, but the angled opening means the clear height is measured at the widest point of the gap, not the full frame height. They also require well clearance for the outward swing. Casement and tilt-and-turn windows produce larger clear openings than awning or hopper styles of the same frame size.
Hopper windows hinge at the bottom and tilt inward. They are common in older basements but rarely meet egress requirements because the inward tilt reduces the clear height significantly. A hopper is generally a light-and-ventilation window, not an egress window.
Fixed windows provide no clear opening at all. They cannot serve as egress under any circumstances.
A 32 × 48 in (813 × 1219 mm) frame sounds large, but whether it meets egress depends entirely on the style and the operable portion. A casement of that size will typically pass. A slider of the same frame size usually does not because only half the width is operable, and the clear opening may fall below code minimum.
When a basement window is only for light and ventilation
Not every basement window needs to meet egress requirements. The rule applies specifically where a sleeping room is present or where a basement suite lacks a second exterior exit. A utility room, laundry area, or storage space does not trigger the egress requirement, and a non-egress window can be smaller, fixed, or hopper-style.
That said, non-egress windows still need to be installed correctly. The building envelope does not care whether the window is egress or not. Water will find a poorly sealed frame either way.
Installation priorities for non-egress basement windows:
- Proper sill pan flashing to direct any water that enters the frame outward, not into the wall cavity.
- Integration with the building’s moisture barrier or house wrap at the rough opening.
- Insulated glass suited to below-grade conditions (more on glazing options below).
- Exterior caulking at the perimeter joint, sized and tooled correctly for freeze-thaw movement.
- Interior air sealing at the rough opening to prevent warm, moist indoor air from reaching the cold frame and condensing.
Conversion alert: If you finish a basement room and it could later be used as a bedroom, measure the clear opening of every window in that space now. Changing the use of a room to a sleeping area triggers the egress requirement, even if the original permit did not include it. Catching this before you frame and drywall saves a costly rough-opening enlargement later.
Replacing any window in a bedroom or changing a room’s use typically requires a building permit. Check with your municipality before starting work. You can seal a window from the inside as a temporary measure, but it does not substitute for a proper egress opening where one is required.
Installation checklist and sealing best practices
Correct installation preserves the clear opening, prevents leaks, and protects the foundation. A window that passes the code measurement but is poorly sealed will cause water damage within a few freeze-thaw cycles.
Full installation checklist:
- Verify the rough opening dimensions before the window arrives on site.
- Install a sill pan with end dams to capture any water that enters the frame and direct it outward.
- Integrate the sill pan flashing with the building wrap or moisture barrier, lapping correctly so water sheds down and out.
- Set the window in the opening, shim level and plumb, and fasten per the manufacturer’s specifications.
- Apply backer rod in the perimeter joint before caulking. The joint should be no wider than 12 mm for most sealants to perform correctly.
- Apply exterior sealant in a single continuous bead, tooled to a concave profile to shed water.
- Air-seal the interior perimeter with low-expansion spray foam or a flexible sealant, then trim and cover with interior casing.
- Back-prime any wood trim before painting to prevent moisture absorption at the cut ends.
Caulking material selection for basement conditions: Exterior basement joints are exposed to standing water, freeze-thaw cycling, and UV at the top of the well. A high-quality polyurethane or modified silicone sealant rated for below-grade use is the right choice. Standard paintable acrylic latex will crack within one or two winters in this application. Improper caulking or flashing is the leading cause of water infiltration around basement windows, and the fix is always more expensive than doing it right the first time.
Post-install inspection checklist:
- Run a hose over the exterior joint and check inside for any water entry after five minutes.
- Check for drafts at the interior perimeter with your hand or a lit incense stick.
- Confirm the window opens fully and the clear opening still meets the measured dimensions.
- Confirm the cover, if present, opens freely from inside.
Pro Tip: The most common homeowner mistake we see is applying a thin bead of caulk over a gap that needed a backer rod first. Without the backer rod, the sealant bridges the joint instead of bonding to two surfaces, and it tears within a season. Proper joint geometry, not just sealant brand, is what makes a seal last. Read up on common window caulking mistakes before attempting this yourself.
A correctly sealed basement window joint, with backer rod and a tooled polyurethane bead, should last 10–15 years in Ontario’s climate before it needs inspection or replacement.
Actionable next steps: measure, confirm code, plan the retrofit
Once you have the measurements and understand the code baseline, the path forward is straightforward.
Action checklist:
- Measure the clear opening of every basement window in sleeping areas. Record width, height, and calculated area.
- Photograph each window in its fully open position and photograph the window well from outside.
- Call your municipal building department to confirm local requirements, including any rules stricter than the OBC.
- If you are replacing a window, request written confirmation from the supplier that the specified unit will deliver a clear opening of at least 0.35 m² with no dimension under 380 mm.
- Get written quotes that include integrated flashing, moisture-barrier integration, and exterior caulking, not just window supply and basic installation.
Hiring tips: Ask any contractor to confirm the measured clear opening in writing before and after installation. Insist on seeing the flashing detail before drywall or trim goes on. A contractor who cannot explain how the window integrates with the moisture barrier is not the right person for this job. For broader renovation context on what egress work involves, egress windows in renovation is a useful reference.
Permit presentation: Bring your measured clear opening dimensions, the window manufacturer’s spec sheet showing the operable clear opening, and your well dimensions. Inspectors move faster when the paperwork is complete on the first visit.
Thermal performance for basement windows in Canada’s climate
Basement windows in Canada face conditions that above-grade windows do not. The frame sits partially or fully below grade, surrounded by soil that stays cold well into spring. The interior side faces conditioned living space. That temperature differential drives condensation on the glass and frame if the thermal performance is inadequate.
For Ontario and most of Canada, look for windows with a minimum Energy Rating (ER) of 25 or higher, and a U-factor of 1.6 W/m²·K or lower for the whole window assembly. Double-pane low-e glass with an argon fill is the practical standard for basement applications. Triple-pane units offer better performance but add weight, which matters when the rough opening is tight and the frame needs to be shimmed precisely.
Frame material also affects thermal performance at the perimeter. Vinyl frames with multi-chamber profiles provide better insulation at the edge of the glass than aluminum frames, which conduct cold directly to the interior surface. Fibreglass frames perform similarly to vinyl in most residential applications and tend to hold their shape better over decades of freeze-thaw cycling.
Interior condensation on a basement window is usually a sign of one of two problems: the window’s thermal performance is too low for the interior humidity level, or the interior perimeter is not air-sealed and warm moist air is reaching the cold frame. Fixing the air seal at the rough opening often resolves condensation before a window replacement is needed.
Materials and glazing options that meet energy and safety codes
Frame materials:
- Vinyl (PVC): The most common choice for basement replacement windows in Canada. Resistant to moisture, does not rot, and provides good thermal performance through multi-chamber profiles. Maintenance is minimal.
- Fibreglass: Dimensionally stable through temperature swings, strong, and thermally comparable to vinyl. Higher cost, but worth considering for larger openings where frame deflection is a concern.
- Aluminum: Durable and slim-profile, but thermally poor without a thermal break. Not recommended for below-grade basement applications in Canadian climates without a proper thermal break built into the frame.
- Wood: Rarely used in new basement installations due to moisture exposure risk. If present in an older home, inspect the frame carefully for rot before assuming it can be resealed rather than replaced.
Glazing options:
- Double-pane low-e with argon fill: The standard for compliant, energy-efficient basement windows in Canada. Low-e coating reduces heat loss and limits UV transmission.
- Triple-pane: Better thermal performance, heavier, and more expensive. Worthwhile in very cold climates or where heating costs are a priority.
- Tempered or laminated safety glass: Required in some applications where the window is close to grade or where breakage risk is elevated. Check local code requirements for your specific installation.
- Obscure glass: Useful for privacy in below-grade windows without sacrificing light. Does not affect egress compliance.
Grilles or divided lites added to any of these glazing options will reduce the clear opening. If egress is required, specify a clear-glass unit without internal grilles, or confirm with the manufacturer that grilles are between the panes and do not affect the operable opening.
Common installation challenges in existing foundations
Retrofitting a basement window into an existing foundation is rarely as simple as swapping one unit for another. The rough opening in a poured concrete or concrete block wall is fixed, and enlarging it is structural work that requires engineering review and a permit.
Rough opening size mismatch: The most frequent challenge is that the existing rough opening is sized for an older, smaller window that does not meet current egress requirements. Enlarging the opening in a concrete wall requires cutting with a diamond saw, installing a lintel to carry the load above, and potentially underpinning or shoring the wall during the work. This is not a DIY project.
Out-of-square openings: Older foundations settle and shift. A rough opening that measured square when the house was built may be out of square by 10–20 mm after decades of movement. Shimming a window into an out-of-square opening requires patience and experience to avoid racking the frame, which can prevent the window from opening fully and reduce the clear opening below the code minimum.
Moisture barrier continuity: In an existing wall, the original moisture barrier may be damaged, missing, or incompatible with modern materials. Integrating a new window into a compromised barrier requires stripping back the interior finish to expose the rough opening and installing new flashing that ties into whatever barrier exists. Skipping this step is the reason many basement windows leak within a few years of installation.
Lintel condition: In older block foundations, the lintel above the rough opening may be a simple steel angle that has corroded. Inspect it before installing a new window. A corroded lintel that is not replaced will continue to deteriorate and can eventually allow the masonry above to shift, distorting the rough opening and binding the window.
For a broader look at how egress work affects resale value and renovation decisions, that context is worth reviewing before committing to a scope of work.
Maintenance tips for window wells and drainage
A well-installed basement window can still develop problems if the well and surrounding drainage are not maintained. Most of the water damage we see around basement windows is not a window failure. It is a drainage failure that the window gets blamed for.
Annual inspection checklist:
- Clear leaves, debris, and soil from the well base every autumn before freeze-up.
- Check the well drain or gravel bed for blockage. Pour a bucket of water into the well and confirm it drains within a few minutes.
- Inspect the exterior caulk joint at the window perimeter. Look for cracking, separation, or gaps where the bead has pulled away from the frame or the masonry.
- Check the well wall for efflorescence (white mineral deposits), which indicates water is moving through the concrete.
- Confirm the well cover opens freely from inside.
Grade and drainage: The soil around the well should slope away from the foundation at a minimum grade of 5% (50 mm drop per metre) for the first 1.5 m. If the grade has settled flat or slopes toward the house, regrading is a straightforward fix that prevents a significant amount of water from reaching the well.
Caulk joint maintenance: Exterior caulk around basement windows typically needs inspection every three to five years in Ontario’s climate. A joint that has cracked or separated should be cleaned out and resealed before water gets behind the frame. Preventing water damage with effective window caulking starts with catching small failures before they become large ones. Leaving a failed joint through one winter can allow enough water infiltration to damage the rough opening framing, the interior drywall, and the insulation in a single season.
Key takeaways
A compliant basement egress window requires a minimum unobstructed clear opening of 0.35 m² with no dimension under 380 mm, measured when the window is fully open, not from the frame.
| Point | Details |
|---|---|
| Minimum clear opening | 0.35 m² (3.77 ft²) with no dimension under 380 mm, per OBC 9.9.10.1. |
| Measure the opening, not the frame | Divided lites, sash thickness, and hardware all reduce the clear opening below the marketed frame size. |
| Window-well clearance | Minimum 550 mm of clear space in front of the window; wells deeper than ~1.2 m require a permanently affixed ladder. |
| Sealing and flashing priority | Improper caulking and flashing is the leading cause of water infiltration around basement windows. |
| Kettlecontracting | Provides site measurement, integrated flashing, and professional caulking for basement window installations across the Greater Toronto Area. |
What we actually see on site
Most basement window problems we encounter come down to three recurring mistakes, and none of them are complicated. They are just easy to overlook when you are focused on getting the window in and the job done.
The first is measuring the frame instead of the clear opening. A homeowner orders a window based on the rough opening size, the window arrives, it gets installed, and nobody checks the actual clear opening until the inspector shows up. Sometimes it passes. Often it does not, because the operable portion of the window was never verified against the 0.35 m² requirement.
The second is poor sill flashing. We have opened up interior finishes around basement windows that were installed five or ten years ago and found the rough opening framing completely saturated. The window itself was fine. The sill pan was either missing or installed without end dams, so every drop of water that entered the frame joint ran straight into the wall. A proper sill pan with end dams, lapped correctly under the moisture barrier, costs almost nothing extra to install correctly the first time.
The third is cheap caulking applied without backer rod. A thin bead of acrylic latex over a 15 mm joint will crack within one freeze-thaw cycle. We see this constantly on windows that were installed by general contractors who treat caulking as an afterthought. The joint geometry matters as much as the product. When the bead is tooled correctly over a backer rod, it bonds to two surfaces and flexes with the building movement. Without the rod, it bridges the joint and tears.
If you are unsure whether your basement windows meet egress requirements, or if you have noticed drafts, condensation, or water staining around the frame, that is the point to call a specialist rather than wait. A small sealing failure caught early is a one-hour fix. Left through a Canadian winter, it becomes a structural repair.
How Kettlecontracting can help with your basement windows
Getting the measurement right is only the first step. The work that protects your basement long-term is the sealing, flashing, and moisture-barrier integration that happens during and after installation, and that work requires trade experience to do correctly.

Kettlecontracting provides site assessments for basement window installations across the Greater Toronto Area. On a site visit, we verify the clear opening dimensions, assess the existing moisture barrier and flashing condition, and provide a written scope that includes permit-ready measurements and integrated sealing details. We use polyurethane and modified silicone sealants rated for below-grade conditions, applied with proper backer rod and joint geometry that holds through Ontario’s freeze-thaw cycles. If you want to understand why caulking is trade-specific work before deciding whether to hire out or attempt it yourself, that is worth reading first. To get started, contact Kettlecontracting for a site assessment and written quote.
Useful sources
- OBC 9.9.10.1 — Egress windows or doors (CodeIndex): The primary Ontario Building Code clause governing egress window requirements, including the 0.35 m² minimum and the no-tools-required rule.
- OBC 3.7.2.1 — Window areas (CodeIndex): Covers window-well clearance requirements and how sash swing affects required clearances.
- Illustrated User’s Guide: NBC 2020 Part 9 (NRC Publications): The National Research Council’s illustrated guide to the National Building Code 2020, with worked examples and graphics for housing and small buildings.
- Window well installation bulletin (District of Peachland): Municipal guidance on window-well installation requirements, including drainage, ladder requirements, and cover rules.
- Safety codes bedroom windows tips (EBS Safety Codes, Alberta): Practical guidance on egress window styles and how casement versus sliding windows compare for clear opening compliance.
Local rules vary. Before ordering a window or starting any rough-opening work, confirm requirements with your municipal building department. The OBC sets the floor; your municipality may require more.
FAQ
What size should basement windows be?
A basement egress window must provide a clear opening of at least 0.35 m² with no dimension under 380 mm (15 in), as required by the Ontario Building Code. Non-egress basement windows have no minimum size requirement but must be properly sealed and insulated.
Does a 36 × 48 in window meet egress?
It depends on the window style. A casement unit at 36 × 48 in (approximately 900 × 1200 mm) typically delivers a clear opening above the 0.35 m² minimum. A slider of the same frame size often does not, because only the operable half counts toward the clear opening area and the resulting gap may fall below code minimum.
What is the difference between a basement window and a regular window?
The construction is similar, but basement windows are installed at or below grade, which means they face higher moisture exposure, require below-grade-rated sealants and flashing, and must meet egress requirements when installed in sleeping rooms. Above-grade windows do not face the same drainage and well-clearance considerations.
How do I know if my basement window meets egress code?
Open the window fully and measure the clear width and clear height of the unobstructed opening. Multiply those two measurements in metres. If the result is 0.35 m² or more, and neither dimension is under 380 mm, the window meets the basic OBC egress requirement. Confirm with your local building department for any municipal variations.
