
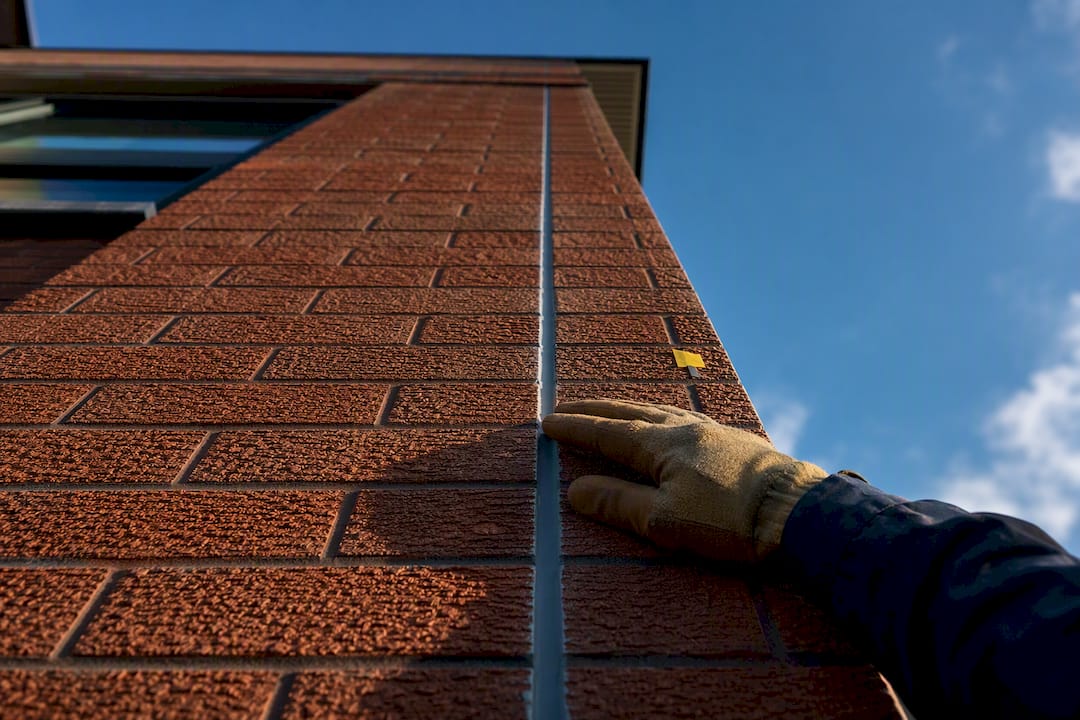
For most brick expansion joints, the right call is a low-modulus silicone or a purpose-built low-modulus polyurethane or polysulfide rated to ASTM C920, Grade NS, Use M, Class 25 or 50. The non-negotiable rule underneath all of it: install a backer rod, hold the sealant to roughly half the joint width, and never let mortar bridge the gap. Skip that, and even premium sealant fails early. Check the joint once a year, and call a pro the moment you see cracking or separation.
TL;DR:
- Use low-modulus silicone or purpose-built low-modulus polyurethane or polysulfide rated to ASTM C920, Grade NS, Use M, and Class 25 or 50 for most brick expansion joints.
- Ensure proper joint preparation by fully removing old sealant and mortar, installing a correctly sized backer rod, and tool the sealant into an hourglass profile to prevent early failure.
- Inspect joints annually and after severe freeze-thaw cycles for cracking, adhesion loss, or debris buildup, and schedule resealing before damage worsens.
- Select a higher movement class, like Class 50, if joints are wide or experience significant seasonal expansion to reduce the frequency of re-sealing.
- Obtain a professional quote that includes full rake-out, correct sizing, primer testing, and a site inspection for optimal long-term sealant performance.
Table of Contents
- Which sealant chemistry actually works on brick expansion joints?
- How do you read a sealant datasheet before you buy?
- How do you prepare and apply sealant to a brick expansion joint?
- How often should you inspect brick expansion joints?
- What mistakes cause brick sealant to fail early?
- What a quality reseal job actually looks like
- Kettle Contracting’s approach to expansion joint resealing
- Sources
- FAQ
Which sealant chemistry actually works on brick expansion joints?
Brick moves. Not dramatically, but enough over a Canadian winter that the material sealing the joint has to stretch and compress thousands of times without tearing or letting go of the brick face. That’s the whole job. Pick based on how each chemistry handles that cycling, not what’s cheapest on the shelf at the hardware store.
Low-modulus silicone is the standard recommendation for most brick expansion joints, and there’s a good reason it shows up on so many specs: it handles UV exposure and weather cycling better than almost anything else on the market, according to BIA Technical Note 18A. It stays flexible in January and doesn’t chalk out after a few summers facing south.
Low-modulus polyurethane bonds aggressively to masonry and takes foot traffic or abrasion better, which matters on joints near grade or on horizontal surfaces. Most polyurethanes need a primer on brick, so read the datasheet before you commit.
Polysulfide sealants show up less often on residential work but hold their own in industrial or marine-adjacent applications where long-term chemical resistance matters more than upfront cost.
- Silicone: best UV and weathering performance, minimal maintenance
- Polyurethane: strong adhesion, needs primer, handles abrasion well
- Polysulfide: specialised, excellent longevity in harsh exposure
Higher movement classes (Class 50 and up) are more commonly available in silicone and polyurethane formulations built specifically for expansion joints. That’s the direction to lean if the joint spacing on your building is wide or the movement calculations come in high.
How do you read a sealant datasheet before you buy?
Every sealant that’s actually built for this job carries an ASTM C920 rating, and that rating tells you almost everything you need to know before you spend a dollar. Grade NS means non-sag, which is what you want in a vertical joint. Use M confirms the manufacturer has tested it specifically for masonry substrates, not just glass or metal.
The class number, 25, 50, or 100/50, tells you how much the sealant can stretch and compress as a percentage of the original joint width. A Class 25 sealant handles plus or minus 25%. Class 50 doubles that range. As a rule of thumb: the wider your joint spacing or the greater the anticipated seasonal movement, the higher the class you want. Many specifiers default to Class 50 specifically to reduce how often joints need to be cut in, according to BIA’s guidance on accommodating expansion.

Quick number to know: joint widths on brick veneer typically run 10 to 12 millimetres depending on wall length and expected movement, per Canada Brick’s movement joint guidance. If your existing joints are noticeably narrower than that and the wall is long, undersized joints are likely part of why the sealant keeps failing.
Before you sign off on a product, run through this checklist:
- Adhesion to brick and mortar (check the primer requirement)
- Application temperature range, since Ontario job sites see wide swings
- Expected service life stated on the datasheet, not the sales sheet
- Colour match options for the brick and mortar tone
- Movement class matched to your joint spacing, using our guide to joint width and sealant performance
How do you prepare and apply sealant to a brick expansion joint?
This is where most jobs succeed or fail, and it’s rarely the sealant’s fault when they fail. It’s almost always the prep.
- Rake out the old sealant and any mortar contamination completely. Full depth, full width. Leaving a skin of old material or mortar dust behind is the single biggest reason resealed joints don’t last.
- Size and install backer rod roughly 25% larger than the joint opening. That oversizing is what keeps the rod compressed and in place instead of slipping. Where possible, install backer rod during the original masonry work so mortar never gets a chance to bridge the gap, a best practice mason contractors have followed for decades.
- Set sealant depth at roughly half the joint width, with an absolute minimum of 6.4 millimetres (a quarter inch), per BIA’s technical guidance. Too deep, and the sealant can’t stretch properly. Too shallow, and it tears.
- Run a field adhesion test before committing to the whole wall, especially if the datasheet calls for a primer. Five minutes of testing on a scrap section saves you from redoing an entire elevation.
- Tool the sealant into an hourglass profile, thinner in the middle than at the edges. That shape keeps movement concentrated in the flexible centre and avoids three-sided adhesion, the sealant bonding to the backer rod as well as both brick faces, which is a fast track to tearing.
Pro Tip: Don’t tool a joint with your finger and a smear of soap on a windy October afternoon and call it done. Cold air stiffens sealant fast, and a rushed tooling job locks in a bad hourglass shape you won’t be able to fix without cutting it all out again.
Let the sealant cure fully before exposing it to standing water or heavy movement. Most products list cure time right on the tube, and it’s worth actually reading it.
How often should you inspect brick expansion joints?
Once a year, minimum, and after any major freeze-thaw season. What you’re looking for isn’t complicated once you know the signs.
- Hard or brittle sealant that’s lost its stretch, often chalky or cracked at the surface
- Adhesion loss, where the sealant has visibly pulled away from either brick face
- Mortar bridging, where debris or mortar has filled part of the joint and stiffened it
- Gaps or voids where sealant has torn through the middle
WR Meadows Canada puts brittleness and adhesion loss at the top of the failure list, and that tracks with what shows up on most Ontario walls. South-facing walls and parapet caps take more UV and thermal cycling, so they tend to fail first, sometimes years ahead of shaded elevations on the same building.
If you spot a small gap, a strip of temporary flashing tape buys you time until scheduling allows a proper reseal. If the damage is widespread, or you’re seeing cracking in the brick itself rather than just the joint, that’s when to bring in a structural assessment rather than a caulking crew alone.
What mistakes cause brick sealant to fail early?
Nearly every early failure I’ve seen traces back to one of four things, and none of them are exotic.
- Mortar bridging: leftover mortar in the joint stiffens the whole assembly and stops it from moving. It’s the most common cause of joint failure, full stop.
- Three-sided adhesion: skip the backer rod, or get the depth wrong, and the sealant bonds to the back of the joint as well as both sides. It tears within a season or two.
- Generic hardware-store silicone: kitchen and bath silicone has no movement rating and no business on an exterior masonry joint, even though it looks identical in the tube.
- Wrong primer or wrong temperature: applying sealant below the manufacturer’s minimum temperature, or skipping a primer the datasheet actually calls for, sets the joint up to fail before it’s even cured.
Pro Tip: A joint that looks perfectly smooth after five years on an older building isn’t always good news. Sometimes it means the original crew never raked it out properly, and the sealant’s just sitting on top of old mortar, never actually working.
What a quality reseal job actually looks like
Sealing a brick expansion joint properly isn’t a weekend caulk-gun job, and I’ll say that plainly because it’s true. In a freeze-thaw climate, a joint that’s sealed wrong doesn’t just look bad, it lets water behind the brick face, and that water freezes, expands, and starts cracking masonry that would otherwise last a hundred years.
A professional crew runs a few checks before the first tube ever gets loaded into a gun: field adhesion testing on the actual substrate, verification that the joint geometry matches what the wall’s movement actually requires, and a primer trial if the product calls for one. None of that shows up on a homeowner’s radar, but it’s the difference between a reseal that lasts fifteen years and one that’s peeling back in three.
A proper quote accounts for access (scaffolding or lift rental on tall elevations), backer rod and primer materials, and the labour of doing full-depth rake-out rather than caulking over what’s already there. If a quote skips straight to “sealant application” with no mention of rake-out or backer rod, that’s a red flag worth asking about.
— Felix
Kettle Contracting’s approach to expansion joint resealing
A professional expansion joint reseal approach involves full rake-out, correctly sized backer rod, masonry-compatible primer where the product calls for it, and a sealant chemistry matched to the specific exposure and movement rather than just whatever’s on hand.

A site visit allows verification of joint width, checking for mortar contamination, and running an adhesion test before quoting, helping ensure the quote reflects the actual condition of the walls rather than a guess. If you’re gathering information for your own quote comparison, it helps to have photos of the current joint condition and rough measurements of joint width and wall length on hand. For a broader look at how joint sealing fits into a full building envelope, our building weatherproofing guide covers where expansion joints fit alongside window and door perimeters. Ready to get your joints assessed? Reach out through our expansion joint caulking page to book a site visit and get a quote built around what your walls actually need.
Sources
- Movement Joint CB 7A (Canada Brick guidance)
- Mason Contractors guidance on joint materials and failures
FAQ
Do brick expansion joints need to be sealed?
Yes. An unsealed expansion joint lets water behind the brick veneer, and in a freeze-thaw climate that water expands as ice and cracks masonry. Sealing also keeps debris and mortar from bridging the gap and locking up the joint’s ability to move.
What type of caulk should you use for brick expansion joints?
A low-modulus silicone or a purpose-built low-modulus polyurethane or polysulfide, rated to ASTM C920 Grade NS, Use M, Class 25 or 50. Generic hardware-store silicone with no movement rating isn’t built for this job.
What is the best sealant for masonry expansion joints?
Low-modulus silicone is the most commonly recommended choice for brick because of its weathering performance, though a movement-rated polyurethane is a solid option where added abrasion resistance or a stronger primer bond is needed. Match the class (25, 50, or higher) to your joint’s actual movement.
How deep should sealant be in a brick expansion joint?
Roughly half the joint width, with a minimum of 6.4 millimetres (a quarter inch), backed by a correctly sized backer rod underneath. Depth that’s too shallow or too deep both shorten the sealant’s working life.
How often should brick expansion joints be inspected?
Once a year, and again after a harsh winter. Look for hardened or brittle sealant, gaps, or spots where the material has pulled away from the brick face.
