
Caulking is defined as the process of sealing gaps, cracks, and joints in a building’s envelope to stop unwanted air movement between conditioned and unconditioned spaces. The role of caulking in energy efficiency is direct: when air leaks are sealed, your heating and cooling systems work less to maintain a comfortable indoor temperature. Sealing air leaks reduces heating and cooling energy use by roughly 10% to 20%. That is a meaningful reduction on any utility bill, and it comes from one of the least expensive maintenance tasks a homeowner or property manager can carry out. In Ontario’s climate, where temperatures swing from below freezing in January to humid heat in July, a tight building envelope is not optional. It is the foundation of a comfortable, energy-efficient home.
How does caulking improve building envelope integrity?
Air leakage is one of the most significant and least visible sources of energy waste in residential and commercial buildings. Air follows the path of least resistance, meaning it moves through the largest gaps first, such as the joints around window frames, door perimeters, foundation sills, and pipe penetrations. Once conditioned air escapes through these openings, your furnace or air conditioner runs longer to compensate.
Windows alone account for 25% to 40% of residential energy loss due to drafts around frames. That figure is striking because most homeowners focus on window glass quality, when the frame perimeter is often the bigger problem. Sealing those perimeters with the right caulk is one of the highest-impact steps you can take.
The role of caulking in building envelope integrity is to maintain a continuous air barrier. Insulation slows heat transfer through walls, but it does very little to stop air movement through gaps. Caulking and insulation work together: one blocks air, the other resists heat flow. Without both, you are leaving energy savings on the table.
Key locations where air leakage is most common include:
- Window and door frame perimeters, especially where the frame meets the wall cladding
- Foundation sill plates, where the wood framing sits on the concrete foundation
- Joints between wall sections, around electrical outlets on exterior walls, and at plumbing penetrations
- Attic hatch perimeters and any seam where two different building materials meet
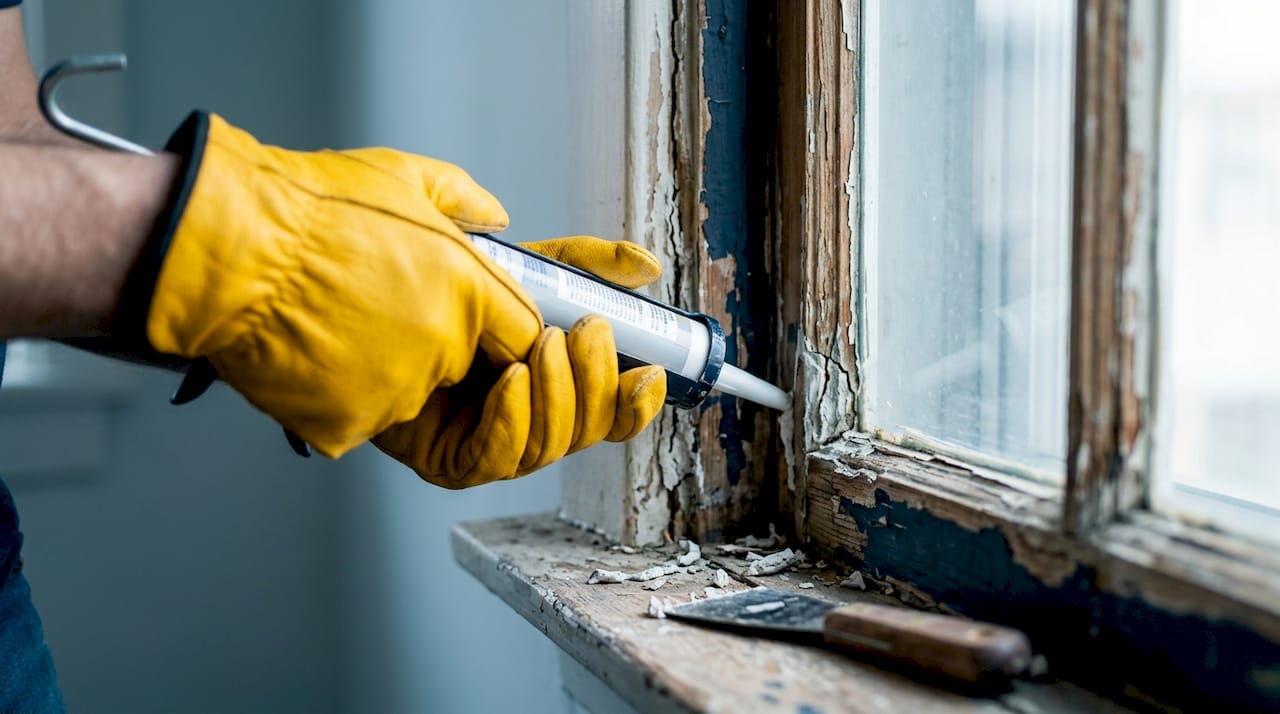
Pro Tip: Run your hand slowly along window frames and door edges on a cold, windy day. If you feel cool air, that gap is costing you money every month. Mark those spots with tape before you start caulking.
Which caulk materials work best for energy efficiency?
Choosing the right sealant matters as much as applying it correctly. The wrong product in the wrong location will crack, shrink, or lose adhesion within a season or two, reopening the air leak you just sealed.
| Caulk type | Best use | Flexibility | Durability in freeze-thaw |
|---|---|---|---|
| Latex (acrylic) | Interior gaps, paintable surfaces | Low to moderate | Moderate |
| Silicone | Windows, doors, wet areas | High | Excellent |
| Polyurethane | Exterior joints, gaps over 6 mm | Very high | Excellent |
| Elastomeric | Large movement joints, masonry | Very high | Excellent |
| Hybrid (silicone-latex) | General exterior use, paintable | High | Very good |
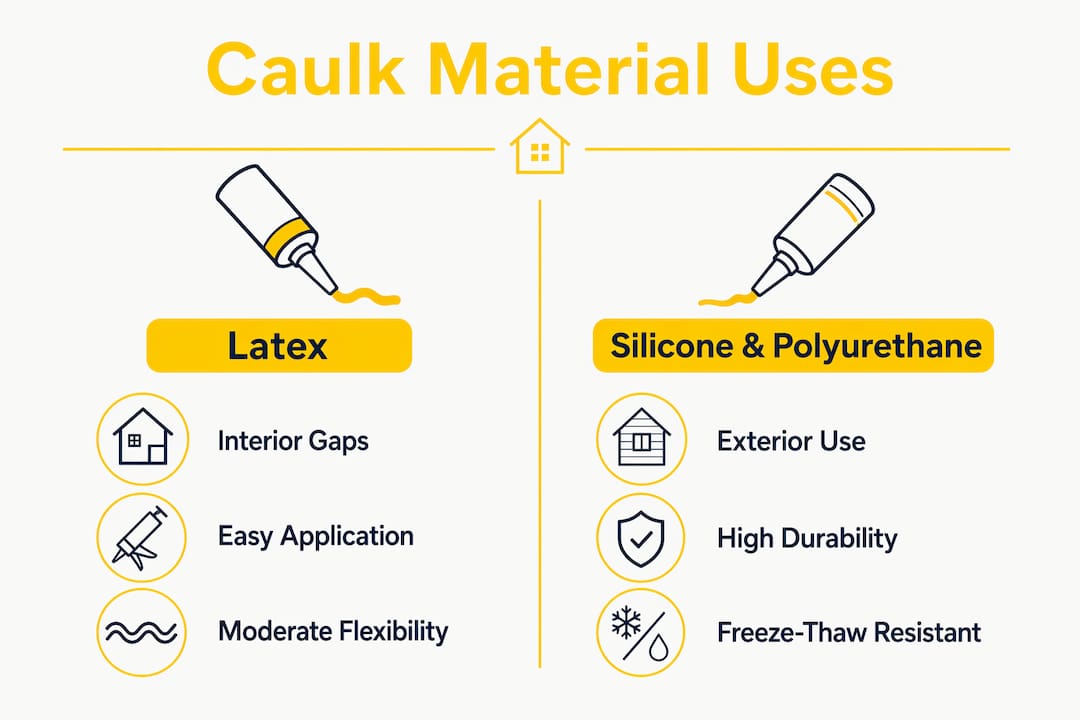
For Ontario homes, silicone and polyurethane products are the most reliable choices for exterior applications. They remain flexible through repeated freeze-thaw cycles without cracking or pulling away from the substrate. Latex caulk is fine for interior gaps where movement is minimal and painting is required.
For more demanding applications, targeted interior air sealants like Prosoco TIAS are designed specifically to seal critical envelope connections from inside the building. These elastomeric products maintain a tight air barrier even when exterior sealing is not practical, which is useful in retrofit projects where you cannot easily access the outside of a wall assembly.
Cost is rarely a barrier here. A small DIY caulking project typically takes one to two hours with materials costing between $3 and $30. A quality caulking gun runs another $15 to $40. The return on that investment, measured in reduced utility costs, is realised within the first heating season.
Pro Tip: For exterior window and door caulking in Ontario, choose a product rated for at least 50% joint movement and a temperature range of at least minus 40°C to plus 80°C. Check the product data sheet before you buy, not after.
Where and when should you apply caulking for the best results?
Timing and location both affect how well caulking performs. Applying sealant in the wrong conditions or skipping high-priority areas reduces the energy savings you will actually see.
The best time to caulk exterior joints is when temperatures are between 5°C and 25°C and no rain is forecast for at least 24 hours. Caulk applied in cold or wet conditions does not adhere properly and may fail before the first winter is over.
Here is a practical sequence for prioritising caulking work on a typical home:
- Window and door perimeters. Start here because windows account for a large share of residential heat loss. Remove old, cracked caulk completely before applying new product.
- Foundation sill plates. The joint between the wood sill and the concrete foundation is a major air leakage point in older homes. Seal it from the interior with a foam backer rod and polyurethane caulk.
- Exterior wall penetrations. Pipes, wires, and vents that pass through exterior walls leave gaps around them. Seal these with an appropriate sealant rated for the substrate material.
- Attic and basement transitions. Air moves vertically through a house. Sealing the top and bottom of the wall assembly stops stack effect air movement, which is especially significant in two-storey homes.
- Expansion joints and seams. In multi-unit or commercial properties, expansion joints between building sections need regular inspection and resealing as part of a scheduled maintenance programme.
Caulk takes about 24 hours to fully cure, though this varies with temperature and humidity. Avoid touching or stressing the joint during that period. In cooler weather, allow closer to 48 hours before exposing the joint to rain or heavy condensation.
Whether you do this work yourself or hire a professional depends on the scope and access. Single-storey window and door caulking is manageable for a careful DIY homeowner. Multi-storey buildings, masonry substrates, or large commercial envelopes are better handled by a professional caulking contractor who has the equipment and product knowledge to do the job correctly the first time.
Pro Tip: Never caulk over old, failing sealant. The new product will bond to the old caulk, not the substrate, and will fail just as quickly. Remove the old material completely with a utility knife and a caulk remover tool before you start.
What problems does failing caulking cause for energy efficiency?
Old or damaged caulking does not just reduce energy savings. It creates a chain of problems that can become expensive to fix.
- Increased air infiltration. Cracked or shrunken caulk reopens the gaps it was meant to seal. Failing caulking leads to conditioned air escaping, increased HVAC workload, and higher utility costs. For commercial properties, this effect multiplies across dozens or hundreds of windows and joints.
- Moisture intrusion. Air leaks carry moisture. When warm, humid interior air meets a cold surface inside a wall cavity, it condenses. That moisture reduces insulation effectiveness and can lead to mould growth and wood rot over time.
- Adhesion failure from poor preparation. Proper surface preparation before caulking is the single most important factor in how long a seal lasts. Surfaces must be clean, dry, and free of old sealant. Skipping this step is the most common reason caulk fails prematurely.
- Freeze-thaw damage. In Ontario, joints expand and contract with every temperature cycle. A sealant that lacks sufficient flexibility will crack within one or two winters. Once cracked, it allows water into the joint, which freezes, expands, and widens the gap further.
- Reduced insulation performance. Moisture in wall cavities compresses and degrades fibreglass and cellulose insulation. A wall that was rated at R-20 when built may perform significantly below that value if air leaks have allowed moisture to accumulate over several years.
Property managers in particular benefit from scheduled inspection programmes that catch failing caulk before it causes secondary damage. A proactive approach costs far less than repairing water-damaged framing or replacing degraded insulation.
How does caulking fit into a broader energy efficiency strategy?
Caulking is the starting point, not the complete solution. The greatest energy savings come when air sealing is combined with insulation upgrades and mechanical improvements.
| Measure | Estimated savings | Best combined with |
|---|---|---|
| Caulking alone | 10% to 20% on heating/cooling | Weatherstripping, insulation |
| Air sealing plus insulation | Up to 15% on total energy costs | HVAC tune-up |
| Full envelope upgrade | 20% to 30% or more | Heat pump, HRV system |
The EPA estimates that combining air sealing with insulation saves homeowners around 15% on heating and cooling costs. That figure reflects the synergy between the two measures: caulking stops air movement, and insulation slows heat transfer through the building assembly. Neither measure is fully effective without the other.
An energy audit is the most reliable way to identify where your building is losing the most energy. Auditors use blower door tests to pressurise the building and locate air leakage points precisely. The audit report gives you a prioritised list of improvements, and caulking almost always appears near the top because it delivers a high return for a low cost.
When your HVAC system does not have to compensate for constant air leakage, it runs fewer cycles, reaches set temperature faster, and experiences less wear. That translates to a longer equipment lifespan and fewer repair calls, which matters especially for property managers overseeing multiple units.
For a detailed look at how window caulking connects to insulation performance, Kettlecontracting has published a thorough breakdown of how these two systems interact in Ontario homes.
Key takeaways
Caulking is the most cost-effective first step in any energy efficiency upgrade because it directly stops the air leakage that forces heating and cooling systems to overwork.
| Point | Details |
|---|---|
| Air sealing reduces energy costs | Sealing gaps cuts heating and cooling energy use by 10% to 20% per year. |
| Windows are the highest-priority target | Window and door perimeters account for 25% to 40% of residential energy loss. |
| Material choice determines longevity | Silicone and polyurethane sealants withstand Ontario’s freeze-thaw cycles far better than latex. |
| Surface prep is non-negotiable | Removing old caulk and ensuring dry surfaces is what makes a new seal last. |
| Caulking works best alongside insulation | Combined air sealing and insulation upgrades can save up to 15% on total energy costs. |
What 25 years of caulking in Ontario has taught me about energy savings
Most homeowners I talk to underestimate how much air leakage is costing them. They replace windows, upgrade their furnace, and add attic insulation, but they skip the caulking because it seems too simple to make a real difference. In my experience, that is exactly backwards.
I have walked through homes where new triple-pane windows were installed but the frames were never sealed to the wall. The glass was performing perfectly. The gap around the frame was undoing all of it. The homeowner’s heating bill had barely moved after a $15,000 window replacement.
What I have found is that the quality of the prep work matters more than the brand of caulk. A $6 tube of silicone applied to a properly cleaned, dry surface will outlast a $20 premium product applied over old, dusty sealant. Every time. Ontario’s winters are not forgiving of shortcuts, and a joint that fails in February is not just an energy problem. It is a water problem waiting to happen.
For property managers, the lesson is scheduling. Buildings that get a caulking inspection every two to three years catch small failures before they become expensive ones. The cost of a tube of caulk and an hour of labour is nothing compared to repairing a water-damaged window frame or replacing mould-affected drywall.
My honest advice: start with a thorough inspection of every window and door perimeter, every foundation joint, and every penetration through your exterior walls. Fix what is failing. Then combine that with insulation where it is needed. You will see the results on your utility bills within one season.
— Felix
Get your windows sealed right before winter arrives

Proper preparation is what separates a caulking job that lasts a decade from one that fails in two winters. Before you apply a single bead of sealant, the surface needs to be clean, dry, and free of old material. Kettlecontracting has put together a comprehensive window preparation guide that walks you through every step, from removing old caulk to choosing the right product for your substrate. If you want results that hold up through Ontario’s freeze-thaw cycles, that guide is the right place to start. For homeowners who prefer to leave it to a professional, Kettlecontracting serves residential and commercial properties across the Greater Toronto Area with the same attention to detail on every project.
FAQ
How much energy can caulking actually save?
Sealing air leaks with caulk reduces heating and cooling costs by roughly 10% to 20%. When combined with insulation upgrades, total savings can reach 15% or more on annual energy costs.
How long does caulk take to cure before it is effective?
Caulk typically takes about 24 hours to fully cure, though cooler temperatures and higher humidity can extend that to 48 hours. Avoid exposing the joint to rain or physical stress during the curing period.
What is the best caulk for windows in a Canadian climate?
Silicone or polyurethane caulk is the best choice for exterior window sealing in Canada. Both products remain flexible through freeze-thaw cycles and maintain adhesion on common substrates like vinyl, wood, and aluminium frames.
Should I caulk windows myself or hire a professional?
Single-storey window and door caulking is manageable as a DIY project if you prepare surfaces properly and choose the right product. Multi-storey buildings, masonry substrates, or large commercial envelopes are better handled by a professional to get lasting results.
How often should caulking be inspected and replaced?
Inspect exterior caulking every two to three years, and replace any sections that show cracking, shrinkage, or separation from the substrate. In Ontario’s climate, proactive maintenance prevents air leaks from becoming water damage problems.
