Many GTA homeowners invest in new insulation expecting lower energy bills, only to find their comfort barely improves. The reason is almost always the same: air leaks were left unsealed. As insulation performance research shows, adding insulation over unsealed penetrations can significantly underperform because air carries both heat and moisture right through your building envelope. Caulking and insulation are not separate upgrades. They are two parts of the same system, and understanding how they work together is the most practical step you can take toward a warmer, more efficient home.
Table of Contents
- Understanding air sealing and insulation basics
- Choosing materials: Caulking, foam, and backer rod explained
- Targeting trouble spots: Attics, windows, and basements
- Smart diagnostics: Locating invisible leaks and planning upgrades
- What most guides miss about caulking and insulation
- Explore expert caulking and insulation solutions
- Frequently asked questions
Key Takeaways
| Point | Details |
|---|---|
| Seal before insulating | Always air-seal gaps before adding insulation for optimal energy savings. |
| Match material to gap | Use caulk for small cracks, foam for mid-sized holes, and backer rod for large gaps. |
| Focus on trouble spots | Prioritise attics, windows, and basements for air sealing in GTA homes. |
| Diagnostics drive results | Blower-door audits identify hidden leaks and help plan effective upgrades. |
| Drainage always matters | Caulking isn’t a substitute for proper drainage or flashing solutions. |
Understanding air sealing and insulation basics
Insulation slows the transfer of heat through solid materials like walls, ceilings, and floors. Air sealing, on the other hand, stops air from physically moving through gaps, cracks, and penetrations in your building envelope. Both are necessary because they address two completely different problems.
Think about it this way. You can have the thickest batt insulation on the market installed in your attic, but if there is an unsealed gap around a plumbing stack or an attic hatch with no weatherstripping, cold air will bypass the insulation entirely. The insulation never gets the chance to do its job.
Proper weatherization practice focuses on air leaks at specific details like attic hatches, plumbing penetrations, and electrical boxes, and pairs those sealing efforts with insulation to meaningfully improve comfort and reduce energy bills. In GTA homes, which face harsh winters and humid summers, this pairing is especially critical.
Where air leaks are most common in GTA homes:
- Attic hatches and pull-down stairs
- Plumbing and electrical penetrations through top plates
- Rim joists in basements and crawl spaces
- Window and door frames, particularly older wood frames
- Recessed light fixtures that penetrate the ceiling
- Gaps around ductwork passing through floors and ceilings
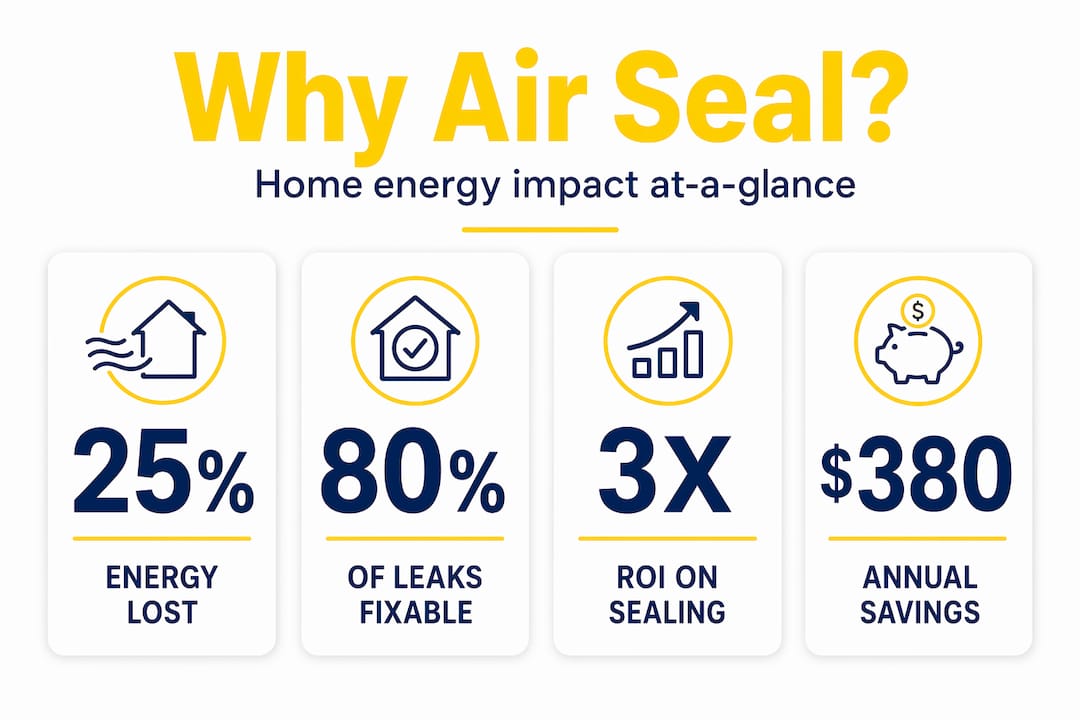
Statistic: Studies consistently show that air leakage accounts for 25 to 40 percent of heating and cooling energy loss in typical Canadian homes. Sealing those leaks before adding insulation can dramatically improve the return on your insulation investment.
The environmental impact of your caulking choices is also worth considering. Reducing air infiltration lowers your heating and cooling demand, which directly reduces your home’s carbon footprint. And if you want a clearer picture of the financial upside, saving money with caulking is one of the most cost-effective first steps a GTA homeowner can take. Beyond caulking, upgrading insulation after sealing air leaks compounds those savings significantly.
Choosing materials: Caulking, foam, and backer rod explained
Not every gap gets the same treatment. The size of the gap, the materials on either side, and whether those materials move seasonally all determine which product you should reach for.
Gap size and material movement are the two key factors: use caulk for small stationary cracks, low-expansion foam for larger penetrations, and backer rod for larger gaps to control sealant depth before applying foam or caulk over top.
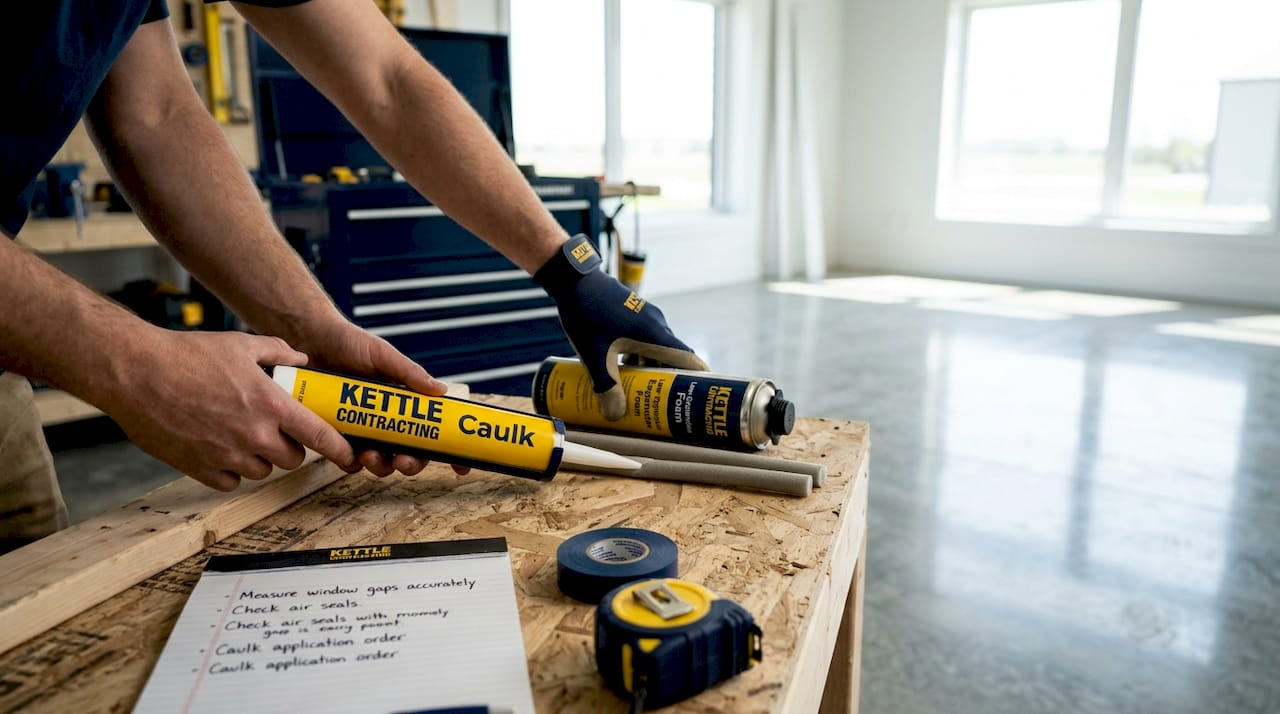
Here is a clear breakdown of each material:
| Material | Best for | Gap size | Key limitation |
|---|---|---|---|
| Paintable latex caulk | Window and door frames, interior trim | Under 6 mm (1/4 inch) | Not flexible enough for large gaps |
| Silicone caulk | Exterior joints, wet areas | Under 6 mm (1/4 inch) | Cannot be painted; needs clean, dry surface |
| Low-expansion foam | Plumbing/electrical penetrations, rim joists | 6 mm to 25 mm (1/4 to 1 inch) | Can warp window frames if wrong type used |
| Backer rod + caulk | Large gaps in masonry, expansion joints | Over 25 mm (1 inch) | Requires correct rod diameter for good adhesion |
Common mistakes to avoid:
- Using standard caulk on gaps wider than 6 mm. It will shrink, crack, and fail within one or two seasons.
- Applying expanding foam around window frames without using a low-expansion product. Standard foam can generate enough pressure to bow the frame and affect how the window operates.
- Skipping backer rod on large gaps. Without it, you end up with a sealant bead that is too deep, which prevents proper curing and wastes material.
- Applying caulk over a dirty or damp surface. Adhesion fails quickly, and you are back to square one within months.
Pro Tip: For any gap wider than 6 mm, use backer rod first. It gives the caulk or foam a proper backing surface and controls the depth of the sealant, which is what determines how well it cures and how long it lasts.
Choosing between caulk vs sealants can also make a significant difference in longevity. For exterior applications in GTA’s freeze-thaw climate, choosing the right caulk for durability is not just about performance today but about avoiding repeat repairs every few years. If you have already attempted sealing and seen poor results, reviewing common window caulking mistakes can help you identify exactly where the process went wrong.
Targeting trouble spots: Attics, windows, and basements
Knowing your materials is only useful if you know where to apply them. In GTA homes, three areas account for the majority of air leakage and heat loss: attics, windows and doors, and basements.
| Location | Primary issue | Recommended treatment |
|---|---|---|
| Attic hatch | Warm air escaping into cold attic | Weatherstrip hatch, add rigid insulation panel |
| Top plate penetrations | Air bypassing insulation through gaps | Low-expansion foam around all pipes and wires |
| Window frames | Seasonal movement creates gaps | Flexible silicone or polyurethane caulk |
| Rim joists | Cold air infiltration, moisture risk | Rigid foam cut-to-fit, then foam-sealed edges |
| Basement penetrations | Pipes and conduits creating pathways | Low-expansion foam, fire-rated where required |
Window caulking’s role in your home’s overall insulation performance is often underestimated. A window with a proper thermal rating can still allow significant heat loss if the frame-to-wall junction is not properly sealed.
Step-by-step approach for the three main areas:
-
Attic: Locate the attic hatch and check for weatherstripping. If none exists, add a compressible foam or rubber seal. Then inspect all plumbing, electrical, and duct penetrations through the top plate. Seal each one with low-expansion foam before adding or upgrading attic insulation.
-
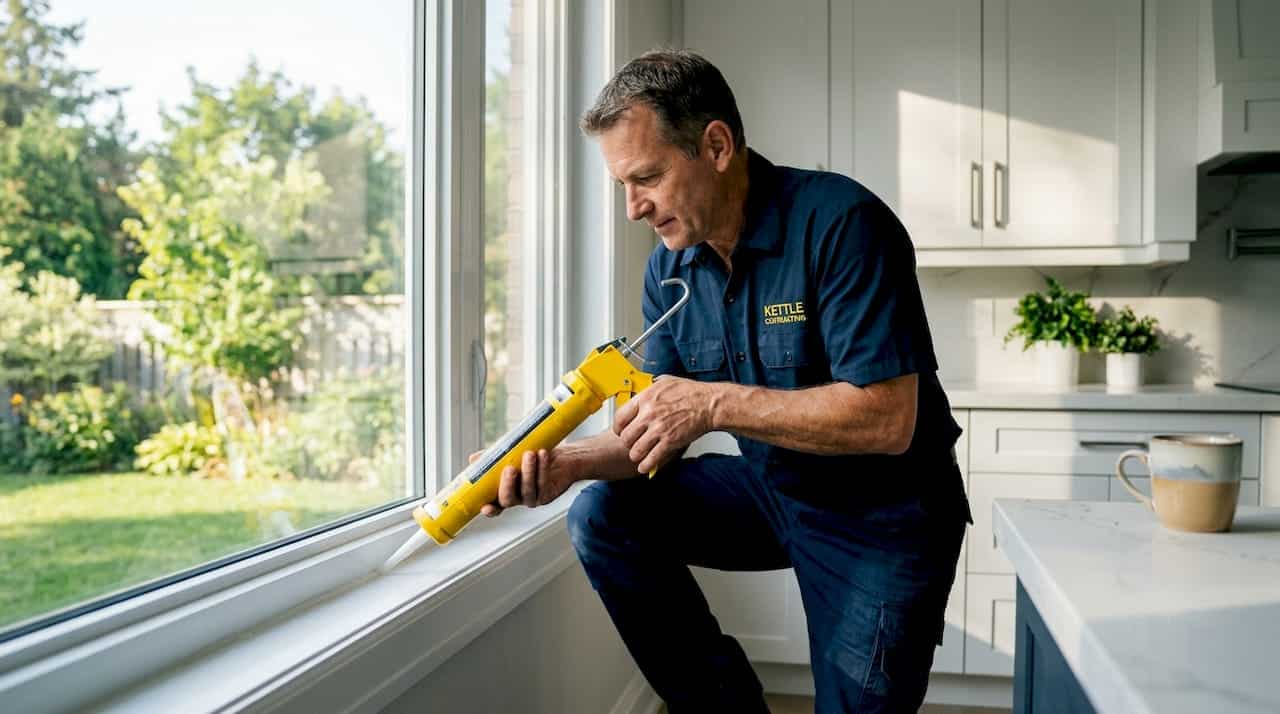
Windows and doors: Run your hand along the interior perimeter of each window on a cold, windy day. Any cold air you feel indicates a gap. Remove old, cracked caulk completely, clean the surface, and apply a fresh bead of flexible exterior-grade caulk. Interior gaps between the window frame and drywall should be filled with a paintable latex caulk.
-
Basement rim joists: This is one of the most impactful areas in any GTA home. Cut rigid foam insulation to fit snugly between each joist bay, then seal the perimeter of each piece with low-expansion spray foam. This combination addresses both air infiltration and thermal resistance in one step.
“For Ontario basements, the building envelope concept includes both vapour control and a continuous air barrier. Rim joist insulation and air sealing is treated as part of the building envelope under Ontario code requirements.”
Ontario’s building code sets specific requirements for basement insulation and air barriers that go beyond what many other provinces require. If your basement renovation does not include a continuous air barrier alongside the insulation, it may not meet current code standards. Proper weatherization at these details is what separates a compliant, comfortable basement from one that continues to leak energy year after year.
Pro Tip: Use an energy savings calculator to estimate the financial impact of sealing your windows before committing to a full window replacement. In many cases, proper sealing extends the useful life of existing windows by several years and delivers measurable savings in the meantime. For additional guidance on reducing drafts throughout your home, consulting an HVAC professional alongside your caulking work can help you address the full picture.
Smart diagnostics: Locating invisible leaks and planning upgrades
Even after you have sealed every visible crack, some air leaks remain completely hidden. They hide behind drywall, under insulation batts, and around recessed fixtures that look perfectly fine from below.
A blower-door audit is the most effective diagnostic tool available. A technician depressurises the home using a calibrated fan mounted in an exterior door, then uses thermal imaging or smoke pencils to reveal exactly where air is entering. This turns guesswork into a prioritised list of repairs.
Steps for planning a smart air sealing upgrade:
- Start with a visual inspection of all penetrations in the attic floor, basement ceiling, and around windows and doors.
- Note any areas where insulation has been disturbed or compressed, as this often signals air movement underneath.
- Schedule a blower-door audit if you suspect significant hidden leakage or if your energy bills remain high despite previous sealing work.
- Use the audit results to prioritise repairs by volume of air loss, not just by visibility.
- Seal all identified leaks before adding or upgrading insulation. Adding insulation first can actually make hidden leaks harder to find and fix.
- After sealing, verify results with a follow-up audit or at minimum a hand-check on a cold day.
Understanding how caulking affects your energy bills is also useful context when planning your upgrades. Sealing is almost always the highest-return first step before any insulation upgrade.
Pro Tip: Always complete your air sealing work before adding insulation, not after. Insulation installed over unsealed gaps traps the problem out of sight and makes future repairs far more difficult and costly.
It is also worth noting that indoor air quality is directly affected by uncontrolled air infiltration. Gaps that let cold air in can also allow pollutants, pollen, and moisture-laden air to enter. If you are concerned about air quality diagnostics alongside your sealing work, addressing filtration and ventilation as part of your overall plan makes sense.
What most guides miss about caulking and insulation
Most articles on this topic treat caulking as a simple maintenance task. Apply a bead here, smooth it out there, and you are done. After years of working on GTA properties through every season, we can tell you that approach misses some of the most important lessons.
The first thing most guides skip is drainage. Caulking is not a substitute for proper flashing and drainage paths at window openings. Exterior window caulking is not a complete substitute for drainage and flashings. If flashing fails or weep holes get blocked, caulking becomes a temporary fix that traps water behind the wall instead of directing it away. Always inspect flashing before reaching for a caulking gun on any exterior window.
The second lesson is that over-sealing can cause real problems. When a building is sealed too tightly without a proper mechanical ventilation strategy, moisture has nowhere to go. In GTA’s humid summers, that can lead to condensation inside wall assemblies, mould growth, and structural damage that is far more expensive than the original air leak. Sealing and ventilation must be planned together.
The third point is about sequencing. We have seen properties where insulation was upgraded first and caulking was treated as an afterthought. The result is almost always disappointing. Insulation added over unsealed gaps performs well below its rated value, and the homeowner ends up spending twice: once on insulation and again on remediation when moisture problems appear.
Our honest advice is this: diagnose first, seal second, insulate third. That sequence is not just best practice. It is the difference between a project that delivers lasting results and one that requires revisiting every few years.
Explore expert caulking and insulation solutions
If you are ready to move from planning to action, working with a professional team makes a measurable difference in the quality and longevity of your results.

At Kettle Contracting, we work with GTA homeowners and property managers to assess their specific sealing needs and apply the right materials in the right sequence. Whether you are starting with window caulking preparation or managing a more complex project like caulking for historic homes, we bring the same level of care and precision to every detail. Our team also understands window caulking in insulation systems and how to integrate sealing work with your broader energy efficiency goals. Reach out to us today to discuss your property and get an honest assessment of where to start.
Frequently asked questions
Which gaps should be caulked and which insulated?
Gaps under 6 mm should be caulked, gaps between 6 mm and 25 mm are best treated with low-expansion foam, and anything larger should have backer rod installed first before foam or caulk is applied over top.
Can air leaks behind insulation be detected easily?
Not without the right tools. A blower-door diagnostic can locate hidden leaks behind walls or under insulation, giving you a clear map of where to focus your sealing efforts.
Is caulking alone enough to prevent water damage?
No. Caulking at window openings is not a substitute for proper flashing and drainage paths. If drainage fails, caulking can trap water rather than redirect it, making the problem worse.
Does insulation improve comfort if gaps are left unsealed?
Not fully. Insulation over unsealed penetrations underperforms because moving air carries heat and moisture right past the insulation, reducing its effective thermal resistance.
How does Ontario basement insulation differ from other areas?
Ontario code requires both a continuous air barrier and vapour control in basements, including specific treatment of rim joists as part of the building envelope, which goes beyond requirements in many other Canadian provinces.
Recommended
- The Role of Window Caulking in Home Insulation – Kettle Contracting
- Caulking and Your Home Insurance: The Surprising Connection Every Homeowner Should Know – Kettle Contracting
- Caulking Windows: A Beginner’s Guide – Kettle Contracting
- How to Choose the Right Caulk for Your Climate – Kettle Contracting