
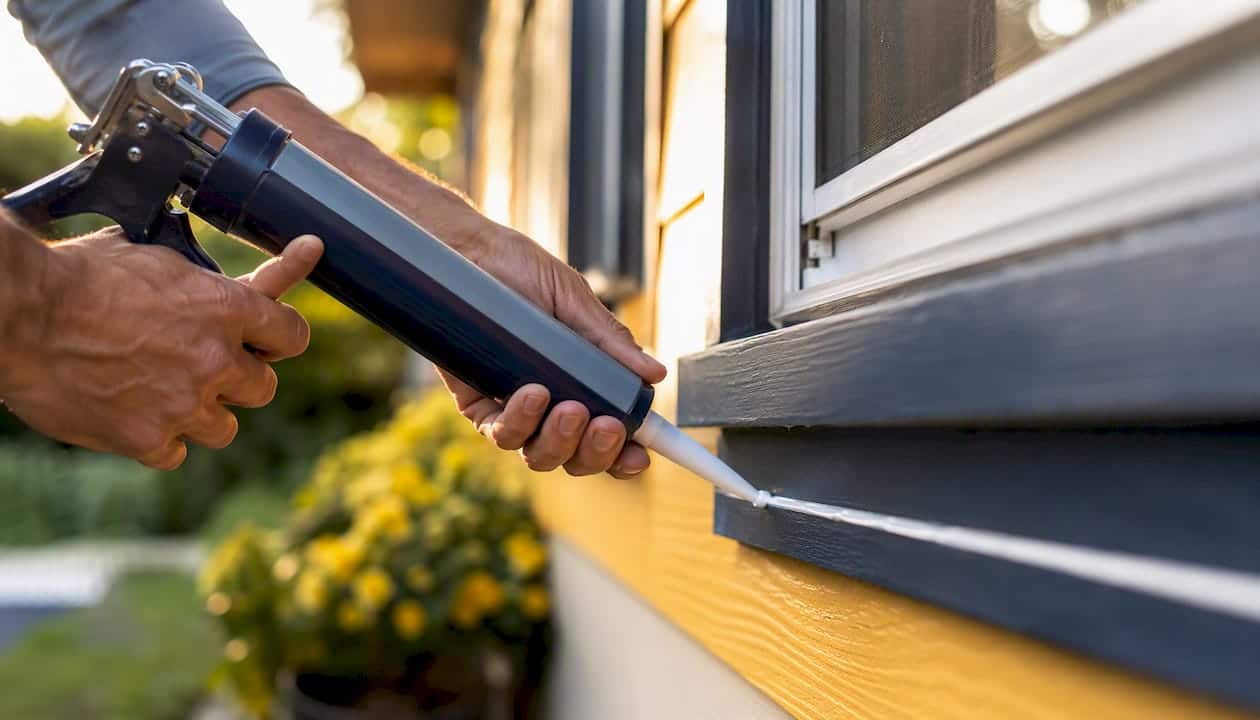
Professional caulking is one of the highest-probability, lowest-cost returns you can make on a house before selling it or just to protect what you already own. Most jobs run a few hundred dollars, take a day or two, and pay you back through avoided repairs, better buyer perception, and modest energy savings. Here’s what you need to know before you decide.
- Cost scale: most single-job caulking work (windows, doors, tub surrounds) falls in the low hundreds of dollars, not thousands.
- Main benefits: water protection, better airtightness, and a “well-kept” impression that buyers and inspectors both notice fast.
- Timing: schedule caulking before you list, and ideally before the freeze-thaw season stresses old joints further.
Further down, you’ll find the actual cost bands, a step-by-step payback calculation, and a real before-and-after case study from Kettlecontracting’s own jobs in the Greater Toronto Area.
Key Takeaways
Professional caulking delivers a high-probability return through avoided repair costs, improved buyer perception, and modest energy savings, especially when done before listing or before winter.
| Point | Details |
|---|---|
| Rule-of-thumb cost | Most single-job caulking work runs $75–$600 per opening depending on scope and access. |
| Payback reminder | Treat conservative energy savings as a floor; add avoided-repair and marketability value on top. |
| Sequencing rule | Air-seal and fix visible caulking failures before cosmetic upgrades or bigger renovations. |
| Documentation matters | Keep receipts, product data sheets, and written scope so agents and inspectors can verify work fast. |
| Where Kettlecontracting fits | Kettlecontracting handles window, door, and exterior joint caulking across the GTA with written scopes and warranty terms. |
Table of Contents
- What ROI actually means for a small repair like caulking
- What caulking actually delivers: water, air, and curb appeal
- What common caulking jobs actually cost
- How do you calculate the ROI on a caulking project?
- Real caulking case studies: resale prep, damage avoided, and energy sealing
- Should you caulk before a bigger renovation or a sale?
- Questions to ask before hiring a caulking contractor
- How appraisers and inspectors treat fresh caulking
- What 25 years of caulking jobs actually teaches you
- How Kettlecontracting handles your caulking project
- Sources
- FAQ
What ROI actually means for a small repair like caulking
When people talk about caulking improvements ROI examples, they’re usually mixing up two different ideas, cost recapture and contributory value. Cost recapture asks “will I get my $400 back in a resale bump?” Contributory value asks a smarter question: “does this repair make a buyer more willing to pay your asking price, and does it help the house sell faster?”
Appraisers work almost entirely in the second frame. They look at what buyers in your market are actually willing to pay for a home in good condition versus one showing neglect, not at what the last contractor charged. Fresh, clean caulking rarely shows up as its own appraisal line item, but it removes a red flag that would otherwise cost you leverage in negotiations. Advanced Appraisals notes that market demand and buyer preference drive contributed value far more than the raw cost of the work itself.
Caulking earns its return through four channels, and they rarely show up on the same invoice:
- Direct energy bill savings from reduced air leakage around windows, doors, and penetrations.
- Avoided repair costs from water that never got in because the seal held.
- Improved buyer perception during showings and inspections.
- Faster sale, because fewer inspection flags mean fewer renegotiation delays.
Major system repairs like roofing or structural work still carry more consistent dollar-for-dollar value in an appraisal. Caulking plays a different role. It’s cheap insurance against those bigger repairs ever becoming necessary, and it signals to a buyer that nothing else has been ignored either.
What caulking actually delivers: water, air, and curb appeal
Break it down into the specific things caulking does for a house, and the ROI story gets a lot less abstract.
Water intrusion prevention is the big one. Failed caulk around windows, door frames, and tub surrounds is one of the most common entry points for water into wall cavities and subfloors. Once water gets behind a wall, you’re not looking at a caulking bill anymore. You’re looking at drywall replacement, mould remediation, and possibly structural repair.
Airtightness matters more than most homeowners assume. Gaps around window and door frames let conditioned air escape year round, and a Carleton University analysis found air sealing measures actually outperformed their predicted energy savings in the program data reviewed, with whole-envelope retrofits cutting natural gas use by roughly 35% in that sample. That’s a stronger result than most homeowners expect from something as unglamorous as caulk.
Curb appeal and perceived maintenance work together during a showing. Cracked, yellowed, or peeling caulk around a front door or exterior trim reads as neglect even when the rest of the house is in good shape. Buyers extrapolate from small details, fairly or not.
Reduced structural risk rounds it out. Every dollar spent keeping water out of a wall cavity is a dollar you’re not spending later on rot repair, insulation replacement, or mould remediation.
Here’s how those four benefits stack up across the most common job types:
| Job type | Typical cost band | Likely payback range | Secondary benefits | Expected lifespan |
|---|---|---|---|---|
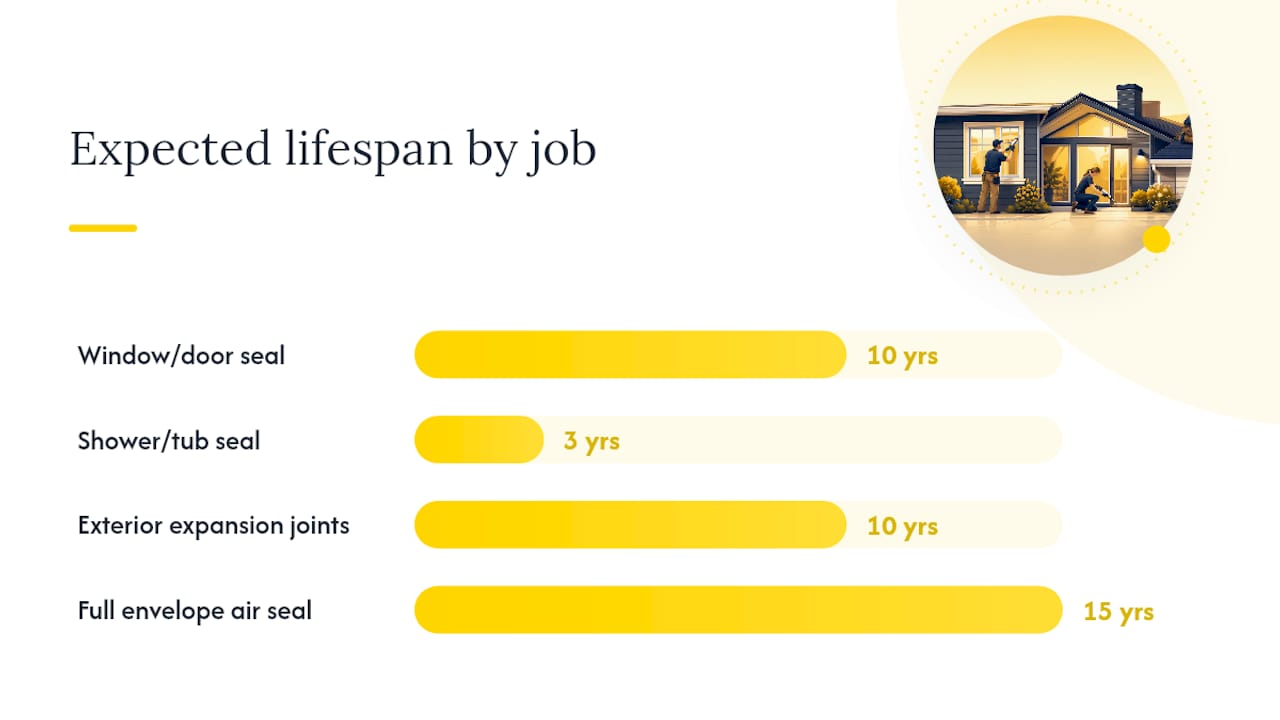
| Window/door seal (per opening) | $75–$600 | Multiple years, energy plus avoided repair | Draft reduction, improved showing impression | 10 years (silicone) |
| Shower/tub seal | Low hundreds per unit | Avoided mould remediation cost | Cleaner inspection report, avoided renegotiation | 3 years |
| Exterior expansion joints | Priced per linear metre, varies with access | Avoided masonry/water damage | Protects structure, reduces freeze-thaw cracking | 10 years |
| Full building envelope air seal | Higher total, scoped per project | Strongest combined payback (energy plus marketability) | Best overall airtightness and buyer impression | 15 years |
Window caulking and weatherstripping costs commonly run $75 to $600 per project, and where you land in that range depends on how many openings you’re doing and what shape the existing seal is in. Air sealing is consistently one of the highest-value envelope measures in a Canadian home simply because heating and cooling dominate residential energy use.
What common caulking jobs actually cost
Homeowners usually want one number, and the honest answer is that it depends on scope. Here’s what drives price on a typical job.
| Job type | Typical materials | Typical cost band | Price drivers |
|---|---|---|---|
| Windows (per opening) | Silicone or hybrid polymer | $75–$600 per opening | Old caulk removal, sill condition, number of openings |
| Doors (per opening) | Silicone or polyurethane | $100–$600 per opening | Threshold condition, weatherstrip integration |
| Interior bathroom/shower | Mildew-resistant silicone | $150–$600 per unit | Substrate prep, tile condition, mould remediation if present |
| Exterior expansion joints | Polyurethane or silicone, backer rod | Priced per linear metre | Access (scaffolding, height), joint width, substrate type |
A few variables move these numbers more than people expect. Access is the big one: caulking a second-storey window run with scaffolding or lift rental costs more than a ground-floor job, full stop. Removing old, failed caulk and prepping the substrate properly often takes longer than applying the new bead, and that labour time is where most of your invoice actually goes, not the tube of caulk itself. Silicone costs more upfront than latex but lasts decades rather than a few years, which changes your real cost-per-year even though the sticker price looks higher. Bundling every window and door into one visit typically lowers your per-opening cost compared to piecemeal jobs spread across a year.
Pro Tip: Book exterior caulking in late spring or early fall if you can. Caulk needs a stable temperature range to cure properly, and doing the work right before winter’s freeze-thaw cycle sets in gives it the best shot at lasting its full lifespan instead of failing prematurely.
How do you calculate the ROI on a caulking project?
You don’t need a spreadsheet model to figure out whether a caulking job is worth doing. Three steps get you a workable answer in about ten minutes.
- Estimate your net project cost. Get a written quote, then check whether any of the work qualifies for Canada Greener Homes Grant support or reduces your net outlay through other efficiency incentives available in your area.
- Estimate annual savings and avoided risk, conservatively. Combine a modest energy savings estimate with a discounted probability of avoiding a future repair. Don’t assume the highest possible number. Use the low end of any range you find.
- Compute simple payback, then layer on a contributory-value scenario. Divide net cost by annual savings for your payback period in years, then separately note how the work might shorten days on market or remove a negotiation point during inspection.
Here’s a worked example using numbers in line with real project costs. A homeowner spends a moderate amount on professional window caulking across several openings. Conservative energy savings come at a modest annual rate, plus a small allowance for avoided water damage risk given the home’s age and exposure. Straight energy payback alone takes multiple years, which sounds long until you add the other side of the ledger: during a pre-listing inspection, that fresh sealing work removed what would have been a flagged item, and the listing sold within its first two weeks on market with no renegotiation over window condition.
That’s the piece pure energy-payback math misses. Air sealing has outperformed predicted savings in program data, and the marketability benefit often arrives faster and matters more to a seller than the utility bill line item. Treat the energy number as a floor, not the whole story, and read our cost-benefit breakdown of professional window caulking for a deeper look at how the math shifts by home type.
Real caulking case studies: resale prep, damage avoided, and energy sealing
Numbers on a spreadsheet only go so far. Here’s what these jobs look like in practice.
- Pre-listing prep job: A GTA homeowner called Kettlecontracting three weeks before listing after a home inspector flagged deteriorating exterior caulking around window frames and a side door. The scope covered eight windows and one exterior door, completed in a single day at a cost in the low hundreds per opening. The listing agent later confirmed the buyer’s inspection came back with zero moisture-related flags, and the sale closed without a repair credit negotiation, something the seller had specifically wanted to avoid after their neighbour’s sale stalled over a similar issue.
- Avoided water damage: A commercial property owner in our service area had a small gap forming at an exterior expansion joint, barely visible from ground level. Left alone through another Ontario winter, that gap would likely have let meltwater behind the cladding, and a repair involving cladding removal and interior drywall work would have run into the thousands. The joint reseal cost a fraction of that.
- Energy-focused sealing: A homeowner sealing four older double-hung windows saw a conservative estimated annual saving in the range other Canadian data supports, with the added benefit that the home’s blower-door test result improved measurably. Envelope work like this often shows modest measured energy gains on their own but strong non-energy benefits, including comfort and reduced draft complaints.
Timelines matter if you’re planning around a listing date. A straightforward window and door caulking job typically runs from initial call to completed work within one to two weeks, factoring in a site visit for the quote and one day of actual labour. Exterior expansion joint work or full-envelope projects can take longer depending on scaffolding access and weather windows. Book earlier than you think you need to, particularly in spring and fall when demand for exterior work peaks. For more on how this plays into resale specifically, see how door caulking can improve home resale value.
Should you caulk before a bigger renovation or a sale?
Caulking should almost always come before cosmetic upgrades, and usually before larger renovations too. Here’s the sequencing logic in three steps.
- Address safety and visible failure first. If caulking is cracked, missing, or visibly failed in photos a buyer or inspector would take, fix it before anything cosmetic. It’s cheap, fast, and removes an obvious red flag.
- Air-seal before you invest in bigger cosmetic work. Sequencing air sealing ahead of items like insulation upgrades or window replacement protects the value of that later investment, since a poorly sealed envelope undercuts the benefit of a better window or added insulation.
- Time it to your weather window and your listing date. Get exterior work done before listing photos are taken and before an inspector walks the property, not after an offer is already on the table.
Climate plays a real role in urgency. Ontario’s freeze-thaw cycles are hard on exterior sealant. Water gets into hairline gaps, freezes, expands, and widens the gap further, which is why exterior caulk here tends to need attention more often than in milder, drier climates. Homes in heavier-precipitation regions see the same acceleration on water intrusion risk specifically. If you’re in a freeze-thaw zone, treat exterior caulking as a maintenance item on a shorter clock than the manufacturer’s lifespan rating suggests.
Questions to ask before hiring a caulking contractor
Not all caulking work is equal, and the wrong hire can leave you worse off than if you’d done nothing.
- Ask how much experience they have with high-movement joints (expansion joints, brick-to-frame transitions) versus straightforward interior work.
- Ask what product brands and formulations they use, and why, for your specific application.
- Ask whether they remove all old caulk and clean the substrate before applying new sealant, or whether they caulk over what’s already there.
- Ask about warranty terms and whether they stand behind the work for a specific number of years.
- Ask for references or photos from similar jobs, ideally ones that have had a season or two to prove out.
Watch for these red flags before you sign anything:
- A quote based on price alone with no mention of scope or prep work.
- Reluctance to remove existing failed caulk, since sealing over old material almost never holds.
- No written scope of work, just a verbal number.
- A one-size-fits-all material choice regardless of joint type or exposure.
A proper written estimate should specify the materials being used, the surface preparation steps involved, warranty terms, expected cure time before the area can get wet or be exposed to weather, any access requirements like scaffolding, and a realistic timeline from start to finish. If a contractor won’t put these details in writing, that’s worth treating as a warning sign on its own. Our guide on professional caulking versus DIY for resale covers this in more depth if you’re weighing your options.
How appraisers and inspectors treat fresh caulking
Appraisers don’t typically assign a specific dollar figure to a caulking job on a report. What they do is factor in overall condition and buyer market demand, and visible, functional maintenance supports that condition assessment even when it doesn’t move a specific number.
Two quick examples show how this plays out at the inspection stage. Fresh exterior seals around windows and doors routinely prevent water-ingress notes from ever appearing on an inspection report, which means one less item for a buyer to use as negotiation leverage. A well-documented shower reseal, done before listing, can head off a mould remediation line item entirely, since inspectors flag visible mould and deteriorated grout as a matter of course.
Keep your receipts, the product data sheet for whatever sealant was used, and a written scope of work from your contractor. If a buyer’s agent or an appraiser has questions about recent maintenance, being able to hand over documentation on the spot moves things along a lot faster than a verbal assurance that “it was done a couple years back.” Real estate seller-prep guidance from CREA lists small repairs like fresh caulking among the cost-effective fixes worth doing before you list.
What 25 years of caulking jobs actually teaches you
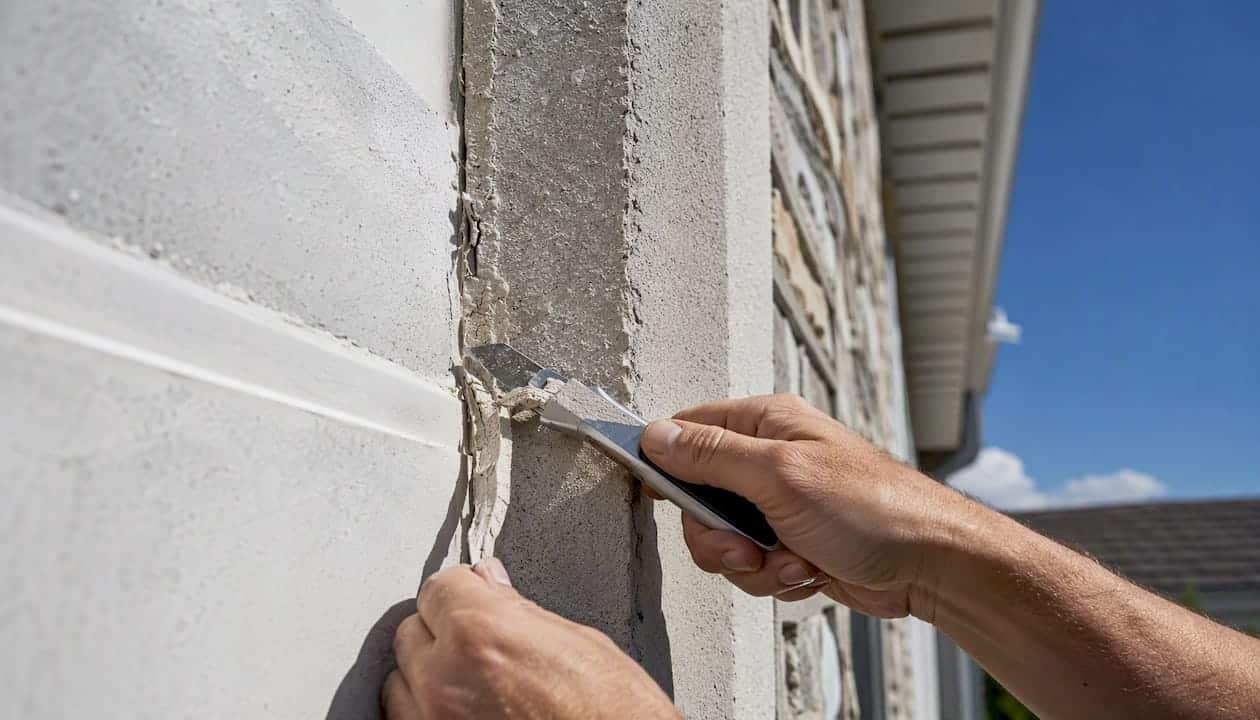
The biggest thing I’ve learned doing this work across Durham Region and the GTA is that most caulking failures aren’t really caulk failures. They’re prep failures. Somebody caulked over old, cracked sealant to save an hour, and eighteen months later the whole bead pulls away because it never bonded to a clean surface in the first place. That’s the corner that gets cut most often, and it’s the one that costs homeowners the most in the long run.
The other thing worth saying plainly: caulk doesn’t cure the same in every season. Silicone and polyurethane both need a stable temperature range to set up properly, and rushing exterior work in a cold snap or a heat wave sets you up for premature failure no matter how good the product is.
Pro Tip: Always insist your contractor removes every trace of old caulk before applying new sealant, and if you’re scheduling exterior work, ask what temperature range they need for a proper cure. A rushed job in the wrong weather is money you’ll spend again in two years instead of ten.
How Kettlecontracting handles your caulking project
Kettlecontracting is the option that skips the guesswork other homeowners run into with one-off handyman jobs or DIY tube-and-gun fixes that don’t survive a full Ontario winter. Our crews specialize in exactly this work across the Greater Toronto Area: professional window and door caulking, exterior expansion joint sealing, shower and tub reseals, and full building-envelope air sealing for both residential and commercial properties.

When you book an on-site quote, expect a full inspection of the affected areas, an itemized scope of work in writing, photos where relevant, a realistic timeline, and clear warranty terms before any work starts. We remove old caulk properly and prep every substrate the same way regardless of how small the job looks, because that’s the step that determines whether the work lasts through freeze-thaw seasons or fails again in two years. If you’re prepping to list, read our guide on preparing your windows for caulking so you know what to expect before we arrive. Have your listing date and a few photos of the problem areas ready, and reach out to request a quote for your property.
Sources
- Household benefits from energy efficiency retrofits: Implications for net zero housing policy (Carleton University research paper)
- How upgrades and renovations impact market value — Advanced Appraisals
- Window caulking & weatherstripping cost calculator (CostToRenovate)
- Canada Greener Homes grant — Natural Resources Canada
FAQ
What renovation adds the most value before selling?
Envelope work like air sealing and caulking often delivers the best ratio of cost to marketability because it’s cheap, fast, and removes visible red flags during inspection, though major systems like roofing carry more consistent dollar-for-dollar appraisal value.
What increases a home’s value the most?
Buyer demand and overall condition drive contributory value more than any single renovation, and appraisers weigh market comparables over the raw cost of any individual repair.
What does a $10,000 bathroom remodel typically include?
A budget in that range usually covers a shower or tub reseal, new fixtures, updated flooring, and paint, but it won’t stretch to a full layout change; a proper caulking job alone represents a small fraction of that total.
What renovations are worth doing before listing a home?
Small, visible maintenance items like fresh caulking, touch-up paint, and fixing obvious wear are worth doing before larger cosmetic renovations, since they remove inspection flags and support a faster, cleaner sale.
How long does a typical caulking project take from start to finish?
Most window and door caulking jobs run from initial call to completed work within one to two weeks, including the quote visit and a single day of labour, though larger envelope projects can take longer.
