

Commercial exterior sealants typically vary in lifespan depending on chemistry and exposure conditions. Silicone can last much longer in the right application; polyurethane and polysulfide often have medium service lives; butyl and asphalt-based products generally have shorter durability. The single most important action your facility team can take right now is to schedule annual inspections for high-risk joints and budget for selective replacement before water gets in.
Act now — quick priorities:
- Inspect annually: expansion joints, window perimeters, flat roof penetrations, and curtain wall interfaces
- Inspect biennially: lower-risk exterior cladding and sheltered façade panels
- Trigger immediate repair: any visible gap, adhesion loss, cracking, or active water ingress
- Post-event check: after major storms, deep freezes, or extreme heat events
- Call a specialist: Kettlecontracting provides commercial condition assessments and selective replacement programmes across the Greater Toronto Area
Proactive recaulking is the highest-value envelope maintenance activity you can schedule. The cost of replacing a failing joint is a fraction of what you will spend remediating water-damaged substrate, insulation, or interior finishes.
Table of Contents
- How long does commercial sealant actually last by chemistry?
- What accelerates sealant deterioration in Canadian commercial buildings?
- What does sealant failure look like before water damage starts?
- How often should you inspect commercial sealants?
- Canadian standards and research that back these recommendations
- When should you repair, and when should you replace?
- How to replace commercial sealant correctly
- How do you choose the right sealant for a Canadian climate?
- How to budget a commercial sealant replacement programme
- Key takeaways
- What field experience actually teaches you about sealant lifespan
- Kettlecontracting’s commercial sealant services for GTA property managers
- Useful sources
- FAQ
How long does commercial sealant actually last by chemistry?
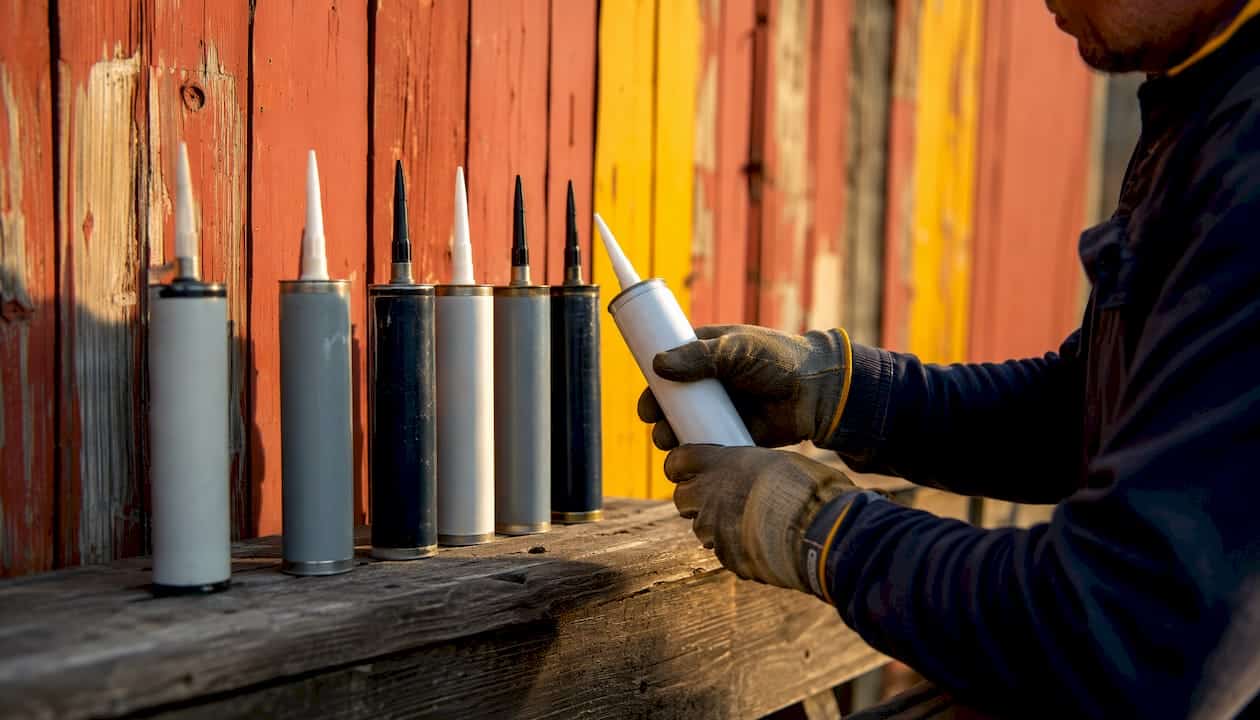
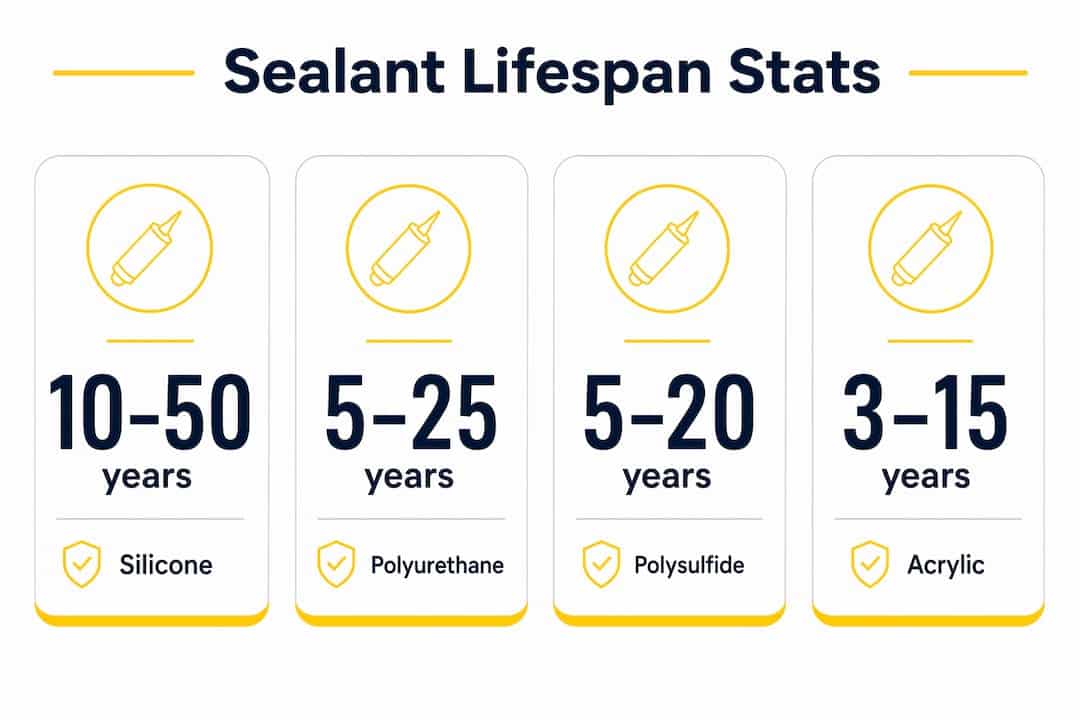
Lifespan ranges for commercial sealants vary considerably by chemistry, exposure, and installation quality. The table below maps each sealant type to realistic service-life windows, movement capability, and the joints where each performs best.
| Sealant type / chemistry | Typical lifespan range | Joint movement capability | Best uses | Substrate compatibility / primer | Approx. replacement frequency |
|---|---|---|---|---|---|
| Silicone | 10–50 years | High (±25–50%) | Curtain walls, glazing, window perimeters, high-UV façades | Glass, aluminium, coated metals; primer often required on porous substrates | Every 15–25 years |
| Polyurethane | 5–20 years | Medium (±20–25%) | Concrete, masonry, expansion joints, parking structures | Concrete, masonry, wood; primer typically required | Every 7–15 years |
| Polysulfide | 5–20 years | Medium (±20–25%) | Glazing, below-grade joints, chemical-exposure areas | Concrete, masonry, glass; primer often required | Every 7–15 years |
| Butyl / asphalt | 2–10 years | Low (±5–20%) | Flashing laps, low-movement joints, temporary seals | Metal, masonry; limited substrate range | Every 3–7 years |
| Hybrid (STPE / MS polymer) | 10–25 years | High (±25%) | Multi-substrate façades, mixed-material joints, renovation work | Broad compatibility; primer often not required | Every 7–15 years |
A few things worth noting here. Manufacturer warranty periods are not the same as expected service life. Warranty terms often understate real exposure variability and should never replace inspection-based decision-making. A 20-year warranty on a silicone product does not mean the joint will perform for 20 years on a north-facing concrete parapet in Sudbury. Installation quality, joint geometry, and substrate preparation all shift the outcome significantly. Silicone often outlasts polyurethane in external, non-abrasive applications, but it picks up more surface dirt and has lower tear resistance — worth knowing when specifying exposed joints on a light-coloured façade.
What accelerates sealant deterioration in Canadian commercial buildings?
Ontario and the broader Canadian climate are genuinely hard on sealants. Freeze-thaw cycling is the most destructive single factor: joints expand and contract repeatedly through winter, fatiguing the sealant at its bond line. Research modelling across Canadian climates shows freeze-thaw cycles and joint movement are the primary drivers of crack growth and time-to-failure, with some datasets reporting roughly 50% of sealants failing within 10 years and 95% within 20 years.
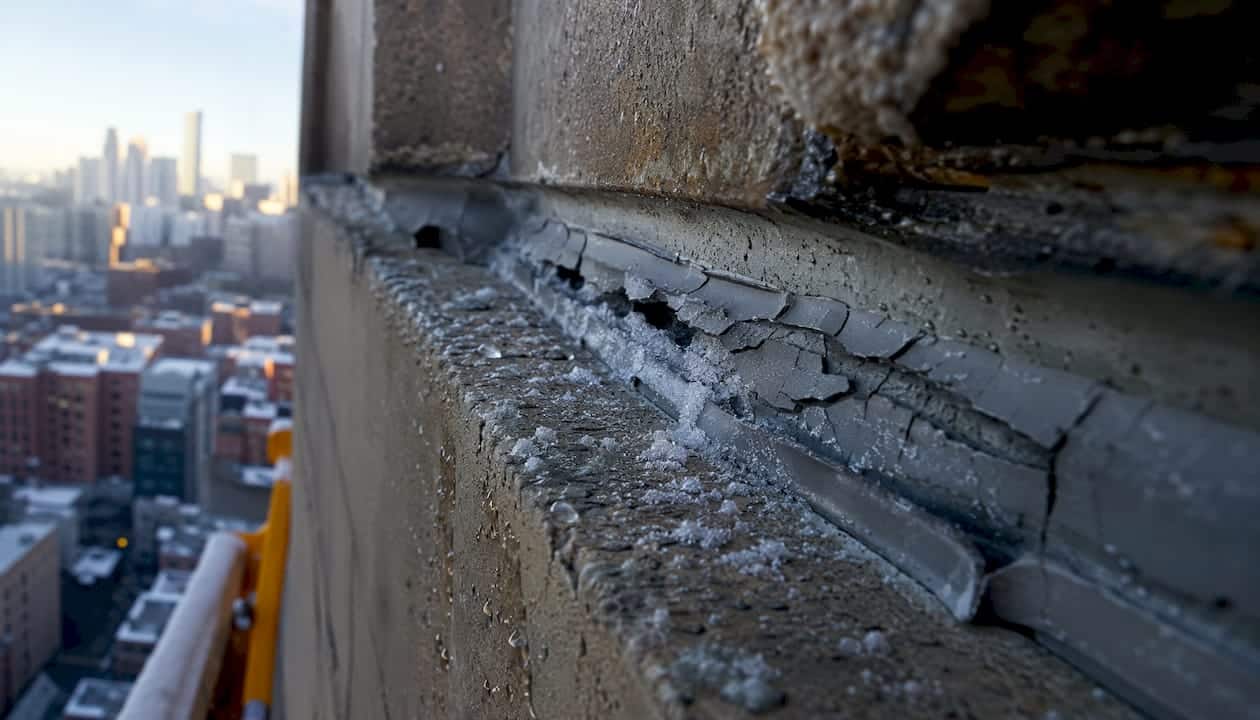
Sealant degradation is almost always multi-factorial. Cyclic movement, UV radiation, and moisture act together rather than in isolation, producing fatigue cracking faster than any single factor would on its own.
The main deterioration drivers to track:
- Freeze-thaw and diurnal temperature swings: repeated expansion and contraction cycles fatigue the sealant, especially at bond lines
- UV exposure: breaks down polymer chains over time, causing surface chalking, hardening, and loss of elasticity
- Joint movement fatigue: joints that move more than the sealant’s rated movement capacity will fail prematurely
- Moisture cycling: repeated wetting and drying accelerates adhesion loss, particularly on porous substrates
- Pollutants and chemicals: acid rain, de-icing salts, and exhaust deposits degrade sealant chemistry and stain adjacent surfaces
- Improper substrate preparation: dust, oil, frost, or residual old sealant on the substrate surface are the leading cause of early adhesion failure
- Incompatible materials: some sealants react with adjacent materials (e.g., certain silicones bleed oils that stain porous stone)
Building design amplifies these risks. A joint that relies on sealant as the only line of defence against water — with no backup flashing or drainage detail — will fail faster and cause more damage when it does.
Pro Tip: The two interventions that yield the biggest lifespan gains are correct joint geometry (width-to-depth ratio of 2:1) and thorough substrate preparation. Skipping either one is the most common reason a new sealant fails within two or three years.
What does sealant failure look like before water damage starts?
Catching failure early is the whole point of a regular inspection programme. By the time you see a water stain on an interior ceiling, the joint has usually been leaking for months. Train your facility crew to look for these signs during walkthroughs.
Adhesive failure means the sealant has lost its bond to the substrate. You will see a clean gap along one or both edges of the joint, often with the sealant bead still intact in the middle. It is the most common failure mode and often results from poor surface prep or an incompatible primer.
Cohesive failure means the sealant itself has torn or split through its body. The bond to the substrate may still be intact, but the sealant has cracked or split under movement stress. This typically signals the product was underspecified for the joint’s movement range.
Inspection checklist for facility crews:
- Window perimeters: look for gaps at the sealant-to-frame interface, shrinkage pulling away from the frame, and surface cracking
- Expansion joints: check for extrusion (sealant pushed out of the joint), tearing, and loss of backer rod support
- Parapets and roof-to-wall junctions: look for open laps, cracking at corners, and efflorescence on the masonry below
- Curtain wall interfaces: check for adhesion gaps, staining from sealant bleed, and any visible daylight through the joint
- Roof penetrations: look for cracking around pipe boots, HVAC curbs, and drain collars
Common installation defects — bridged joints, insufficient depth, or sealant applied over a dirty substrate — accelerate every one of these failure modes. Knowing what to look for helps you triage work orders accurately.
How often should you inspect commercial sealants?
BC Housing guidance recommends annual inspections for high-risk components and biennial reviews for lower-risk exterior surfaces. That cadence is a practical baseline for any Canadian commercial asset.
| Component / zone | Recommended inspection frequency | Risk rationale |
|---|---|---|
| Expansion joints | Annual | High movement, high consequence of failure |
| Window perimeters | Annual | Direct water ingress path to interior |
| Flat roof penetrations and parapet caps | Annual | Ponding water, UV, and freeze-thaw exposure |
| Curtain wall interfaces | Annual | Complex geometry, multiple substrates |
| Exterior cladding (sheltered panels) | Biennial | Lower movement, indirect water exposure |
| Below-grade and parking structure joints | Biennial + post-event | Chemical exposure from de-icing salts |
| Post-storm / extreme weather | Targeted check within 2 weeks | Catches early failures annual checks miss |
Post-event inspections after major storms, deep freezes, or extreme heat events are worth scheduling explicitly. Standard annual checks can miss early failures triggered by a single extreme event, and a two-week delay in catching a breach is often the difference between a tube of sealant and a drywall remediation project.
Inspection log — what to record every visit:
- Date and inspector name
- Joint ID or location reference (tied to a building drawing)
- Condition rating (sound / monitor / repair / replace)
- Failure mode observed (adhesive, cohesive, shrinkage, staining)
- Photo reference number
- Recommended action and priority (safety/water ingress first, energy loss second, cosmetic last)
A documented inspection log also meets asset management expectations under CSA S478:19 and supports selective replacement decisions economically. Without records, you are making replacement decisions blind.
Canadian standards and research that back these recommendations
Canadian guidance on sealant maintenance is grounded in both provincial practice and national standards. BC Housing’s Maintenance Matters series sets the inspection cadence benchmarks used across the country. The Standards Council of Canada frames durability as a design and management requirement, recommending that building owners define a design service life and maintain a formal operations and maintenance programme.
That finding has direct budget implications. If you are managing a building where the original sealant is 8–12 years old and has never been inspected, statistically a significant portion of those joints are already at or past their functional limit.
Canadian climate zones matter too. A joint on a south-facing glass curtain wall in Windsor sees far more UV and thermal cycling than the same joint on a sheltered north elevation in Edmonton. Adjust your inspection priority and product specification accordingly. Integrating post-event inspection policies into your asset management plan is the operational step that turns this research into reduced repair costs.
UBC’s technical guidelines reinforce another key point: sealants should not be used as the primary waterproofing method. Proper flashing and penetration details must be in place. When they are not, sealant failure becomes a structural water ingress event rather than a routine maintenance item.
When should you repair, and when should you replace?
The decision between selective repair and full replacement comes down to how much of the joint system is still sound.
Replace immediately when you see:
- Active water ingress through or around the joint
- Continuous adhesion loss along a joint run (not isolated spots)
- Cohesive tearing across more than roughly one-third of a joint’s length
- Repeated repair on the same joint within a single inspection cycle
- Sealant that has hardened, lost elasticity, and can no longer accommodate movement
Consider selective replacement when:
- Failure is isolated to specific joints or elevations
- The bulk of existing sealant remains chemically sound and well-bonded
- Failure mode is adhesive at one edge only, with the body intact
Selective replacement of failing segments is often more cost-effective than a full building-wide removal when the majority of sealant is still performing. The key is having the inspection records to know which joints are sound and which are not.
The ROI case for proactive replacement is straightforward. Sealant failure is the most common entry point for water ingress, and proactive recaulking prevents the majority of ingress events. Water damage remediation, lost tenancy, mould abatement, and HVAC energy penalties all cost orders of magnitude more than a planned sealant replacement programme. A simple decision flow: triage all joints by condition rating, schedule selective replacement for joints rated “repair,” and set a full-replacement threshold when more than roughly one-third of a façade elevation is failing.
How to replace commercial sealant correctly
Correct replacement procedure is what separates a joint that lasts 15 years from one that fails in three. These steps apply whether you are doing selective repairs or a full re-caulk programme.
- Assess the joint: confirm joint width, depth, movement range, substrate type, and existing sealant chemistry before specifying a replacement product
- Remove old sealant completely: use a mechanical tool (oscillating cutter or grinder) to remove all existing sealant; do not apply new sealant over old
- Clean the substrate: remove dust, oil, frost, efflorescence, and any residual sealant with an appropriate solvent; allow to dry fully
- Apply primer where required: confirm primer compatibility with both the substrate and the new sealant; follow manufacturer dwell time exactly
- Install backer rod: use closed-cell polyethylene backer rod sized to achieve a 2:1 width-to-depth ratio; the rod controls depth and prevents three-sided adhesion
- Apply sealant: tool the sealant into the joint with consistent pressure; avoid air pockets and bridging
- Tool and profile: smooth the surface within the open time specified by the manufacturer; a concave profile sheds water and reduces stress concentration
- Cure check: do not expose the joint to movement or water until the manufacturer’s minimum cure time has passed; in cold weather, this can be significantly longer than the stated time
Contractor vetting checklist:
- Verify licences and liability insurance for work at height
- Request references from comparable commercial projects
- Ask for material data sheets and confirm the specified product matches the joint’s movement class
- Confirm warranty coverage terms in writing before work begins
Pro Tip: The most common corner-cutting shortcut is applying new sealant directly over old without full removal. You can spot it during a pre-bid walk by pressing the existing sealant — if it feels hard and does not spring back, it has lost elasticity and the new layer will fail at the same bond line within a few years.
How do you choose the right sealant for a Canadian climate?
Selecting the right product starts with the joint’s movement range and the substrates it bonds to. Matching joint type to movement class is the first and most important decision.
| Selection criterion | Silicone | Polyurethane | Hybrid (STPE/MS) |
|---|---|---|---|
| Movement capability | ±25–50% | ±20–25% | ±25% |
| UV resistance | Excellent | Moderate (yellows) | Good |
| Tear resistance | Moderate | Good | Good |
| Adhesion to aluminium / glass | Excellent | Moderate | Good |
| Adhesion to concrete / masonry | Good (primer often needed) | Excellent | Excellent |
| Paintability | No | Yes | Yes |
| Dirt pickup | Higher | Lower | Lower |
Decision checklist for product selection:
- Calculate expected joint movement from thermal expansion of the substrate and live loads; never underspecify movement accommodation
- Confirm the product’s service temperature range covers your climate zone’s extremes (Ontario ranges from roughly -30°C to +35°C)
- Check manufacturer data for compatibility with adjacent sealants and materials, particularly where old sealant residue may remain
- Verify primer requirements for each substrate in the joint; skipping primer on a porous substrate is a leading cause of early adhesion failure
- Avoid using sealant as the only waterproofing measure; coordinate with flashing and penetration details
For multi-substrate façades or renovation work where substrate compatibility is uncertain, hybrid STPE/MS polymers are often the most practical choice. They bond well to a broad range of materials without primer and tolerate the movement ranges typical of Canadian commercial construction. Exterior cleaning before re-caulking removes the surface contamination that undermines adhesion, and it is a step that is easy to overlook on a tight mobilisation schedule.
How to budget a commercial sealant replacement programme
Sealant replacement costs vary widely depending on access requirements, material class, and the extent of substrate repairs needed. Planning a 3–5 year rolling programme is the most effective way to manage capital and reduce emergency call-outs.
Key cost drivers:
- Access: scaffolding, swing stages, and aerial lifts are often the largest single cost item on a mid-rise or high-rise building
- Scope: selective replacement costs less per linear metre than full removal, but mobilisation costs are similar
- Material class: silicone and hybrid products cost more per cartridge than polyurethane, but their longer service life reduces lifecycle cost
- Primer and testing: adhesion pull tests and primer application add cost but are worth it on critical joints
- Substrate repairs: spalled concrete, corroded metal, or deteriorated mortar must be repaired before new sealant is applied
- Contingency: budget 15–20% for substrate conditions that are not visible until old sealant is removed
| Programme phase | Typical scope | Budget approach |
|---|---|---|
| Year 1 | Condition assessment, inspection log, priority triage | Capital: assessment fee + emergency repairs |
| Year 2–3 | High-risk joint replacement (expansion joints, window perimeters) | Capital: largest spend; access costs dominate |
| Year 4–5 | Lower-risk cladding joints, follow-up selective repairs | Operating: smaller scope, reduced access cost |
| Ongoing | Annual inspection, post-event checks, minor repairs | Operating: maintenance budget line |
Reserve fund planning should account for the full replacement cycle, not just the next repair. For a mid-rise commercial building, a rolling sealant programme spread over 3–5 years smooths capital expenditure and avoids the large emergency spend that follows deferred maintenance. Reducing maintenance costs through planned sealing is a straightforward case to make to a board or ownership group when you have the inspection records to back it up.
Key takeaways
Commercial sealant lifespan in Canadian buildings varies widely depending on chemistry, exposure, and installation quality; annual inspection of high-risk joints and selective replacement based on documented failure criteria is the most cost-effective way to protect your building envelope.
| Point | Details |
|---|---|
| Lifespan varies by chemistry | Silicone lasts 10–50 years; polyurethane, polysulfide, and hybrid sealants last 5–20 years; butyl/asphalt lasts 2–10 years. |
| Inspect on a risk-based cadence | Annual for expansion joints, window perimeters, and flat roofs; biennial for lower-risk cladding. |
| Replace on failure criteria, not age alone | Trigger replacement on active water ingress, widespread adhesion loss, or repeated failure on the same joint. |
| Proactive programmes save capital | Selective replacement before water ingress occurs costs far less than water damage remediation. |
| Kettlecontracting delivers commercial programmes | Kettlecontracting provides condition assessments, selective replacement, and full re-caulk programmes across the GTA. |
What field experience actually teaches you about sealant lifespan
The lifespan numbers in any table are a starting point, not a guarantee. After 25 years working on building envelopes across Ontario, the pattern I see most often is this: the joints that fail first are almost never the ones in the worst weather exposure. They are the ones that were installed with the wrong depth, over a dirty substrate, or with a product that was not rated for the joint’s actual movement range.
North-facing elevations in the shade consistently outlast south-facing glass curtain walls by several years, even when the same product was used. Sheltered joints under a soffit can still be performing at year 18 while an exposed parapet cap on the same building needs full replacement at year 9. That variability is why a blanket “replace everything at year 15” policy wastes money, and why a documented inspection programme pays for itself.
The other thing I see regularly is buildings where the sealant was treated as the only waterproofing layer, with no backup flashing. When that sealant fails, the water goes straight into the wall assembly. A proper envelope assessment catches that design gap before it becomes a remediation project.
If your building is approaching the 7–10 year mark on its original sealant, or if you have never had a formal condition assessment done, that is the right time to get a professional set of eyes on it. Kettlecontracting offers envelope assessments specifically for commercial and multi-unit properties across the GTA, and the findings give you the documentation you need to plan and justify a replacement programme.
Kettlecontracting’s commercial sealant services for GTA property managers
Waiting for a leak to appear before scheduling sealant work is the most expensive approach a facility manager can take. Kettlecontracting gives commercial clients across the Greater Toronto Area a better option: a planned, documented sealant programme that protects the building envelope before water gets in.

Services include building envelope condition assessments, selective joint replacement, full re-caulk programmes, access and scaffolding coordination, and ongoing maintenance scheduling. Every project is backed by 25 years of field experience and a clear warranty on workmanship. Whether you manage a single commercial property or a portfolio of multi-unit buildings, Kettlecontracting delivers the trade-specific expertise that generic contractors cannot match on envelope work.
To get a condition assessment or a quote for your next replacement programme, contact Kettlecontracting directly through kettlecontracting.com.
Useful sources
| Source | Why it matters |
|---|---|
| BC Housing — Maintenance Matters No. 5: Sealant Maintenance | Sets inspection cadence benchmarks and lifespan ranges; the primary Canadian field reference for sealant maintenance programmes |
| Standards Council of Canada — Durability in Buildings | Frames durability as a design and management requirement; supports asset management programme justification |
| MDPI — Crack length of elastomeric sealants in contrasting Canadian climates | Research modelling of freeze-thaw and movement impacts on sealant failure rates across Canadian climate zones |
| NRC Publications — Durability and service life prediction for building sealants | National Research Council overview of sealant degradation mechanisms and service life prediction methods |
| UBC Technical Guidelines — Joint Sealants | Institutional specification guidance; reinforces that sealants are one part of a water-management system, not a standalone waterproofing measure |
| Kettlecontracting — Why caulking is trade-specific work | Practical guidance on scope and contractor selection for commercial envelope work |
FAQ
What is the life expectancy of caulking on a commercial building?
It depends on the sealant chemistry and exposure. Silicone typically lasts 10–50 years, polyurethane and polysulfide 5–20 years, and butyl or asphalt-based products 2–10 years; installation quality and Canadian climate conditions significantly affect where within those ranges a joint lands.
How often should commercial caulking be replaced?
High-risk joints such as expansion joints and window perimeters should be inspected annually and replaced based on condition, not a fixed schedule. In practice, most commercial sealants require selective replacement between 7–15 years for polyurethane, polysulfide, and hybrid sealants, and between 15–25 years for silicone, based on exposure and installation quality.
How long does construction sealant last in Canadian climates?
Research modelling across Canadian climates indicates roughly 50% of sealants fail within 10 years and approximately 95% fail within 20 years, driven primarily by freeze-thaw cycling and joint movement fatigue. South-facing and high-UV exposures tend to reach end-of-life earlier than sheltered or north-facing joints.
Does caulk degrade over time even without visible damage?
Yes. UV radiation and thermal cycling cause molecular changes in the polymer that reduce elasticity and adhesion long before cracking is visible. A sealant that looks intact but has hardened and lost its spring is no longer accommodating joint movement and will fail at the bond line under the next significant temperature swing.
When should I call a professional instead of doing spot repairs?
Call a specialist when you see active water ingress, widespread adhesion loss across multiple joints, or repeated failure on the same joint after a previous repair. Kettlecontracting provides commercial condition assessments across the GTA to help facility managers determine whether selective repair or a full replacement programme is the right call.
