
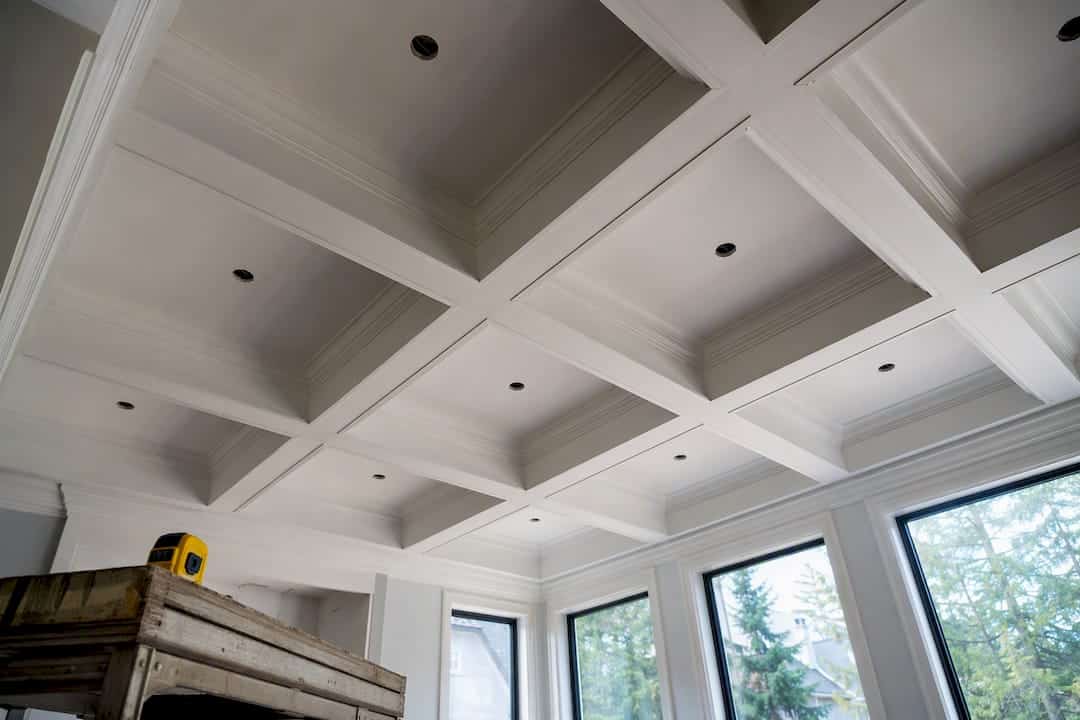
Professional coffered ceiling installation across the GTA typically ranges broadly depending on design and materials, so a 150 sq ft room lands somewhere between $3,000 and $7,500 all in. Where you fall in that range comes down to three things: how fancy the material is, how intricate the beam pattern gets, and how much finish carpentry the crew has to do on-site.
TL;DR:
- Prefabricated polyurethane coffer kits are suitable for DIY projects in flat ceilings but cannot achieve the sharp shadow lines of built-up beams.
- Site-built MDF or wood systems with mitred corners require professional installation due to the precision needed for angles and finishes.
- Most GTA projects take three to seven days on-site, with blocking, framing, finishing, and painting phases, and custom millwork adding extra lead time.
- Using plywood backing beneath coffers is strongly recommended to hide ceiling imperfections and prevent future nail loosening caused by seasonal movement.
- The total cost for a 150 sq ft room typically ranges from $3,000 to $7,500, with labor accounting for the largest portion of the price, especially on complex designs.
Table of Contents
- Coffered ceiling cost breakdown for Toronto and the GTA
- Which materials work best for Ontario homes?
- Should you hire a pro or DIY your coffered ceiling?
- Do you need permits or structural changes for a coffered ceiling?
- How lighting and HVAC affect your design and budget
- What’s the typical project timeline?
- Is a coffered ceiling worth it long-term?
- How to get and compare coffered ceiling quotes
- Lessons from the field: what actually goes wrong on site
- Get a straight answer on your coffered ceiling project
- Sources
- FAQ
Coffered ceiling cost breakdown for Toronto and the GTA
That $20 to $50 per square foot range isn’t just a nice round guideline. It’s what shows up on real invoices across Ontario homes, and material costs alone tend to sit between $10 and $25 per square foot depending on what you’re building with.
Here’s how that breaks down by tier:
- Prefab/budget tier ($15 to $25/sq ft): Lightweight polyurethane coffer kits, straightforward grid pattern, minimal on-site customization.
- Mid-range site-built ($25 to $40/sq ft): MDF beams with plywood backing, built to fit your room, painted finish.
- Premium hardwood or custom millwork commands higher cost per square foot. Solid wood, stain-grade finish, custom profiles and deeper coffers.
Labour typically forms a significant portion of the total cost on site-built projects. in the GTA market, which surprises a lot of homeowners who assume materials drive the price. They don’t. Precision cutting, mitred corners, and skim-coating for a paint-ready finish take time, and time is what you’re paying for.
For sample totals, a 100 sq ft room usually costs a few thousand dollars and a 150 sq ft room costs somewhat more, depending on materials and detail, matching the wider range seen in general cost guides too. A 250 sq ft great room can cost several thousand dollars or more, depending on scope. once you factor in longer beam runs and more corner joints.
Add-ons push those numbers higher. Relocating pot lights or electrical runs before the ceiling goes up can add extra cost. Speaker wiring, crown moulding upgrades, and additional coats of paint all stack on top of your base quote, so ask your contractor to itemize these separately rather than folding them into one lump figure.
Which materials work best for Ontario homes?
The material you pick affects both your budget and how the ceiling holds up through Ontario’s freeze-thaw cycles and seasonal humidity swings indoors.
- Prefabricated polyurethane: Light, inexpensive, and easier for a DIY-friendly install, but it has real limits on span length and depth. It won’t give you the crisp shadow lines of a built-up beam.
- MDF with plywood backing: This is what most GTA homeowners end up choosing for a painted finish. MDF holds its shape well through seasonal humidity changes, and it’s dimensionally stable in a way solid wood simply isn’t.
- Solid wood/custom millwork: Beautiful for a stain-grade look, but it needs to acclimate in the home for several days before installation, or you risk hairline cracks and joint movement once the seasons change.
- Drywall/panel backing: Simplifies future repairs and gives electricians and painters a familiar surface to work with.
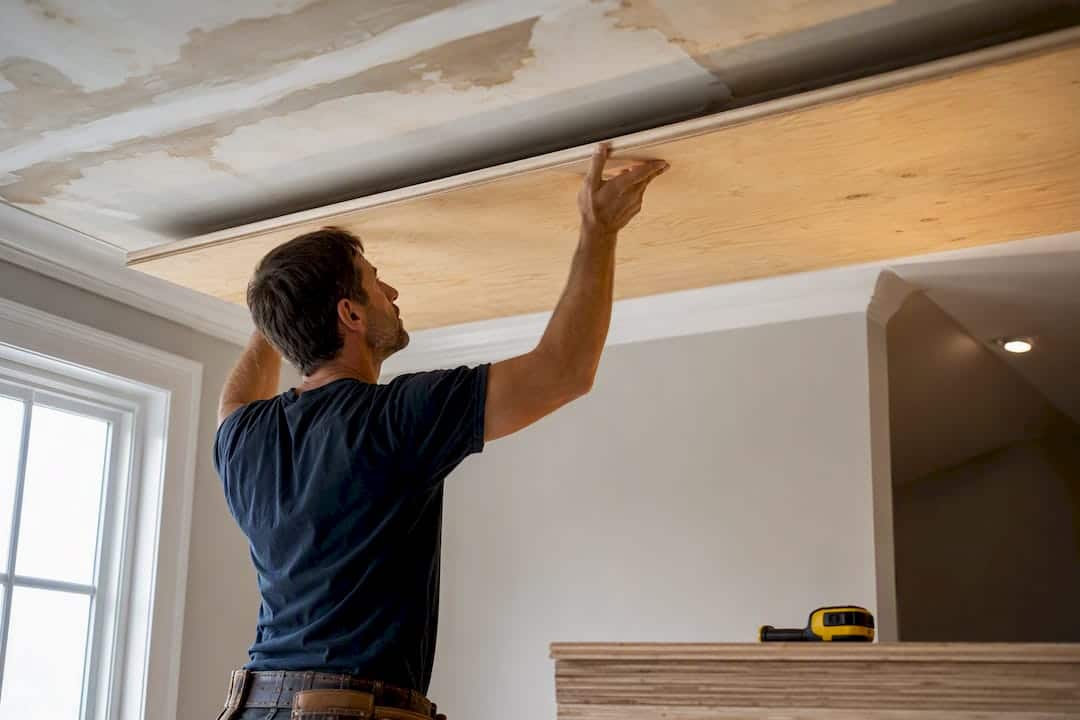
Whatever material you land on, don’t skip the backing. Finish carpentry guides consistently recommend plywood backing, often quarter-inch birch, underneath the coffers. It gives trim a nailable surface and hides whatever imperfections are already lurking in your existing ceiling.
Pro Tip: If your ceiling has old water stains or uneven drywall seams, plywood backing solves two problems at once, it hides the damage and gives you a clean surface to nail into. Skipping it to save a few dollars almost always costs more later in patch work.
Should you hire a pro or DIY your coffered ceiling?
Labour dominates this project’s cost for a simple reason: cutting a beam is easy, but cutting forty beams to the exact same angle, level, and finish is a skill that takes years to get right. Professional installs in the GTA generally start around $25 per square foot and climb from there with wood selection and detail.
Here’s how to think about what’s realistic to tackle yourself and what isn’t:
- DIY-friendly: Prefab polyurethane kits with a simple grid, assuming your ceiling is already flat and level.
- Better left to a carpenter: Site-built MDF or wood systems with mitred corners, crown transitions, and skim-coat finishing.
- Always contract out: Anything involving structural blocking, electrical relocation, or rooms with sloped or uneven ceilings.
The most common DIY mistake we see is skipping proper blocking behind the beams. It looks fine for a few months, then the seasonal expansion and contraction starts pulling nails loose, and now you’re paying a pro to fix a problem that didn’t need to exist.
Do you need permits or structural changes for a coffered ceiling?
Most coffered ceilings don’t require a building permit because they’re a cosmetic addition, not a structural change. That said, a few situations do call for extra planning.
- Low ceilings: If your ceiling is under 8 feet, a full coffer grid can make the room feel cramped. A moulding-only approach, flat trim applied directly to the existing ceiling, often looks better and costs less.
- Blocking and framing: If your existing ceiling joists don’t line up with where you want beams to land, you’ll need additional blocking installed first. That’s extra labour and material cost before the visible work even starts.
- Structural changes: If you’re removing a load-bearing element or altering ceiling height, consult your local building official before work begins. This is rare for a standard coffered ceiling, but it happens on older Toronto homes with unconventional framing.
How lighting and HVAC affect your design and budget
Before you settle on coffer depth, map out where your pot lights, speakers, and air registers actually sit. Deep beams can interfere with fixture placement or block airflow from a register, and moving either one after the ceiling is built means tearing into finished work.
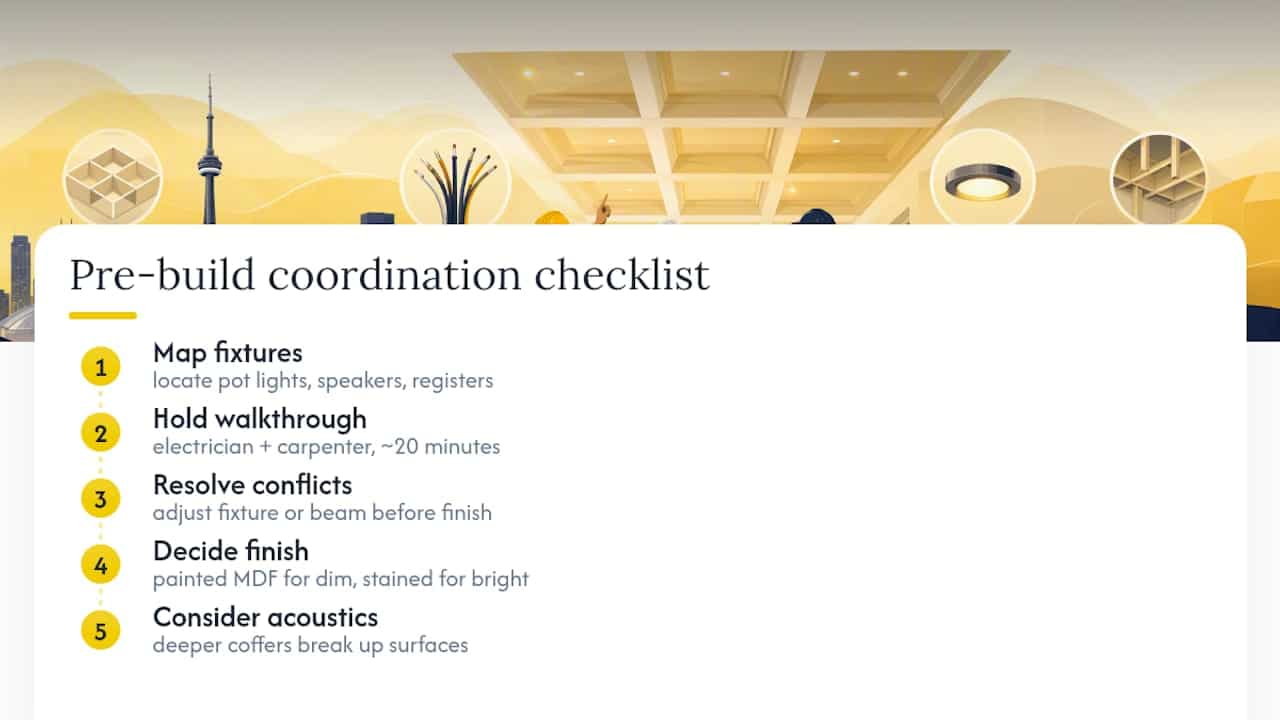
Pro Tip: Have your electrician walk the room with the carpenter before beams go up, not after. It takes twenty minutes and it’s the single easiest way to avoid a change order.
Room lighting also affects your finish decision. A dim room with limited natural light usually looks better with a painted MDF finish since it reflects more light back into the space, while a bright, sunlit room can carry a darker stained wood look without feeling heavy. Deeper coffers can also improve room acoustics slightly by breaking up flat ceiling surfaces, which matters more in open-concept homes than most homeowners expect.
What’s the typical project timeline?
Most GTA coffered ceiling projects move through the same sequence, with total on-site time ranging from three to seven days depending on room size and material.
- Measurement and design sign-off (day 1): Confirming beam layout, coffer depth, and material selection, plus mapping lighting and vents.
- Blocking and beam assembly (days 1 to 2): Installing backing and framing before any visible trim goes up.
- Paneling and trim (days 2 to 4): The bulk of the finish carpentry happens here, cutting and fitting each beam.
- Skim-coat and paint (days 4 to 6): Filling seams, sanding, and applying finish coats.
Material lead times can add a week or more if you’re ordering custom millwork profiles, so build that into your schedule before booking a start date. Hidden repairs behind old ceilings are the most common cause of delay.
Is a coffered ceiling worth it long-term?
Coffered ceilings tend to read as a higher-end feature to buyers, particularly in dining rooms and primary suites, and they can support a modest resale premium in higher-value GTA homes. That premium isn’t guaranteed everywhere, and it matters more in move-up neighbourhoods than starter homes.
- Painted MDF holds up well with minimal upkeep, occasional touch-up paint after settling or minor seasonal movement is normal.
- Solid wood needs closer attention to humidity control indoors to avoid joint gaps over time.
- For most Toronto renovations, painted MDF with plywood backing offers the best return relative to cost. Custom millwork is justified when the room is already a showpiece, think a formal dining room in a high-end resale.
How to get and compare coffered ceiling quotes
A good quote spells out exactly what you’re paying for, not just a single number. Make sure each bid covers:
- Material specs (MDF vs. wood, backing type, beam dimensions)
- Number of finish coats and whether paint/stain is included
- Who handles electrical relocation, the carpenter or a separate electrician
- Cleanup and disposal of old ceiling material
| Ask about | Why it matters |
|---|---|
| Warranty on workmanship | Protects you if trim cracks or beams shift after a season |
| Proof of insurance | Covers you if something goes wrong on-site |
| References from recent GTA jobs | Confirms they’ve handled projects like yours locally |
| Payment milestones | Avoids paying in full before work is complete |
Watch for vague “allowance” line items with no dollar figure attached. That’s often where change orders sneak in later.
Lessons from the field: what actually goes wrong on site
Most callbacks we see on coffered ceilings trace back to one thing: skipped or undersized blocking. It holds up fine through summer, then Ontario’s freeze-thaw cycle sets in and joints start opening up.
Proper backing and blocking cost more upfront, but they’re what separates a ceiling that looks good for one season from one that looks good for fifteen years. When our team arrives on-site, expect us to check joist spacing, confirm lighting and vent locations, and walk the layout with you before a single beam goes up.
— Felix
Get a straight answer on your coffered ceiling project
A professional contracting team can handle the full scope of a coffered ceiling build, including site-built carpentry, plywood backing, skim-coat and paint prep, and coordination with electricians on lighting and vent placement, so you’re not managing three separate trades yourself.

We serve homeowners in the Greater Toronto Area and price jobs with clear, itemized quotes before work starts to avoid vague allowances and surprise change orders. If you’ve already got a paint plan for the rest of the room, our interior painting cost guide is worth a look too, since finish coats on a coffered ceiling often get bundled with broader room painting. For homeowners weighing coffers against other finishing work, our services overview walks through what a typical build involves.
To get started, request an estimate and have your room dimensions, ceiling height, and any lighting changes ready to discuss. We’ll walk the space, confirm blocking requirements, and give you a written quote you can actually compare against other bids.
Sources
- Coffered ceiling installation guide for Ontario homes 2026
- How much does a coffered ceiling cost? (2026)
- An easy approach to coffered ceilings — Fine Homebuilding
FAQ
How much should a coffered ceiling cost?
Expect $20 to $50 per square foot for professional installation in the GTA, with a 150 sq ft room typically totalling $3,000 to $7,500 depending on material and design complexity.
Are coffered ceilings still popular?
Yes, they remain a sought-after feature in dining rooms, primary suites, and living areas across higher-end GTA homes, and they continue to show up regularly in renovation requests.
What does a false ceiling cost for a 12×12 room per square foot?
A 150 square foot room typically costs between $3,000 and $7,500 depending on material and finish.
Can you install a coffered ceiling on an 8-foot ceiling?
Yes, but deep beam grids can make an 8-foot ceiling feel lower. A flat moulding-only design often works better in these rooms, and it typically costs less than a full coffer system.
