

Curtain wall wet sealing is a remedial cap bead of silicone applied over failing gaskets to turn a leaking joint into a sealed barrier, and it is the right call when the leak is coming from accessible exterior gaskets and the insulated glass units behind them are still dry. It costs less and moves faster than replacing glazing systems, but it only holds up when the installer respects the wall’s drainage and keeps up with maintenance. Skip it if the weeps are blocked or the glass itself has failed.
TL;DR:
- Wet sealing over drained curtain wall systems can provide years of protection if weep holes are maintained and installation details are properly followed.
- Properly designed and executed, a wet seal relies on the integrity of every weep and drain, making inspection and surface preparation crucial for longevity.
- It is most effective when gaskets are cracked or shrunk, the glass units are still intact, and the weep openings are clear and functional.
- Failures to clean weeps, overfill glazing pockets, or ignore internal gutter slope can trap water behind the seal, accelerating degradation.
- Regular post-repair checks for crack, chalking, and internal water stains are essential to verify sealant performance and determine if full re-gasketing is needed.
Table of Contents
- What wet sealing is and how it differs from a drained system
- When to choose wet sealing, re-gasketing, or full replacement
- Sealant selection and materials: silicone, primers, and backer rods
- Field preparation and step-by-step wet-seal procedure
- Drainage, weep holes, and the biggest failure modes to watch for
- Inspection and maintenance after wet sealing
- Kettle Contracting field guide: prep, tooling, and frost-zone cautions
- Balancing short-term fixes and long-term envelope strategy
- Kettle Contracting services for curtain wall sealing and leak repair
- Sources
- FAQ
What wet sealing is and how it differs from a drained system
A wet seal, sometimes called wet glazing, is a bead of sealant run over degraded gaskets and frame joints to stop water from getting past the glazing line at all. It is a barrier approach: no water is meant to get in, full stop. That is a fundamentally different philosophy from how most curtain walls are built.
High-performance curtain walls are designed as pressure-equalized, drained systems that expect some water to get past the outer gasket. That water lands in a glazing pocket, and weep holes let it drain back out before it does any damage. Face-sealed systems, by contrast, depend entirely on one continuous seal holding for decades without a single gap. According to the same field guide, drained systems tend to outperform face-sealed ones over the long run precisely because they do not need perfection.
When you wet-seal over a drained pocket, you are converting it into a face-sealed system, at least locally. That has real consequences:
- Any water that still finds a way past the new seal has nowhere to go if the weeps get blocked in the process.
- The repair is only as good as the installer’s attention to detail, since there is no drainage backup.
- Adjacent unsealed joints can still behave as drained pockets, creating an inconsistent wall system.
Done carefully, with weeps respected, a wet seal buys real years. Done sloppily, it traps water behind glass that used to drain fine on its own.
When to choose wet sealing, re-gasketing, or full replacement
Not every leak calls for the same fix. A quick set of condition checks tells you which direction to go, guided by fire door gasketing requirements for NYC buildings principles to ensure proper sealing and gasketing.
- Exterior gaskets are cracked, shrunk, or pulling away, but the glass and frame are sound: this is the classic wet-seal case, especially when budget is tight and the leak is isolated to a few joints.
- Weep holes and internal gutters are clear and functioning: wet sealing only makes sense on a wall that can still drain the joints you are not touching.
- Insulated glass units show fogging or condensation between the panes: this points to seal failure inside the glass, and prolonged edge wetting is a common cause, which means the unit typically needs replacing rather than resealing.
- Weeps are blocked, painted over, or missing: re-gasketing or a broader drainage repair should come first, or any new seal just traps water.
- You see frame distortion, movement cracking, or repeated leaks after past repairs: that is a sign of structural or system-wide issues that a cap bead will not fix.
When the leak location is not obvious, or you are about to sign off on a repair scope, an ASTM E1105 field water test under static pressure will tell you exactly where water is getting in before anyone touches a gasket. It is worth the day it takes, especially on multi-storey work. For a broader look at whether caulking is even the right category of fix, see our notes on caulking window leaks.
Sealant selection and materials: silicone, primers, and backer rods
Neutral-cure silicone is the standard choice for an exposed cap bead, and for good reason. It handles UV exposure without chalking or cracking the way some other chemistries do, and it accommodates the thermal movement that aluminium frames go through every day, especially through a full freeze-thaw cycle. This is not a job for whatever tube is on the shelf.
- Neutral-cure silicone: the default for exposed exterior cap beads, chosen for UV stability and movement range.
- Primers: required on some anodized or painted aluminium finishes, never assumed. Always run an adhesion test on a sample of the actual substrate before committing to a full run.
- Backer rod: sized to the joint depth so the bead has proper hourglass geometry, not a flat smear that looks fine on day one and pulls away within a season.
- Polyurethane sealants: generally a poor fit for exposed cap beads because of weaker UV resistance, and should be avoided outside of below-grade or fully protected joints.
- Structural silicones: built for a different job (bonding glass to frame), not for weatherproofing gaps, and misapplying one in a wet-seal repair confuses two very different performance requirements. Our structural glazing sealant guide breaks down that distinction in more detail.
Joint geometry matters as much as the product chosen. A bead that is too shallow will not have enough sealant mass to stretch with the frame, and one that is too deep wastes material without adding strength. Tooling the bead to the right profile, concave and consistent, is what actually determines whether it survives ten winters or two.
Pro Tip: Always test adhesion on an actual sample of the wall’s aluminium finish before the crew starts the real bead. Coatings vary more than product data sheets suggest.
Field preparation and step-by-step wet-seal procedure
A wet seal lives or dies on preparation, not on which tube of silicone gets used. The sequence below is what a careful crew follows from first inspection to final sign-off.
- Locate and map every leak point. Walk the wall from inside and out, photograph active leak paths, and note which joints are affected versus which are dry.
- Inspect weep holes and internal gutters. Confirm they are open before doing anything else. A blocked weep changes the whole scope of the job.
- Check insulated glass units for fogging. Any unit showing internal condensation gets flagged for replacement, not resealing, since the failure is inside the glass, not at the gasket.
- Cut back degraded gaskets cleanly. Remedial procedures call for removing the failed gasket material fully rather than sealing over it, which gives the new bead a sound surface to bond to.
- Solvent-clean the substrate. Any residue, old sealant, or oxidation left behind is where adhesion failures start.
- Mask adjacent finishes and protect interiors. Simple, but skipping it is how a two-day job turns into a cleanup headache.
- Set backer rod to the correct depth. This controls bead geometry and keeps the sealant from bonding on three sides, which would restrict movement.
- Prime where the substrate calls for it, based on the adhesion test done beforehand.
- Gun the cap bead in a continuous pass, sized to the joint, then tool it to a smooth concave profile before it skins over.
- Keep sealant off the weeps. This is the step that gets rushed and causes callbacks. Weep openings and snap-cap drains stay completely clear.
- Verify with a field water test where the scope justifies it. ASTM E1105 applies static air pressure and controlled water spray to confirm the repaired joint actually resists water penetration, rather than just looking finished.
- Document everything. Photos of the finished bead, weep condition, and test results all belong in the maintenance file for the next inspection cycle.
A curtain wall’s wet-seal repair is only as good as its weakest weep. CMHC’s best-practice guidance notes that a barrier seal must perform without a single gap, because any water that does get through has no drainage path left to rely on. That single fact is why the weep check happens first on every job, not last.
Drainage, weep holes, and the biggest failure modes to watch for
Weep holes and internal gutters exist to let incidental water, condensation, wind-driven rain, whatever gets past the outer gasket, find its way back outside instead of pooling behind the glass. On a drained wall, that is by design. Once you introduce a wet seal, those same weeps become the only insurance policy left for any water that still sneaks past.
The most common ways a repair crew accidentally defeats that drainage:
- Overfilling the glazing pocket with sealant, leaving no space for water to move even if the weep is technically open.
- Sealing over snap-cap drains because they look like just another gap in the frame.
- Failing to re-establish slope in a sill or gutter after cleaning, so water sits instead of running to the weep.
The corrective move is simple in principle: clear every weep before you seal anything, test that water actually flows through it, and keep internal gutters free of debris and old sealant. On larger repairs, a hybrid approach, restoring drainage in one section while wet-sealing an adjacent one, often outperforms a blanket barrier fix across the whole elevation. Our notes on common sealant failures cover more of these patterns in detail.
Inspection and maintenance after wet sealing
A wet seal is not a set-and-forget repair. Plan on a visual check right after installation, another at the one-year mark, and a walk-through after any major freeze-thaw season or wind-driven storm.
- Weep function: confirm openings are still clear and draining.
- Bead condition: look for cracking, chalking, or adhesion loss at the edges.
- Interior staining: any new water marks near the glazing line mean the seal or the drainage behind it has failed.
- IGU fogging: a new haze between panes means that unit needs replacing, not resealing.
Spot repairs are cheap when caught early. If the same joint needs resealing every year or two, that is the wall telling you it is time for full re-gasketing rather than another cap bead. Our guide on preventing water damage with window caulking has more on setting up a realistic inspection routine.
Pro Tip: Keep a simple photo log at each inspection. Comparing this year’s bead against last year’s is the fastest way to catch slow failures before they become interior damage.

Kettle Contracting field guide: prep, tooling, and frost-zone cautions
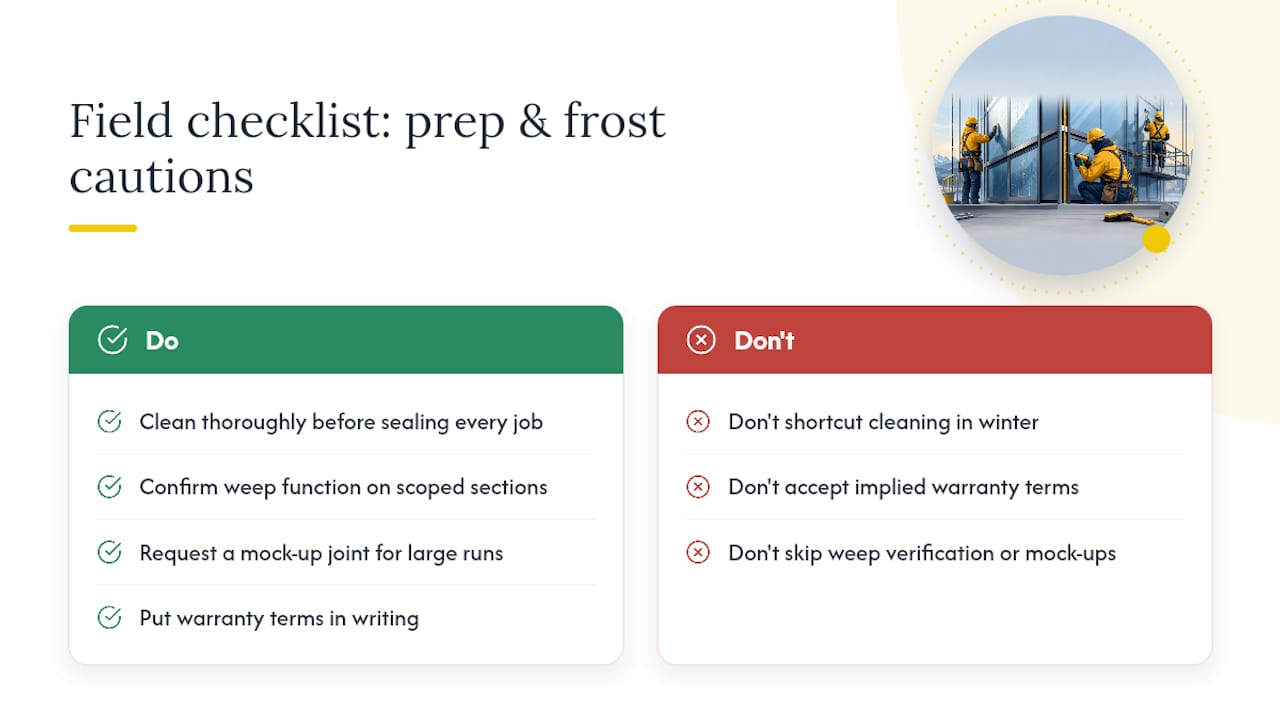
Winters do more damage to a bad seal than sun ever will. Freeze-thaw cycling stresses every joint on a wall, and road salt carried up by wind or splashback attacks aluminium finishes in ways that undercut adhesion long before the sealant itself gives out. That is why cleaning is never a step we shortcut, no matter how tight the schedule.
Before we bid a wet-seal job, we run through a short checklist: confirm weep function on the sections in scope, ask for a mock-up joint on larger commercial runs so the client can see the actual tooled profile before full production starts, and put warranty terms in writing rather than leaving them implied. A field checklist approach with mock-ups and verified weep function is standard practice across the industry, and it should be standard on any quote you accept.
Balancing short-term fixes and long-term envelope strategy
A well-installed wet seal is a legitimate repair, not a corner cut, but it is still a barrier patch on a wall that was built to drain. The honest framing is that you are trading a lower cost today for a maintenance commitment tomorrow. That trade makes sense for a lot of buildings, especially when the alternative is a full glazing replacement the budget cannot support this year.
Where I push back is on treating wet sealing as a one-time fix. Insist on a mock-up before full production, a field water test after completion, and a written maintenance schedule, not just a verbal promise. Those three things separate a repair that lasts from one you will be redoing in three years.
— Felix
Kettle Contracting services for curtain wall sealing and leak repair
If your building is showing the signs covered above, staining near the glazing line, weeps that will not drain, or a bead that is cracking faster than it should, Our assessments and sealing work cover curtain wall and commercial glazing projects.

Our assessments start with a visual inspection and weep test, followed by a scope recommendation that spells out what is repairable with a wet seal versus what needs re-gasketing, along with a straightforward maintenance plan so there are no surprises down the line. We use sealants designed to withstand freeze-thaw conditions and provide pricing details clearly. For commercial glazing and curtain wall work, start with our Commercial Window Caulking page or reach out through Building Envelope Sealing to request a site assessment.
Sources
- Curtain wall glazing installation field guide – Anvilfield
- Wet sealing a curtain wall — Albion Engineering
FAQ
What sealant can be used in wet conditions?
Neutral-cure silicone is the standard choice for exterior cap beads exposed to weather, since it handles UV exposure and ongoing movement without breaking down. Polyurethane sealants are generally reserved for protected or below-grade joints rather than exposed wet-seal beads because of weaker UV performance.
What is wet sealing a window?
Wet sealing a window means applying a silicone cap bead over existing gaskets and frame joints to create a barrier against water intrusion, rather than relying on the window’s original drainage design. It is a remedial fix, most appropriate when the exterior gaskets have failed but the glass unit itself is still sound.
What does curtain wall glazing mean?
Curtain wall glazing refers to the glass and frame system set into a building’s non-structural exterior wall, along with the gaskets, sealants, and drainage details that keep water out. Most high-performance versions are built as pressure-equalized, drained systems rather than fully sealed barriers.
What are the maintenance requirements for a curtain wall system?
Curtain walls need regular checks of weep holes and internal gutters to confirm they remain clear, along with visual inspections of sealant beads for cracking or adhesion loss. Guidance on drainage details stresses that openings must stay unobstructed for the system to keep performing as designed over time.
