
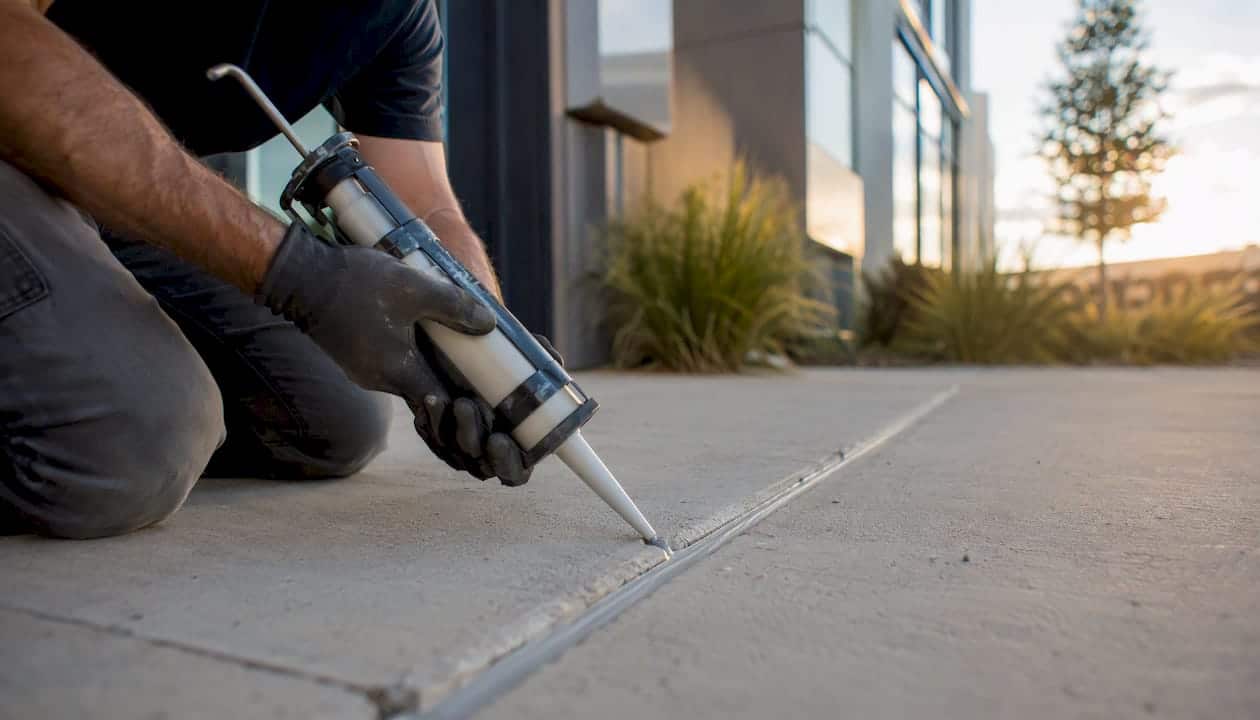
For most concrete expansion joints, the right call is a movement-rated polyurethane or hybrid sealant installed over a correctly sized closed-cell backer rod, with primer applied where the technical data sheet (TDS) requires it. That combination handles the cyclic compression and extension that Canadian freeze–thaw conditions demand. Before you buy anything, measure the joint width and depth, pull the TDS for the product you’re considering, and confirm its movement class and minimum working temperature. Then decide honestly whether this is a DIY job or one that warrants a phone call.
Unsealed or failed expansion joints let water reach the subgrade. Once water gets under a slab and freezes, it expands and lifts. That cycle repeats every winter until the concrete spalls, heaves, or cracks through. If you’re heading into a Canadian winter with open or deteriorated joints, sealing before freeze-up is the single highest-return maintenance task you can do.
As SVD Restoration notes, expansion joints are designed to absorb thermal and moisture-related movement. When they fail, cracking, heaving, and costly repairs follow. The industry term you’ll see on product labels and standards documents is “joint sealant” rather than caulk, though the two words are used interchangeably in the field.
Key takeaways
The most reliable expansion joint sealant in Canadian conditions is a movement-rated polyurethane or hybrid product installed over a closed-cell backer rod with primer applied where the TDS requires it, and resealed every 3–5 years before freeze-up.
| Point | Details |
|---|---|
| Match movement class to the joint | Use ASTM C920 Class 25 or Class 50 to confirm the sealant can handle your joint’s actual movement range. |
| Backer rod prevents early failure | A correctly sized closed-cell backer rod eliminates three-sided adhesion, the most common structural cause of sealant tearing. |
| Primer is not optional on flagged substrates | Skipping primer where the TDS requires it causes adhesion failure, often within the first winter. |
| Reseal every 3–5 years for exterior joints | Annual inspection and a 3–5 year reseal interval protects the subgrade from freeze–thaw damage. |
| Kettlecontracting for GTA properties | Kettlecontracting provides TDS-matched, warranted expansion joint sealing for residential and commercial properties across the Greater Toronto Area. |
Table of Contents
- What type of expansion joint sealant should you use?
- How to seal a concrete expansion joint properly
- How Canadian winters change your product selection
- Which Canadian products and manufacturers should you consider?
- Common mistakes that cause joint sealant to fail early
- When should you hire a professional caulking contractor?
- What actually fails in Ontario, and what to do about it
- Kettlecontracting handles expansion joint sealing across the GTA
- Sources
- FAQ
What type of expansion joint sealant should you use?
Choosing the wrong material family is the most common reason a joint fails within two or three seasons. Here’s how the main chemistries compare for Canadian conditions.
Polyurethane
Polyurethane sealants are the workhorse of concrete joint sealing in Canada. Semi-rigid hydrophobic polyurethanes have shown particular effectiveness at limiting water inflow in cold, wet environments. Research from the Montreal area80) found that freeze–thaw cycles and humidity significantly affect bonding and longevity, making proper substrate preparation and primer use just as important as the product itself. Sika (Sika Canada), Tremco (Vulkem line), and Pecora all offer polyurethane joint sealants with Canadian distribution and technical support.
Polysulfide
Polysulfide sealants resist fuel, oils, and many chemicals, which makes them the preferred choice for parking decks, fuel-dispensing areas, and industrial slabs. They cure to a flexible, rubber-like consistency and perform well in submerged or high-moisture conditions. The trade-off is slower cure time and sensitivity to UV exposure over the long term. Pecora and Tremco both carry polysulfide products suited to traffic-deck applications.
Silicone
It’s a strong choice for building-envelope transitions, curtain walls, and glazing perimeters. The limitation for concrete flatwork is paintability: silicone won’t accept paint, and it can be difficult to remove cleanly if a reseal is needed. Sika Canada offers silicone joint sealants for envelope work.
Polyether
Polyether sealants sit between polyurethane and silicone in performance. They cure well at low temperatures, resist hydrolysis (breakdown from water contact), and work on porous substrates without always requiring a primer. They’re a practical option for below-grade or wet-environment joints where polyurethane primers may not flash properly. Soprema’s product range includes polyether-based options for building envelope transitions.
Hybrid and preformed systems
For complex building envelope transitions where a liquid sealant alone won’t maintain continuity across three-axis movement, preformed expansion profiles and hybrid membrane systems are the right answer. Soprema Canada describes these as monolithic, custom-made systems that absorb movement in all three axes simultaneously. Emseal specialises in preformed compression seals and hybrid systems for parking structures, plaza decks, and building facades — situations where a standard gun-applied sealant would be overstressed.
When to use primer: Polyurethane sealants on smooth or contaminated concrete almost always need a primer. Check the TDS. Skipping primer on a substrate the manufacturer flags as requiring it is one of the fastest ways to get adhesion failure within the first winter.
NRC guidance on sidewalk construction recommends 12 mm compressible filler at roughly 15-metre intervals for expansion joints and control joints at approximately 1.2–2 m transverse spacing. Knowing the joint’s designed function helps you match the right sealant movement class to what the joint will actually experience.
How to seal a concrete expansion joint properly
Good prep is what separates a joint that lasts a decade from one that fails in two seasons. Follow this sequence.
-
Measure the joint. Record width and depth. The target sealant depth is roughly half the joint width, with a practical minimum of 6 mm and a maximum of 13 mm for most gun-applied products. If the joint is deeper than that, you need a backer rod.
-
Remove old sealant and debris. Use an oscillating tool, grinder, or saw to cut out deteriorated sealant to at least half the joint depth. Follow with compressed air or a shop vacuum to clear dust and loose material. For contaminated joints, a wire brush and solvent wipe may be needed. CityWide’s best-practice guidance confirms that cleaning to at least half the joint depth before resealing is a baseline requirement.
-
Allow adequate dry time. In cold weather, concrete holds moisture longer. A substrate that looks dry may still be damp below the surface. Check with a moisture meter or tape test before priming.
-
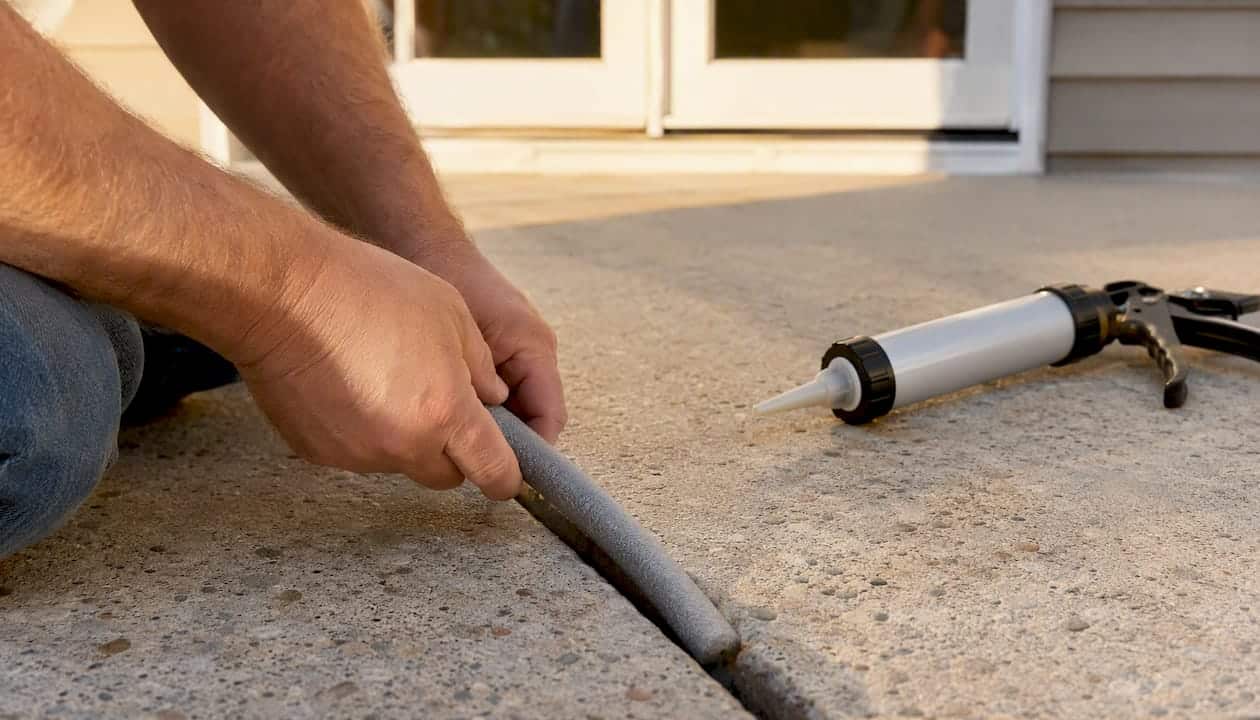
Install the backer rod. Use a closed-cell polyethylene backer rod sized roughly 25% larger than the joint width so it seats with light compression. Press it to the correct depth so the sealant above it achieves the target depth-to-width ratio. The backer rod prevents three-sided adhesion, which would restrict the sealant’s ability to stretch and compress freely.
-
Apply primer if required. Check the TDS. If primer is specified, apply it with a brush to both joint faces, let it flash to the manufacturer’s stated time (typically 15–60 minutes depending on temperature), and apply sealant within the open window. Don’t let primer sit overnight before sealing.
-
Apply the sealant. For horizontal joints, use a self-levelling formulation; for vertical or overhead joints, use a non-sag product. Cut the nozzle at a 45-degree angle slightly smaller than the joint width. Push the bead into the joint rather than dragging it across the surface. Fill in one continuous pass where possible.
-
Tool the sealant. Within the working time, tool the bead with a wet finger or rounded tool to press it firmly against both joint faces and create a slightly concave profile. This improves adhesion contact and sheds water away from the joint edges.
-
Protect during cure. Keep foot traffic off for at least 24 hours; vehicle traffic for 48–72 hours minimum, or per the TDS. Rain within the first few hours can wash out uncured sealant. In cold weather, cure time extends significantly.
Safety and PPE: Wear nitrile gloves and safety glasses throughout. Solvent-bearing primers require a respirator rated for organic vapours and good ventilation. Dust from grinding old sealant or concrete requires an N95 mask at minimum.
Pro Tip: In marginal weather (substrate temperature below 5°C), warm the sealant cartridge in a bucket of warm water for 20–30 minutes before application. Cold sealant flows poorly, traps air, and bonds inconsistently. Never apply directly to a frozen substrate.
How Canadian winters change your product selection
Ontario and most of Canada see dozens of freeze–thaw cycles per year. A joint sealant that performs adequately in a mild climate can debond, pump out, or crack after a single hard winter here if the product wasn’t selected with cold-climate data in mind.
The table below covers the key TDS parameters to check before committing to any product for an exterior Canadian application.
| TDS Parameter | What to Look For | Why It Matters in Canada |
|---|---|---|
| Movement capability (%) | ±25% minimum; ±50% for high-movement joints | Freeze–thaw cycles drive repeated compression and extension |
| Working temperature range | Minimum substrate temp, often +5°C or higher | Application below minimum causes adhesion failure |
| Service temperature range | Typically –40°C or lower for cold-climate products | Must survive Ontario winters without embrittlement |
| Primer required | Listed by substrate type | Skipping primer on flagged substrates causes early debonding |
| Shore hardness (cured) | Lower Shore A = more flexible | Harder sealants crack under cyclic movement |
| UV resistance | Rated or not rated | Silicone and polyether resist UV better than polysulfide |
| Expected service life | 10–20 years for quality products in cold climates | Guides reseal intervals and maintenance budgeting |
| ASTM C920 classification | Type S or M, Grade P or NS, Class 25 or 50 | Confirms movement class and application orientation |
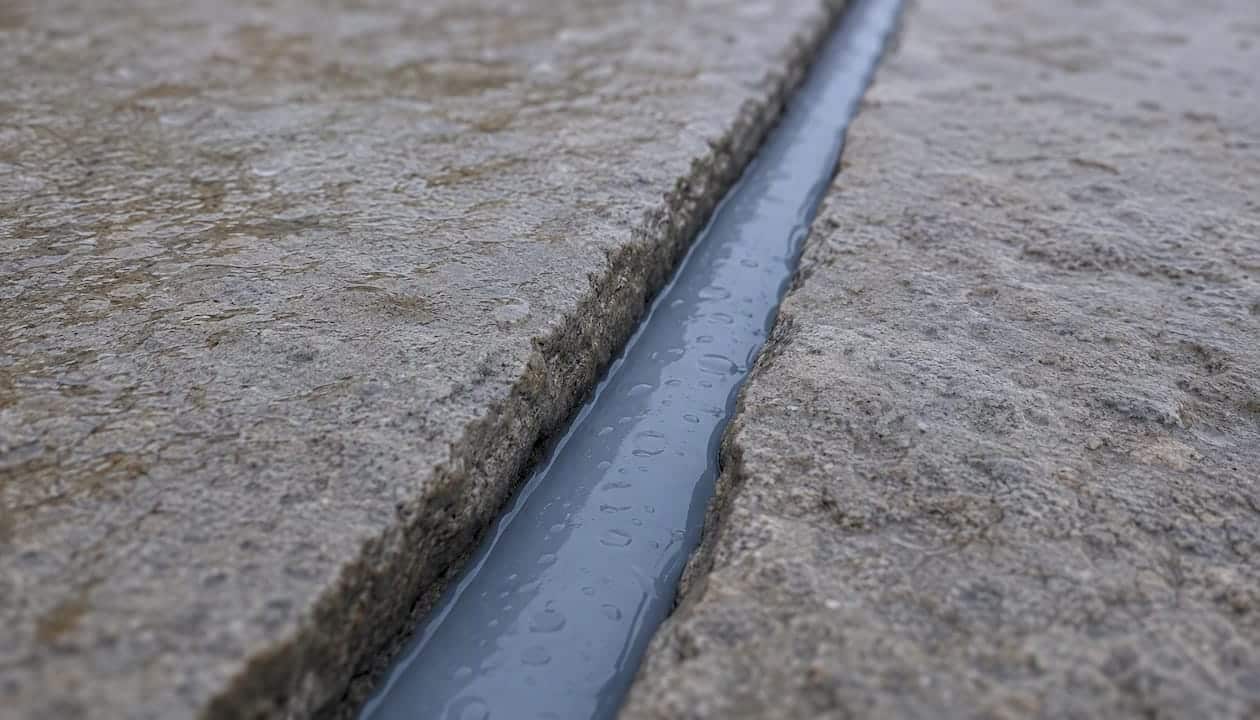
Aurum Concrete’s field guidance recommends annual inspections and reseal intervals of 3–5 years for exposed exterior joints in freeze–thaw climates. High-traffic or heavily exposed joints may need attention sooner.
De-icing salts add a chemical attack dimension on top of the physical freeze–thaw stress. Polyurethane and polysulfide formulations generally resist chloride-based salts well. Silicone is largely inert to chemical exposure. Check the TDS chemical resistance section if your joint is on a driveway, parking deck, or any surface where salt accumulates.
For timing, the best window to reseal in Ontario is late summer to early fall, when substrate temperatures are stable, above 10°C, and there’s enough warm weather left for the sealant to fully cure before the first freeze. Spring resealing works too, but wait until nighttime temperatures are consistently above 5°C.
Temperature and humidity also affect how caulking products cure and perform over time. Kettlecontracting’s guide on environmental compliance covers how these conditions interact with product selection and installation quality.
Which Canadian products and manufacturers should you consider?
The manufacturers below all have Canadian distribution, published TDS documents, and field technical support. This is not an exhaustive list, but these are the names you’ll encounter most often on commercial and residential projects in the GTA and across Ontario.
- Sika Canada — broad product range covering polyurethane, silicone, and hybrid sealants for concrete flatwork, building envelopes, and traffic decks. Sika’s Sikaflex line is widely specified for expansion and control joints.
- Soprema Canada — strong in building envelope and plaza deck applications; offers preformed expansion joint profiles and liquid-applied membrane systems for three-axis movement situations.
- Emseal — specialises in preformed compression seals and hybrid systems for parking structures, facades, and stadium-scale joints where gun-applied sealants would be overstressed.
- Tremco / Vulkem — the Vulkem polyurethane line is a long-standing standard for traffic-bearing and pedestrian deck joints. Tremco also offers technical field support for complex projects.
- Pecora — polyurethane and polysulfide products for commercial and industrial applications; well-regarded for parking deck and plaza work.
For an overview of exterior joint sealing systems across different building types, Kettlecontracting’s in-house guide covers product families and application contexts in more detail.
Reading an ASTM C920 classification
Most quality joint sealants are classified under ASTM C920. The classification string tells you the movement class (Class 25 = ±25%, Class 50 = ±50%), the grade (P = pourable/self-levelling, NS = non-sag), and the type (S = single-component, M = multi-component). A product labelled “Type S, Grade NS, Class 25” is a single-component, non-sag sealant rated for ±25% movement. Match the class to your joint’s expected movement range before purchasing.
Manufacturer installation guides, such as those published by Tower Sealants for their AU-1 product line, spell out fill technique, substrate compatibility, and primer requirements in detail. Always download the current TDS from the manufacturer’s website rather than relying on a distributor’s summary sheet, which may be outdated.
Common mistakes that cause joint sealant to fail early
Most joint sealant failures in Ontario trace back to a short list of installation errors. Knowing them helps you either avoid them yourself or evaluate whether a contractor did the job properly.
Three-sided adhesion is the most common structural mistake. When sealant bonds to the bottom of the joint as well as both faces, it can’t stretch freely. The result is a tear at one of the bond lines, usually within the first or second winter. A correctly installed backer rod prevents this entirely.
Wrong depth or overfilling creates a sealant profile that’s too thick to flex. The sealant acts more like a rigid plug than a flexible membrane. Stick to the depth-to-width ratio in the TDS.
Skipping primer on a substrate that requires it is a fast path to adhesion failure. Field experience consistently shows that correct substrate prep and primer use matter more to long-term performance than choosing a more expensive sealant.
Poor cleaning leaves bond-breaking contaminants on the joint faces. Dust, oil, old sealant residue, and curing compounds all prevent adhesion. There’s no shortcut here.
Applying outside the temperature window produces sealant that looks fine on day one but fails at the first temperature extreme. Check the TDS minimum substrate temperature before you start.
Using a low-movement-rated product on a joint that moves more than the sealant can handle causes tearing. A ±12.5% rated product on a joint that cycles ±25% will fail predictably.
For a broader look at installation errors that apply across joint types, this guide on common caulking mistakes covers the patterns that show up most often on residential and commercial properties.
Failure signs to watch for
- Cracking or tearing along the sealant bead
- Sealant pulling away from one or both joint faces (adhesion loss)
- Pump-out: sealant pushed up above the joint surface from repeated compression
- Dirt-laden or hardened sealant that no longer flexes
- Weeds or root intrusion through the joint
- Water staining at joint edges or damp spots in the slab below
Maintenance schedule
Inspect all exterior joints annually, ideally in September before freeze-up. For busy exterior joints on driveways, sidewalks, and parking areas, plan for reseal every 3–5 years depending on traffic and exposure. A joint that shows adhesion loss or cracking should be resealed before winter, not deferred to spring.
Quick repair vs full removal: If adhesion is intact on both faces and the sealant is simply surface-cracked, a clean-and-cap repair may hold for another season. If adhesion has failed on either face, or if pump-out has occurred, full removal and reseal is the right call.
When should you hire a professional caulking contractor?
Some expansion joint work is genuinely DIY-friendly: a single horizontal control joint on a residential driveway or sidewalk, accessible, low-movement, and not part of a waterproofing assembly. Most other situations benefit from a professional.
Red flags that justify calling a pro:
- Structural movement joints in a building (not just flatwork)
- Joints in traffic decks, parking garages, or plaza decks
- Vertical or shear-plane joints where non-sag product must be applied overhead
- Any joint that’s failed twice or more under previous DIY repairs
- Joints at waterproofing transitions (roof-to-wall, below-grade membrane connections)
- Large-scale projects where consistent depth, tooling, and cure management matter
Questions to ask any contractor before hiring:
- What movement class does the product you’re specifying carry, and does it match this joint’s expected movement?
- Will you provide the TDS for the sealant and primer you’re using?
- How will you prepare the joint surface, and what tools will you use?
- Is primer required for this substrate, and will you apply it?
- What is your warranty on workmanship, and for how long?
- Do you carry liability insurance and WSIB coverage?
- What does your scope include for traffic control, protection during cure, and cleanup?
A reasonable written quote should itemise materials (sealant, primer, backer rod), labour, surface preparation, and any traffic control or protection required. For a moderate residential job, expect a one-day turnaround with a 48–72 hour cure window before normal use. Larger commercial scopes will vary.
Ask for photographic documentation of the joint before and after preparation, and keep a copy of the TDS for the product installed. That record matters if a warranty claim arises later.
What actually fails in Ontario, and what to do about it
After 25 years of caulking work across the GTA and Oshawa, the pattern is consistent: the jobs that fail early almost always skipped the backer rod, skipped the primer, or were done in October when the substrate was already too cold. The product itself is rarely the culprit.
The one check most installers skip is a simple tap test after the sealant cures. Run a finger firmly along the bond line on both joint faces. Properly adhered sealant will resist and flex with pressure. Sealant that’s already debonding will feel hollow or lift slightly at the edge. If you catch that in the first week, you can still address it before winter locks in the failure.
DIY is reasonable for straightforward horizontal joints on residential flatwork, provided you follow the TDS, use a backer rod, and work within the temperature window. Anything vertical, anything in a waterproofing assembly, or anything that’s failed before deserves a professional assessment. The cost of a proper reseal is a fraction of what subgrade water damage costs to fix.
Kettlecontracting handles expansion joint sealing across the GTA

Proper expansion joint caulking protects your property from the kind of water damage that quietly compounds through every Ontario winter. Kettlecontracting provides professional joint sealing for residential and commercial properties across the Greater Toronto Area, covering concrete flatwork, building envelopes, parking areas, and full exterior joint systems.
When you call, you get an on-site measurement, TDS-matched product selection, correct backer rod and primer installation, and a documented scope with a clear workmanship warranty. Pricing reflects actual materials and labour for your specific joint conditions, not a flat estimate that ignores prep. Most residential jobs are completed in a single visit, with the site ready for normal use within 48–72 hours.
To understand why this work requires trade-specific knowledge and what you should expect from a qualified contractor, read Kettlecontracting’s guide on trade-specific caulking work. Ready to get a quote? Contact Kettlecontracting directly to book an on-site assessment.
Sources
The following references are worth bookmarking when you’re reviewing product options or verifying installation standards for Canadian conditions.
- NR25-2-54E.pdf
- How Joint Sealing Protects Concrete From Premature Failure — Aurum Concrete
- Best Practices For Concrete Expansion Joint Filling And Maintenance | CityWide®
- What Are Expansion Joints and Why Does Your Concrete Need Them?
A note on standards: ASTM C920 and manufacturer TDS documents are your primary decision tools. Industry blog posts and guides (including this one) are useful for orientation, but the TDS governs installation requirements for your specific product and substrate.
FAQ
Are you supposed to caulk expansion joints?
Yes. Expansion joints should be sealed with a flexible, movement-rated sealant to prevent water from reaching the subgrade. In freeze–thaw climates like Canada, unsealed joints allow water infiltration that causes spalling, heaving, and structural damage over time.
What is the best caulk for expansion joints?
A polyurethane or hybrid sealant rated to ASTM C920 Class 25 or Class 50 is the best general choice for concrete expansion joints in Canada. Products from Sika Canada, Tremco (Vulkem), and Pecora are widely available and well-suited to cold-climate conditions.
How do you seal a concrete expansion joint?
Clean the joint to at least half its depth, install a correctly sized closed-cell backer rod, apply primer if the TDS requires it, then fill with a movement-rated sealant and tool the surface for full face contact. Check the TDS for minimum substrate temperature before starting.
What caulk will expand and contract with the joint?
Polyurethane, polyether, and silicone sealants all accommodate cyclic movement. For concrete flatwork in Canada, polyurethane is the most common choice because it bonds well to concrete, tolerates de-icing salts, and is available in Class 25 and Class 50 movement ratings from multiple Canadian suppliers.
How often should expansion joints be resealed?
For exposed exterior joints in freeze–thaw climates, a reseal interval of 3–5 years is the standard recommendation, with annual visual inspections to catch adhesion loss or cracking before winter.
