
Exterior joint sealing is defined as the process of filling and protecting the gaps between building components to prevent water intrusion, air leakage, and structural movement damage. The quarter-inch sealant bead is arguably the most critical building envelope component, because most water infiltration happens precisely at these joints. Choosing the right sealant chemistry and movement class is not optional. Professional-grade sealants like silicone, polyurethane, and MS polymers last 15 to 25 years, compared to just 1 to 3 years for inadequate materials. This guide covers every major exterior joint sealing type for buildings, from sealant chemistry to installation practice, so you can make the right call the first time.
1. The main types of exterior joint sealants and their best uses
The five sealant chemistries used in exterior building joint sealing are silicone, polyurethane, MS polymer, acrylic, and polysulfide. Each one has a distinct performance profile, and choosing the wrong chemistry is the single most common cause of premature joint failure. Chemically incompatible sealants cause failures more than any other factor on site.
Here is how each type performs in practice:
- Silicone: Outstanding UV resistance and flexibility. Rated for curtain walls, glazing, and metal facades. Not paintable, and not load-bearing, so it cannot replace structural waterproofing. Lifespan of 20 to 25 years when properly applied.
- Polyurethane: Paintable and abrasion resistant. The preferred choice for concrete joints, masonry, and traffic-exposed areas like parking decks. Less UV resistant than silicone, so it requires paint or coating protection on exposed facades.
- MS polymer (modified silicone): A hybrid that combines paintability with UV resistance. Suited for perimeter joints on mixed substrates. Bonds well to most building materials without a primer.
- Acrylic: Paintable and easy to apply, but only suitable for interior use or very low-movement exterior joints in sheltered locations. Poor durability outdoors in Ontario’s climate.
- Polysulfide: Specialised for chemical exposure, immersion, and below-grade applications. Used in water treatment facilities, fuel storage joints, and below-grade concrete. Rarely specified for standard building facades.
Pro Tip: Never use acrylic latex caulk on an exposed exterior joint, even if the label says “paintable exterior.” It will crack and pull away within one to two freeze-thaw cycles in Ontario.
2. How movement capability affects sealant selection
Movement capability is the percentage of joint width a sealant can expand or compress without tearing or debonding. It is the most technically important specification in exterior joint sealing, and it is the one most often ignored on smaller projects.
ASTM C920 is the standard that classifies sealant movement performance. Most exterior building joints require a minimum of ±25% movement capability for standard weatherproofing. Curtain walls and high-movement zones require ±50%. Seismic or extreme-condition joints may need ±100%. Selecting a sealant rated below the actual joint movement will cause tearing, water infiltration, and early failure.
| Joint type | Recommended movement class | Typical sealant |
|---|---|---|
| Standard weatherproofing joint | ±25% | Polyurethane or MS polymer |
| Curtain wall perimeter joint | ±50% | Silicone |
| Expansion joint in concrete | ±50% | Polyurethane or silicone |
| Seismic or high-movement joint | ±100% | High-performance silicone |
| Below-grade or immersion joint | ±25% | Polysulfide |
Sealant movement classes must exceed anticipated joint movement with a safety margin of 50 to 100% above calculated values. This accounts for thermal cycling, settlement, and unexpected loading. In Ontario, where temperature swings from minus 30°C to plus 35°C are common, that safety margin is not conservative. It is necessary.
Pro Tip: When in doubt, specify one movement class higher than your calculation suggests. The cost difference between a ±25% and ±50% sealant is minimal. The cost of resealing a failed joint is not.
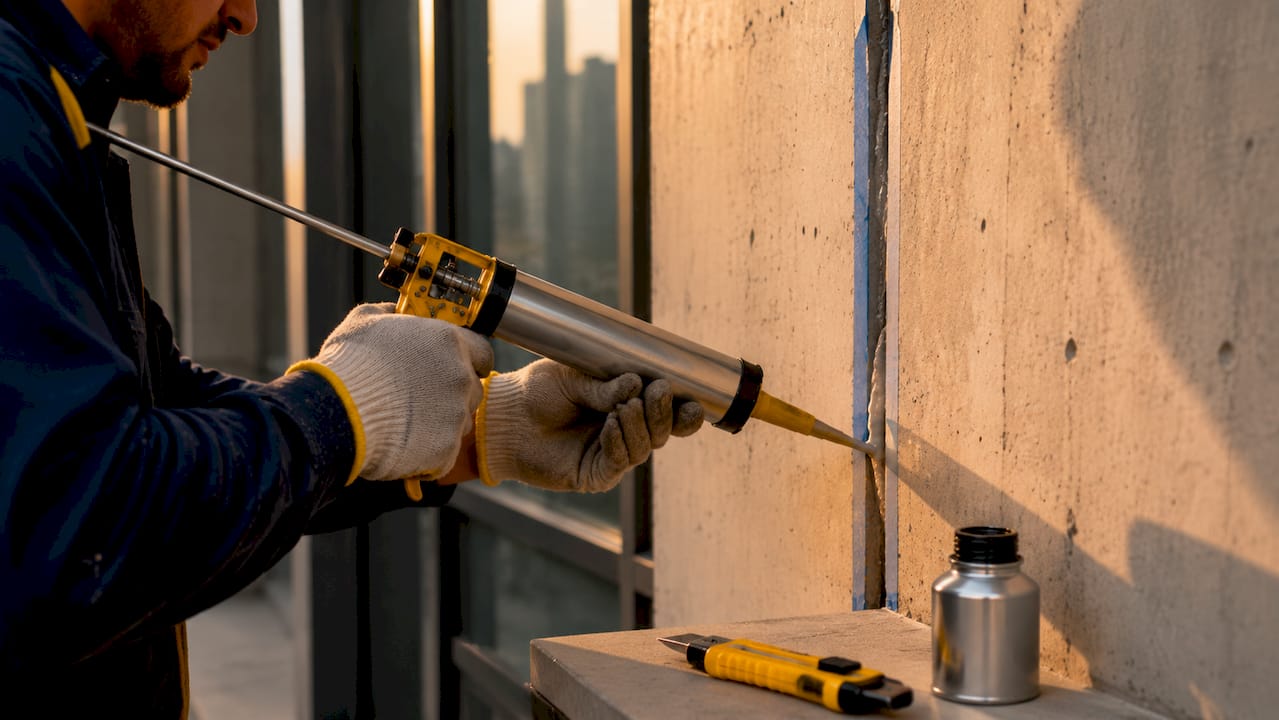
3. Joint sealing materials and installation practices that determine durability
Getting the sealant chemistry right is only half the job. The installation method and supporting materials determine whether that sealant performs for 20 years or fails in two.
Backer rod and bond breaker tape
Backer rod is a closed-cell polyethylene foam inserted into the joint before sealant application. Its job is to control sealant depth and prevent three-sided adhesion. Three-sided adhesion occurs when sealant bonds to both sides of the joint and the back of the joint simultaneously. This restricts the sealant’s ability to flex, causing it to tear under movement. Bond breaker tape serves the same purpose in shallow joints where backer rod cannot fit.
Joint dimension ratios
Correct joint dimensions are non-negotiable. Follow these steps to get them right:
- Measure the joint width at its widest point, accounting for thermal expansion.
- For joints up to 12 mm wide, set sealant depth equal to joint width (1:1 ratio).
- For joints wider than 12 mm, cap sealant depth at a maximum of 12 mm (half-inch). Depth beyond 12 mm creates a rigid sealant plug that tears under movement rather than flexing.
- Insert backer rod to achieve the correct depth before applying sealant.
- Tool the sealant surface concave immediately after application to improve adhesion and shed water.
Substrate preparation
Clean, dry, and primed surfaces are the foundation of a lasting seal. Remove all old sealant, dust, oil, and moisture before applying anything. Many polyurethane and MS polymer sealants require a compatible primer on porous substrates like concrete and masonry. Skipping this step cuts adhesion strength significantly.
Pro Tip: Apply sealant when substrate temperatures are between 5°C and 40°C. Cold substrates cause sealant to skin over before it cures properly, and hot surfaces cause it to sag and bubble.
4. Choosing the right sealant by substrate and environmental exposure
Silicone is mandatory for UV-exposed glass and metal curtain walls. Polyurethane suits concrete and masonry joints exposed to traffic. MS polymers are the preferred choice for paintable perimeter joints on mixed substrates. Matching sealant to substrate is not a preference. It is a performance requirement.
| Substrate | Best sealant type | Key reason |
|---|---|---|
| Glass and metal curtain wall | Silicone | UV resistance, flexibility, long-term adhesion |
| Concrete and masonry | Polyurethane | Abrasion resistance, paintable, bonds to porous surfaces |
| Natural stone | Neutral-cure silicone or MS polymer | Acid-cure silicone causes permanent staining |
| Wood (exterior trim) | MS polymer or paintable polyurethane | Paintable, accommodates wood movement |
| Mixed substrates (perimeter joints) | MS polymer | Bonds to most materials, UV stable, paintable |
One detail that catches many people off guard: acid-cure silicone on natural stone causes permanent staining and joint failure. The acetic acid released during curing reacts with the stone surface. Always specify neutral-cure silicone or MS polymer on limestone, granite, marble, and similar materials.
Environmental exposure matters just as much as substrate type. In coastal or high-humidity zones, silicone and MS polymers outperform polyurethane because they resist moisture absorption. In traffic-exposed areas like parking structures and loading docks, polyurethane’s abrasion resistance makes it the clear choice. For buildings targeting energy performance, the role of sealant in commercial windows extends well beyond weatherproofing. It directly affects air leakage rates and heating and cooling loads.
5. Common errors that reduce durability in exterior joint sealing
Most joint sealing failures are preventable. They come down to a short list of recurring mistakes that show up on sites of all sizes.
- Using the wrong sealant chemistry. Applying an interior-grade acrylic on an exposed exterior joint is the most common error. It will fail within one season in Ontario.
- Ignoring movement class. Specifying a ±12.5% sealant on a curtain wall joint that moves ±35% will cause tearing within the first year. Always verify the movement class against actual joint conditions.
- Skipping the backer rod. Without backer rod or bond breaker tape, three-sided adhesion is almost guaranteed. The sealant cannot flex, and it tears at the bond line.
- Overfilling the joint. A sealant depth greater than 12 mm creates a rigid plug. When the joint moves, the plug tears rather than stretches.
- Installing in poor conditions. Applying sealant to wet, frozen, or contaminated surfaces causes adhesion failure regardless of sealant quality.
- Applying over old sealant. Capping new sealant over failed old material does not restore performance. Remove all old sealant completely before resealing.
- Neglecting primer on porous substrates. Concrete and masonry absorb moisture and oils that prevent adhesion. Primer is not optional on these surfaces.
Catching these errors before they happen is exactly why common window caulking mistakes are worth reviewing before any exterior sealing project. The same principles apply across all building joint types.
Key takeaways
Exterior joint sealing performance depends on matching sealant chemistry, movement class, and substrate compatibility. Skipping any one of these three factors leads to premature failure.
| Point | Details |
|---|---|
| Sealant chemistry determines longevity | Silicone, polyurethane, and MS polymer last 15 to 25 years; acrylic fails within 1 to 3 years outdoors. |
| Movement class must exceed joint movement | Specify at least ±25% for standard joints and ±50% for curtain walls, with a 50 to 100% safety margin. |
| Backer rod prevents three-sided adhesion | Always use backer rod or bond breaker tape to allow sealant to flex under movement. |
| Substrate compatibility is non-negotiable | Acid-cure silicone on natural stone causes permanent staining; neutral-cure or MS polymer is required. |
| Installation conditions affect adhesion | Apply sealant only to clean, dry surfaces between 5°C and 40°C for full cure and bond strength. |
What 25 years on the tools has taught me about joint sealants
After two and a half decades of caulking buildings across Ontario, the pattern I see most often is not a product failure. It is a specification failure. Someone chose a sealant based on price or availability rather than movement class and substrate compatibility, and the joint failed within two years.
The detail that gets overlooked most consistently is joint design. You can apply the best silicone on the market, but if the joint is overfilled, if there is no backer rod, and if the depth is twice what it should be, that sealant will tear. The product gets blamed. The installation method is the actual problem.
I have also seen the paintability versus UV resistance trade-off cause real grief on commercial projects. Architects specify a paintable polyurethane on a south-facing facade because the colour needs to match. Two years later, the UV degradation has chalked the surface and the paint is peeling. MS polymer solves this problem cleanly. It is paintable and UV stable. It costs a little more, but it does not need to be redone in three years.
Ontario’s freeze-thaw cycles are unforgiving. A joint that moves 2 mm in summer and contracts 4 mm in winter needs a sealant that can handle that range without fatigue. Specifying to the minimum movement class is not saving money. It is scheduling a callback. Exterior sealant protection done right the first time is always cheaper than doing it twice.
— Felix
Get the right seal on your building’s exterior joints

If you are working through a building envelope project and need clarity on which sealant type fits your joints, Kettlecontracting’s team has been solving exactly these problems across the Greater Toronto Area for years. Whether it is a commercial curtain wall, a multi-unit residential building, or a custom home, the approach is the same: right product, right prep, right installation.
Start with Kettlecontracting’s guide on preparing windows for caulking to understand what proper surface preparation looks like before any sealant goes on. For a deeper look at material performance and what makes a seal last, the guide on long-lasting caulk science covers the chemistry behind durability in plain terms. When you are ready to talk specifics, Kettlecontracting is available for professional assessment and product selection.
FAQ
What is the best sealant for exterior building joints?
Silicone is the best choice for UV-exposed glass and metal joints. Polyurethane suits concrete and masonry, and MS polymer works best for paintable perimeter joints on mixed substrates.
How long do exterior building sealants last?
Properly specified sealants like silicone, polyurethane, and MS polymer last 15 to 25 years. Low-quality or incorrectly specified materials typically fail within 1 to 3 years.
What movement class do I need for a curtain wall joint?
Curtain wall and high-movement joints require a minimum of ±50% movement capability. Standard exterior weatherproofing joints require at least ±25%, with a safety margin of 50 to 100% above calculated movement.
Why is backer rod required in exterior joint sealing?
Backer rod prevents three-sided adhesion, which restricts sealant flexibility and causes tearing under joint movement. It also controls sealant depth to maintain the correct width-to-depth ratio.
Can I use silicone sealant on natural stone?
Acid-cure silicone causes permanent staining on natural stone surfaces. Use neutral-cure silicone or MS polymer on limestone, granite, marble, and similar materials.