
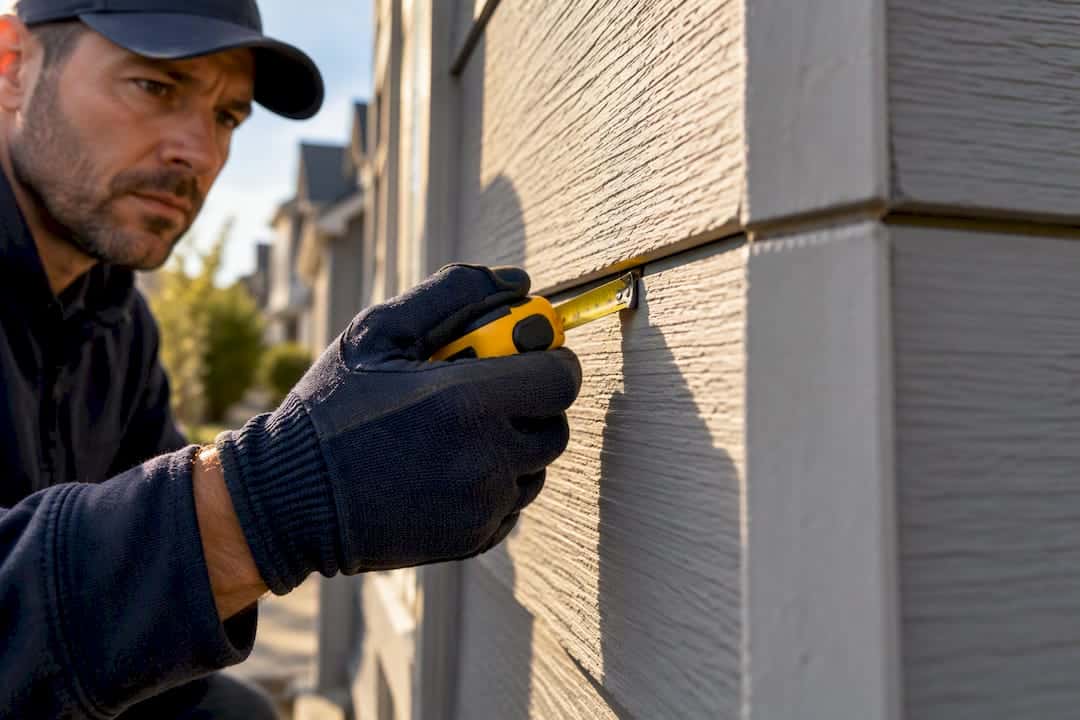
Keep fiber cement gaps around 1/8 inch at trim and wood interfaces, and caulk only where the manufacturer or code calls for it, mainly window and door perimeters and horizontal flashing lines. Leave most vertical butt joints and lap seams open per manufacturer detailing. Use a permanently flexible sealant that meets ASTM C920 or ASTM C834, and make sure flashing is doing its job behind the board.
TL;DR:
- Gaps around fiber cement siding should typically be 1/8 inch at trim and wood interfaces, with some allowances up to 1/4 inch depending on detail and movement.
- Sealant is only necessary at window and door perimeters, penetrations, and horizontal flashing lines, while vertical joints and lap seams are best left uncaulked to allow drainage and evaporation.
- Use permanently flexible sealants that meet ASTM C920 or ASTM C834 standards, ensuring they can accommodate movement, UV exposure, and paintability for long-lasting performance.
- Proper preparation, including removing failed sealant and using an appropriately sized backer rod, is crucial for creating durable, flexible joints that resist cracking over time.
- Inspections should be annual or after severe weather; avoid sealing oversized gaps or relying solely on caulk if flashing or water management behind the siding is compromised.
Table of Contents
- Recommended gap sizes and why they matter
- When to caulk and when to leave gaps alone
- How to choose a sealant that will last
- Preparation and sealing technique for a durable joint
- Maintenance: inspection timetable and when to re-seal
- Common mistakes and red flags to avoid
- Installer perspective from Kettle Contracting
- What matters most in fiber cement gap sealing
- Kettle Contracting’s sealing and inspection services
- Sources
- FAQ
Recommended gap sizes and why they matter
Fiber cement moves with temperature and humidity, so the gap you leave at installation has to account for that movement, not just look tidy on day one. James Hardie’s own installation guidance points to a 1/8 inch gap where siding butts against wood-based trim, with some butt joint conditions allowing a bit more room, up to around 1/4 inch, depending on the detail. That range exists for a reason: too tight, and the board has nowhere to expand into during a humid Ontario summer; too loose, and you’re relying on caulk to do a job it was never designed for.
Installation temperature matters more than most homeowners realize. Boards installed on a cold day expand as the weather warms, so a gap that looks fine in January can close up by July. Boards stored or installed in warm weather need a bit more clearance because they will contract as temperatures drop.
- Trim and wood interfaces typically call for a 1/8 inch gap.
- Some butt joint conditions allow up to roughly 1/4 inch, per manufacturer detail.
- Gaps wider than manufacturer specification are a repair issue, not a caulking one.
If you’re staring at a gap that’s clearly too wide, don’t just load it with sealant and hope. Caulk hides a problem for a season or two, then fails, and you’re back where you started with water behind the board.
When to caulk and when to leave gaps alone
Not every seam on a fiber cement wall needs sealant, and knowing the difference saves you from creating moisture problems where none existed.
- Seal around window and door perimeters, at penetrations like vents and pipes, and where siding transitions to a different material, since these are the spots James Hardie identifies as good building practice for sealing.
- Seal horizontal flashing junctions where the Ontario Building Code requires it, unless the assembly already meets specific overlap or drained air space conditions.
- Leave most vertical butt joints and lap seams uncaulked, following manufacturer practice, because sealing every seam can trap moisture that should be draining or evaporating behind the cladding.
- Follow the manufacturer’s warranty instructions closely. Deviating from them, even with good intentions, can void coverage if a failure shows up later.
These aren’t arbitrary rules. A wall assembly is designed to shed water through gravity, flashing, and a drained air space, not through an unbroken bead of caulk. When you seal a joint that was meant to breathe, you’re often making the moisture problem worse, not better.
How to choose a sealant that will last
The sealant you pick has to survive freeze-thaw cycles, UV exposure, and years of board movement without cracking or pulling away. That rules out a lot of what’s sitting on a hardware store shelf.
- Look for products labelled “permanently flexible,” not just “flexible” or “paintable.”
- Check for compliance with ASTM C920 for elastomeric sealants or ASTM C834 for latex joint sealants, since these standards set minimum movement and durability requirements.
- Confirm the product’s movement capability matches or exceeds the joint width you’re sealing.
- Choose a sealant rated for UV exposure if it’s staying uncovered, and confirm paint compatibility if you plan to paint over it.
- Match the sealant to the substrate. Fiber cement, wood trim, and metal flashing don’t all bond the same way to every formulation.
A high-quality silicone, polyurethane, or a specified acrylic-latex meeting ASTM C920 Grade NS, Class 25 or higher, or ASTM C834, are the acceptable generic types for most fiber cement joints, and choosing correctly here is what separates a joint that lasts a decade from one that cracks after its first winter.
Avoid rigid, non-elastomeric caulks and anything not rated for exterior movement. They look fine going in, then split the first time the board shifts. If you want more detail on matching sealant to substrate, our piece on choosing sealant for fiber cement siding walks through the trade-offs in more depth.
Preparation and sealing technique for a durable joint
Getting the prep right matters more than the caulk gun work that follows.
- Remove all old, failed sealant and clean both surfaces of dust, mildew, and residue before anything new goes in.
- Check the flashing and the weather-resistive barrier behind the joint. If either is compromised, sealing over the top just traps the problem.
- Select a backer rod sized to the joint width for correct compression, since it prevents three-sided adhesion and lets the sealant form the hourglass shape it needs to stretch properly.
- Set backer rod depth so the finished sealant bead has enough thickness to move without tearing, but isn’t so deep it loses shape.
- Apply sealant in a continuous bead, then tool it to the correct hourglass profile so it bonds to the two opposing faces only, not the back of the joint.
- Allow full cure time before painting, since painting too early can cause flashing or cracking in the finish.
Pro Tip: If the gap is wider than the sealant’s rated movement capability, fix the substrate first. No amount of tooling turns an oversized gap into a good joint.
Call a professional when you’re dealing with failed flashing, repeated leaks after a repair attempt, or gaps that clearly exceed what caulk was designed to bridge. That’s not a caulk problem anymore, it’s a building envelope problem, and it needs someone who can trace the water path, not just fill the visible crack.
Maintenance: inspection timetable and when to re-seal
Sealant is a wear item, full stop. It’s not going to last the life of the siding, and expecting it to is how small problems turn into rot behind the wall.
- Do a visual check once a year, and again after any severe storm or extreme freeze-thaw stretch.
- Time re-sealing for warmer, dry weather when possible, since cure conditions affect how well the new bead performs.
- Watch for cracking, gaps where the sealant has pulled away from one side, chalky or brittle texture, staining below the joint, or any sign of water getting through.
- Handle small touch-ups yourself if you’re comfortable with a caulk gun and the joint is straightforward.
- Book a tradesperson for anything involving flashing, repeated failures, or joints you can’t reach safely.
Our exterior wall caulking schedule breaks this down by season if you want a more detailed checklist to work from.
Common mistakes and red flags to avoid
Most siding gap problems trace back to the same handful of errors, and once you know what to look for, they’re easy to spot on a walk around the house.
- Over-caulking every vertical butt joint instead of leaving them per manufacturer detail, which traps moisture that should be draining freely.
- Using a rigid or non-elastomeric caulk that can’t handle board movement, guaranteeing an early crack.
- Relying on caulk to compensate for missing or failed flashing rather than fixing the actual water management issue.
- Filling gaps that exceed the sealant’s movement capability instead of repairing the substrate underneath.
- Ignoring manufacturer instructions, which can also void warranty coverage if a claim comes up later.
Installer perspective from Kettle Contracting
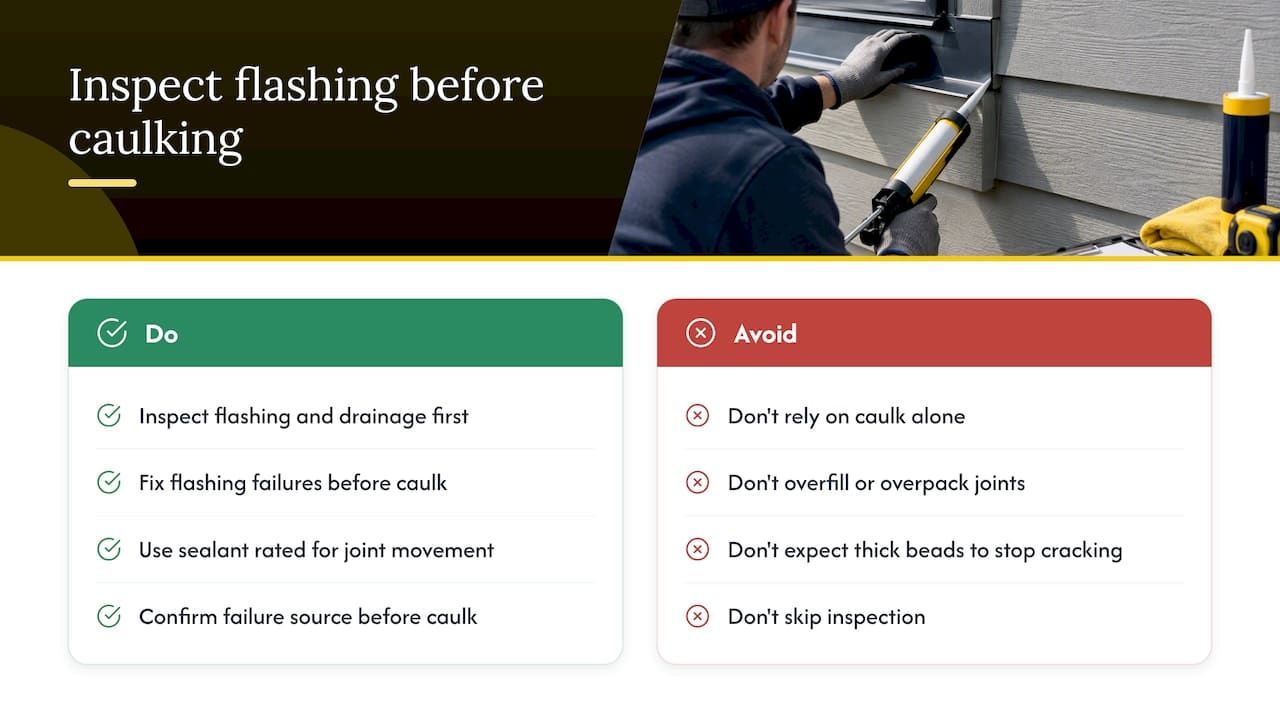
Check the flashing before you touch the caulk gun. Backer rod and a permanently flexible sealant handle the rest, but only if the water management behind the board is already sound. Routine checks catch small failures before they become rot.
— Felix
What matters most in fiber cement gap sealing
The conventional advice treats caulk as a cure-all, and that’s the part that needs pushing back on. Every gap gets filled, every seam gets a bead, and the homeowner walks away thinking the wall is sealed tight. That’s backwards. A wall assembly depends on flashing and drainage first, caulk second, and the industry’s own installation guides say as much even when the marketing around caulking products doesn’t.
What’s overrated is the idea that a bigger bead or a thicker gap fill makes a joint stronger. It doesn’t. A joint that exceeds the sealant’s rated movement capability will crack regardless of how much product you pack into it. What’s underrated is checking the flashing first, because that’s the step most homeowners skip entirely, and it’s the one that actually determines whether water gets behind the board.
If you take one thing from this, prioritize inspection over application. Find out what’s actually failing before you reach for the caulk gun.
Kettle Contracting’s sealing and inspection services
If your fiber cement siding has gaps that look wrong, or caulk that’s already cracking after a season or two, a proper fix starts with checking the flashing and the joint geometry, not just laying down a fresh bead over the old problem. Specialty contractors handle residential window caulking, commercial jobs, and full building envelope sealing across property types, including expansion joint sealing where movement is part of the design.

Hiring a specialty caulking contractor means someone is actually diagnosing the joint, not just refilling it. If you’re dealing with recurring gaps or want a proper inspection before winter, consider booking a residential window caulking assessment to get a clear read on what your siding actually needs.
Sources
- James Hardie installation guide
- Caulking tips | James Hardie
- OBC 9.27.3.8 – Flashing installation | CodeIndex
FAQ
Do you caulk seams on fiber cement siding?
Some seams get caulked and others don’t. Window and door perimeters, penetrations, and material transitions typically call for sealant, while many vertical butt joints and lap seams are left uncaulked to avoid trapping moisture, following manufacturer practice.
Should there be gaps in Hardie board siding?
Yes, small gaps are intentional and necessary to allow the board to expand and contract with temperature changes. Manufacturer guidance points to roughly 1/8 inch at trim and wood-based interfaces, with some butt joint conditions allowing a bit more.
What are the common problems with fiber cement siding?
The most frequent issues are gaps sized incorrectly for the installation temperature, sealant used where flashing should be doing the work instead, and caulk that fails prematurely because it wasn’t rated as permanently flexible. Left unaddressed, these lead to trapped moisture and water intrusion behind the cladding.
What is the best filler for filling gaps in Hardie board siding?
For gaps within the sealant’s rated capacity, a high-quality silicone, polyurethane, or acrylic-latex product meeting ASTM C920 or ASTM C834 is the right choice. Gaps that exceed the sealant’s movement capability need substrate repair, not more filler.
