
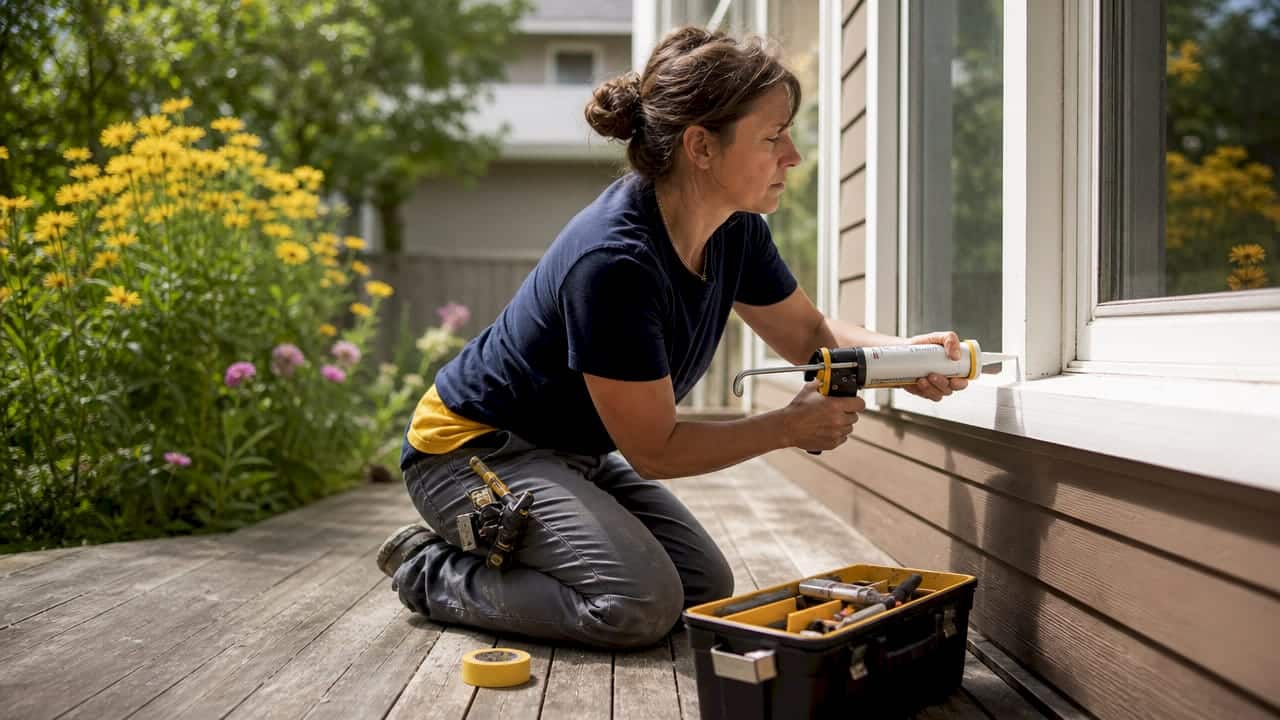
Caulking is defined as the flexible sealant applied to gaps, joints, and seams in a building’s envelope to block water and air infiltration. Moisture penetration causes 70% of construction defects in Canada, making caulking one of the most consequential maintenance tasks a property owner can perform. When caulking fails, water tracks silently behind cladding and framing long before a visible leak appears. Proper caulking maintenance protects structural integrity, supports energy efficiency, and directly influences building warranty conditions and property appraisal values. Understanding how caulking extends building lifespan is the first step toward protecting what is likely your largest financial asset.
How does caulking prevent structural damage and extend building lifespan?
Water infiltration is the primary cause of hidden structural deterioration. When moisture enters through failed joints around windows, doors, or expansion joints, it saturates insulation and begins rotting wood framing before any visible sign appears on interior walls. Failed caulking causes hidden structural damage through water tracking behind surfaces, meaning the damage is already significant by the time you notice a stain or a soft floor.
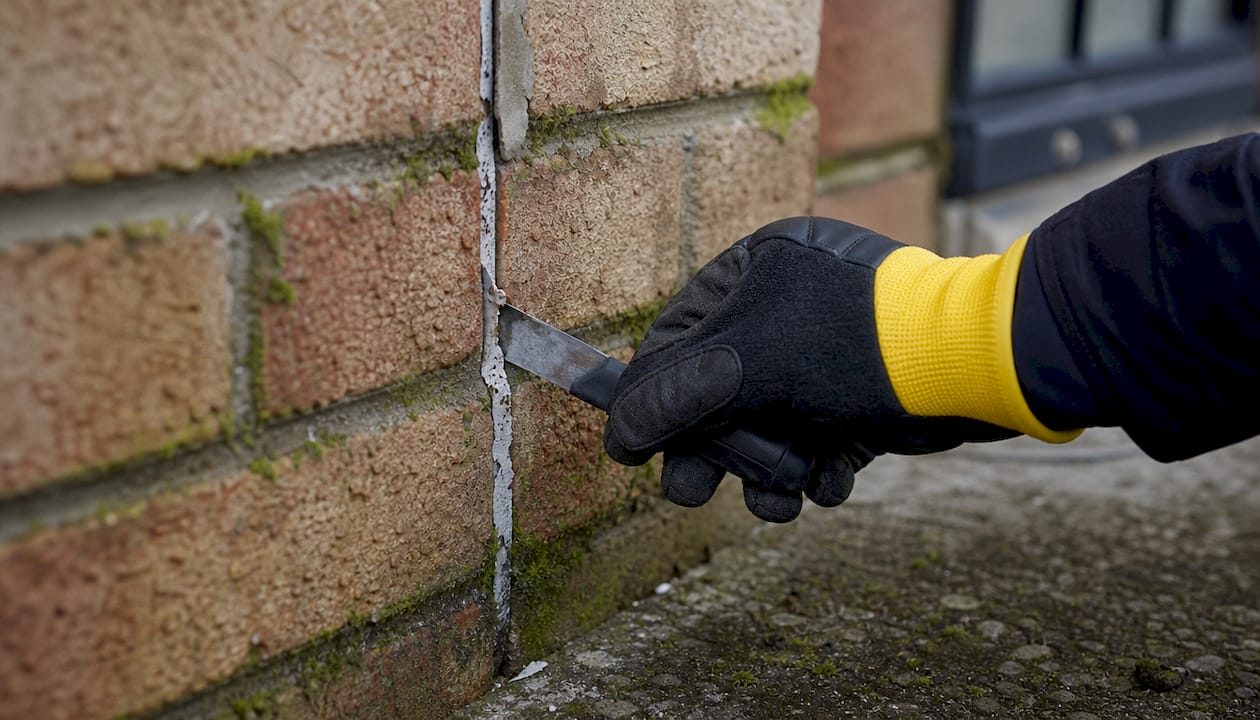
Ontario’s freeze-thaw cycles make this worse. Water that enters a small crack in autumn expands as it freezes in january and february, widening that crack with each cycle. Over several winters, what started as a hairline gap becomes a structural problem requiring significant repair. Caulking interrupts this cycle by keeping water out of the joint entirely.
Air leakage compounds the problem. Uncontrolled air leakage accounts for approximately 25% of heat loss in older Canadian homes. That figure represents real money leaving through gaps that a tube of sealant could close. Air movement also carries moisture vapour into wall cavities, accelerating mould growth and insulation degradation.
Effective caulking works because it is flexible. Unlike rigid materials, a quality sealant moves with the building as temperatures shift from minus 30°C in winter to plus 35°C in summer. This flexibility prevents the sealant from cracking or pulling away from the substrate during thermal movement.
Key areas where caulking prevents structural damage:
- Window and door perimeters: The most common entry points for both water and air infiltration
- Expansion joints: Designed to move; they require elastic sealant that accommodates that movement without tearing
- Sill plates and foundation transitions: Ground-level joints are exposed to splash-back and standing water
- Roof-to-wall intersections: Often overlooked, these joints carry significant water loads during heavy rain
- Utility penetrations: Pipes, wires, and vents create gaps that allow both air and pests to enter
Pro Tip: Run your hand along window frames on a cold, windy day. If you feel air movement, the caulking has failed. You do not need a blower door test to identify the most obvious leaks.
What are the best practices for applying caulking in Canadian climates?
Timing is the single most controllable factor in caulking performance. Caulking applied above 5–10°C during shoulder seasons adheres better and lasts significantly longer than sealant applied in cold or damp conditions. Late spring and early fall are the optimal caulking application windows for Canadian properties. Applying caulk in january or february is a common mistake that leads to poor adhesion and premature failure.
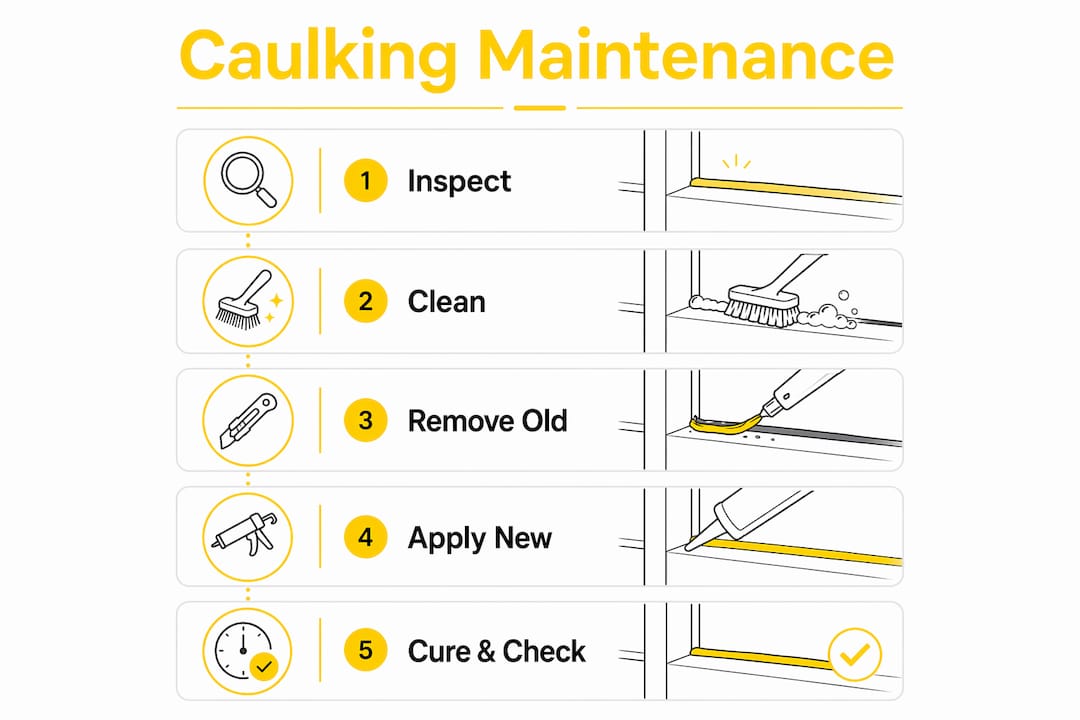
Proper preparation matters more than product choice. Applying new caulk over old, failing caulk guarantees failure. The substrate must be clean, dry, and free of the old sealant before any new product goes on. Skipping this step is the most common reason homeowners find themselves resealing the same joint two years in a row.
Follow these steps for a lasting result:
- Remove all old caulk completely. Use a caulk removal tool or utility knife to cut and pull out the existing sealant. Do not leave residue.
- Clean the joint thoroughly. Wipe the substrate with isopropyl alcohol or a suitable cleaner to remove dust, oil, and mould. Let it dry fully.
- Check joint width. Joints wider than 12mm may need a backer rod inserted first to give the sealant proper depth and support.
- Select the right product. Caulking must be elastic and UV-resistant to accommodate Canadian thermal movement without tearing. Silicone and high-quality polyurethane sealants are the standard choices for exterior applications.
- Apply in dry conditions above 10°C. Moisture on the substrate or in the air prevents proper adhesion and curing.
- Tool the bead immediately. Use a wet finger or a caulking tool to press the sealant into the joint and create a concave profile. This improves adhesion and sheds water.
One detail that catches many homeowners off guard: do not seal the bottom of window sills completely. Window frames are designed with weep holes to drain any moisture that gets past the glazing. Sealing those drainage points traps water inside the frame, accelerating rot and hardware corrosion.
Pro Tip: For exterior joints on brick or concrete, choose a polyurethane sealant over standard latex. Polyurethane bonds to masonry without primer in most conditions and handles the movement these materials produce far better than latex caulk.
You can find a detailed seasonal caulking guide on the Kettlecontracting website if you want to plan your maintenance schedule around Ontario’s weather patterns.
How does regular caulking maintenance affect energy efficiency and building warranty?
Caulking for energy efficiency is not a minor consideration. Proper window caulking reduces heating and cooling costs by 10–15%. For a property with high heating bills, that reduction is meaningful every single winter. The savings compound over years of maintained sealing.
Caulking supports modern air-tight building standards that improve both energy performance and indoor air quality. The “build tight, ventilate right” principle, widely adopted in Canadian building science, depends on the building envelope being sealed properly at every joint and penetration. Caulking is the front-line tool that makes this possible in existing buildings.
The warranty implications are significant and often overlooked:
- Manufacturer warranties on windows and doors frequently require evidence of proper installation and maintenance, including perimeter caulking. A failed seal that allows water to damage the frame can void the product warranty.
- New home warranties under Ontario’s Tarion programme require builders to address deficiencies related to water penetration. Once the warranty period ends, that responsibility transfers to the owner. Maintaining caulking is how you carry that protection forward.
- Property appraisals reflect maintenance condition. An appraiser who identifies failed caulking, water staining, or signs of air infiltration will factor deferred maintenance into the assessed value. Regular caulking maintenance is one of the lowest-cost ways to protect your appraisal position.
| Maintenance action | Benefit | Frequency |
|---|---|---|
| Full exterior reseal | Restores air and water barrier | Every 5–10 years |
| Spot inspection and repair | Catches early failures before water enters | Annually, each spring |
| Window and door perimeter check | Prevents most common infiltration points | Each fall before freeze |
| Expansion joint inspection | Avoids costly structural joint failure | Every 2–3 years |
Keeping a window caulking maintenance checklist makes this easier to track across a full property or multi-unit building.
What are the financial consequences of neglecting caulking maintenance?
The cost gap between proactive and reactive maintenance is stark. A proactive exterior reseal costs approximately $600. Restoration costs from moisture damage can exceed $12,000. That is not a worst-case scenario. It is a realistic outcome when water infiltration goes unaddressed through multiple freeze-thaw cycles.
The damage path is predictable. Water enters through a failed joint in september. It saturates the insulation batt behind the cladding through the fall. In december, that moisture freezes and expands, widening the gap. By march, the framing behind the wall has begun to soften. By the following summer, mould is present. The homeowner notices a musty smell or a soft spot in the drywall and calls a contractor. At that point, the repair involves removing cladding, replacing framing, treating for mould, and re-insulating, all because a joint was not resealed.
Deferred caulking maintenance does not save money. It delays a small cost and guarantees a much larger one. Water does not wait for a convenient time, and freeze-thaw cycles do not slow down because a repair has been postponed. Every season of inaction compounds the damage already underway inside the wall.
The mould risk adds a health dimension that goes beyond repair costs. Mould remediation in a wall cavity is expensive and disruptive. Insurance policies vary on coverage for water damage resulting from maintenance neglect. Many policies exclude damage that developed gradually, which is exactly how caulking failure works.
Preventing water damage through regular caulking maintenance is the most cost-effective building preservation strategy available to property owners. The return on a $600 reseal, measured against a $12,000 restoration, requires no further calculation.
Key takeaways
Proper caulking maintenance is the most cost-effective way to prevent structural damage, reduce energy costs, and protect building warranty and appraisal value over the long term.
| Point | Details |
|---|---|
| Moisture is the primary threat | Building envelope failures cause 70% of Canadian construction defects, and caulking is the first line of defence. |
| Preparation determines performance | Removing old caulk completely and cleaning the substrate matters more than which product you choose. |
| Timing affects adhesion | Apply caulk above 10°C in late spring or early fall for the best adhesion and longest service life. |
| Cost gap is significant | A $600 reseal prevents restoration costs that routinely exceed $12,000 when water damage is left to develop. |
| Warranty and appraisal depend on maintenance | Failed caulking can void manufacturer warranties and reduce property appraisal values through visible deferred maintenance. |
What 25 years on the job taught me about caulking
After two and a half decades of working on buildings across the Greater Toronto Area, the pattern I see most often is this: homeowners treat caulking as cosmetic. They notice it when it looks bad, not when it is failing structurally. By the time caulking looks bad enough to act on, water has usually been entering the wall for at least one full season.
The second most common mistake is the DIY patch-over. Someone buys a tube of latex caulk from a hardware store, runs a bead over the cracked existing sealant, and considers the job done. That repair will fail within one freeze-thaw cycle. The old sealant underneath is already debonded. The new layer has nothing solid to grip. I have seen this on properties where the same joint has been “repaired” four or five times without anyone removing the original material.
What actually works is straightforward: proper removal, clean substrate, right product for the application, and correct timing. None of that is complicated. The difficulty is that it takes more time and effort than a patch-over, and the results are not immediately visible. You cannot see the water that did not get in.
My honest advice to any property owner is to schedule a caulking inspection every fall before the ground freezes. Catching a failing joint in october costs almost nothing to fix. Finding the same failure in april, after a full winter of freeze-thaw cycles, is a different conversation entirely. The importance of caulking in construction and ongoing maintenance is something the industry has understood for decades. The gap is in how that knowledge reaches property owners.
— Felix
Kettlecontracting’s approach to long-term building protection
Kettlecontracting specialises in professional caulking services for residential and commercial properties across the Greater Toronto Area. Every project starts with a full envelope assessment to identify failing joints, hidden moisture entry points, and areas where previous repairs have not held.

The team at Kettlecontracting selects sealant products matched to the specific substrate, joint width, and exposure conditions of each property. Scheduling is planned around shoulder-season windows to maximise adhesion and service life. If you are ready to protect your building before the next freeze-thaw season, the window preparation guide is a practical starting point. For properties showing signs of existing damage, the construction defect examples page helps you identify what to look for before calling a contractor.
FAQ
How often should exterior caulking be replaced?
Exterior caulking typically lasts 5–10 years depending on product quality, application conditions, and sun exposure. Annual inspections each spring help catch early failures before water infiltration begins.
Does caulking actually reduce energy bills?
Proper window and door caulking reduces heating and cooling costs by 10–15% by closing the gaps responsible for air leakage. Older homes with original caulking see the largest savings after resealing.
Can failed caulking void a building warranty?
Manufacturer warranties on windows and doors often require evidence of proper maintenance, including perimeter sealing. Documented caulking failures that allow water damage can void coverage under both product and new home warranties.
Why does caulking fail faster in Ontario than in milder climates?
Ontario’s freeze-thaw cycles put extreme stress on sealants. Water expands as it freezes, and joints move significantly between summer highs and winter lows. Only elastic, UV-resistant sealants designed for Canadian thermal movement hold up reliably over multiple seasons.
Is it worth hiring a professional for caulking, or is DIY sufficient?
DIY caulking works for small interior repairs, but exterior envelope sealing requires proper substrate preparation, correct product selection, and timing that most homeowners underestimate. Professional application on a full exterior reseal pays for itself by lasting two to three times longer than a typical DIY repair.
