
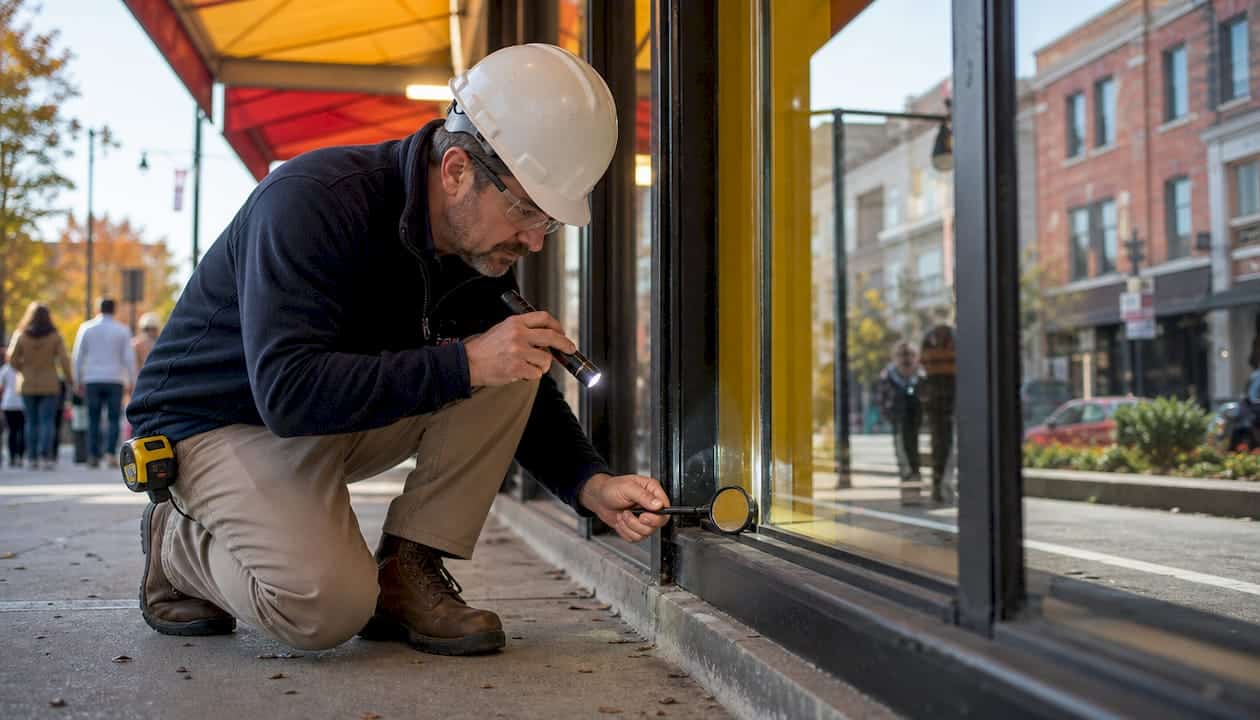
Inspecting storefront window perimeter seals is the essential first step in protecting your building from water infiltration, air leakage, and rising energy costs. The industry term for this process is “perimeter seal inspection,” and it covers the sealant joints where your window frame meets the surrounding wall assembly. Quarterly visual checks are the minimum standard for commercial storefronts, with a detailed professional assessment at least once a year. In Canadian climates, where freeze-thaw cycles stress every joint in your building envelope, skipping this step is a costly mistake.
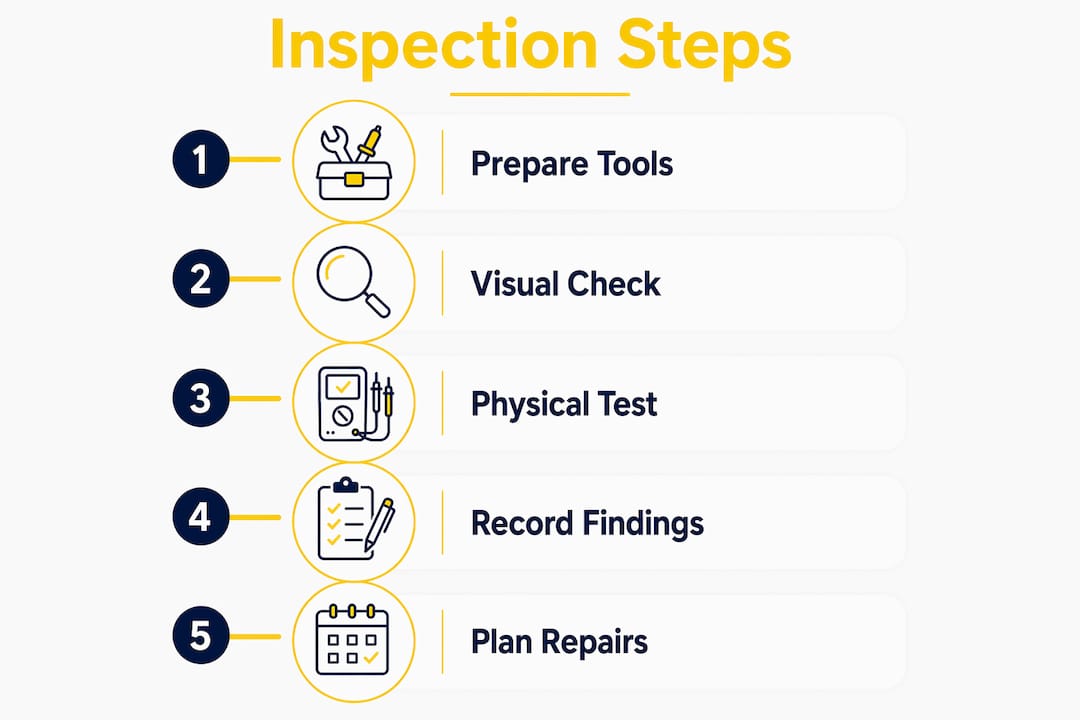
How to inspect storefront window perimeter seals: tools and preparation

A thorough storefront seal inspection starts before you ever touch the building. Gathering the right tools and choosing the right conditions separates a reliable assessment from a wasted hour.
Tools to bring
- Flashlight or headlamp: Illuminates shadowed frame edges and sill areas where sealant failure hides.
- Moisture meter: Detects water trapped in wall cavities or framing that a visual check will miss.
- Binoculars: Lets you scan upper-storey frames safely from ground level before committing to ladder access.
- Inspection form or digital log: Records exact locations, photos, and condition ratings for each joint.
- Safety equipment: Non-slip footwear, gloves, and a hard hat if you are working near traffic or overhead hazards.
Environmental and building considerations
Timing matters. April is the most critical month for commercial window servicing in Canada because thaw cycles expose weakened seals and frame shifts that milder weather conceals. Avoid inspecting during heavy rain, as standing water masks the true source of leaks.
Buildings older than 20 years, or those near salted roads and coastal areas, need closer attention. Salt deposits accelerate corrosion on aluminum frames, which then compromises the bond between the frame and the sealant. Note the building’s age, exposure level, and any history of water complaints before you start.
Pro Tip: If a leak is currently active, inspect it immediately. Active leak inspections yield better diagnostics because water evaporates quickly and leaves fewer clues once it dries.
| Preparation step | Why it matters |
|---|---|
| Check weather forecast | Avoid rain or freezing temps that distort findings |
| Review maintenance history | Identifies repeat problem areas before you start |
| Confirm safe access | Ladders, lifts, or binoculars depending on building height |
| Prepare documentation | Photos and written notes create a reliable repair record |
Step-by-step visual and physical inspection of perimeter seals
Work from the outside in, and from the top of the frame down. This sequence follows the path water takes, which is the most logical way to catch problems early.
Exterior visual check
- Scan the full perimeter of each window frame. Look for cracks, gaps, peeling edges, or chalking in the sealant bead. Chalking means the sealant has oxidised and lost flexibility.
- Check adhesion at both edges of the sealant joint. Sealant that has pulled away from either the frame or the wall substrate is no longer doing its job, even if it looks intact from a distance.
- Look for dirt tracks on or near the sealant. Air leakage leaves visible dirt tracks along failed seal paths. These dark streaks are a reliable indicator of exactly where the seal has broken down.
- Inspect weep holes and drainage channels. Blocked weep holes cause water to back up behind the frame. Clear any debris with a thin wire or compressed air.
- Check structural sealant joints for adhesion failure. Per ASTM C1521, structural sealant joints require adhesion testing to detect substrate failure, which is a safety hazard requiring immediate attention.
Interior inspection
- Look for condensation or fogging between glass panes, which signals a failed insulated glass unit seal.
- Check interior sills and surrounding drywall for water stains, efflorescence (white salt deposits), or soft spots.
- Feel for drafts along the frame perimeter on a windy day. A lit incense stick held near the joint will show air movement clearly.
- Inspect frame alignment. A frame that has shifted or warped suggests movement in the wall assembly, not just sealant wear.
Pro Tip: Smoke testing is a practical diagnostic tool that quickly reveals air leak paths and helps you tell the difference between a weatherstripping failure and a frame-to-wall joint problem. It takes minutes and removes the guesswork.
Record every finding with a photo and a location note. Vague records like “north window, some cracking” are not useful six months later when you are planning repairs.
What signs tell you perimeter seals need repair or replacement?
Seal failure rarely announces itself all at once. It builds gradually, and the early signs are easy to dismiss until the damage is expensive.
Visual indicators to watch for:
- Cracked, separated, or missing sealant along the frame perimeter
- White powdery deposits (efflorescence) on the frame or surrounding masonry
- Fogging or condensation between glass panes
- Dark staining on interior walls or ceilings near the window
Physical signs:
- Drafts felt along the frame edge during cold or windy weather
- Loose or warped frames that no longer sit flush against the wall
- Water staining on interior surfaces below or beside the window
Ignoring these signs accelerates deterioration. Water that enters through a failed perimeter seal does not stay at the window. It travels into wall cavities, saturates insulation, and promotes mould growth. Repair costs multiply quickly once framing or interior finishes are involved.
“Freeze-thaw cycles are the most aggressive force acting on storefront sealant in Canadian climates. Every winter, water enters a hairline crack, freezes, expands, and widens the gap. By spring, what started as a minor adhesion failure has become a significant opening. Catching it in the fall, before the first freeze, is always cheaper than repairing it in April.”
The role of perimeter sealant in a commercial window system goes beyond weatherproofing. It is the primary barrier against air and water infiltration at the most vulnerable joint in the building envelope. When it fails, the whole system is compromised.
Seasonal and environmental maintenance tips for longer seal life
Perimeter seal maintenance is not a once-a-year task. Canadian weather demands a schedule that accounts for both salt exposure and temperature extremes.
- Spring inspection (april). This is your most important inspection of the year. Freeze-thaw cycles will have stressed every joint over winter. Check for new cracks, adhesion loss, and frame movement before the rainy season begins.
- Late April cleaning and waxing. Clean and wax aluminum frames in late April to remove winter salt deposits and apply a protective coating before summer UV exposure begins.
- Fall inspection (october). Identify and repair any sealant failures before freezing temperatures arrive. A failed seal going into winter will be a much larger problem by spring.
- October waxing. Apply a second wax coat to aluminum frames before the salt season starts. This reduces corrosion risk significantly over the winter months.
- Monthly rinses during winter. In areas where road salt is applied regularly, rinse frames monthly to prevent salt from accumulating and corroding the frame-to-sealant bond.
For buildings with a history of water infiltration or structures older than 20 years, professional building envelope assessments are recommended every 3–5 years. Newer buildings in good condition can extend that cycle, but should not skip it entirely.
Pro Tip: Applying a wax coating to aluminum frames before the salt season significantly reduces corrosion and extends frame life. It takes less than an hour per storefront and prevents repairs that cost far more.
For a full seasonal approach to maintaining your seals, Kettlecontracting’s guide on window caulking maintenance covers the Canadian climate in practical detail.
Common inspection mistakes and how to avoid them
Even experienced property managers make errors during storefront seal inspections. These mistakes lead to missed failures, misdiagnosed problems, and repairs that do not last.
- Relying only on surface appearance. A sealant bead can look intact while water is already moving behind it. Always use a moisture meter on the surrounding wall and sill area.
- Assuming the window is the source of every leak. Water entry at window heads is often caused by roof leaks travelling behind curtain walls. Always check drainage systems and neighbouring assemblies before concluding the perimeter seal has failed.
- Resealing without fixing the root cause. Replacing sealant without addressing blocked weep holes or frame misalignment is a temporary fix. The new sealant will fail for the same reason the old one did.
- Skipping documentation. An inspection with no written record is nearly useless for planning repairs or tracking deterioration over time. Photograph every anomaly with a timestamp.
- Treating the window as an isolated component. Experts treat the window perimeter as part of the entire building envelope, not a standalone element. Failures at the window often reflect broader issues in the wall assembly.
If you are unsure whether a problem is a sealant failure or something deeper, Kettlecontracting’s resource on spotting failed caulking walks through the visual and physical signs in plain language.
Key takeaways
Regular, structured perimeter seal inspections are the most cost-effective way to prevent water infiltration, energy loss, and structural damage in commercial storefronts.
| Point | Details |
|---|---|
| Inspect on a schedule | Conduct quarterly visual checks and a detailed annual assessment as a minimum standard. |
| Time inspections seasonally | April and october are the most critical months for Canadian storefront seal inspections. |
| Look beyond the surface | Use a moisture meter and check weep holes, not just the visible sealant bead. |
| Fix root causes first | Address frame misalignment and drainage blockages before resealing any joint. |
| Document every finding | Timestamped photos and written notes make follow-up repairs faster and more accurate. |
What 25 years of inspections taught me about storefront seals
The most common mistake I see property managers make is treating a storefront seal inspection as a quick visual pass. They walk by, glance at the frame, see no obvious gaps, and tick the box. That approach misses the majority of real failures.
The signs that matter most are often subtle. Dirt tracks along the sealant edge, a faint draft on a cold morning, a small water stain on the interior sill that appeared after a heavy rain. These are the early warnings. By the time you see a visible gap or active water entry, the damage behind the wall has usually been building for months.
What I have also learned is that Canadian storefronts face a specific combination of stressors that buildings in milder climates do not. Salt from winter road maintenance attacks aluminum frames from october through april. Freeze-thaw cycles work on every micro-crack in the sealant. UV exposure in summer dries out older sealant formulations faster than most people expect. A seal that looked fine in September can be compromised by February.
The other thing worth saying plainly: resealing without a proper diagnosis is money wasted. I have seen storefronts resealed three times in five years because no one checked the weep holes or looked at the frame alignment. The sealant was never the problem. Integrating your inspection findings into a broader building envelope maintenance plan is what separates a property that holds its value from one that keeps generating repair bills.
— Felix
Professional caulking services for storefront perimeter seals
When your inspection turns up sealant failures, frame movement, or drainage issues, the repair work requires more than a tube of caulk from a hardware store. Proper resealing involves surface preparation, correct product selection for the substrate and exposure conditions, and application technique that creates a lasting bond.

Kettlecontracting specialises in commercial caulking across the Greater Toronto Area, with experience on storefronts, curtain walls, and full building envelopes. Before any sealant goes on, the team addresses surface preparation and root causes, because a well-applied seal over an unresolved problem is just a delayed repair. Learn more about why caulking is trade-specific work and what that means for your storefront’s long-term performance. For properties preparing for a reseal, the window preparation guide outlines exactly what needs to happen before work begins.
FAQ
How often should I inspect storefront window perimeter seals?
Conduct a basic visual inspection quarterly and a detailed professional assessment annually. Buildings older than 20 years or with a history of water infiltration should schedule professional assessments every 3–5 years at minimum.
What does a failed perimeter seal look like?
Failed sealant shows as cracks, gaps, peeling edges, or chalking along the frame joint. Dirt tracks on the sealant surface and interior water stains near the window are also reliable indicators of seal failure.
Can I reseal a storefront window myself?
You can apply fresh sealant to minor surface cracks, but lasting repairs require addressing root causes first. Blocked weep holes, frame misalignment, or drainage issues will cause new sealant to fail for the same reason the old sealant did.
What is the best time of year to inspect storefront seals in Canada?
April is the most critical time for storefront seal inspections in Canada. Freeze-thaw cycles over winter reveal weakened seals and frame shifts that are not visible in milder seasons. A fall inspection in october is equally important before the next freeze season begins.
How do I tell if water is coming from the window seal or somewhere else?
Check the drainage system and roof above the window before assuming the perimeter seal has failed. Water entry at the window head is often caused by roof leaks travelling behind the wall assembly, not by the window seal itself.
