
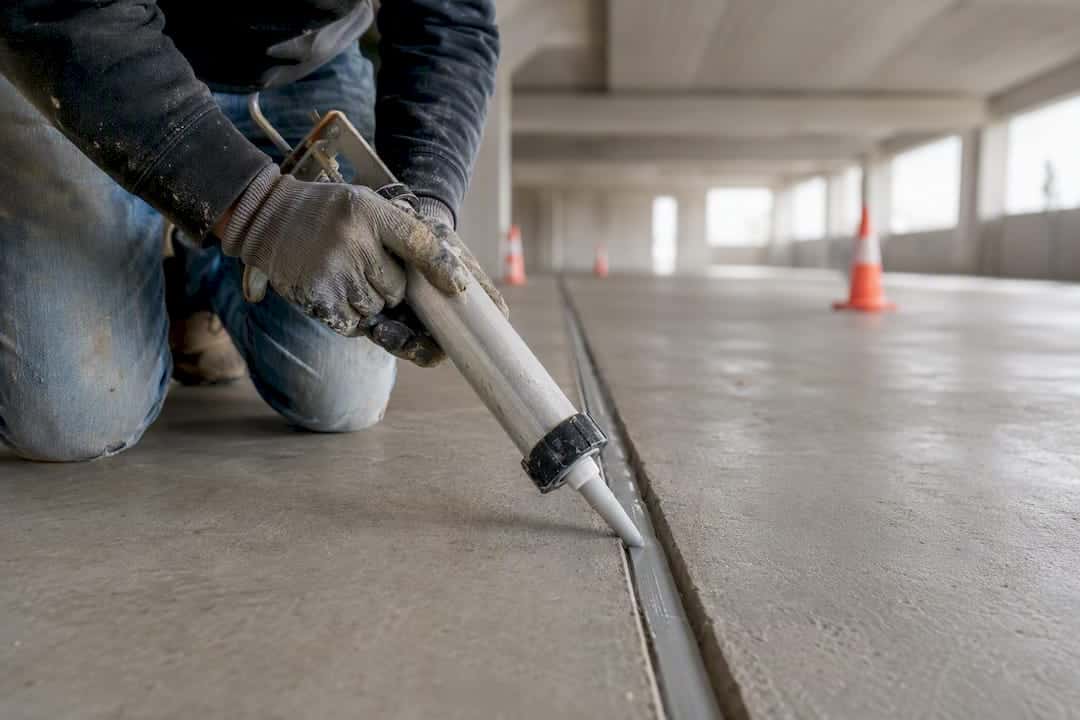
For traffic-exposed drive aisles and ramps, specify an armoured or traffic-grade polyurethane or polysulfide seal system, and back it with annual inspections plus prompt spot repairs the moment a joint shows movement or debris packing. That combination, more than any single product choice, is what separates a parking structure that lasts thirty years from one that’s fighting rebar corrosion by year twelve. Field-applied sealants generally hold up 5 to 10 years under traffic, while preformed and armoured systems run considerably longer when they’re sized and installed correctly.
Here’s what should drive your specification and your maintenance calendar:
- Drive aisles and ramps: armoured or traffic-grade polyurethane/polysulfide, sized for daily vehicle movement
- Roof decks and low-traffic joints: preformed compression seals or quality field-applied sealant with proper backer rod
- Inspection rhythm: one full annual inspection, with a semi-annual walk-through and flush after wash-downs
- Budget signal: once repairs cover more than roughly 30% of a joint run, plan full replacement rather than patching
Skip the inspection discipline and even the best sealant won’t save you from the repair bills that follow.
Key Takeaways
| Point | Details |
|---|---|
| Match system to location | Use armoured or traffic-grade polyurethane/polysulfide on drive aisles; preformed seals elsewhere. |
| Inspect on a fixed schedule | Run one annual full inspection plus a semi-annual walk-through with post-wash flushing. |
| Know the four failure types | Watch for adhesion, cohesive, substrate, and property-loss failures during every walk-through. |
| Budget with real numbers | Sealant replacement runs $50 to $100 per linear foot versus $200 to $500 per square foot for concrete spall repair. |
| Call Kettlecontracting for proper installation | Kettlecontracting handles expansion joint caulking and surface prep across the Greater Toronto Area with documented, code-aware methods. |
Table of Contents
- What types of joint systems belong in a parking structure?
- Which sealant material actually holds up on a parking deck?
- How do you know when a joint seal is failing?
- How should a contractor prepare and install a joint seal?
- How much should you budget for joint sealing over the structure’s life?
- When does a joint problem need an engineer, not just a sealant crew?
- What 25 years of Ontario parking decks has taught us
- What safety and compliance standards apply to joint sealing work?
- How do you write a specification and choose the right contractor?
- How is joint sealing tested and verified during installation?
- What maintenance keeps sealed joints performing between inspections?
- How does traffic load affect joint design and sealant choice?
- Why does this matter more than most owners assume?
- Get your parking structure joints assessed properly
- Sources
- FAQ
What types of joint systems belong in a parking structure?
Not every joint on a parking deck does the same job, so it shouldn’t get the same treatment. Matching the system to the location is the single biggest lever you have over long-term cost.
- Field-applied sealants use a backer rod set behind a poured or gunned sealant bead. They’re the standard choice for control joints, wall-to-slab transitions, and lower-traffic areas where movement is modest. They’re also the most affordable to install and the easiest to spot-repair, which is exactly why they’re the wrong call for a drive aisle taking thousands of tire passes a week.
- Preformed compression seals and strip seals are pre-manufactured elastomeric profiles compressed into a joint opening. They resist debris packing better than a field-applied bead because there’s no exposed adhesive line for grit and salt to work into, and they typically outlast field-applied sealants by a wide margin when sized correctly for the expected movement.
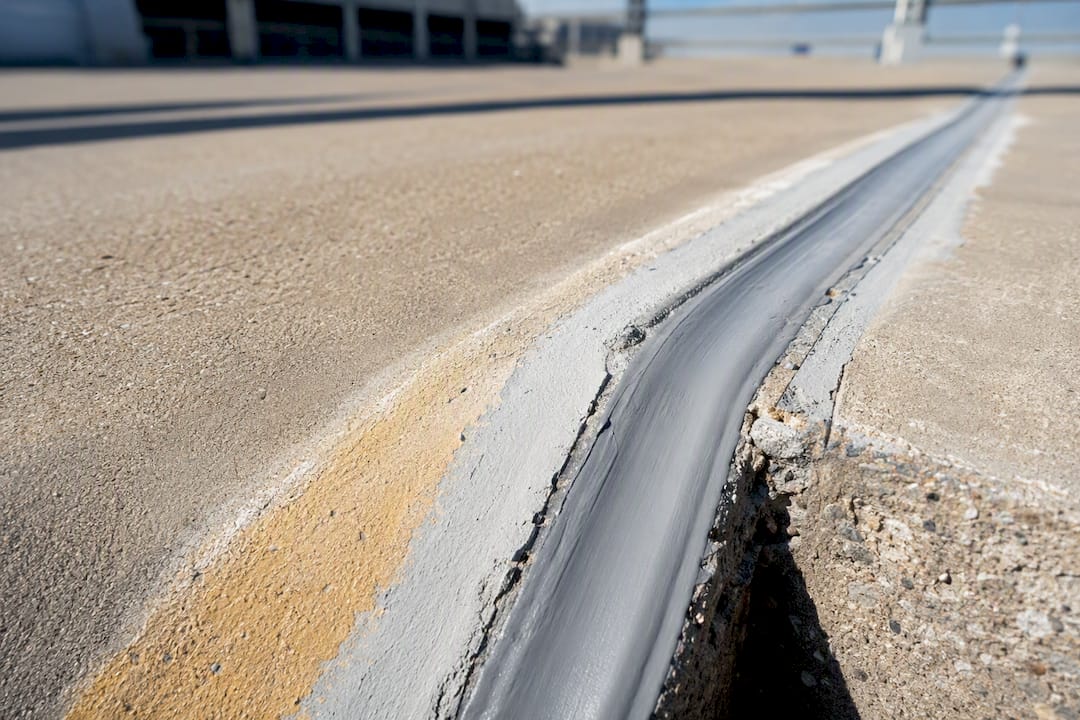
- Armoured systems pair a metal or reinforced nosing with a replaceable seal element. This is the right call for drive aisles, ramp transitions, and any expansion joint that sees direct wheel loading, since the nosing takes the abrasion and the seal itself can be swapped without tearing up surrounding concrete.
Roof decks, ramps, and double-tee flange edges each carry different exposure risks, and your joint schedule should reflect that rather than using one product across the whole structure.
Which sealant material actually holds up on a parking deck?
Material choice comes down to what the joint is exposed to: de-icing salts, UV, standing water, or constant abrasion from tires.
- Polyurethane and polysulfide are the workhorses for traffic-exposed joints. Both handle repeated movement and chemical exposure from de-icers well, and both are commonly specified for expansion joints on ramps and drive aisles.
- Silicone performs fine in low-movement, low-abrasion locations (some wall or curb joints), but it’s a poor fit anywhere tires roll over it directly. Silicone doesn’t resist abrasion the way polyurethane does, and its adhesion in consistently wet or salt-laden conditions can weaken over time.
- Neoprene and closed-cell elastomers are what most preformed compression seals are built from. They bring long-term resilience to freeze-thaw cycling without relying on adhesion the way a wet-applied sealant does.
When you write the specification, don’t leave the sealant class up to interpretation. Call out the ASTM C920 class, the required primer, and the expected movement percentage directly in the tender documents. Vague specs invite substitutions, and substitutions are how a contractor ends up installing a general-purpose sealant where a traffic-grade product was actually needed.
How do you know when a joint seal is failing?
Four failure types cover almost everything you’ll see on a walk-through, and PCI’s own committee guidance breaks them down the same way we’d describe it on site.
- Adhesion failure — the sealant pulls away cleanly from the concrete edge, usually because the substrate wasn’t clean or dry enough at install.
- Cohesive failure — the sealant itself splits or tears through the middle, a sign it’s been asked to stretch beyond what the material or joint width can handle.
- Substrate failure — a chunk of concrete comes away with the sealant still attached, which points to a weak or damaged edge rather than a sealant problem.
- Loss of sealant properties — the material has gone hard, chalky, or brittle from UV and age, even though it’s still technically bonded.
Your inspection routine should include an annual full walk plus a semi-annual check, with a flush and inspect right after any pressure wash. Watch joints under live traffic for visible movement, sound suspect areas with a hammer for hollow spots, and check the underside of the deck for staining, which usually means water is already past the seal. Log every finding by joint location so you can track which areas are failing repeatedly and budget accordingly.
Pro Tip: Keep a simple joint map with dates and photos for every repair. When the same joint shows up three inspections in a row, that’s not a sealant problem anymore, it’s usually a structural one.
How should a contractor prepare and install a joint seal?
Surface prep is where most premature failures actually start, and it’s the part owners rarely get to watch happen.
- Grinding, not sandblasting. The joint edges should be ground to expose a sound, concrete-white profile, then vacuumed clean. Random sandblasting can round edges and leave dust that undermines adhesion.
- Backer rod sizing. The rod should be roughly 25% larger than the joint width to seat properly and create the right bond breaker. Aim for a sealant width to depth ratio close to 2:1, with a practical minimum depth so the bead can flex without tearing.
- Priming and moisture limits. Primer needs to match the sealant chemistry, and the substrate has to be within the manufacturer’s moisture and temperature range. Installing on a damp or too-cold slab is one of the fastest routes to adhesion failure.
- Cure protection. Traffic needs to be kept off the joint until cure is substantially complete, and snow-plow blades or mechanical sweepers need clear guidance on how close they can run to a fresh or existing seal without catching the edge.
If you want more detail on how joint width itself drives these ratios, our guide to why joint width affects sealant performance walks through the geometry in plain terms.
Pro Tip: Ask your contractor what temperature the slab was at during installation, not just the air temperature. A cold deck on a mild day can still be well outside the sealant’s working range.
How much should you budget for joint sealing over the structure’s life?
Service life varies by system, and that variance is exactly what should shape your capital plan. Field-applied sealants generally run 5 to 10 years before needing replacement, preformed compression seals stretch to 10 to 20 years, and properly maintained armoured nosings can reach 15 to 25 years.
The cost comparison is where proactive maintenance earns its keep. Sealant replacement runs roughly $50 to $100 per linear foot, while letting water get past a failed joint and into the concrete pushes you into spall and delamination repairs costing $200 to $500 per square foot. That’s not a rounding error, it’s the difference between a maintenance line item and a capital emergency.
- Spot repair is fine when failures are isolated and the joint geometry is still sound
- Once repairs exceed roughly 30% of a joint run, plan full replacement rather than chasing patches
- Prioritize roof decks and any area with heavy salt exposure. They fail first and cost the most to ignore
For a broader look at how sealing fits into a full maintenance budget, see our page on reducing maintenance costs on an investment property.
When does a joint problem need an engineer, not just a sealant crew?
Some signs mean you’re past a maintenance job. A joint that’s visibly moving beyond what the sealant was designed for, a fractured connection at a double-tee flange, or the same location failing repeatedly are all reasons to bring in a structural engineer before you resurface anything. So are spalls with exposed rebar. Repeated failures at one spot usually point to a root cause like a failed connection or excessive slab movement, and resealing over that without addressing the cause just buys you a short-term fix.
When you’re screening contractors for parking structure work, ask for:
- References specific to parking structures, not general commercial caulking
- A written warranty covering both workmanship and material
- Their proposed inspection and documentation approach before work starts
A phased approach usually makes the most financial sense: spot repairs now, targeted replacement on the worst joints this budget cycle, and a full reseal schedule with structural review where warranted.
What 25 years of Ontario parking decks has taught us
Every garage we’ve worked on eventually tells the same story: joints that got proper surface prep and the right material class last well past their expected service life, and the ones that got a quick patch job start failing again within a couple of winters. Ontario’s freeze-thaw cycle doesn’t forgive shortcuts.
- Schedule resealing work in the shoulder seasons when temperature swings are more predictable
- Communicate the maintenance calendar to tenants and parking operators early. Closures are easier to plan than emergencies
- Treat de-icing salt exposure as a design input, not an afterthought
The garages that hold up longest aren’t the ones with the fanciest sealant. They’re the ones where someone actually walked the joints every year and fixed the small stuff before it became a concrete problem.
What safety and compliance standards apply to joint sealing work?
Joint sealing on an occupied parking structure isn’t a standalone maintenance task. It happens around live traffic, pedestrians, and often above occupied space below, so the safety plan needs to account for all three.
Traffic control is the first practical concern. Lane closures, cones, and signage need to be planned so vehicles aren’t routed across fresh sealant or open joints, and workers need a clear buffer from moving cars. On multi-level structures, work zones near the edge of a deck or ramp need fall protection consistent with general construction site requirements, since crews are often working at height with limited barriers.
Chemical handling matters too. Primers and some sealants carry flammability and ventilation requirements, particularly in enclosed or below-grade decks where fumes can build up without proper airflow. A qualified contractor will have safety data sheets on hand and a ventilation plan for enclosed structures, not just for the crew’s protection but because poor ventilation can also compromise cure quality.
On the structural side, the standards that matter most are the ones tied to design and material performance, referenced through guidance from bodies like PCI and ACI on joint detailing, movement capacity, and connection protection. These aren’t safety codes in the fire-code sense, but they govern whether the joint system will actually perform under the loads and movement it’s designed for. Ask any contractor bidding on structural joint work whether their proposed materials and installation method align with recognized PCI or ACI guidance for parking structures specifically, not general building envelope standards. The difference matters more than most bid documents make clear.
How do you write a specification and choose the right contractor?
A weak specification is where most joint sealing problems start, long before a crew shows up on site. If your tender document just says “reseal expansion joints,” you’re leaving the sealant class, the primer, and the installation method entirely up to whoever bids lowest.
A solid specification should name the ASTM C920 sealant class required, the primer system, the expected joint movement percentage, and the minimum width to depth ratio for the bead. It should also specify surface preparation method (grinding, not sandblasting) and require photo documentation of the prepared substrate before sealant goes in. Without that level of detail, you can’t hold a contractor accountable to anything specific if the work fails early.
The bidding process itself should require each contractor to walk the site before quoting, not price off drawings alone. Joint conditions vary enormously across even one structure, and a bid based on assumptions rarely matches the real scope once grinding begins.
For contractor qualification, look past price and ask for:
- Project references specifically on parking structures, not general commercial sealant work
- Proof of manufacturer training or certification on the specific sealant system being proposed
- A sample of their documentation process, including how they photograph and log substrate condition before and after prep
Owners who skip this vetting step tend to be the ones calling us back two years later to fix work that should have lasted ten.
How is joint sealing tested and verified during installation?
Good installers don’t just apply sealant and walk away. There’s a verification process that should happen both during the work and after it’s cured, and owners are entitled to ask for evidence of it.
Adhesion testing, sometimes as simple as a pull tab or hand-tension test on a sample section, confirms the sealant is actually bonding to the prepared substrate rather than just sitting on top of it. This matters most in the first few joints of a large job, since it catches a bad primer batch or an under-prepped section before the whole run is compromised.
Movement simulation isn’t something every contractor performs on site, but for larger expansion joint replacements, some specifications call for verifying the installed sealant can accommodate the joint’s rated movement without tearing at the bond line. This is more common on larger structural expansion joints than on routine control joint work, where the movement demand is lower.
Visual quality checks matter just as much as instrumented testing. A properly tooled bead should have consistent depth, no air pockets, and a clean bond line at both edges with no bridging or sagging. Ask your contractor to walk you through the completed work before final payment, and don’t accept a joint that looks rushed just because it’s been signed off. Photo documentation at handover, matched against the pre-installation photos from the prep stage, gives you a record to compare against during your first annual inspection.
What maintenance keeps sealed joints performing between inspections?
Inspection catches problems, but a few maintenance habits actually prevent them from starting.
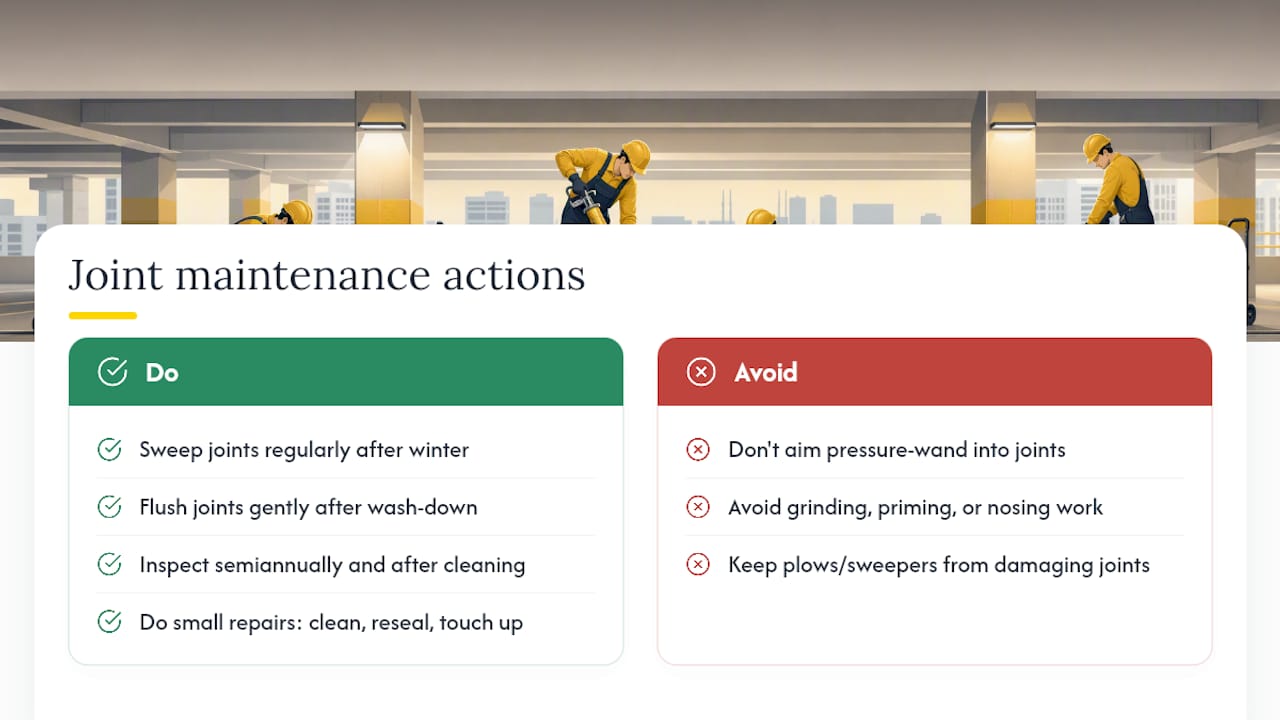
Debris is the biggest quiet threat to joint performance. Grit, sand, and organic material that packs into a joint prevents it from compressing and expanding the way it’s designed to, which puts unplanned stress on the sealant every time a vehicle rolls over it. Regular sweeping, especially after winter when salt and sand build up fast, keeps joints free to move.
Wash-downs need care too. Pressure washing is common on parking decks, but aiming a wand directly into a joint at close range can drive water and debris past the seal rather than just cleaning the surface. Flush joints gently after any wash-down and inspect them while you’re there, since routine maintenance guidance calls for exactly this kind of semi-annual check paired with the annual full inspection.
Minor repairs are worth doing in-house on a small scale, but they have limits. Cleaning out debris, resealing a short section of visibly cracked field-applied sealant, or touching up a small area where cohesive splitting has just started can extend a joint’s life cheaply. What shouldn’t be a do-it-yourself job is anything involving grinding, priming, or armoured nosing replacement. Those steps require the same surface prep discipline as a full installation, and a rushed patch usually fails faster than the original joint did.
Heavy equipment and snow removal also deserve a written procedure. Plow blades set too low or sweepers run too aggressively across a joint edge can tear a seal that would otherwise have lasted years. If your facility handles snow removal in-house, make sure whoever runs the equipment knows exactly where the expansion joints are.
How does traffic load affect joint design and sealant choice?
The amount and type of traffic a joint sees should be the starting point for every material decision, not an afterthought once the sealant’s already picked.
Expansion joints have to accommodate thermal movement, creep, shrinkage, and live-load deflection simultaneously, and all of that while staying watertight. A joint on a low-traffic roof deck sees mostly thermal movement. A joint on a ramp or drive aisle sees that same thermal movement plus constant wheel loading, which is why the same sealant that performs fine on the roof can fail fast on the ramp below it.
Wheel loading does two things to a joint that thermal movement alone doesn’t: it introduces repeated impact and abrasion at the joint edge, and it can accelerate wear on any exposed sealant bead that isn’t protected. That’s precisely why armoured systems with replaceable seals hold up better than field-applied sealant on drive aisles; the nosing absorbs the impact that would otherwise chew through an exposed bead.
Joint width and spacing also need to reflect the structure’s actual movement range, not a generic default. A joint sized too narrow for the structure’s thermal expansion will overstress the sealant every cycle, while one sized too wide for light traffic wastes material and creates an uneven surface. Getting this right at the design stage, ideally with input from whoever detailed the precast connections, preserves a sound substrate for sealing and avoids the kind of field repairs that end up needing concrete work in addition to a new seal.
Why does this matter more than most owners assume?
Treating sealant replacement as structural maintenance rather than a cosmetic touch-up is the mindset shift that actually protects a parking structure. The conventional advice tends to stop at “reseal when it looks cracked,” which misses the point entirely: by the time a joint looks obviously bad, water has often already been working its way to the rebar and connections underneath for a season or two.
What gets underestimated is how much the substrate prep decision, grinding versus sandblasting, dry versus damp concrete, drives whether a sealant lasts five years or ten. Owners fixate on brand and material class, and those choices matter, but a premium polyurethane installed on a poorly prepped joint will still fail early. The prep work is invisible once the job is done, which is exactly why it gets shortcut on lower bids.
Reactive sealing, done only after a leak shows up on the level below, is always the more expensive path.
— Felix
Get your parking structure joints assessed properly
Kettlecontracting is the crew you call when you want joint sealing done to the standard this guide describes, not a quick bead of caulk over a problem that’s going to reopen by spring. We handle expansion joint caulking, surface prep, and full building envelope sealing for commercial and residential properties across the Greater Toronto Area, and we treat parking structure work the same way we’d treat any load-bearing detail: prep first, product second, documentation always.

If your last resealing job looks like it was rushed, or you’re not sure whether your current joints are adhesion failures or something more serious, our page on why caulking is trade-specific work explains what proper installation actually involves and what to expect from a contractor who does it right. Reach out for an assessment of your structure’s joints, and we’ll tell you plainly whether you’re looking at a maintenance job or something bigger.
Sources
For joint design and movement capacity, see Parking structure expansion joint design. For installation detail and prep standards, see the PCI Journal entry on joint detailing. For specification pages, visit our exterior joint sealing types guide.
- Parking structure expansion joint design (Parking Professional)
- Joint detailing best practices (PCI Journal DOI entry)
FAQ
Should you seal concrete joints?
Yes. Sealing prevents water and de-icing salt from reaching rebar and structural connections, and proactive sealant replacement costs far less than the concrete repairs that follow chloride-induced corrosion.
How can I seal the gap between my garage and driveway?
That gap functions as a control joint and needs a backer rod set to the correct width to depth ratio before a traffic-grade sealant is applied over top. This is a job for a professional installer given the movement and load involved, not a DIY caulk gun fix.
How long does concrete joint sealant last?
Field-applied sealants typically last 5 to 10 years under traffic, while preformed compression seals run 10 to 20 years and armoured nosing systems can reach 15 to 25 years with proper maintenance.
When should a garage joint be replaced instead of repaired?
Once spot repairs cover roughly 30% or more of a joint’s original length, plan for full replacement rather than continuing to patch the same run.
