
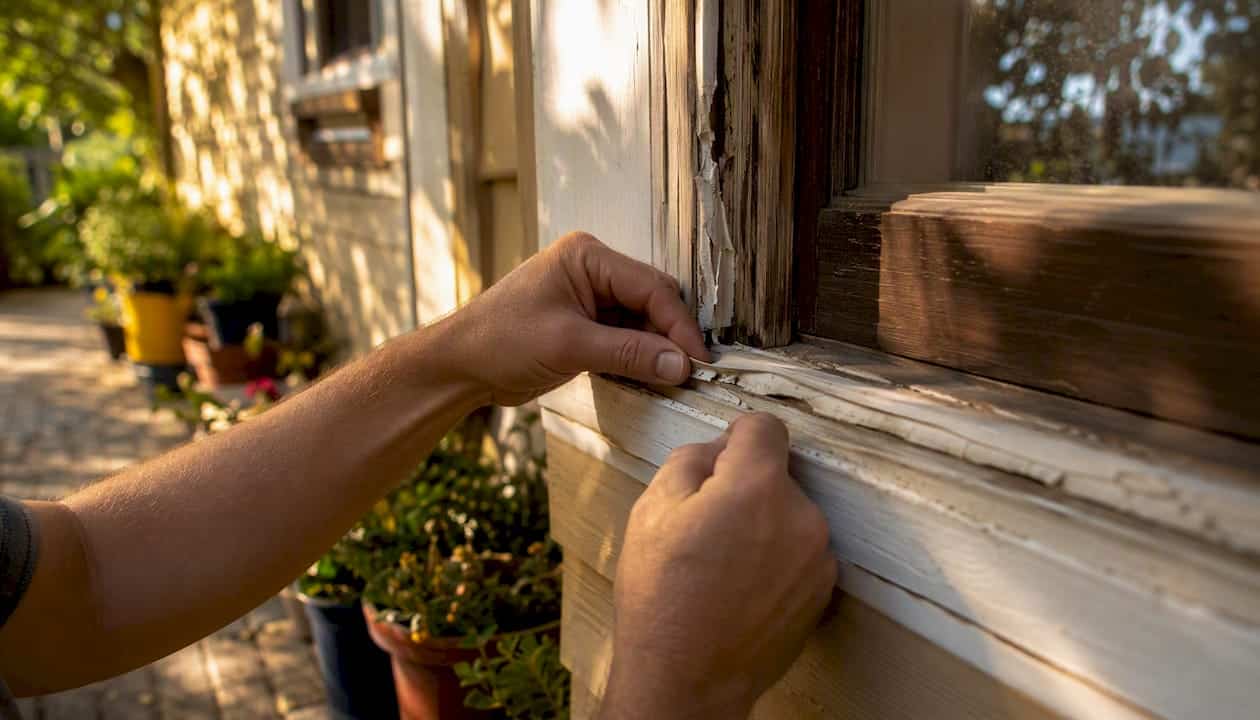
Cracked, pulled-away, or hardened caulk around your windows is the clearest sign that replacement is overdue. When the perimeter seal fails, water and cold air find their way in, and the damage that follows — rot, mould, peeling paint, higher heating bills — costs far more to fix than a tube of sealant. Field installers confirm that many calls about drafts and interior stains trace back to failed perimeter caulk rather than the window itself. Catching it early is the whole game.
Quick scan checklist:
- Visible cracks, gaps, or caulk pulling away from the frame
- Caulk that crumbles or feels hard when you press it with a fingernail
- Daylight visible around the frame from inside
- Drafts near the sill or jamb on a calm day
- Interior water stains, peeling paint, or mould below the window
Pro Tip: Run your visual inspection in late April or early October. Shoulder seasons give you the best light and the best application conditions if repairs are needed. For anything above ground level, have a second person steady the ladder.
Key takeaways
Failing window caulk shows up as visible cracking, brittleness, pull-away, or interior water stains, and replacing it before damage reaches the wall cavity is always the lower-cost outcome.
| Point | Details |
|---|---|
| Inspect twice a year | Run a visual check each spring and fall; do a thorough probe every five years. |
| Caulk lasts 5–10 years | Exposed Canadian elevations often reach the lower end; check after any severe winter. |
| Prep determines durability | Remove all old caulk, confirm the wood is sound, and let the joint dry fully before applying. |
| Know when caulk won’t help | IGU fogging, rot, and flashing failures need a different repair — caulk will not fix them. |
| Kettlecontracting for GTA work | Professional inspection and re-caulking across the Greater Toronto Area, matched to Ontario conditions. |
Table of Contents
- Eight visual signs your window caulk is failing
- How to confirm a draft or leak source yourself
- When re-caulking will not solve the problem
- DIY or professional re-caulking: how to decide
- Best timing and sealant types for Canadian climates
- Prep steps that determine whether new caulk will last
- Re-caulking a single-storey window: the basic sequence
- A note from 25 years on the job in the GTA
- Professional window caulking across the GTA from Kettlecontracting
- Sources
- FAQ
Eight visual signs your window caulk is failing
Knowing window caulk deterioration signs before they become structural problems saves you money. Here is what to look for on a careful walk-around.
- Cracking or alligatoring. A bead that shows a pattern of surface cracks has lost its elasticity. Ontario’s freeze–thaw cycles accelerate this faster than almost any other climate stress.
- Pull-away from the substrate. Caulk that has separated from the frame or wall on one side is no longer sealing anything. Water tracks straight along that gap.
- Crumbling or brittleness. Press the bead with your fingernail. Healthy caulk feels rubbery and flexible; if it crumbles or dents without springing back, it has lost elasticity and needs replacing.
- Shrinkage. A bead that has pulled inward and sits below the joint surface is under tension and will crack soon if it has not already.
- Daylight around the frame. Stand inside on a bright day and look at the frame perimeter. Any light showing through is a direct path for air and water.
- Interior water stains or peeling paint. Staining or paint failure below the sill often means water has been tracking in through a failed exterior bead for some time.
- Mould or dark streaks on the bead. Black or green discolouration on the caulk line signals trapped moisture. Vertical dark streaks on the wall below the joint confirm active water movement.
- Multiple windows showing the same pattern. When several windows on the same elevation show identical cracking or pull-away, the original product has reached the end of its service life across the whole face.
Pro Tip: Photograph any suspect joint before you touch it. A close-up shot helps you track whether the gap is growing and gives a professional a clear picture of what they are dealing with.
How to confirm a draft or leak source yourself
These checks are low-risk and take under an hour for a typical single-storey home.
- Daylight check. Close all interior lights on a bright day and scan each window frame from inside. Mark any light gaps with painter’s tape.
- Incense or tissue test. Hold a lit incense stick or a single sheet of tissue near the frame perimeter on a windy day. Movement or deflection points to an air path. Keep the incense away from curtains and never leave it unattended.
- Flashlight test at night. Have someone shine a flashlight along the outside frame while you watch from inside. Light bleeding through confirms a gap.
- Fingernail pressure test. Press firmly along the bead. Caulk that cracks, flakes, or indents without recovering has lost its seal.
- Controlled water test. On a calm day, use a garden hose on a gentle spray setting directed at the frame from outside. Watch inside for any water entry. Use short bursts only — you are confirming a path, not forcing water through a wall.
Safety note: For any check above the first storey, ladder falls are a real risk. Use a stabiliser bar, have someone hold the base, or call a professional. The caulking and energy efficiency savings are not worth a trip to the emergency room.
When re-caulking will not solve the problem
Re-caulking is the right fix for a failed perimeter seal. It is the wrong fix for several other conditions that look similar.
- Fogging between the panes. Condensation or cloudiness inside the glass means the insulated glass unit (IGU) has failed. Caulking cannot fix a failed IGU — the unit needs replacement, and in some cases the whole window does too.
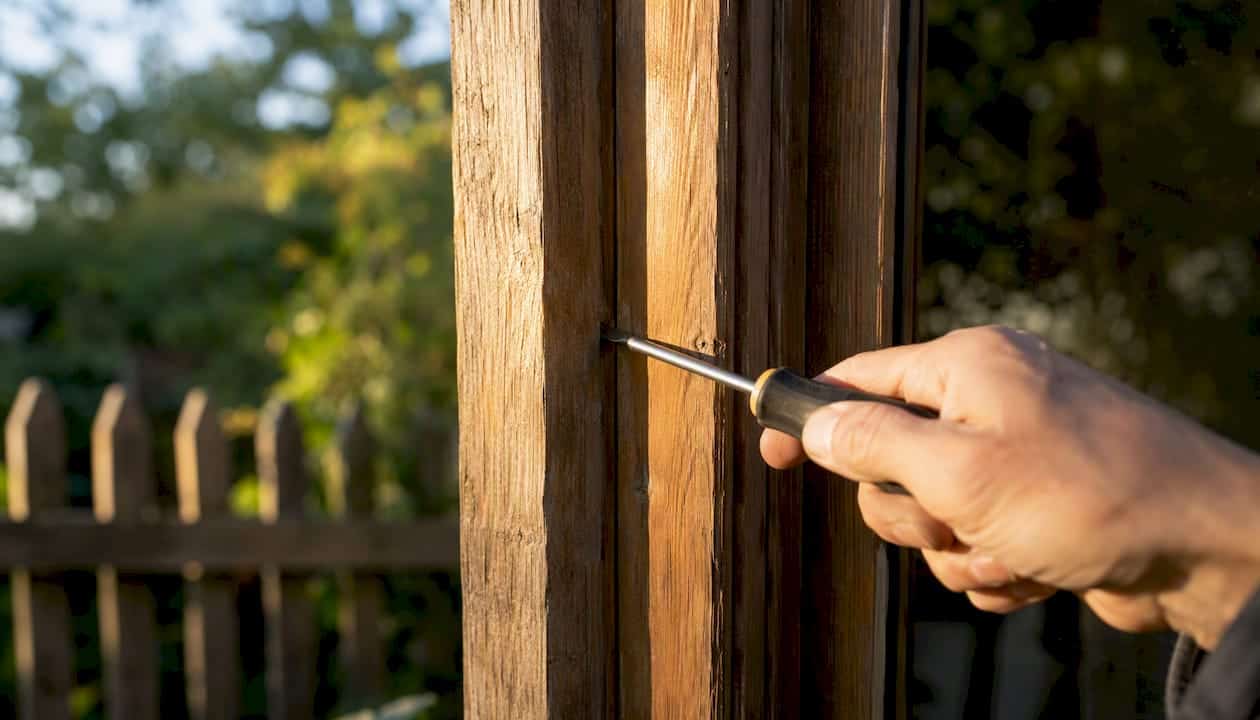
- Rotted or soft wood at the frame. Caulking over rot traps moisture and accelerates hidden decay. Probe the frame with a screwdriver before you reach for a caulking gun.
- Gaps wider than about 12 mm (1/2"). A gap that large needs backer rod and possibly a structural repair before any sealant is applied.
- Broken hardware or sashes that do not close fully. A window that does not seat properly will leak regardless of how well the perimeter is sealed.
- Persistent leaks after proper re-caulking. If water returns after a correct repair, the source is likely flashing failure or an installation fault, not the caulk bead.
- Interior condensation on the glass surface. High indoor humidity and poor ventilation cause surface condensation independently of exterior sealing. Check your humidity levels before assuming re-caulking will help.
Pro Tip: Never caulk over old, failing material. New sealant needs a clean, sound substrate — otherwise you are trapping moisture and the repair will fail within a season.
DIY or professional re-caulking: how to decide
DIY is reasonable when:
- The window is on the ground floor with stable, level access
- The gap is under about 6 mm (1/4") and the substrate is sound
- Surfaces are dry, clean, and the forecast shows several dry days above 5°C
- The trim material is standard painted wood or vinyl
Call a professional when:
- The window is on the second storey or higher
- You find soft wood, discolouration, or any sign of moisture behind the joint
- The substrate is stucco, brick, or a composite material requiring primer or specialty sealant
- The same joint has failed twice after what seemed like a proper repair
- Flashing or installation issues are suspected
Annual visual inspections in spring and fall, with a deeper check every five years, catch most problems before they require professional intervention. When the job does call for a pro, Kettlecontracting handles caulking and sealing across the GTA with the prep and product knowledge that makes repairs last through Ontario winters.
Pro Tip: If you are unsure whether the wood is sound, press a thin screwdriver into the frame at the joint. Sound wood resists firmly; soft or punky wood sinks in with little pressure.
Best timing and sealant types for Canadian climates
Quality exterior caulk in Canadian conditions typically lasts 5–10 years, with exposed north- and west-facing elevations often reaching the lower end of that range after a hard winter.
When to re-caulk:
- Late spring (May to early June) or early fall (September to mid-October)
- Surface temperature above 5°C and at least two dry days forecast after application
- Never in rain, frost, or when the surface feels damp to the touch
Sealant types for Ontario windows:
- 100% silicone. Best UV resistance and longest service life. Does not accept paint, so use it where appearance is secondary or where colour-match tubes are available.
- Siliconized acrylic latex. Paintable and easier to tool than pure silicone. A practical choice for most painted wood and vinyl window trim. Slightly shorter lifespan than silicone on exposed joints.
- Polyurethane. Excellent adhesion on difficult substrates like masonry and stucco. Harder to apply cleanly but very durable where movement is expected.
For choosing between caulk and sealant types, match the product to the substrate and the joint width. Use backer rod for any gap deeper than about 6 mm — caulk alone in a deep joint will not cure properly and will fail early.
Pro Tip: Buy one extra tube per project. Running short mid-bead and having to stop and restart creates weak points. Test the product on a small, hidden section first if you are working with an unfamiliar substrate.
Prep steps that determine whether new caulk will last
The prep is where most DIY re-caulking jobs succeed or fail. Rushing it is the single most common cause of early failure.
- Remove all old caulk. Use a caulk removal tool or utility knife to cut and pull the old bead completely. Leaving fragments behind prevents adhesion.
- Probe for rot. Before cleaning, press a screwdriver into the wood at the joint. Any softness means the rot must be repaired before sealing.
- Clean the joint. Brush out debris, then wipe with isopropyl alcohol or an approved surface cleaner. Remove all dust, grease, and old sealant residue.
- Allow full drying. The joint must be completely dry. Even slight surface moisture causes adhesion failure. Wait at least 24 hours after rain.
- Install backer rod for wide gaps. For gaps over 6 mm deep, press closed-cell foam backer rod into the joint before applying sealant. This controls joint depth and prevents three-sided adhesion.
- Mask the edges. Apply painter’s tape on both sides of the joint for a clean bead line. Remove it while the caulk is still wet.
Common mistakes: applying over damp or dirty surfaces, skipping backer rod on deep joints, using an interior product on an exterior joint, and working in temperatures below 5°C. See common caulking mistakes for a fuller list of what to avoid.
A perfectly applied bead on a poorly prepped surface will fail. A workmanlike bead on a clean, dry, properly backed joint will last years.*
Re-caulking a single-storey window: the basic sequence
This sequence applies to a standard painted wood or vinyl window on the ground floor with sound substrate.
- Remove old caulk fully with a caulk tool and utility knife.
- Inspect and repair any soft wood before proceeding.
- Clean and dry the joint thoroughly (isopropyl alcohol, 24-hour dry time after rain).
- Insert backer rod for gaps deeper than 6 mm.
- Apply painter’s tape on both sides of the joint.
- Cut the nozzle at a 45-degree angle to match the joint width. Apply a steady, continuous bead in one pass.
- Tool the bead immediately with a wet finger or caulk tool to press it into the joint and create a concave finish.
- Remove the tape while the caulk is still wet, pulling away at a 45-degree angle.
- Allow full cure before painting or exposing to rain. Cure time varies by product — check the label, as silicone and polyurethane products typically need longer than acrylic latex.
Tools and PPE: caulking gun, utility knife, caulk removal tool, stiff brush, isopropyl alcohol, painter’s tape, gloves, safety glasses. Use a ladder stabiliser if any height is involved.
Pro Tip: For a clean concave finish, keep your tooling finger consistently wet and move in one direction without stopping. If the bead tears or pulls, the surface was not fully dry.
A note from 25 years on the job in the GTA
Every spring, the same pattern shows up on inspection calls across the GTA. Caulk that looked fine going into November has cracked or pulled away by April. The freeze–thaw cycle here is relentless — water gets into a hairline crack, freezes, expands, and opens the gap wider. North- and west-facing elevations take the worst of it. Salt air near the lake and prolonged UV exposure on south-facing walls add to the load.
The mistake most homeowners make is waiting until they see a water stain inside before acting. By that point, the water has usually been tracking through the wall cavity for at least one season. The repair cost at that stage is rarely just a tube of caulk.
What we see most often: caulk applied over old material without removal, the wrong product used on a brick or stucco interface, and joints that were sealed in October when the temperature was already too low for proper adhesion. None of those repairs last. Kettlecontracting works across the GTA specifically because these conditions require the right product, the right prep, and the right timing — not just a quick bead before winter.
Professional window caulking across the GTA from Kettlecontracting
Spotting failing caulk is the first step. Getting it fixed correctly — with full removal, sound substrate prep, and a product matched to your exposure — is what actually stops the water.

Kettlecontracting provides professional inspection and re-caulking for residential and commercial properties across the Greater Toronto Area. The work covers windows, doors, expansion joints, and full building envelopes, with products and techniques chosen for Ontario’s freeze–thaw conditions. No quick patches over old material. No wrong-season applications. For homeowners who want the job done right the first time, professional caulking services from a specialist are the straightforward next step. Contact Kettlecontracting to book an inspection or get a quote for your property.
Sources
- Exterior Window Caulking: What Actually Holds Up in Canadian Conditions | AlphaTech Windows & Doors
- Window caulking & weathersealing guide | Colfax Glass
- Window caulking 101: How to caulk windows the right way | Windows Canada
- Caulking windows & doors guide | DD Home Services
- Condensation information | Natural Resources Canada
FAQ
What are the most reliable signs window caulk needs replacing?
Visible cracking, caulk pulling away from the frame, a bead that crumbles under fingernail pressure, daylight around the frame, and interior water stains or mould below the sill are the clearest indicators that replacement is needed.
How long does exterior window caulk last in Canada?
Quality exterior sealant typically lasts 5–10 years in Canadian conditions, with exposed elevations often failing sooner due to freeze–thaw cycling and UV exposure.
Can I caulk over old caulk without removing it?
No. Applying new sealant over old, failing material prevents proper adhesion and traps moisture, which accelerates hidden wood rot. Full removal and surface cleaning are required before reapplication.
When is the best time of year to re-caulk windows in Ontario?
Late spring and early fall are best: surfaces should be dry and above roughly 5°C, with at least two dry days forecast after application. Avoid working in cold, damp, or freezing conditions.
Does fogging between window panes mean the caulk has failed?
No. Condensation between the panes signals a failed insulated glass unit (IGU), which caulking cannot repair. The IGU or the full window may need replacement depending on the extent of the failure.
