
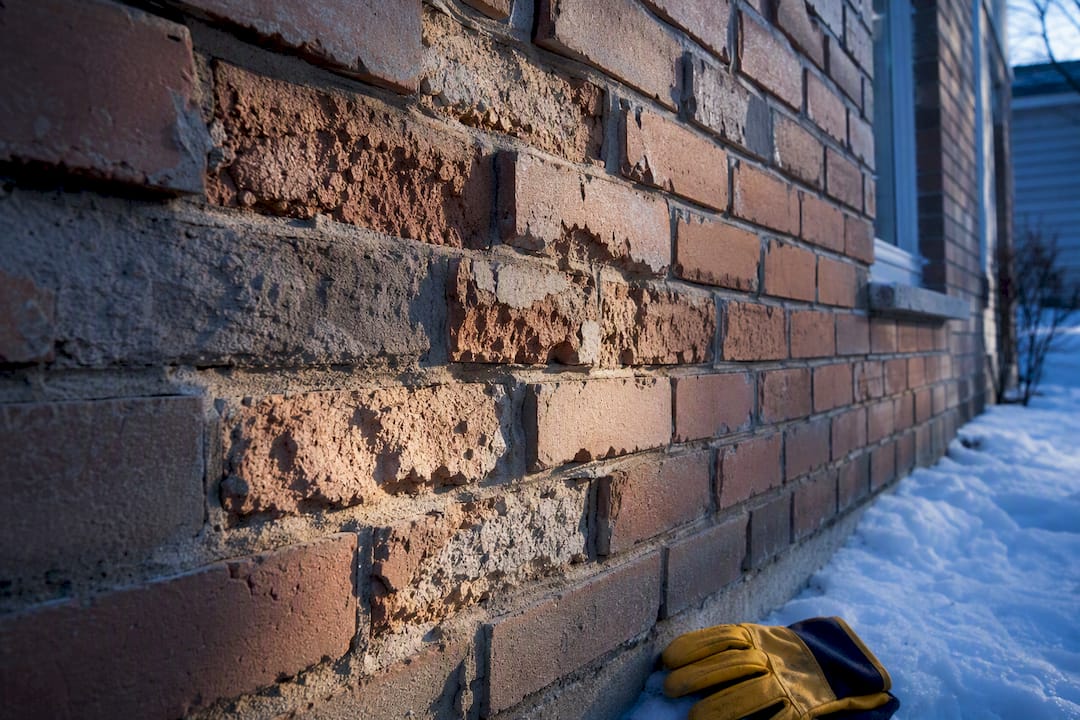
Spalling brick repair is possible in most homeowner situations, but not all of them. Shallow face loss on a handful of bricks usually responds well to patching or individual brick replacement, while deep spalling, crumbling cores, or loose bricks overhead mean replacement is the only durable fix. Your first move isn’t a repair at all. It’s documenting the damage, keeping people clear of the area, and stopping whatever water is feeding the problem.
TL;DR:
- Shallow spalling can often be repaired with patching or matching repair mortar, but deep or crumbling cores require individual brick replacement.
- Controlling moisture sources, such as fixing leaks, grading, and drainage, is essential to prevent repeat spalling and prolong repair longevity.
- Proper mortar selection, especially using lime-rich or compatible mixes, is crucial for repair durability and avoiding accelerated damage.
- Rushing repairs without fixing water entry points or proper curing is a common mistake that leads to recurring spalling problems.
- A professional assessment should focus on tracking water intrusion, inspecting flashing and caulking, and providing warranties on work to ensure lasting solutions.
Table of Contents
- Quick action checklist: what to do in the next 48 hours
- What causes spalling brick (moisture mechanics and common errors)
- How to assess severity: simple tests and red flags
- Repair options and step-by-step guide for common scenarios
- Preventing recurrence: maintenance priorities and moisture control
- Costs and timeline: realistic expectations for small repairs through larger restoration
- A contractor’s perspective: site-tested notes from Kettle Contracting
- How I approach spalling brick work
- How Kettle Contracting can help with your brick and moisture problems
- Sources
- FAQ
Quick action checklist: what to do in the next 48 hours
Before you call anyone or buy anything, you need to control the situation. Here’s the order I’d walk through it in on a job site:
- Photograph everything. Take clear, dated shots from several angles, close up and from a few feet back. Note the date you first spotted the damage.
- Clear loose debris and rope off the area. If chunks of brick are on the ground, more are probably coming. Don’t let kids or delivery drivers walk under it.
- Redirect water immediately. A cheap downspout extension pointed away from the wall can buy you time. Don’t caulk or seal the damaged brick face yourself. Trapping moisture behind a sealer is one of the fastest ways to turn a small problem into a big one.
- Call a professional if you see interior staining or large chunks missing. That’s not a wait-and-see situation.
What causes spalling brick (moisture mechanics and common errors)
Spalling starts with water getting into the brick and ends with the face of the brick popping off. The mechanism itself is simple: brick is porous, it absorbs moisture, and when that moisture freezes it expands. Brick can’t flex to accommodate that expansion, so the fired face cracks and separates. This is the primary mechanism behind spalling, and it repeats every freeze cycle until something changes.
The water rarely shows up by accident. It’s usually getting in through one of a few predictable routes:
- Cracked or missing mortar joints that let water track straight into the wall
- Poor grading or clogged gutters that dump roof and ground water against the brick
- Downspouts splashing water back onto the base of the wall instead of away from it
- Rising damp from grade contact where there’s no proper barrier
Two mistakes I see constantly make things worse instead of better. The first is repointing with a mortar that’s harder than the brick itself. Modern portland cement mixes are strong, but that strength has nowhere to go except into the brick, which is softer. The stress transfers straight to the face and accelerates the damage. The second is sealing or aggressively cleaning the wall. Film-forming sealers and sandblasting can strip the fired face or trap moisture inside, which is the opposite of what you want.
Pro Tip: If you’re near a driveway or sidewalk that gets de-icing salt in the winter, check that section of wall first. Salt crystallization inside the brick adds extra pressure on top of the freeze-thaw cycle, and those walls almost always spall faster.
How to assess severity: simple tests and red flags
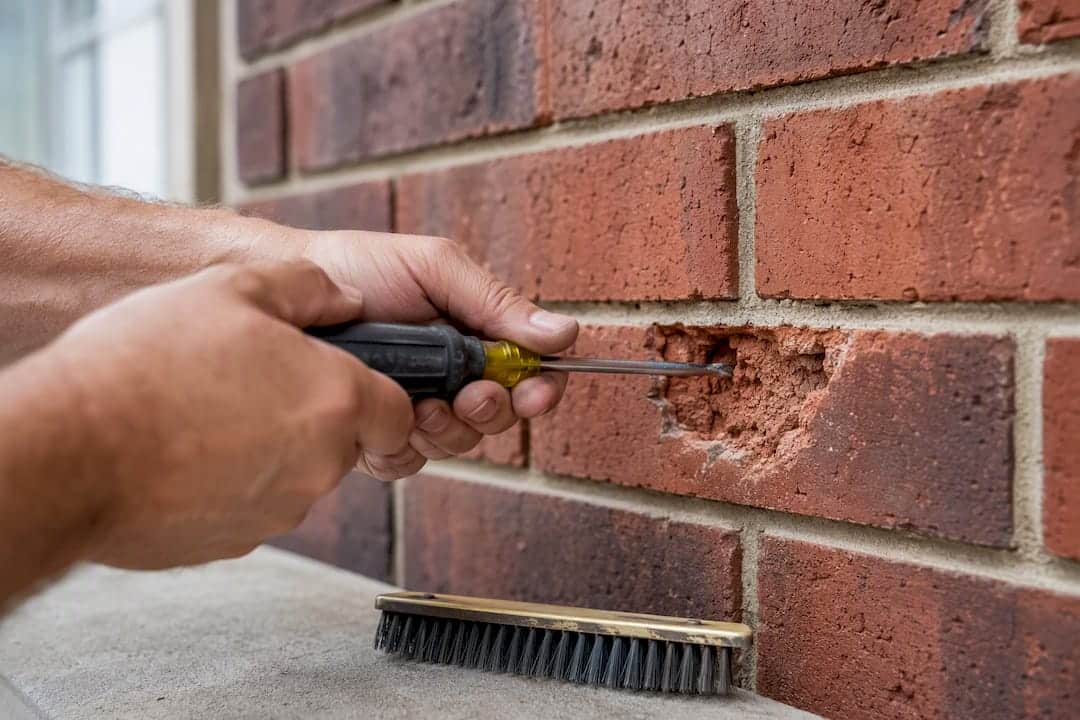
Not every spalled brick needs the same response, and figuring out which category you’re dealing with saves you money and worry. Start with a simple press test: push on the damaged area with your thumb or a flathead screwdriver. If it’s just surface flaking and the brick underneath feels solid, you’re likely looking at shallow damage. If material crumbles away easily or the screwdriver sinks in, the damage runs deeper.
Watch for these warning signs that mean the situation is more urgent than a weekend project:
- Chunks of brick actively falling, especially near doorways or walkways
- Loose bricks you can wiggle by hand, particularly above entry points
- Interior wall staining or damp patches that line up with exterior damage
- A patch of spalling that’s visibly larger than it was a season ago
While you’re up close, take notes on mortar condition, whether the damage sits near a downspout or grade line, and whether the area gets road salt exposure in winter. That inspection record is exactly what a contractor needs to give you an accurate quote, and shallow face loss can often be rebuilt with colour-matched repair mortar, while deep spalling or a crumbling core usually can’t.
Repair options and step-by-step guide for common scenarios
Once you know how deep the damage goes, the repair method mostly picks itself. Here’s how the options break down.
Surface patching and consolidants work only on shallow, cosmetic spalling where the brick’s structural integrity is intact. A breathable repair mortar can rebuild the lost face and match the surrounding colour reasonably well. Patching over a brick with a crumbling core just hides the problem for a season or two before it fails again.
Individual brick replacement is the standard fix for a brick that’s spalled through to its core:
- Carefully cut out the surrounding mortar joints with a grinder or chisel, working slowly to avoid cracking neighbouring bricks.
- Remove the damaged brick in pieces if needed rather than trying to pry it out whole.
- Select a replacement brick that matches the original in size, colour, and porosity as closely as possible.
- Set the new brick with mortar mixed to match the wall’s original strength, not today’s strongest bag of cement.
- Tool the joints to match the surrounding profile and let the mortar cure slowly, keeping it protected from rapid drying or freezing.
Repointing replaces failed mortar joints without touching the brick itself, and it’s often the highest-value repair on an older wall. The mortar mix matters more than most homeowners expect. Lime-rich mortars are the right call on masonry built before 1919, and even on newer brick, a mortar that’s too hard will just transfer stress and create the next round of spalling. Preservation guidance consistently recommends identifying the cause before starting repairs so the fix doesn’t repeat the mistake that caused the damage.
Section rebuilds or full façade restoration come into play when spalling has spread across a large area, or when several courses of brick have failed structurally. This is more involved work: scaffolding, matching brick sourced from a supplier or salvage yard, and often coordination with flashing and drainage repairs at the same time. It costs more because it is more, not because someone’s padding the invoice.
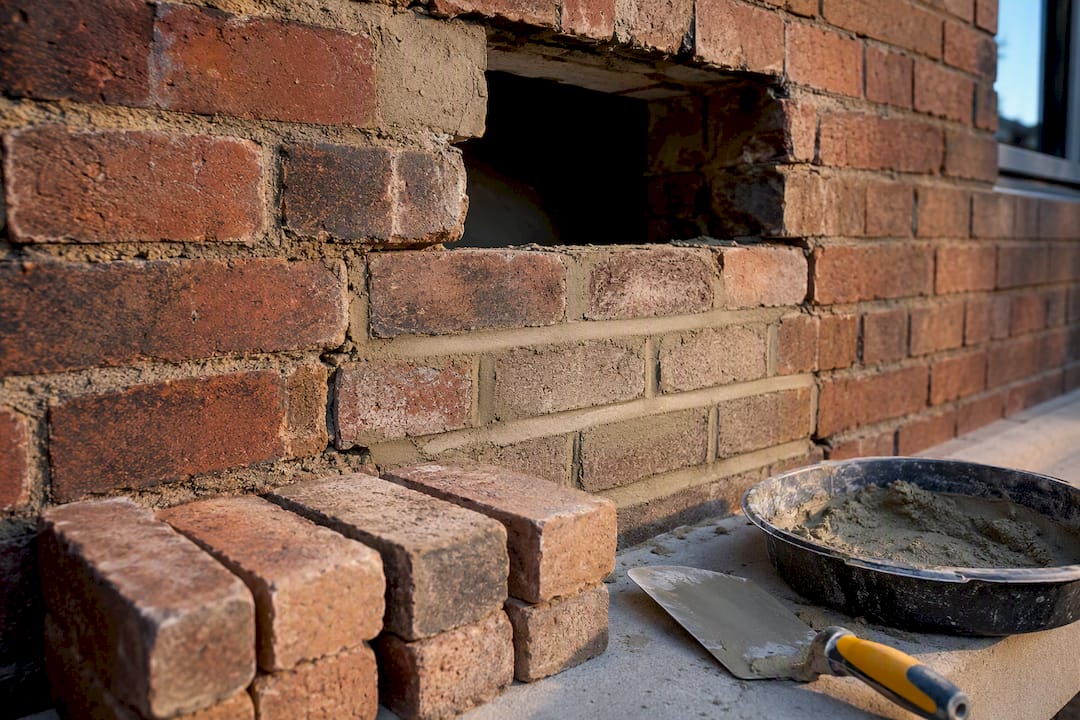
Pro Tip: Curing time isn’t optional. Rushing a repair by exposing fresh mortar to heat, cold, or rain before it sets properly is one of the most common reasons a “fixed” wall fails again within a year. Proper curing directly affects bond strength.
Once the repair is done and cured, cleaning the wall gently and applying a breathable water repellent, never a film-forming sealer, can help going forward. But that step only makes sense after the actual moisture source is fixed. Sealing a wall that’s still absorbing water from bad grading just traps the problem behind a nicer-looking face.
Preventing recurrence: maintenance priorities and moisture control
Repairing the brick without fixing what let water in is a temporary win at best. Here’s where to put your attention once the repair is done.
- Grade the ground around your foundation so it slopes away from the wall, and extend downspouts well past the foundation line with splash blocks or solid extensions.
- Keep gutters clear and in good repair. A gutter dumping water down the wall face all winter will undo a repointing job fast.
- Check flashing anywhere a roof meets masonry. Failed flashing is one of the sneakier water paths because you often can’t see it from the ground.
- Repoint with a compatible mortar mix on the schedule your masonry actually needs, not on a hard-cement default.
- Skip film-forming sealers entirely. If a repellent is warranted, use a breathable silane or siloxane product, and only after the moisture source is corrected.
- Walk the property every spring after freeze-thaw season and photograph anything that looks new. Comparing photos year over year is the easiest way to catch a small problem before it becomes a big one.
Caulking around windows and door openings plays a bigger role in this than most homeowners assume, since failed caulking is a direct entry point for the water that ends up freezing inside your brick. If you want a deeper look at how sealant choices affect a brick home specifically, window caulking for brick homes is worth a read.
Costs and timeline: realistic expectations for small repairs through larger restoration
Costs for spalling repair span a wide range because the scope varies so much from one wall to the next. Single-brick replacement is the cheapest end of the spectrum. A handful of bricks can often be done in a single day if access is easy and matching brick is on hand. Small-section repairs covering a few square metres take longer, typically a few days, once you factor in mortar curing time between steps.
Full façade restoration is a different scale of project entirely. Scaffolding, matching historic brick, and coordinating flashing or drainage work alongside the masonry can stretch a project into weeks. The Masonry Advisory Council’s guidance emphasizes early intervention precisely because catching spalling while it’s still localized keeps the project, and the invoice, smaller.

The variable that changes a quote the most isn’t usually the brick itself. It’s access (scaffolding versus a ladder), how close the replacement brick needs to match visually, and whether the crew also has to chase down and fix the moisture source. Skipping that last step doesn’t save money. It just delays the same repair bill by a year or two, usually with more damage attached.
A contractor’s perspective: site-tested notes from Kettle Contracting
On site, the replace-or-patch decision comes down to one question: does the brick still have structural integrity? If the core is sound and only the face is gone, patching holds up. If a screwdriver sinks into the brick, it’s coming out.
The mistake I see most often isn’t the brick work itself. It’s caulking and flashing installed years earlier without any thought to where water actually travels once it hits the wall. A bead of caulk in the wrong spot can direct water straight into a joint instead of away from it. Years of experience show that tracing water paths back to their source before touching a single brick is essential in fixing spalling issues.
How I approach spalling brick work
I’ve walked up to plenty of walls where the homeowner wanted a quick patch, and the honest answer was that the water source needed fixing first or we’d be back in two years doing it again. One job stands out: a section that had been “repaired” three times with the same hard-cement patch, and it kept failing because nobody ever traced the leak back to a cracked downspout elbow twelve feet away.
When you’re getting quotes, ask three things: what’s causing the moisture, what mortar mix they’re using and why, and what happens if new spalling shows up nearby next year. A contractor who’s done the prep work will have straight answers to all three. Expect a written scope and a warranty on the workmanship, not just the materials. Proper prep and curing take time, and any contractor promising a same-day miracle on a large section is cutting a corner somewhere.
— Felix
How Kettle Contracting can help with your brick and moisture problems
A trade professional can trace the moisture source and handle the repair rather than gambling on a DIY patch that might trap water instead of stopping it. Where a general handyman might re-caulk the visible gap and call it done, our approach starts by tracking where the water is actually getting in, whether that’s a failed brick joint, bad flashing, or a caulking job that was never sealing anything to begin with.

A site assessment covers the masonry, the flashing where roof meets wall, and the caulking around every window and door opening nearby, because those are usually connected problems even when they look separate. We prioritize fixes that last through Ontario’s freeze-thaw cycles rather than quick patches that fail by the next winter. If you’re dealing with spalling brick and you’re not sure whether it’s a caulking issue, a drainage issue, or both, request a quote through our page on how moisture enters home walls and we’ll walk the property with you before recommending anything.
Sources
- A guide to the repair of old brick walls | The SPAB
- How to fix spalling brick | Family Handyman
- Brick spalling causes and repair | Stone Haven Developments
- Preservation brief 2: repointing | NPS
FAQ
Can spalling bricks be repaired?
Yes, in most cases. Shallow face loss can be patched or rebuilt with colour-matched repair mortar, while deeper spalling or a crumbling core usually calls for individual brick replacement.
Can you render over spalling bricks?
Rendering over active spalling without fixing the moisture source just traps water behind a new surface, which speeds up further damage. Any covering should go on only after the cause of the water intrusion is corrected and the wall is repaired.
Why do bricks start to crumble?
Bricks crumble when absorbed moisture repeatedly freezes and expands inside the material, a cycle known as freeze-thaw damage. Failed mortar joints, poor drainage, and salt exposure all speed up how fast that crumbling spreads.
What does it mean when bricks are spalling?
Spalling means the fired outer face of the brick is cracking and breaking away, usually because trapped moisture froze and expanded inside it. It’s a sign of an ongoing water problem, not just cosmetic wear, and it tends to get worse each winter until the moisture source is addressed.
