

For most hairline and small stucco cracks, the fix is straightforward: clean the crack, open it slightly, fill it with a flexible, paintable patch or caulk, texture to match, and let it cure fully before painting. That handles the vast majority of cases. Call a professional when you hear a hollow sound on the knock test, see repeated cracking in the same spot, or spot water staining. Cure time matters too. You want temperatures consistently above about 10°C for several days to allow proper curing., and freeze-thaw cycles will wreck a rushed patch every time.
TL;DR:
- Proper repair requires opening, cleaning, bonding, filling, texturing, and curing patches, with heating above 10°C crucial for long-term success.
- Wide, stair-stepped, or recurring cracks indicate structural movement or ongoing settlement, not just surface issues.
- Use specific materials such as flexible crack fillers for tiny cracks, mesh reinforcement for mid-sized cracks, and elastomeric compounds or polyurethane sealants based on crack size and location.
- Regular maintenance, timely repairs, and inspection ahead of winter freeze-thaw cycles prevent small issues from worsening and avoid costly full replacements.
- Hiring a professional is advised for hollow, water-stained, or recurrent cracks, and a thorough assessment ensures fixing root causes rather than just patches.
Table of Contents
- How do you know if a stucco crack is serious?
- What materials and tools do you need for stucco crack sealing?
- Step-by-step: how to seal cracks in stucco properly
- How do you stop stucco cracks from coming back?
- When should you call a contractor instead of DIYing it?
- Trade tips from a Canadian caulking specialist
- Why durable stucco repair beats the quick fix
- Get a proper stucco and caulking assessment
- Sources
- FAQ
How do you know if a stucco crack is serious?
Not every crack means trouble, but you need to read them correctly before grabbing a caulking gun. Hairline cracks, usually under 1/16 inch, are common and often come from normal thermal movement as the wall expands and contracts through the seasons. Wider cracks, especially anything approaching 1/8 inch or beyond, point to something else going on, like foundation settlement or an impact that stressed the substrate.
Pattern matters as much as width. A single straight crack near a window corner is typical stress cracking. A stair-step pattern, or cracks that keep reopening in the same spot after you’ve patched them, usually means the structure underneath is still moving.
Here’s what to check on-site before you decide on a repair:
- Width and shape: Hairline (under 1/16") is generally cosmetic; wider or stair-stepped cracks suggest movement.
- The knock test: Tap the stucco around the crack with a knuckle or the handle of a screwdriver. A hollow, drum-like sound means the stucco has delaminated from the substrate underneath.
- Staining: Dark streaks or discolouration below a crack almost always mean water has been getting behind the wall.
- Recurrence: A crack that reappears in the same location within a season or two, even after a proper patch, points to ongoing structural movement, not a one-time settling event.
If you’re not sure, mark the ends of the crack with a pencil and check it again after a few weeks of weather changes. Growth tells you more than a single snapshot ever will.
What materials and tools do you need for stucco crack sealing?
The right product depends entirely on the crack width and where it sits on the wall. Get this wrong and you’ll be redoing the job by next spring.
For hairline cracks, a flexible crack filler applied straight from a cartridge does the job well. Sto Flexible Crack Filler is one example of this product class, built specifically for cracks up to about 1/8 inch. For cracks in the 1/16 to 1/8 inch range, Sto Canada’s technical specification calls for mesh reinforcement combined with a skim coat, not just filler pushed into the gap. That mesh is what keeps the crack from simply reopening along the same line once the wall moves again.

For above-grade cracks up to about 1/4 inch, elastomeric patching compounds like PITT-FLEX give you a flexible, waterproof repair. One catch worth knowing: these products aren’t rated for below-grade or constantly wet substrates, so don’t use them near grade level or where water pools.
For vertical joints and control joints rather than random cracking, a polyurethane non-sag sealant, such as the Zinsser WATERTITE line sold through Home Depot Canada, is built for that movement.
Your basic tool kit:
- Mesh tape or fibreglass mesh for reinforced repairs
- Backer rod for deeper joints
- A masonry bonding agent for old, chalky substrate
- A cold chisel and wire brush to open the crack
- A margin trowel or rubber float for texturing
- A caulking gun sized to your cartridge
Pro Tip: Keep a small offcut of your patch compound and test it on a hidden section of wall first. Cheap stucco patch dries a shade lighter than fresh stucco almost every time, and you want to know that before you’re staring at a bright patch on your front elevation.
Step-by-step: how to seal cracks in stucco properly
This sequence works for the typical above-grade crack you’ll find around windows, corners, and control joints. Skip a step and you’re patching over a problem instead of fixing it.
- Open the crack. Use a chisel or utility knife to widen hairline cracks slightly, creating a shallow V shape. This gives the filler something to grip instead of just sitting on the surface.
- Clean it out. Brush or vacuum loose debris, dust, and old chalky material from the crack. Anything left behind will stop your patch from bonding properly.
- Dampen or bond. On older, porous stucco, lightly dampen the area or apply a bonding agent so the new material doesn’t dry out too fast and pull away from the edges.
- Fill accordingly. Caulk hairline cracks directly. For anything wider than 1/16 inch, use a patch compound, and for cracks approaching 1/8 inch, embed fibreglass mesh into the first layer before applying a second skim coat over top.
- Texture while it’s workable. Timing is everything here. You need to match the surrounding texture while the patch is still plastic, not after it’s set up. A dabbing motion with a stiff brush or a stippling sponge, matched to the existing pattern, is what makes a patch disappear into the wall instead of standing out like a scar.
- Let it cure. Give the patch At least several days above about 10°C are needed before painting… This timing window is critical: cold, wet weather is the single biggest cause of common patch failures in Canadian climates, and rushing this step is the number one reason DIY patches fail within a year.
- Paint and protect. Once cured, paint with a product suited to masonry, matching sheen and colour as closely as possible to the surrounding field.
Finish and texture matching is genuinely the hardest part of this whole process, harder than the actual filling. Behr’s own repair guidance makes the same point: simply filling the crack is only half the job. A technically sound patch that stands out visually is still, in a practical sense, a failed repair. Protect the surrounding area with drop sheets or masking before you start, and don’t work in direct sun that can flash-dry your patch before it bonds.
How do you stop stucco cracks from coming back?
Prevention comes down to catching small problems before winter gets its teeth into them, as explained in this exterior remodel in St. George: what to expect guide. Ontario’s freeze-thaw cycle is brutal on anything that’s already compromised. Water gets into a hairline crack in November, freezes in January, and by March you’ve got a crack twice the size.
- Do a seasonal walk-around each spring and fall, checking window perimeters, control joints, and any spot with a prior patch.
- Repair small cracks in late spring or summer when you’ve got a reliable stretch of warm, dry weather for proper curing.
- Keep flashing, grading, and joint caulking around penetrations (vents, pipes, hose bibs) in good shape, since failures there feed moisture straight into the stucco field.
- If hairline cracking is widespread across a wall rather than isolated, consider a full elastomeric recoat instead of patching dozens of individual spots.
- Budget for maintenance rather than treating stucco as a set-and-forget material. Small annual repairs run far cheaper than a full re-stucco.
It’s also worth knowing that standard home insurance policies generally exclude gradual deterioration and maintenance issues, covering only sudden, listed perils like fire or storm damage. A slowly widening stucco crack from neglect isn’t something your policy is likely to pick up the tab for, which is exactly why staying ahead of small cracks matters. For a full seasonal routine, our exterior wall caulking schedule breaks down what to check and when.
When should you call a contractor instead of DIYing it?
Some cracks are a weekend job. Others are a symptom of something bigger, and no amount of patch compound fixes a problem that’s still moving underneath.
- Hollow-sounding sections on the knock test, which usually mean the stucco has delaminated from the sheathing.
- Water staining, bubbling paint, or a musty smell near the crack, all signs of moisture already inside the wall assembly.
- Cracks that keep reopening in the same location after a proper repair.
- Diagonal or stair-step cracking near foundations, which often points to settlement rather than surface stress.
- Any crack near a roofline, chimney, or window head where flashing failure is a likely cause.
Before you call anyone, take clear photos, measure the crack’s length and width, and note how long it’s been there. A contractor doing a proper assessment will want that history, plus a look at the surrounding grade and flashing, before quoting a fix. If you’re weighing whether a job is DIY-friendly at all, our guide on DIY or hiring a pro for exterior caulking walks through that decision in more depth.
Trade tips from a Canadian caulking specialist
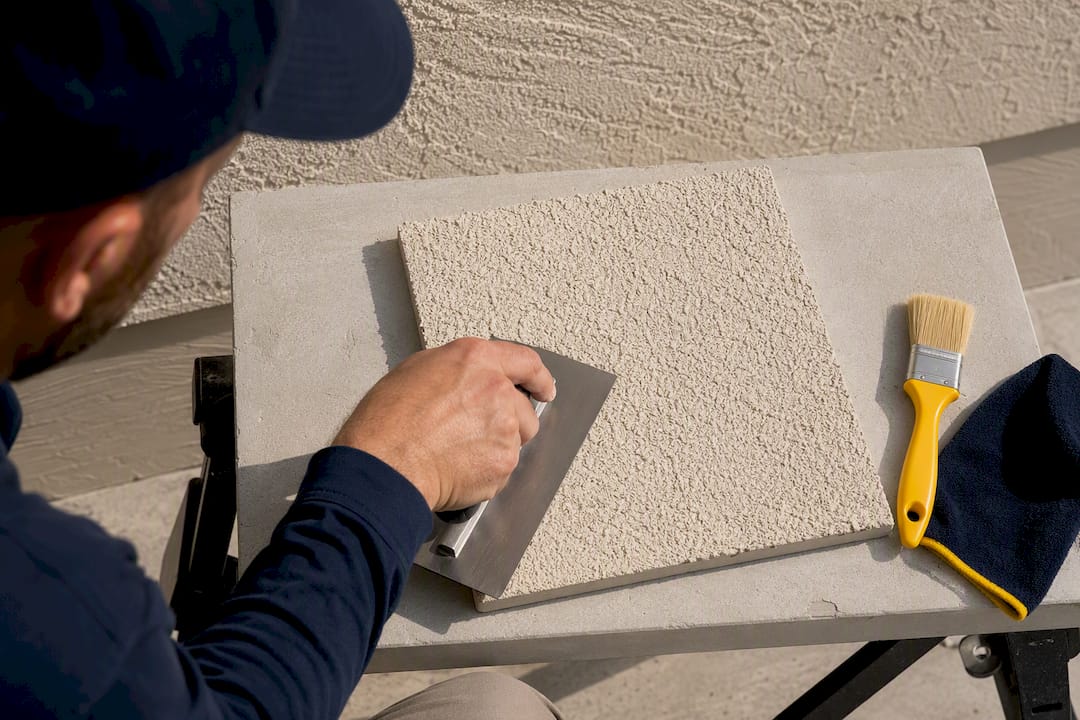
Two things separate a decent patch from an invisible one. First, always run a small sample panel on scrap board or a hidden wall section before touching the visible facade. Second, use a timed stipple technique, applying your texture in the same rhythm and pressure as the original crew did, which you can usually feel out after a few practice passes.
Freeze-thaw changes everything about material choice up here. We plan cure days around forecast windows, not just the calendar, and we build a diagnostic checklist into every estimate: crack width, pattern, moisture reading, and substrate condition.
Why durable stucco repair beats the quick fix
Most of the mistakes I see come from treating a stucco crack like a drywall crack: caulk it, paint over it, move on. That approach ignores substrate movement, mesh reinforcement, and cure timing, and it shows up as a failed patch within a season or two. A repair done right the first time costs more upfront in labour and material, but it costs far less than paying twice for the same wall.
— Felix
Get a proper stucco and caulking assessment
A professional contractor is a practical alternative to guessing your way through a stucco repair. Where a hardware store trip gets you one product for one crack, our team walks the whole envelope, checks flashing, grade, and joint caulking together, and gives you a written scope before any work starts.

If you’re dealing with recurring cracks, hollow spots, or a wall with more patches than original surface, that’s usually a sign the issue is bigger than one crack. Our building envelope sealing service looks at the whole picture, from joint sealant condition to water paths around windows and penetrations, so you’re not patching the same spot every other year. For movement-related cracking near expansion joints specifically, our expansion joint sealing work addresses the actual cause rather than the symptom. Every estimate includes photos, measurements, and a plain-language explanation of what’s causing the cracking and what it’ll take to stop it for good. Reach out through our residential window caulking page to get a contractor’s eyes on your wall before winter turns a small crack into a bigger repair bill.
Sources
FAQ
How can I fix cracks in my stucco?
Open hairline cracks slightly, clean out debris, fill with a flexible crack filler or caulk, texture to match while the patch is still workable, and let it cure at least 72 hours above roughly 10°C before painting. Wider cracks need mesh reinforcement and a skim coat rather than filler alone.
Should cracks in stucco be repaired?
Yes, and promptly. A small crack left alone lets water behind the wall, and freeze-thaw cycling turns a hairline crack into a much bigger repair within a season or two.
Does homeowners insurance cover stucco cracks?
Usually not. Standard Canadian home insurance policies exclude gradual deterioration and maintenance issues, covering only sudden, listed perils like fire or storm damage.
What is the best sealant for stucco?
It depends on the crack. Flexible crack fillers suit hairline cracks, elastomeric patching compounds like PITT-FLEX handle cracks up to about 1/4 inch above grade, and polyurethane non-sag sealants are built for control joints and vertical movement joints. For recurring or widespread cracking, a professional assessment through a service like Kettle Contracting’s building envelope sealing identifies the right approach for your specific wall.
