Most homeowners think of caulk as something you squeeze into a gap and forget about. It looks tidy for a season, then cracks, and you caulk it again. But the real role of caulk home exterior surfaces play in your building’s health is far more significant than cosmetic upkeep. Proper caulking is what stands between your framing, sheathing, and interior walls and the water, air, and pests that want to get past them. Get it right, and you protect your investment for years. Get it wrong, and you are paying for it in rot, mould, drafts, and deferred repairs.
Table of Contents
- Key takeaways
- The role of caulk on the home exterior
- Choosing the right caulk for exterior use
- Common mistakes that shorten caulk life
- Caulking and curb appeal
- Inspecting and maintaining exterior caulk in Ontario
- My honest take after 25 years on the job
- Protect your home with professional caulking
- FAQ
Key takeaways
| Point | Details |
|---|---|
| Caulk blocks moisture and air | Sealing gaps at joints and transitions stops water intrusion and reduces energy loss by up to 20%. |
| Product choice matters | Match caulk type to surface and joint size. Use ASTM C920-rated sealants for masonry and wide joints. |
| Prep determines performance | Never apply caulk to damp or dirty surfaces. Clean, dry conditions are non-negotiable for a lasting bond. |
| Drainage paths must stay open | Never seal the bottom edge of exterior trim designed to shed water. Blocking weep holes causes rot. |
| Annual inspection pays off | Checking caulk yearly at windows, doors, and trim joints catches failure before it becomes structural damage. |
The role of caulk on the home exterior
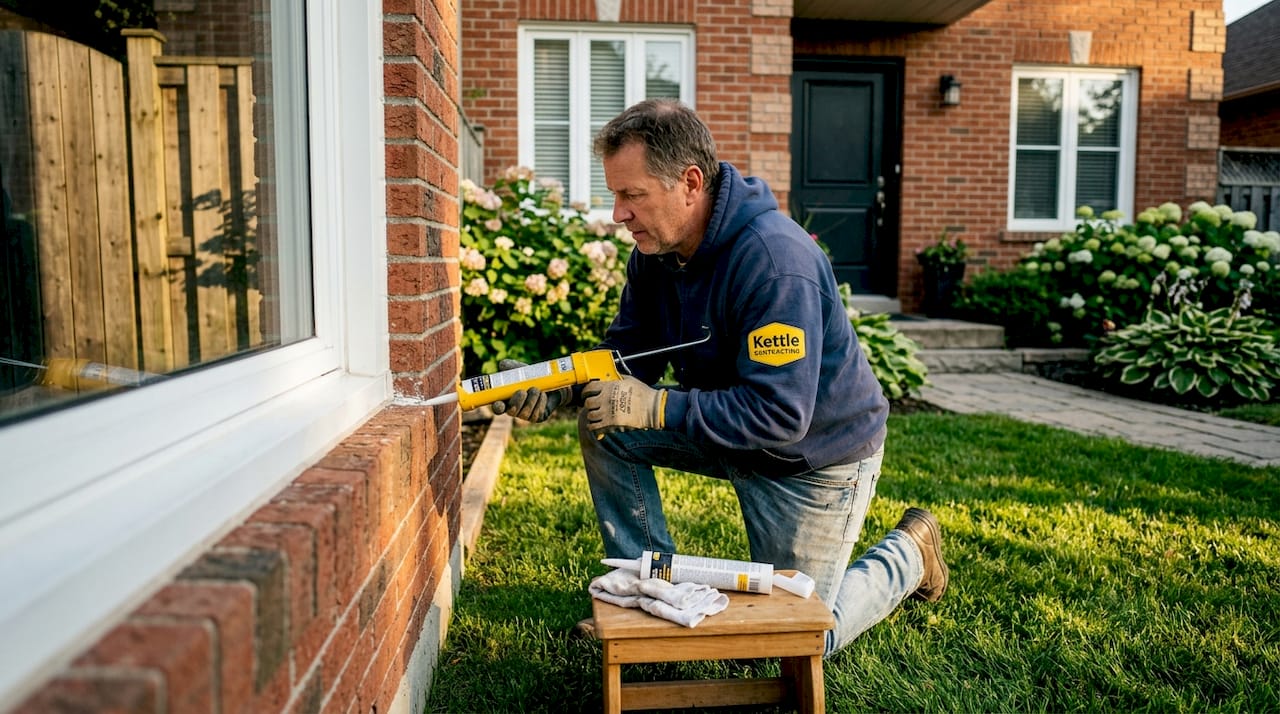
Caulk is not decorative. It is a flexible sealant that fills the gaps and transitions in your building envelope where two different materials meet. Think of the joint between your window frame and siding, the seam where trim meets brick, or the line where a dryer vent penetrates your wall. These are points of movement and exposure, and without a proper seal, they let water and air in.
When water gets behind cladding, it has nowhere to dry out. That is how you end up with wood rot and mould working their way through your framing well before you notice anything from the outside. Air infiltration through unsealed gaps also creates drafts, raises heating and cooling costs, and makes your home less comfortable in every season.
Here is what caulking accomplishes at the exterior of your home:
- Moisture barrier. Stops rain and snowmelt from entering at joints, seams, and penetrations.
- Air seal. Reduces unwanted air exchange between inside and outside, cutting energy loss.
- Pest exclusion. Closes off small gaps that insects and rodents use as entry points.
- Structural protection. Keeps water away from wood framing and sheathing, preventing rot over time.
- Paint longevity. Intact caulk prevents moisture from getting under paint film and causing peeling.
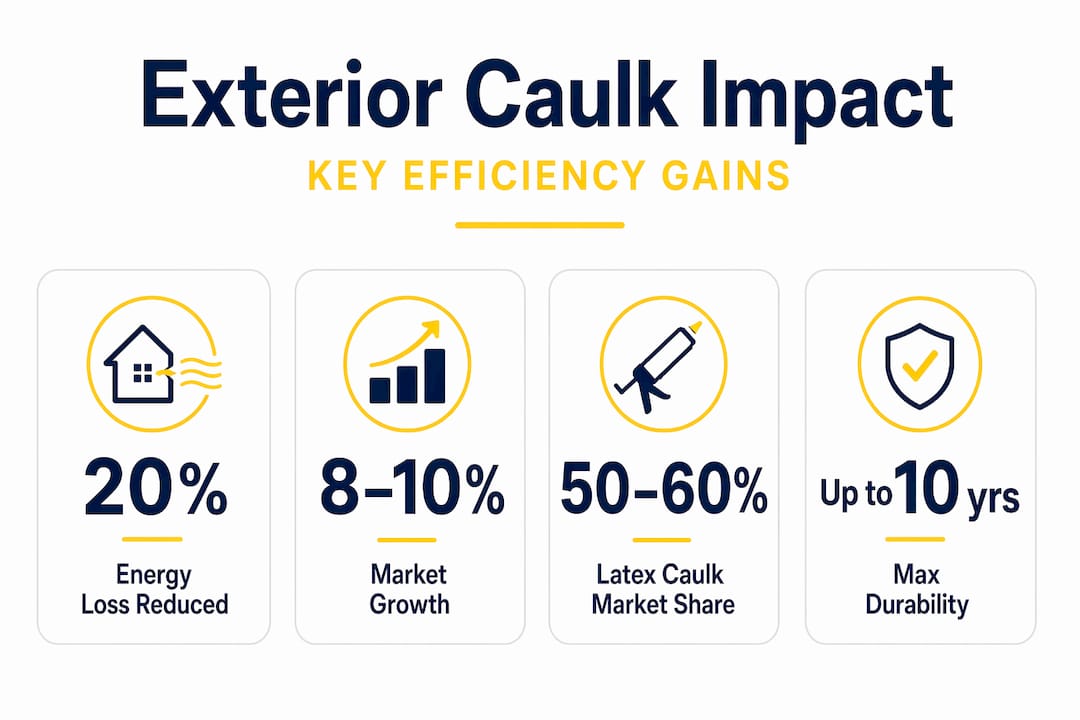
Sealing gaps around windows and doors can reduce energy loss by up to 20%. That is not a minor gain. Over a winter in Ontario, that adds up to real money on your gas or electric bill.
One thing worth understanding: exterior caulking is more about controlling water’s path around the building envelope than just plugging holes. Done correctly, it creates a continuous flexible gasket that sheds water and directs it away from vulnerable areas.
Choosing the right caulk for exterior use
Not all caulk is built for outdoor exposure, and using the wrong product is one of the most common reasons exterior seals fail early. Here is a breakdown of what is available and where each type belongs:
| Caulk type | Best use | Paintable | Typical lifespan |
|---|---|---|---|
| Acrylic latex | Siding, trim, window perimeters | Yes | 5–10 years |
| Siliconised acrylic | Windows, doors, trim gaps | Yes | 10–20 years |
| Silicone | Glass, metal, non-porous surfaces | No | 20–50 years |
| Polyurethane | Masonry, concrete, wide joints | Some formulas | 15–30 years |
| Hybrid polymer | High-movement joints, general exterior | Yes | 15–25 years |
Acrylic latex caulk holds roughly 50–60% of the market because it is affordable and easy to work with. But it does not perform as well as silicone or polyurethane in joints with significant thermal movement. For most trim and siding work, a siliconised acrylic is a better choice.
For masonry, stucco, or joints wider than 12 mm, you need ASTM C920-rated sealants. These are engineered for higher movement capacity. Standard window perimeters typically call for a Class 25 sealant, while joints with greater expansion and contraction require Class 50.
Hybrid polymer products are the fastest-growing segment, with 8–10% annual market growth, and for good reason. They combine the paintability of acrylic with the flexibility and weather resistance closer to silicone. For Ontario’s climate, where temperature swings between January and July can exceed 50 degrees Celsius, that flexibility is not a luxury.
Pro Tip: If you are painting over caulk, confirm it is labelled paintable before you buy. Silicone is excellent for durability but paint will not adhere to it, leaving you with a visible line or a peeling finish.
You can also read more about selecting caulk for windows if you want product-specific comparisons for window applications.
Common mistakes that shorten caulk life
The quality of your caulk application depends less on the product you buy and more on what you do before and after you open the tube. Most early failures trace back to a small number of avoidable errors.
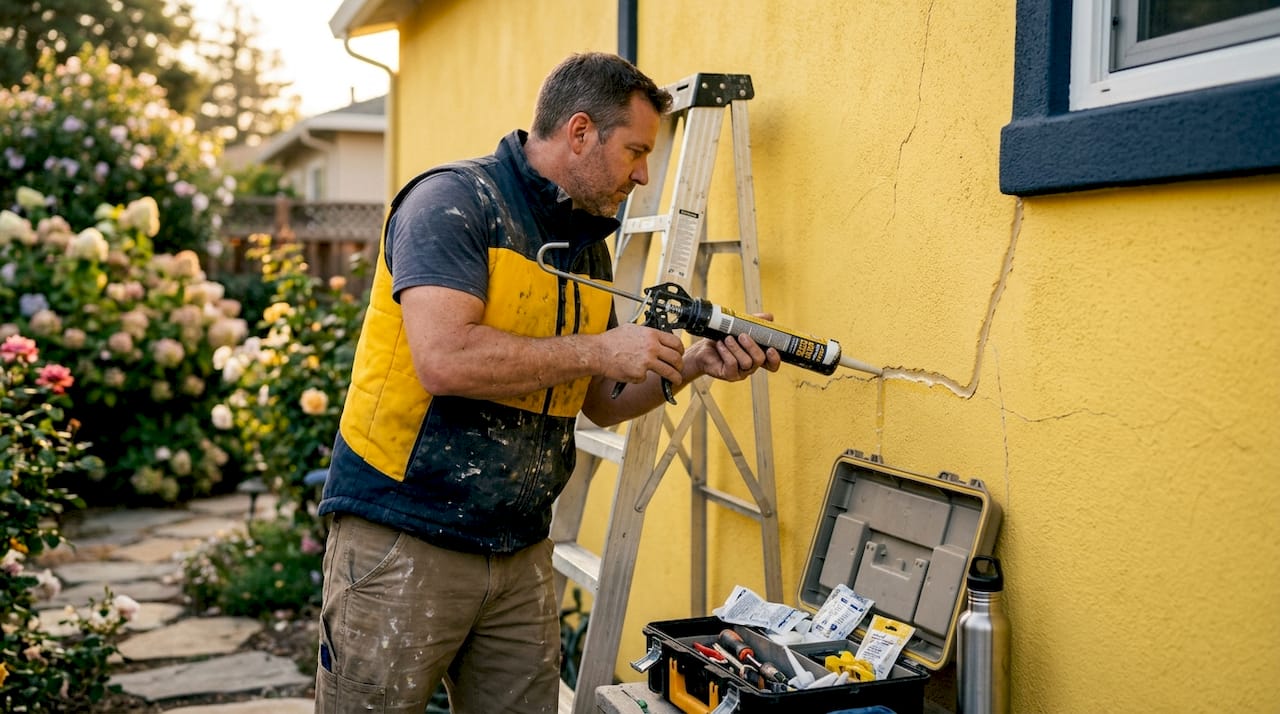
Surface preparation is everything. Caulk does not adhere to damp, dusty, or chalky surfaces. Applying it on a cool morning when the substrate is still holding moisture from overnight dew or rain is a reliable way to get a bond that lasts one season. Wait for a genuinely dry, warm day. Clean off old caulk residue, chalking paint, and dirt before you start.
Using backer rods in wider joints. For any joint wider than about 6 mm, install a foam backer rod first. Backer rods prevent three-sided adhesion, which is when the caulk bonds to the back of the joint as well as both sides. Three-sided adhesion restricts the caulk’s ability to stretch with movement, and it tears. A backer rod keeps the caulk adhered to the two faces only, so it can flex.
Here are the other mistakes worth knowing before you start:
- Applying caulk over failing caulk. Old, cracked caulk must be removed completely. Layering new over old creates a poor bond and traps moisture between the layers.
- Sealing drainage paths. Never caulk the bottom edge of exterior trim or window sill that is designed to drain. Blocking these weep holes traps moisture behind the trim and causes rot faster than leaving the gap open would.
- Caulking in cold weather. Most exterior caulks require the substrate to be above 7°C for proper curing. Applying below this temperature leads to weak adhesion and early cracking.
- Skipping tooling. Running a bead without smoothing it with a tool or wet finger leaves air pockets and poor contact with the substrate. A properly tooled bead is concave and pressed firmly into both surfaces.
Pro Tip: When removing old caulk, use a dedicated caulk removal tool rather than a standard utility knife. You will get a cleaner substrate without gouging the trim or siding, and the new application will bond much better.
For a detailed walkthrough of technique, the exterior caulking application guide covers each step with practical detail.
Caulking and curb appeal
There is a direct connection between the condition of your exterior caulking and how your home looks and what it is worth. Neat, intact caulk lines signal that the building has been maintained with care. Cracked, missing, or discoloured caulk signals the opposite.
Cracked or missing caulk is one of the first things a home inspector flags as deferred maintenance. It raises questions about what else has been neglected, and it gives buyers and inspectors reason to look harder. Dealing with this before listing, or simply as part of regular upkeep, removes that conversation entirely.
The benefits of good caulk maintenance for your property’s appearance include:
- Clean sight lines. Uniform caulk joints at windows and trim create a finished, professional look that is immediately noticeable.
- Paint that stays intact. Caulk prevents moisture from getting under paint at joints and trim edges. Without it, paint bubbles and peels within a season or two.
- Improved property value. Neat, continuous caulk lines contribute to overall exterior finish quality and support higher valuations.
- Lower maintenance costs over time. Protecting the substrate means your paint jobs last longer and you avoid rot repairs.
The curb appeal improvements exterior caulking delivers are real and measurable. It is one of the most cost-effective exterior maintenance tasks available to a homeowner, with materials costing between $3 and $15 per tube and the impact lasting years when done correctly.
To see how caulking specifically affects visual impact and resale, the article on window caulking and curb appeal is worth reading.
Inspecting and maintaining exterior caulk in Ontario
Ontario’s climate puts exterior caulk through significant stress. The freeze-thaw cycles that run from late October through to April cause building materials to expand and contract repeatedly. Caulk that was applied correctly and with the right product will handle this. Caulk that was not will fail, often in the first winter.
Here is a practical annual inspection process:
- Do a walkthrough every spring. After the last freeze, inspect all exterior joints at windows, doors, trim, and where different cladding materials meet. This is when winter damage shows up clearly.
- Look for cracking, shrinkage, and separation. Caulk that has pulled away from one substrate, cracked through the bead, or gone hard and brittle needs to come out.
- Check corners and penetrations. Hose bibs, electrical boxes, dryer vents, and pipe penetrations are high-risk spots that are easy to overlook.
- Press lightly on the bead. Good caulk is still slightly flexible. If it crumbles or snaps rather than compressing, it has reached the end of its useful life.
- Time your repairs well. Best application conditions in Ontario are late spring through early fall, when temperatures are reliably above 10°C and rain-free days are predictable. Avoid applying in August heat spells when surfaces exceed 40°C.
Pro Tip: If you find failing caulk alongside soft or discoloured wood, do not just re-caulk over it. Probe the wood first. Soft spots indicate rot has already started, and sealing over it will trap moisture and accelerate the damage. Address the rot before resealing.
When caulk failure is extensive, or when you find repeated failure in the same spots after correct reapplication, that is a signal that something structural or design-related is causing unusual movement or water exposure. That warrants a professional assessment rather than another DIY repair.
My honest take after 25 years on the job
I have seen every variation of exterior caulking done wrong. Tubes of cheap acrylic latex pressed into joints over old, cracked material. Silicone applied on a damp October afternoon that peels off by spring. Bottom sill edges sealed tight when the manufacturer specifically left them open for drainage. All of it comes back to the same underlying issue: treating caulk as a cosmetic product rather than a building envelope component.
In my experience, the homeowners who spend the least on caulk repairs over time are the ones who invest in proper prep and the right material the first time. That means removing the old material completely, cleaning the substrate, waiting for real caulking weather, and choosing a product rated for the joint conditions. It takes more time upfront. But it holds.
What I have also learned is that knowing when not to caulk is just as important as knowing where to caulk. Drainage paths exist for a reason. The role of caulking exterior sheathing is to protect it from water getting in, not to trap water once it has found its way behind cladding. Respect the design of the assembly, and the caulk will do its job. Ignore it, and you are creating the problem you were trying to prevent.
View caulking as preventive maintenance. A couple of hours each spring will keep your building tight and save you from a far more expensive conversation later.
— Felix
Protect your home with professional caulking
If your exterior caulking is overdue for attention, or if you have found soft wood, persistent drafts, or obvious joint failure during your inspection, Kettlecontracting can help.

Kettlecontracting specialises in high-performance residential and commercial caulking across the Greater Toronto Area, including window perimeters, door frames, expansion joints, and full building envelopes. Every project starts with a proper assessment of the joints, substrate condition, and appropriate product selection for Ontario’s climate. No shortcuts. No painting over failure. Just clean, durable work that holds through our freeze-thaw cycles. Whether you are maintaining a single-family home or managing a multi-unit property, contact Kettlecontracting for an honest assessment and a lasting result. You can also learn more about door sealing services if entry-point protection is a priority.
FAQ
What does exterior caulk actually protect against?
Exterior caulk seals gaps at joints and transitions to block water infiltration, air leakage, and pest entry. It protects underlying framing and sheathing from moisture damage, mould, and rot.
How often should exterior caulk be replaced?
Inspect exterior caulk annually, typically each spring. Depending on the product and exposure, expect to replace acrylic latex caulk every 5 to 10 years and higher-grade siliconised or polyurethane products every 15 to 20 years or more.
Can exterior caulking lower my energy bills?
Yes. Sealing gaps at windows and doors can reduce energy loss by up to 20%, which translates directly to lower heating and cooling costs throughout the year.
Is caulking over old caulk ever acceptable?
No. Applying new caulk over old, failing material leads to poor adhesion and early failure. The old caulk must be fully removed and the substrate cleaned before any new sealant is applied.
Why should I hire a professional instead of doing it myself?
Complex joints, wide gaps, masonry surfaces, and repeated failures all benefit from professional assessment and product selection. Kettlecontracting identifies underlying causes of failure and applies appropriate sealants for each joint, reducing the chance of rework and long-term damage.
Recommended
- When and How to Replace Exterior Caulk – Kettle Contracting
- Can Window Caulking Improve Curb Appeal? | Small Fixes with Big Impact – Kettle Contracting
- Should I Caulk Around My Exterior Doors? | Signs It’s Time for a Refresh – Kettle Contracting
- Which Type of Caulk Is Best for Exterior Windows? – Kettle Contracting