
Caulking phasing is the staged application of sealants timed to match each construction sequence in a new build. Construction professionals who skip this process or treat caulking as a single end-of-project task consistently face premature joint failure, air leaks, and moisture infiltration. Air leaks account for 20–30% of a home’s heating and cooling costs, which means why new builds require caulking phasing is not a procedural question. It is an energy code and building durability question. Phased sealing aligns sealant application with structural movement, curing windows, and substrate stability at each build stage.
Why new builds require caulking phasing at every construction stage
New buildings move. That is not a defect. It is physics. Concrete shrinks as it cures, wood framing dries and shifts, and steel expands and contracts with temperature changes. These movements are predictable, but they are not uniform across a build. Different parts of the structure move at different rates and at different times.
Building envelope failures most often occur at joints where different materials meet. A quarter-inch sealant bead at one of these joints can be more critical to the building’s performance than the primary structure around it. That finding from architect Michael Riscica reflects what experienced site crews already know: joints are the weakest points in any envelope.
Phased caulking addresses this directly. By scheduling sealant application to match each construction stage, you give the building time to move before you seal it. Sealing too early locks in stress. The sealant stretches beyond its capacity, cracks, and fails within one or two seasons.
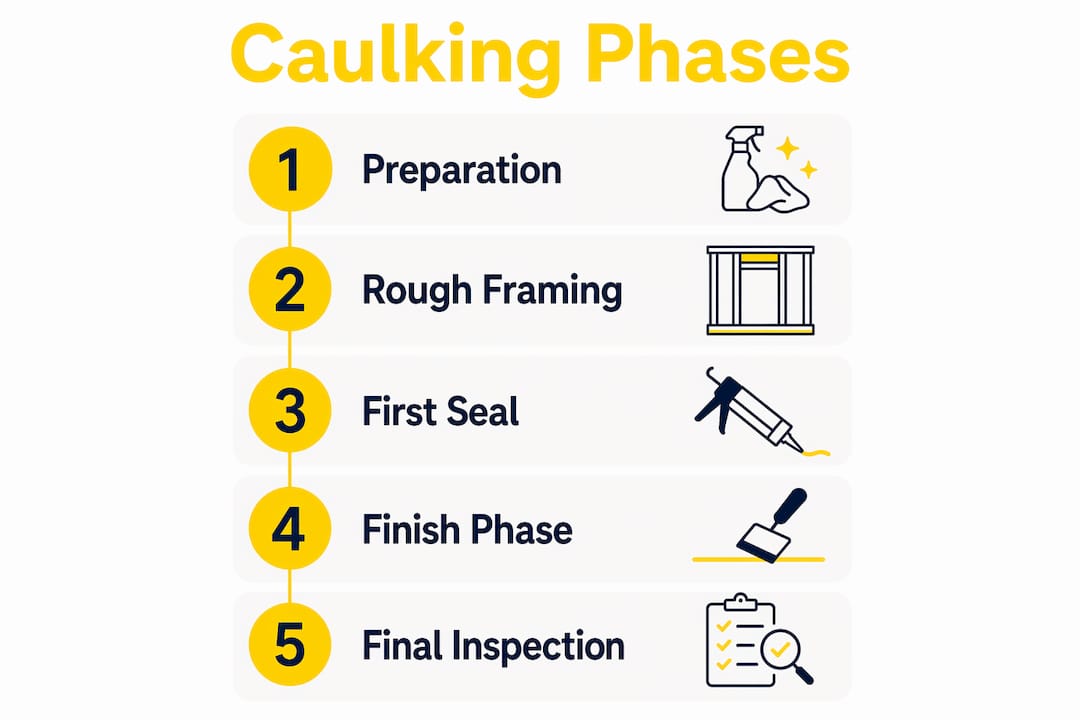
The key reasons phased application matters in new construction:
- Framing phase: Rough sealants applied at this stage handle large gaps and accommodate significant early movement in wood and engineered lumber.
- Exterior enclosure phase: Once sheathing, windows, and doors are set, sealants address weather-resistive barrier transitions and window perimeter joints before cladding goes on.
- Finish phase: Interior and exterior finish sealants are applied after materials have stabilised, using products matched to the smaller movement ranges of settled joints.
- Post-occupancy inspection: Some joints, particularly around mechanical penetrations, benefit from a final inspection and touch-up after the building has gone through its first heating season.
Pro Tip: Schedule a caulking review at each major milestone sign-off. Treat it the same way you treat framing inspections. Catching a missed joint at the enclosure phase costs far less than repairing water damage after occupancy.
How surface preparation and curing time shape each caulking phase
Surface preparation is not optional. Over 50% of paint and coating failures trace back to inadequate surface preparation and sealing before finishing. The same principle applies to sealant joints. Contaminated or damp surfaces prevent proper adhesion, and no amount of high-quality caulk compensates for a poorly prepared substrate.
Phasing creates the scheduling space needed to do preparation correctly. When caulking is treated as a single task squeezed in before painting, crews rush surface cleaning, skip priming on porous substrates, and apply sealant over dust or moisture. The result is adhesion failure that shows up within the first year.
Curing time is equally critical. Standard paintable caulks skin over in 30 minutes but require 2–4 hours of curing before a topcoat can be applied without compromising the seal. Rushing that window causes the paint film to trap solvents, which leads to bubbling, cracking, and eventual joint failure.
A practical preparation sequence for each caulking phase:
- Clean the substrate. Remove dust, oil, old sealant residue, and any surface contamination. Use a solvent wipe on non-porous surfaces like metal or glass.
- Allow the substrate to dry completely. Moisture under a sealant bead is the most common cause of adhesion failure on new builds in Ontario’s humid summers.
- Apply primer where required. Porous substrates like concrete, masonry, and some wood species need a compatible primer to achieve full adhesion.
- Install backer rod on wide joints. Backer rod controls sealant depth and prevents three-sided adhesion, which restricts the sealant’s ability to stretch with joint movement.
- Apply sealant and tool immediately. Tooling within the open time specified by the manufacturer ensures full contact with both joint faces.
- Protect the joint during cure. Keep traffic, moisture, and paint away from fresh sealant until the manufacturer’s full cure time has passed.
Pro Tip: In Ontario, autumn and spring installations require extra attention to substrate temperature. Sealant applied below 5°C will not cure properly and will fail prematurely. Check surface temperature, not just air temperature, before you start.
Does sealant type matter as much as application timing?
Sealant type matters just as much as timing. Matching sealant elongation to joint movement is critical. Incorrect selection causes failures within 1–2 seasons, regardless of how well the surface was prepared or how carefully the sealant was applied.
Multi-stage caulking uses different sealants during framing and finishing to accommodate structural settling and material stabilisation. This is not a preference. It is a technical requirement driven by the different movement ranges joints experience at each build stage.
High elongation silicones, which can stretch beyond 500%, handle the structural shifts common in early build phases. Acrylic latex sealants, with elongation below 50%, suit stable finish-phase joints where movement is minimal and paintability matters. Applying a low-elongation acrylic to a high-movement joint at the framing phase is a guaranteed failure.
| Build phase | Joint movement range | Recommended sealant type | Key property |
|---|---|---|---|
| Rough framing | High | Silicone or hybrid sealant | 500%+ elongation, moisture resistance |
| Exterior enclosure | Moderate to high | Polyurethane or silicone | UV resistance, weather flexibility |
| Interior finish | Low | Paintable acrylic latex | Paintability, low shrinkage |
| Post-occupancy touch-up | Low to moderate | Silicone or siliconised acrylic | Durability, adhesion to aged surfaces |
Caulking is a moisture management tool, not a cosmetic finish. Paint protects surfaces from UV; caulk controls water movement to prevent structural damage. Treating them as interchangeable tasks on the schedule is one of the most common mistakes on new build sites.
What happens when caulking phasing is skipped?
Skipping phased application produces predictable failures. The importance of caulking in construction becomes obvious only after the damage appears, which is usually well after the trades have left the site.
The most common defects from unphased caulking:
- Premature cracking. Sealant applied before the structure has settled tears at the joint face within the first heating and cooling cycle.
- Three-sided adhesion failure. Without backer rod, sealant bonds to the back of the joint as well as both faces. When the joint moves, the sealant tears rather than stretches.
- Moisture infiltration at window perimeters. Window joints sealed too early or with the wrong product allow water to track behind cladding, causing rot that is invisible until it is severe.
- Air leakage at penetrations. Mechanical, electrical, and plumbing penetrations sealed at the wrong phase are often disturbed by subsequent trades, breaking the seal before the building is even occupied.
- Paint failure over uncured sealant. Painting over sealant that has not fully cured traps solvents and causes the paint film to fail, requiring costly rework.
Building experts consistently note that caulking is undervalued on construction sites, yet neglect leads to invisible long-term water damage and structural rot. The cost of fixing these defects after occupancy is always higher than the cost of phasing correctly during construction.
Best practices for scheduling caulking phases in new construction
Effective phasing starts at the project planning stage, not on the day a trade shows up with a caulking gun. Coordinate caulking milestones with your construction schedule the same way you coordinate mechanical rough-in or insulation installation.
- Define three caulking milestones in the project schedule. Rough framing, exterior enclosure, and interior finish are the three natural phases. Each gets its own inspection and sign-off before the next phase begins.
- Communicate with painters and finishing trades early. Painters need to know which joints will be caulked before priming and which will be caulked after. Misaligned sequencing is the most common cause of rework on new build sites.
- Specify sealants by phase in your materials list. Do not leave sealant selection to the crew on the day. Specify product type, elongation rating, and cure time for each phase in the project documentation.
- Inspect joints before sealing, not after. Check substrate condition, joint width, and backer rod installation before the sealant goes in. Correcting a missed backer rod after the sealant is applied means cutting it out and starting again.
- Account for Ontario’s climate in your scheduling. Avoid exterior sealant application during rain, high humidity, or temperatures below 5°C. Build weather contingency into your caulking milestones, particularly for autumn and spring builds.
Proper airtightness testing results depend directly on how well each caulking phase was executed. Buildings that fail blower door tests almost always have unsealed penetrations or failed joints from rushed or unphased sealant work.
Key takeaways
Phased caulking is the single most effective way to prevent joint failure, moisture infiltration, and energy loss in new construction.
| Point | Details |
|---|---|
| Phase timing drives seal integrity | Applying sealant before the structure settles causes cracking and adhesion failure within the first season. |
| Sealant type must match joint movement | High-movement framing joints need silicone with 500%+ elongation; finish joints suit paintable acrylic latex. |
| Surface prep cannot be skipped | Clean, dry, primed substrates and backer rod installation are required for sealant to bond and flex correctly. |
| Curing windows must be respected | Standard caulks need 2–4 hours before topcoating; rushing this step causes paint and seal failure. |
| Phasing reduces long-term costs | Correctly phased caulking prevents water damage, structural rot, and energy losses that are expensive to repair after occupancy. |
What 25 years on site taught me about caulking phases
The pressure to finish fast is real on every new build. I have seen it on custom homes and large multi-unit projects alike. The caulking always seems to be the task that gets squeezed when the schedule slips. That is exactly backwards.
The jobs where phasing was treated as a genuine milestone, not an afterthought, are the ones that hold up through Ontario winters without callbacks. The ones where a single crew showed up at the end and caulked everything in a day are the ones that generate warranty claims eighteen months later. Water finds every gap. It is patient in a way that construction schedules are not.
The detail that catches most builders off guard is three-sided adhesion. Skipping backer rod on a wide joint looks like a time-saving shortcut. What it actually does is lock the sealant to the back of the joint, so when the building moves, the sealant tears instead of stretching. You cannot see that failure until water has already been tracking behind the cladding for a season or two.
My honest advice: build caulking phases into your schedule before you price the job. It is far easier to hold a trade to a phased scope when it is written into the contract than to argue about it on site when the painter is waiting.
— Felix
Kettlecontracting’s phased caulking services for new builds
New builds across the Greater Toronto Area need caulking that keeps pace with construction, not caulking that gets done once and forgotten.

Kettlecontracting specialises in multi-phase caulking services for residential and commercial new construction. The team works directly with builders and general contractors to schedule sealant application at the right stage, with the right product, on properly prepared substrates. From rough framing through to finish-phase sealing, Kettlecontracting coordinates with your trades to keep the project moving without compromising the envelope. If you are planning a new build or managing a multi-unit development in the GTA, contact Kettlecontracting to discuss a phased caulking scope that fits your construction schedule.
FAQ
What is caulking phasing in new construction?
Caulking phasing is the practice of applying sealants in stages that align with construction milestones, including rough framing, exterior enclosure, and interior finishing. Each phase uses sealants matched to the joint movement and substrate conditions present at that stage.
Why does building settlement affect caulking performance?
New buildings settle and materials expand and contract after construction, which puts stress on sealant joints. Sealant applied before settlement is complete stretches beyond its capacity and fails, allowing air and moisture to enter the building envelope.
How long does caulk need to cure before painting?
Standard paintable caulks skin over in approximately 30 minutes but require 2–4 hours of curing before a topcoat can be applied without compromising the seal.
What sealant should be used at the framing phase?
High-movement framing joints require silicone or hybrid sealants with elongation ratings above 500%. Low-elongation acrylics are not suitable for early-phase joints and will fail within one to two seasons.
What is three-sided adhesion and why does it cause failures?
Three-sided adhesion occurs when sealant bonds to both joint faces and the back of the joint cavity. When the joint moves, the sealant tears rather than stretches. Installing backer rod before applying sealant prevents three-sided adhesion and allows the sealant to flex correctly.