
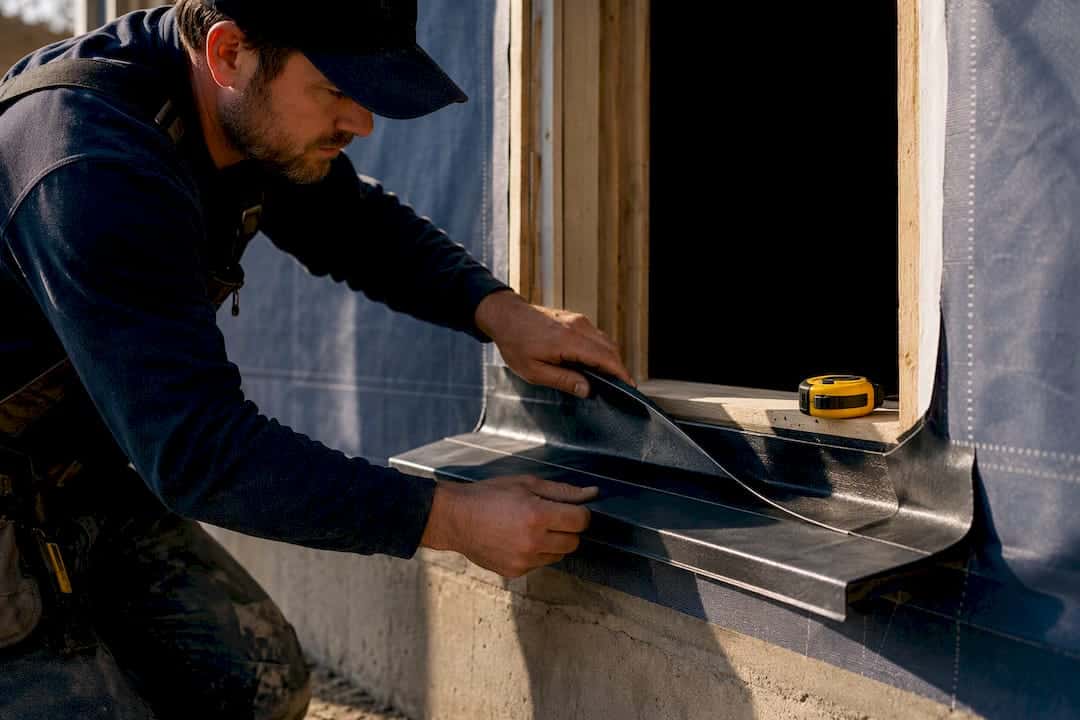
Flashing is your primary line of defence against water. Sealant is the backup that handles movement, not the thing keeping water out. Every joint should shingle downward, sill first, then jambs, then head, with the bottom flange left uncaulked so any water that gets behind the cladding has somewhere to go. Skip that order, and you’re just delaying the leak, not preventing it.
TL;DR:
- Flashed joints should follow the shingle principle, with the sill flashing installed first and uncaulked bottom flange to allow water drainage.
- Window flashing requires different materials for the sill, jambs, and head, with sealant chosen based on movement and exposure, and compatibility verified beforehand.
- Proper installation involves prepping housewrap, layering flashing from bottom to top, and tooling all sealant beads to ensure long-term watertightness.
- Sealant fails primarily due to joint geometry issues, improper joint size, or lack of priming, making correct joint design critical.
- Retrofitting flashing on existing windows is complex, requiring careful surface preparation, correct overlapping, and adherence to manufacturer instructions to avoid warranty issues.
Table of Contents
- Window flashing and sealant material types: what goes where
- How to install window flashing and sealant step by step
- Sealant selection and joint design that actually holds
- Retrofitting flashing on windows that are already installed
- Common flashing and sealant mistakes (and how to catch them)
- Codes and specifications worth knowing
- What 25 years on Ontario job sites teaches you about flashing
- Why flashing sequencing is the whole game
- Get your windows flashed and sealed right the first time
- Sources
- FAQ
Window flashing and sealant material types: what goes where
Every window opening has three flashing zones, and each one calls for a different approach. Get the material wrong for the location, and you’re setting up a callback in three years.
The sill (pan) carries the most water, so it needs the most attention. A rigid pan flashing (metal or moulded plastic) with a back dam works well on new builds. A flexible peel-and-stick membrane, folded up the jambs and back over the sill plate, does the same job on retrofits or tight rough openings.
Jamb flashing laps over the sill flashing on both sides. Head flashing goes in last, often paired with a drip cap that kicks water away from the wall instead of letting it run down the face of the siding.

Sealant chemistry matters just as much as flashing type, with different sealants favored for varying movement and exposure conditions, such as polyurethane, silicone, or hybrid types.
Compatibility trips people up more than product quality does. Asphaltic peel-and-stick tapes can react with vinyl window flanges over time, and some WRBs need a specific primer before tape will bond at all. Check the flashing manufacturer’s compatibility chart before you buy anything, not after.
How to install window flashing and sealant step by step
The sequence below follows the shingle principle: every layer overlaps the one below it, so water always moves down and out, never sideways into the wall cavity.
- Prep the WRB. Cut an inverted “I” or a modified apron pattern in the housewrap at the rough opening, folding the flaps in so the sill is exposed.
- Install the sill pan first. Set a rigid pan flashing with a back dam, or apply a flexible membrane that runs up both jambs by at least 150mm. This is the step Inspectapedia’s flashing guidance treats as non-negotiable: start at the bottom, always.
- Run jamb flashing next, lapping directly over the sill pan. Never reverse this order.
- Set the window into the opening, level and shimmed, then fasten through the flange per the manufacturer’s schedule.
- Bed the side and head flanges in sealant. Leave the bottom flange uncaulked entirely to allow drainage, preventing trapped water that can cause rot over time.
- Install head flashing and the drip cap, then fold the WRB head flap down over it and tape the top edge shingle-fashion.
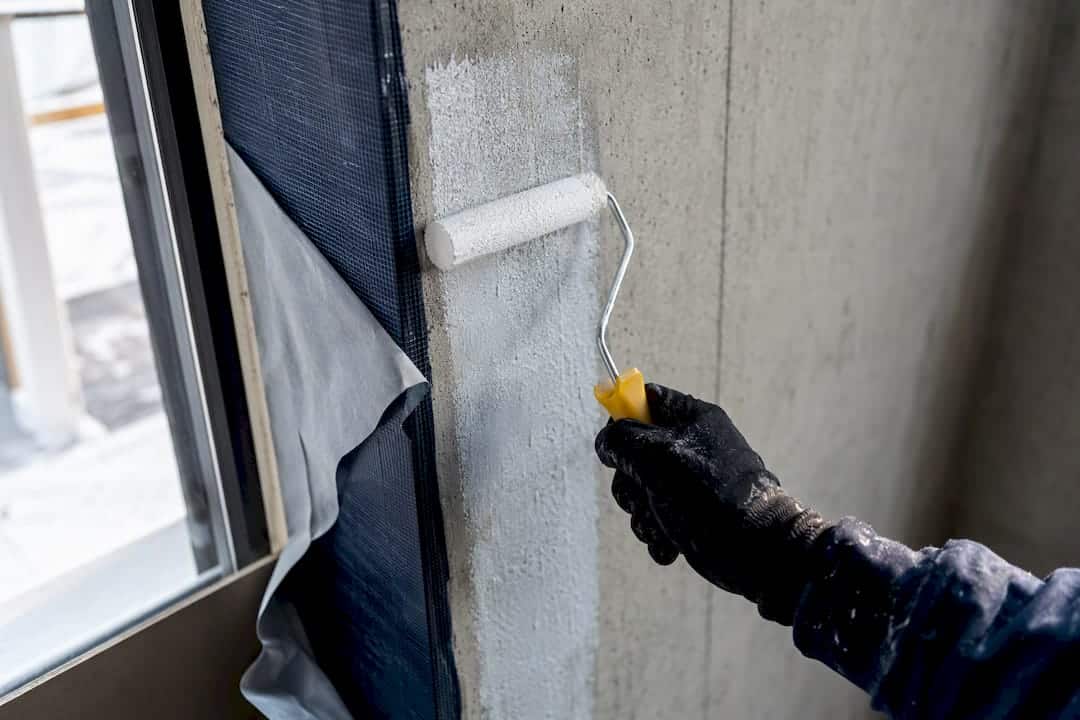
- Press all tape and membrane with a roller. Hand pressure alone leaves air pockets that fail early, especially in cold weather when adhesives are stiffer, a point BuildingAdvisor’s flashing writeup backs up directly.
- Tool the sealant beads on sides and head so they compress into the joint instead of sitting as a surface skin.
For lap dimensions, aim for a minimum vertical overlap of 100mm, staggered so no two seams line up, following the practice one municipal window installation detail spells out for permit-level work.
Pro Tip: If you’re working below 5°C or the substrate is even slightly damp, prime it first. Peel-and-stick adhesive that looks stuck at installation can peel clean off the wall a year later if it never actually bonded.
Sealant selection and joint design that actually holds
Sealant fails less because of bad product and more because of bad joint geometry. Get the dimensions wrong, and even premium silicone will tear loose within a few freeze-thaw cycles.
The rule of thumb: joint depth should be roughly half the joint width, with a practical minimum around 6mm. Too shallow, and the sealant can’t stretch. Too deep, and it never cures properly through the middle, leaving a soft, unreliable core.
- Use backer rod in any joint wider than about 6mm to control depth and create a bond-breaker at the base.
- Match sealant to a movement capability class (low, medium, or high) based on how much the joint actually expands and contracts seasonally.
- Prime porous or unusual substrates before applying sealant, especially brick, weathered wood, or certain vinyl formulations.
- Re-inspect sealant joints every few years; hairline cracking or chalking is your cue to reseal before water gets a path in.
CMHC’s building practice guidance is direct on this point: sealant has to be sized and selected for the movement it will actually see, not just caulked in and hoped for. Sealant sized for a low-movement joint on a high-movement application will fail well before it should, sometimes inside two years. Get a fuller picture of how flashing and sealant divide the labour in a two-stage sealing system.
Retrofitting flashing on windows that are already installed
Adding flashing to a window that’s already in the wall is doable, but it’s not the same job as new construction. You’re working around finished siding, existing WRB laps, and whatever the original installer did (or didn’t do) years ago.
- Clean and fully dry the substrate before applying anything; flexible membranes won’t adhere to damp or dusty surfaces.
- Where access allows, tuck a flexible pan flashing under the existing WRB at the sill rather than just surface-mounting it.
- Non-flanged windows and brickmould trim need different detailing than flange-style units, so don’t assume one method fits every window on the house.
- If you drill or add weep paths, check the manufacturer’s warranty terms first. Some voids coverage if the flange or frame is altered outside their spec.
Retrofits get complicated fast when there’s hidden rot, a masonry sill that needs rebuilding, or you’re dealing with a multi-unit building where one bad detail repeats forty times. According to NRC’s publication on flashing retrofits, retrofit work is fully viable, but it has to lap correctly into existing housewrap and follow the window maker’s install instructions to keep any warranty intact. That’s usually the point where it’s worth calling in a pro instead of chasing a leak yourself.
Common flashing and sealant mistakes (and how to catch them)
Most window leaks trace back to one of a handful of repeat offenders, and you can catch several of them just by looking closely.
- Caulked sill flange. The single most common mistake we see. That bead looks tidy, but it seals in the exact water it’s supposed to let out.
- Reverse-lapped WRB or flashing. Water runs downhill; any seam facing the wrong way collects it instead of shedding it.
- Stretched tape. Peel-and-stick pulled taut during application shrinks back and pulls away from the substrate over time.
- Missing primer on cold or damp surfaces, leaving membrane that never truly bonded.
- Sloppy sealant tooling. A bead that sits on the surface instead of being pressed into the joint skins over but doesn’t actually seal.
For a quick check, look at lap direction at each seam, probe the sill for soft spots with a screwdriver, and give any old flashing tape a gentle tug to see if it’s still adhered. If you find rot or a tape that lifts easily, that’s a reflash job, not a quick recaulk. Working at height or pulling trim off a second-storey window isn’t a solo weekend project; that’s when it’s worth bringing in someone with proper fall protection.
Codes and specifications worth knowing
Building codes generally require flashing at any sill where the window isn’t inherently self-flashing, with minimum lap and slope requirements built in. CodeIndex’s excerpts on sealants, trim, and flashing reference ASTM and CAN/CGSB standards for sealant performance, covering things like movement capability and adhesion testing.
- Minimum vertical lap: 100mm is the practical municipal benchmark.
- End dams at the sill pan prevent water from escaping sideways off the ends.
- Drip caps need enough offset from the wall face to actually throw water clear.
- Two layers of building paper is often better practice than the code minimum of one.
Where code and manufacturer instructions differ, follow the manufacturer’s spec. Codes frequently defer to it anyway, and departing from it can cost you warranty coverage on the window itself.
What 25 years on Ontario job sites teaches you about flashing
Field conditions change the plan more than any spec sheet does. In cold weather, we always prime peel-and-stick membrane before it goes down, skipping that step in November is how you get a membrane that looks fine on installation day and peels off by spring.
- Roll every membrane seam by hand, every time, no exceptions.
- Favour high-movement sealant chemistries on southwest-facing walls, where thermal swings are worst.
- Shim windows level before flashing goes on; a window installed out of plumb throws off drainage slope no matter how good the materials are.
- A proper inspection means probing the sill, measuring joint widths, and documenting existing conditions before quoting any scope.
If you want the fuller version of how flashing and sealant work together as a system, our piece on building envelope sealing walks through it in more detail.
Why flashing sequencing is the whole game
Sealant gets all the attention because it’s visible and easy to reapply. Flashing is buried, boring, and does the actual work of keeping a wall dry for thirty years instead of three.
The pattern I keep coming back to: almost every failure we get called to fix started with someone treating sealant as the primary defence instead of the backup it’s meant to be. Do the sequencing right the first time, sill first, drainage open, and document what the window manufacturer actually specifies before you close up the wall.
— Felix
Get your windows flashed and sealed right the first time
Reading about proper sequencing is one thing. Getting a sill pan installed correctly, jambs lapped the right direction, and sealant tooled into a joint sized for real movement, is another. Professional caulking specialists handle that work, building every job around the flashing-first, drainage-open principle this article just walked through.

If your windows are showing early signs of a bad seal, drafts, staining, or a soft sill, Residential Window Caulking is where to start. Managing a commercial property or multi-unit building instead? Our Building Envelope Sealing service covers the same flashing-first approach at scale, with documented scope and materials chosen for the Canadian climate. Reach out for a site visit, we’ll probe the sills, measure the joints, and tell you honestly whether you need a reseal or a full reflash.
Sources
- NRC publication on flashing retrofits
- Inspectapedia: How to Install Window & Skylight Flashing & Sealants
- BuildingAdvisor: Updated method for leakproof window flashing
FAQ
Should I caulk around window flashing?
Caulk the side and head flanges where flashing meets the window frame, but never caulk the bottom sill flange. The sill needs to stay open so any water that gets behind the flashing can drain out instead of pooling against the frame.
What flashing should be used for windows?
The right flashing depends on the location: rigid pan or flexible peel-and-stick membrane at the sill, overlapping jamb flashing on the sides, and head flashing with a drip cap at the top. BuildingAdvisor’s guidance notes peel-and-stick performs best on clean, dry substrates, primed if conditions are cold or damp.
Does a window actually need flashing?
Yes. Flashing is what physically directs water away from the wall assembly. Sealant alone can’t do that job long term, since it only accommodates movement and gaps rather than shedding bulk water the way flashing does.
Can I add flashing to windows that are already installed?
You can, though retrofit work is more involved than flashing a new install. It requires lapping new flashing correctly into the existing housewrap and following the window manufacturer’s instructions to avoid voiding the warranty, as outlined in NRC’s retrofit guidance. Hidden rot or masonry sill damage usually means it’s time to call a contractor rather than tackle it solo.
