

In this guide, window flashing types refers to the caulks and sealants that seal the gaps and joints around a window frame, not metal or membrane flashing. The families that matter for this work are silicone, polyurethane, hybrid or MS polymer, acrylic, butyl, and low expansion urethane foam used as a gap filler. Each one handles movement, weather, and paint differently, and picking the wrong one is one of the most common reasons a window starts leaking again within a year or two.
TL;DR:
- Sealant choice should be based on substrate compatibility, expected movement, finish requirements, temperature conditions, and gap size to ensure durability.
- Proper installation requires correct joint depth, clean surfaces, use of backer rods, steady application, and adherence to manufacturer guidelines, especially for joint design.
- Silicone, polyurethane, and hybrid sealants generally last several years, but acrylics age faster and are better suited for interior applications.
- Visual inspections once or twice a year can identify early signs of failure, such as cracking or detachment, allowing for timely resealing before water intrusion.
- Professional caulking is recommended for recurrent leaks, complex joints, or warranty-covered jobs, where precise prep, materials, and inspection documentation prevent costly failures.
Table of Contents
- 1. Sealant chemistries every window job runs into
- 2. How do you choose the right sealant for a window joint?
- 3. What does a proper window caulking installation involve?
- 4. How long does window caulking actually last?
- 5. When does this job need a professional?
- 6. A contractor’s take on joint design over labels
- 7. Book a window caulking estimate that’s done right the first time
- 8. Where this guide’s technical details come from
- Sources
- FAQ
1. Sealant chemistries every window job runs into
Every contractor who works on window perimeters ends up choosing between the same handful of chemistries, and each one earns its spot for a reason.
Silicone sealants, like Sikasil N Plus, are neutral cure products known for long weathering resistance and strong movement capacity, and they bond well to non-porous surfaces such as glass and aluminium without priming. The trade-off is that most silicones are not paintable, so they are a poor fit anywhere a homeowner wants a painted, uniform trim line.
Polyurethane sealants offer tenacious adhesion and high movement capability, and they take paint well, which makes them popular for wood trim and masonry returns. They cure more slowly than silicone or hybrids, so a job scheduled ahead of rain needs a longer weather window.
Hybrid or MS polymer sealants split the difference. Products like SikaHyflex-150 LM are one-part, low modulus formulas rated at up to ±50% movement, they skin quickly, often within about an hour, and they accept paint. That combination is why hybrids have become a default choice for perimeter caulking on mixed substrates.
Acrylic or acrylic latex caulks are inexpensive, paintable, and easy to tool, but their movement capability is limited, which makes them better suited to interior trim than an exterior joint exposed to freeze thaw cycles.
Butyl sealants stick well to metal and masonry and are still used in specific flashing details, though their movement range is moderate compared to hybrids or silicones.
Low expansion urethane foam fills larger gaps around the rough opening rather than sealing the visible joint. Natural Resources Canada warns that only low expansion formulas belong around windows, because standard expanding foam can bow the frame and cause the sash to bind.
- Silicone: excellent weathering and movement, generally not paintable.
- Polyurethane: strong adhesion and paintable, slower cure.
- Hybrid or MS polymer: paintable, fast skinning, high movement capability.
- Acrylic: budget friendly and paintable, limited movement, best for interior trim.
- Butyl: solid adhesion to metal and masonry, moderate movement.
2. How do you choose the right sealant for a window joint?
Picking a sealant isn’t about grabbing whatever tube is on the shelf. It comes down to a short list of practical questions you or your contractor should walk through before the gun ever touches the joint.
- Check the substrate. Glass and aluminium usually need no primer with quality silicones, while porous wood, vinyl, and brick often need a primer to get proper substrate adhesion.
- Estimate real movement, not just the label. SikaHyflex documentation shows hybrids rated up to ±35 to 50% movement, but professionals size the joint to expected seasonal expansion and contraction rather than trusting a printed number alone.
- Decide whether the finish needs paint. If the trim will be painted, rule out most silicones and lean toward hybrids, polyurethanes, or acrylics.
- Factor in temperature at install time. Cold, damp, or freshly rained-on substrates compromise cure and adhesion for almost every chemistry.
- Plan for gap size. Wide rough openings call for low expansion foam and a backer rod before any finish bead goes in.
3. What does a proper window caulking installation involve?
Good sealant choice only pays off if the installation is done right, and this is where most warranty claims actually start. NRC research points to joint design and installation quality, not the product itself, as the leading factor in sealant service life.
A few fundamentals separate a job that lasts from one that fails within a season:
- Joint depth should run about half the joint width, using a backer rod to control depth and prevent three-sided adhesion.
- Closed-cell backer rod should be sized roughly 25% larger than the joint width and compressed no more than 40%, per Sika’s application guidance.
- Surfaces need to be clean, dry, and primed where the substrate calls for it, and sealant should be within its shelf life before it goes on the gun.
- Application should use steady gun pressure, a continuous bead, and concave tooling immediately after placement.
- Dry tooling is preferred for many hybrid sealants; soapy water can leave residue that interferes with adhesion unless the manufacturer specifically allows it.
- Sealant should never be applied to a substrate outside the temperature range listed on the product data sheet, and damp masonry or wood needs time to dry first.
Pro Tip: Ask your contractor to show you the backer rod before the finish bead goes in. If there’s no rod in a joint wider than about a quarter inch, that’s a callback waiting to happen.
Owners who want a written record of scope should also ask for defined failure criteria and inspection documentation, an approach Fenestration Canada recommends to reduce disputes down the line. For a closer look at how sloppy prep shows up later, our breakdown of common window caulking mistakes covers the patterns we see most often.
4. How long does window caulking actually last?
Longevity depends heavily on chemistry. Silicone, polyurethane, and hybrid sealants tend to hold up for years under normal exposure, while acrylic caulks age faster and are better suited to protected interior joints than an exposed exterior sill.
Watch for these signs that a joint needs attention:
- Cracking or chalking on the bead surface, often the first visible sign of UV wear.
- Adhesive failure, where the sealant pulls cleanly away from the substrate rather than tearing.
- Cohesive failure, where the bead itself splits down the middle.
- Heavy dirt pickup or a sticky surface that never fully cures.
A quick visual check once or twice a year catches most of these early, before water gets behind the frame. Small cracks can often be cut out and resealed, but widespread detachment usually calls for a full reseal. It’s also worth remembering Natural Resources Canada’s point that interior air sealing should be finished before exterior caulking goes on, otherwise moisture can get trapped in the wall assembly. If you’re not sure what you’re looking at, our guide to spotting failed window caulking walks through the visual cues.
5. When does this job need a professional?
Some window caulking is genuinely a small, manageable task. But a few situations call for a trade professional rather than a weekend fix.
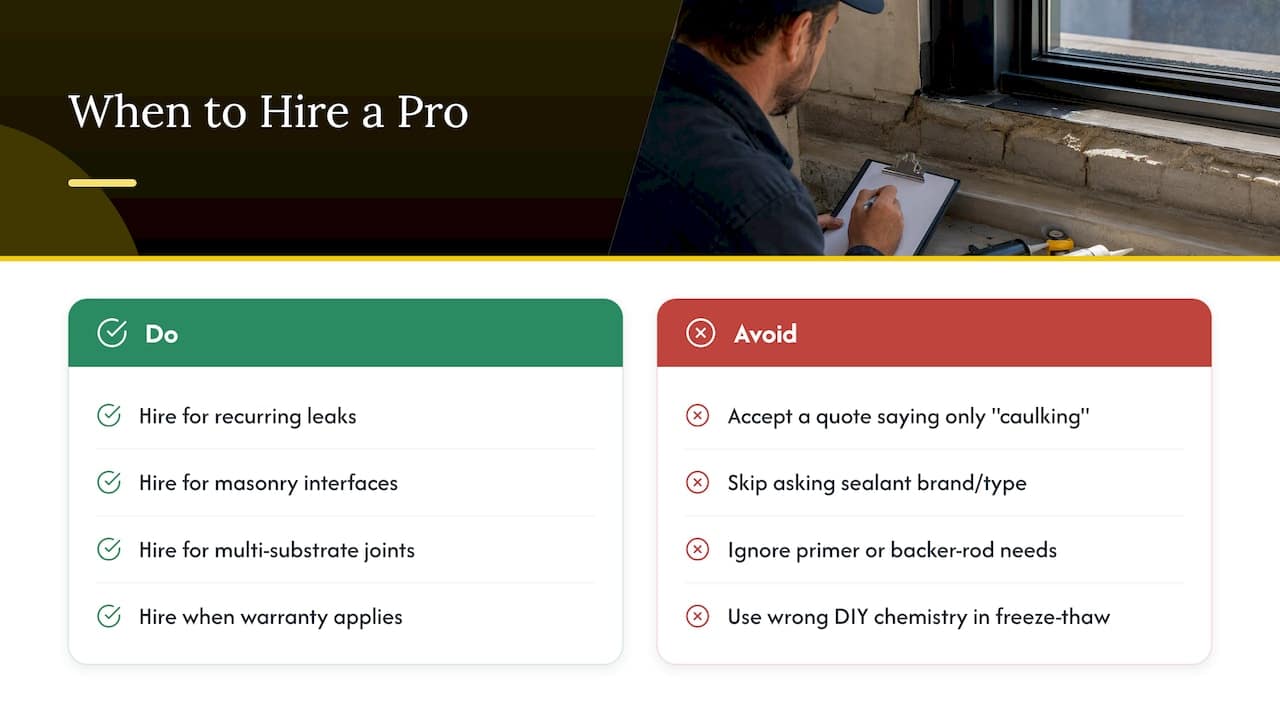
Recurring leaks, masonry interfaces, multi-substrate joints, or anything tied to a warranty claim are all cases where the wrong product or a rushed install can cost more to fix later than it would have to hire out properly. Freeze thaw cycles are especially unforgiving of poor joint design, since a bead that cracks in its first winter will only get worse.
A proper quote should spell out the sealant brand and type, backer rod use, primer requirements, surface prep steps, tooling method, expected cure window, and what inspection or short warranty comes with the work. If a quote skips all of that and just says “caulking, one window,” ask more questions. Trade-specific knowledge matters here because the freeze thaw cycle punishes shortcuts fast, and a DIY tube of the wrong chemistry rarely holds past a season.
6. A contractor’s take on joint design over labels
I’ve resealed plenty of windows where the previous caulk was a perfectly good product, applied with no backer rod and a bead half the depth it should have been. The sealant wasn’t the problem. The joint design was.
Chasing the highest movement number on a tube won’t save a badly built joint. Ask any contractor for their scope in writing, including backer rod, prep, and warranty terms, before they start.
— Felix
7. Book a window caulking estimate that’s done right the first time
If you’d rather not second-guess sealant chemistry, joint depth, or backer rod sizing yourself, that’s exactly the kind of work we handle every day. We use premium sealants matched to the substrate and climate, and we’re upfront about materials, prep, and what’s included before a single tube gets opened.

A written scope should always name the sealant product, backer rod, primer, prep steps, and any warranty on the work, and we build our quotes that way as standard practice.
- Residential Window Caulking for homeowners dealing with drafts, leaks, or aging caulk.
- Commercial Window Caulking for property managers maintaining multi-unit or commercial buildings.
- Door Caulking & Weather Sealing Services when the same issues show up around entry doors.
- Building Envelope Sealing for larger projects covering windows, joints, and the wider envelope.
Request a written estimate through Residential Window Caulking and ask for the sealant type and scope details in writing before work starts.
8. Where this guide’s technical details come from
The joint design and movement figures here come from Natural Resources Canada’s materials guidance, NRC’s sealant durability research, and product data sheets from Sika and Dymonic FC. Fenestration Canada’s field testing resources informed the installation and documentation points.
Sources
- Sikasil® N Plus — Sika Canada
- Keeping the heat in — Materials: insulation, house wrap barriers and weatherstripping — Natural Resources Canada
- Sealant durability and joint design — NRC/CNRC research
- Dymonic FC sealant — product page (distributor listing)
FAQ
What’s the difference between silicone and polyurethane window caulk?
Silicone offers strong weathering resistance and high movement capacity but is generally not paintable, while polyurethane accepts paint and adheres tenaciously, though it cures more slowly. The right choice depends on whether the finished trim will be painted.
Can I use regular expanding foam around windows?
No, standard expanding foam can bow the window frame and cause the sash to bind. Natural Resources Canada recommends low expansion foam specifically for gaps around windows and doors.
How often should window caulking be inspected?
A visual check once or twice a year catches cracking, dirt pickup, or detachment before water gets behind the frame. Small cracks can often be cut out and resealed, while widespread failure usually means a full reseal.
Do I need a primer before caulking a window?
It depends on the substrate. Non-porous surfaces like glass and aluminium often need no primer with a quality sealant, while porous materials such as wood, vinyl, and brick typically require one for proper adhesion.
What should be included in a window caulking quote?
A proper quote names the sealant brand and chemistry, backer rod use, primer requirements, surface prep, application method, and any inspection or warranty terms. Kettle Contracting’s Residential Window Caulking estimates include these details in writing before work begins.
