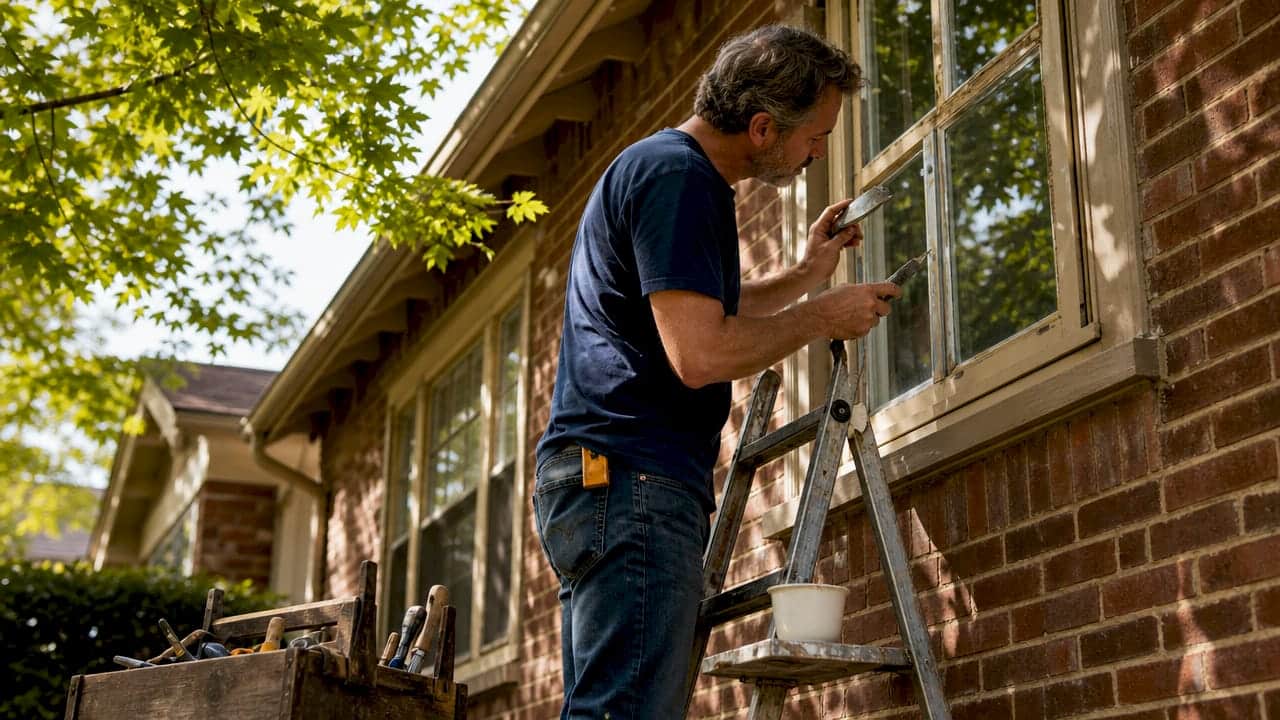
Window reglazing is defined as the repair or replacement of the glazing compound that seals and holds glass panes inside wooden window frames, while caulking seals the gaps between the window frame and the building exterior to stop air and water infiltration. These are two distinct processes that address different parts of your window assembly. Understanding what is window reglazing vs caulking matters because applying the wrong fix to the wrong problem wastes time and money, and in Ontario’s climate, it can lead to rot, mould, and rising heating bills. Both methods are complementary, not interchangeable, and knowing when to use each one is the foundation of sound window maintenance.
What is window reglazing vs caulking: definitions and key differences
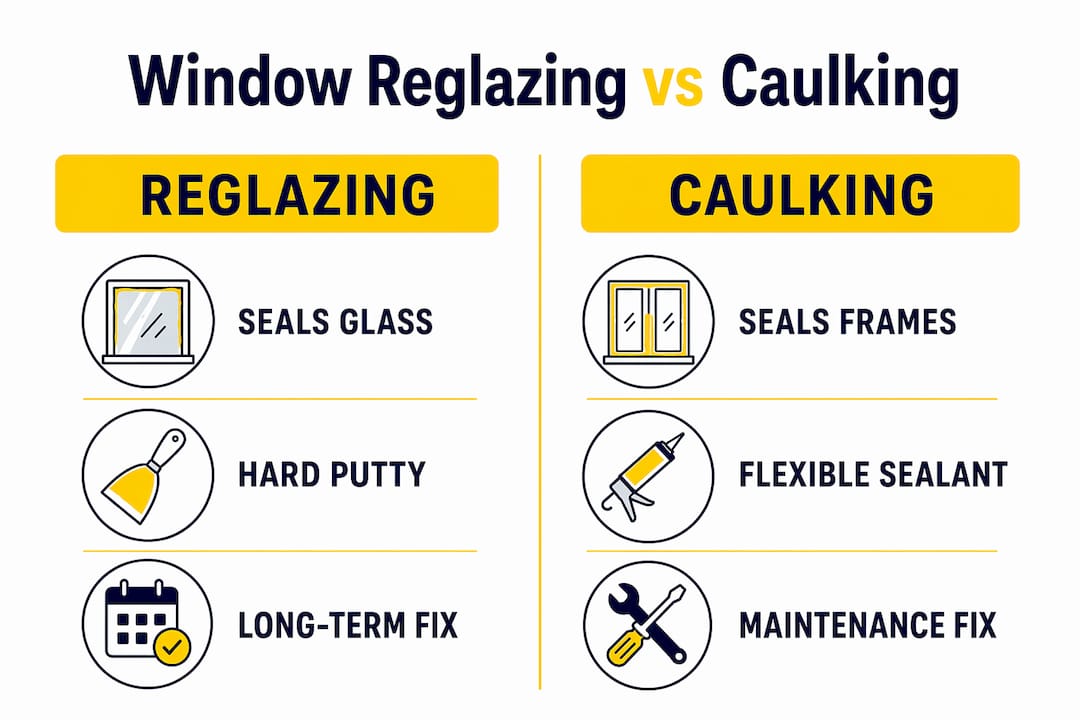
Reglazing addresses glass-to-sash failures; caulking addresses frame-to-building-envelope gaps. That single distinction separates two repair methods that homeowners frequently confuse. Reglazing is specific to single-pane wood windows where the glazing compound has cracked, shrunk, or fallen away from the glass edge. Caulking, by contrast, runs along the perimeter where the window frame meets the exterior wall cladding.
The materials are also fundamentally different. Glazing putty is a hard-curing compound made from chalk and linseed oil that bonds glass to wood and sheds water off the sash. Caulk is a flexible sealant, typically silicone or siliconized latex, designed to accommodate the movement between two different building materials. Using one in place of the other does not work. Caulk applied in glazing channels causes adhesion failure and long-term performance problems because it is not designed to bond glass to wood under those conditions.
Think of it this way: reglazing keeps the glass secure and weathertight within its frame, while caulking keeps the frame secure and weathertight within the wall. Both seals need to be intact for the window to perform properly.

How does window reglazing work?
Window reglazing restores the glass bed and seal to provide stable, weather-resistant performance that can last decades when correctly done and finished with a coat of paint. The process applies primarily to single-pane wood windows, which are common in older Ontario homes built before the 1970s. Modern double-pane or vinyl windows use factory-sealed insulated glass units and do not require traditional reglazing.
Here is how the reglazing process works, step by step:
- Remove the old glazing compound. Use a heat gun or putty knife to soften and scrape away cracked or missing putty from the glazing channel around the glass pane.
- Secure the glass with glazing points. These small metal clips hold the glass firmly in the frame before any compound is applied.
- Apply the glazing compound. Linseed-oil glazing putty, made from whiting (chalk) and linseed oil, is pressed into the channel at a 45-degree angle using a putty knife to create a clean, sloped bead that sheds water away from the glass.
- Allow the putty to cure. Linseed-oil putty cures slowly by hardening over days to weeks. Surface preparation and correct channel placement are critical to how well it bonds and holds.
- Prime and paint the cured putty. Paint seals the putty surface and significantly extends its lifespan. Unpainted putty dries out and cracks within a few years.
Common signs that reglazing is needed include cracked or missing putty lines, glass that rattles in the frame, visible gaps between the glass edge and the wood, and water staining on the interior sill after rain.
Pro Tip: Never skip the paint step after reglazing. Glazing putty is porous and will dry out and crack within a season or two if left unfinished. A coat of oil-based primer followed by exterior paint is what gives a reglazed window its longevity.
How does window caulking work and why does it matter for energy efficiency?
Caulk is a flexible sealant applied around the perimeter of the window frame where it meets the exterior wall. Its job is to seal that joint against air leakage and water intrusion. Drafts around windows contribute to 25 to 40% of energy loss in a home, which means a failing caulk bead is not just a cosmetic problem. It is a direct hit to your heating and cooling costs.
Choosing the right caulk type matters. Here are the most common options for window applications:
- Silicone caulk: Highly durable and waterproof, with excellent adhesion to glass, metal, and vinyl. Not paintable, which limits its use on wood trim where aesthetics matter.
- Siliconized latex (acrylic latex with silicone): Paintable and flexible, with good adhesion to wood, brick, and stucco. The most common choice for exterior window frames on residential properties.
- Polyurethane caulk: Very durable and paintable, with strong adhesion to most substrates. Harder to tool and clean up, but a good choice for high-movement joints.
For wood window frames specifically, Kettlecontracting recommends checking out guidance on caulk for wood frames before purchasing, since the wrong product can cause the wood to trap moisture rather than shed it.
Proper caulking application follows a clear sequence. Complete removal of old sealant, cleaning the substrate, and choosing a caulk type that matches the frame material and expected expansion are all required to avoid early failure. Applying new caulk over old, degraded caulk is one of the most common mistakes homeowners make, and it almost always leads to premature cracking and separation.
Pro Tip: Run your hand along the window frame on a cold, windy day. If you feel air movement, the caulk bead has failed. That draft test costs nothing and takes 30 seconds per window.
Reglazing vs caulking: a side-by-side comparison
The table below summarises the key differences between reglazing and caulking to help you identify which repair your windows actually need.
| Attribute | Window reglazing | Window caulking |
|---|---|---|
| What it seals | Glass pane to wood frame (glazing channel) | Window frame to exterior wall |
| Primary material | Linseed-oil glazing putty (hard-curing) | Silicone or siliconized latex (flexible) |
| Window types | Single-pane wood windows | All window types and frame materials |
| Signs it’s needed | Cracked, missing, or shrinking putty; rattling glass | Visible gaps, drafts, water stains near frame edge |
| DIY difficulty | Moderate (requires putty knife, glazing points, paint) | Low to moderate (requires caulk gun, surface prep) |
| Longevity when done correctly | Decades with proper paint finish | 5 to 10 years depending on climate and product |
Diagnosing which seal has failed before starting any repair is the most important step. Window assemblies have multiple independent seal layers, and repairing the wrong one leaves the actual problem unresolved. A window can have intact glazing putty but a completely failed exterior caulk bead, or vice versa. Inspect both locations separately before deciding what work is needed.
The risk of substituting one material for the other is real. Glazing putty bonds and sheds water in a way that flexible caulk cannot replicate in a glazing channel. Conversely, hard-curing putty applied at a frame-to-wall joint will crack almost immediately because it cannot flex with seasonal building movement.
When should you reglaze or recaulk? Timing and costs
Ontario’s freeze-thaw cycles put more stress on window seals than most climates. A caulk bead that looks fine in September can be cracked and separated by March after months of thermal expansion and contraction. The same applies to glazing putty on older wood windows. Staying ahead of seal failure is far less expensive than dealing with the rot and water damage that follows.
| Maintenance type | Recommended interval | Typical cost range | Signs it’s overdue |
|---|---|---|---|
| Window caulking | Every 5 to 10 years | $10 to $30 DIY per window | Cracks, gaps, visible daylight, drafts |
| Window reglazing | Every 15 to 30 years | $75 to $150 per window (up to $250 with lead containment) | Missing putty, rattling glass, water on sill |
| Full-house reglazing | As needed | $1,500 to $3,500+ depending on scope | Multiple windows failing simultaneously |
Visible cracking, brittleness, or shrinkage in an exterior caulk bead signals it is time to recaulk before moisture gets inside the wall cavity. Delaying that repair means water works its way behind the cladding, and once rot sets into the rough framing or window buck, you are looking at a much larger project. Scheduling recaulking when the bead first shows degradation is the most cost-effective approach. You can check whether your windows are showing signs of failing caulk using a simple visual inspection checklist.
How do reglazing and caulking improve energy efficiency and building health?
Both processes directly reduce air leakage, which is the primary driver of heat loss through the window assembly. When either seal fails, the consequences go beyond comfort.
- Reduced heating and cooling costs. Sealing gaps at the frame-to-wall joint with fresh caulk cuts the air infiltration that accounts for a significant portion of HVAC load in older homes.
- Moisture prevention. Failed glazing putty allows water to sit against the wood sash, leading to paint failure, wood rot, and eventually glass seal failure. Failed exterior caulk allows water behind the cladding, where it can cause mould growth inside wall cavities.
- Extended window lifespan. A properly reglazed and painted wood window can outlast a modern replacement window. Maintaining the glazing compound protects the wood sash from the moisture that destroys it.
- Mould risk reduction. Water that enters through failed seals does not always dry out, particularly in Ontario’s cooler months. Mould growth inside wall assemblies is a health concern and an expensive remediation project.
- Improved indoor comfort. Eliminating cold-air infiltration at window frames makes rooms feel warmer at lower thermostat settings, which is a practical benefit beyond the energy bill.
The benefits of re-caulking your windows extend well beyond stopping a visible gap. When both the glazing putty and the exterior caulk are in good condition, the window performs as a complete, weathertight assembly.
Key takeaways
Window reglazing and caulking are distinct repairs that target different seal failures, and using the right method in the right location is what determines whether the fix actually lasts.
| Point | Details |
|---|---|
| Reglazing seals glass to frame | Use linseed-oil glazing putty on single-pane wood windows where the glazing channel has cracked or failed. |
| Caulking seals frame to wall | Apply flexible siliconized latex or silicone caulk around the window perimeter to block drafts and water intrusion. |
| Materials are not interchangeable | Caulk in a glazing channel causes adhesion failure; hard putty at a frame joint cracks with seasonal movement. |
| Diagnose before you repair | Inspect both the glazing channel and the exterior caulk bead separately before deciding which repair is needed. |
| Ontario’s climate demands regular checks | Freeze-thaw cycles degrade both putty and caulk faster than in milder climates; inspect annually and act early. |
What 25 years on the job has taught me about these two repairs
After two and a half decades of caulking windows across the Greater Toronto Area, the mistake I see most often is homeowners reaching for a tube of caulk when the problem is actually in the glazing channel. It is an understandable error. Caulk is familiar, it is easy to buy, and it looks like it should work. But caulk in a glazing run does not bond to glass the way putty does, and within a season or two it separates, traps water, and accelerates the wood rot it was supposed to prevent.
The other common error is the opposite: people reglaze a window and then ignore the exterior caulk bead, which has been cracked for years. The glazing putty looks fresh and the window seems sorted, but water is still getting behind the brick mould through a gap you could fit a pencil into. Both seals need to be sound for the window to perform properly.
What I have also learned is that preparation is where most DIY jobs fail. Applying new caulk over old, degraded caulk is the single most common reason a fresh bead fails within a year. The same applies to reglazing over contaminated or damp wood. Clean, dry, properly prepared surfaces are what make the difference between a repair that lasts one winter and one that lasts ten.
Ontario’s climate is not forgiving. The freeze-thaw cycle that runs from November through March puts real stress on every seal in your building envelope. If you are going to do this work, do it right. Use the correct material for the correct location, prepare the surface properly, and do not skip the paint on your glazing putty.
— Felix
Get professional window sealing done right the first time

If your windows are showing cracked putty, visible gaps at the frame, or you are feeling drafts on a cold day, Kettlecontracting can help. With 25 years of caulking experience across residential and commercial properties in the Greater Toronto Area, our team knows how to diagnose seal failures correctly and apply the right fix in the right location. Before any caulking work begins, proper preparation is what separates a lasting result from one that fails by spring. Kettlecontracting’s guide to preparing your windows for caulking walks through every step in detail. For durable, code-compliant results that hold up through Ontario winters, contact Kettlecontracting for a professional assessment.
FAQ
What is the main difference between reglazing and caulking?
Reglazing replaces the glazing compound that seals glass panes inside a wooden window frame, while caulking seals the gap between the window frame and the exterior wall. They address different parts of the window assembly and are not interchangeable.
Can I use caulk instead of glazing putty on my windows?
Caulk is not a suitable substitute for glazing putty in a glazing channel. Glazing putty is purpose-designed to bond glass to wood and shed water; caulk applied in that location causes adhesion failure and can trap moisture against the wood sash.
How often should I recaulk my windows in Ontario?
Exterior window caulk should be inspected annually and replaced every 5 to 10 years, depending on the product and exposure. Ontario’s freeze-thaw cycles degrade caulk beads faster than in milder climates, so acting when you first see cracking or shrinkage prevents water damage inside the wall.
How much does window reglazing cost?
Window reglazing typically costs between $75 and $150 per window without lead containment, and up to $250 per window when lead paint is present. A full-house reglazing project can range from $1,500 to $3,500 or more depending on the number of windows and their condition.
How do I know if my window needs reglazing or recaulking?
Inspect two separate locations. If the putty line between the glass and the wood frame is cracked, missing, or pulling away, the window needs reglazing. If the bead running along the outside edge of the frame where it meets the wall is cracked, shrunken, or has visible gaps, it needs recaulking. Both can fail at the same time.
Recommended
- DIY or Hire a Pro: Caulking Your Exterior Windows – Kettle Contracting
- Is There a Difference Between Window and Door Caulking? | Know the Details – Kettle Contracting
- How Long Does Window Caulking Last? | What Homeowners Need to Know – Kettle Contracting
- How to Make Window Caulking Last Longer: Expert Tips for Homeowners – Kettle Contracting