
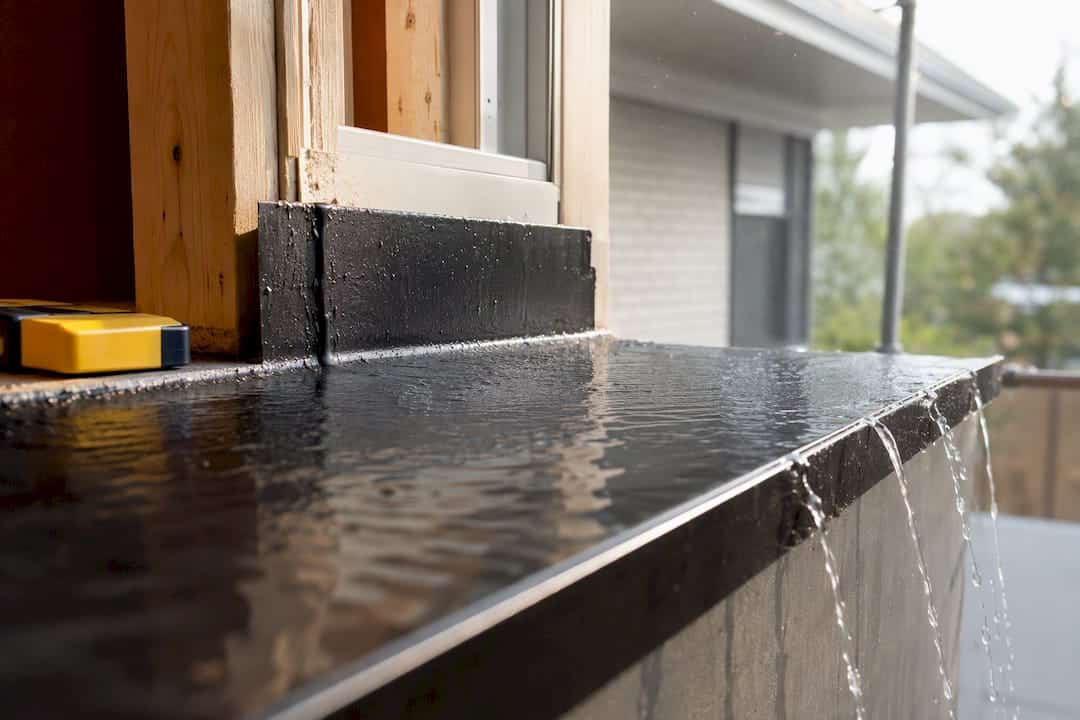
If you’re seeing water stains under a window sill, check the drainage gap and sill pan first, not the caulk bead. A quick recaulk buys you time, but if the sill pan flashing is missing, cracked, or wasn’t lapped correctly with the wall’s water barrier, you’re looking at a proper flashing replacement, built to the 1/15 slope and 150 mm jamb lap that the National Research Council recommends. Skip that step and the leak comes back within a season.
TL;DR:
- Proper sill pan installation requires a minimum slope of 1/15 and at least 150 mm of membrane lap up the jambs to prevent water infiltration.
- Common installation errors include missing sill pans, incorrect membrane lapping, sealed drainage gaps, and sealing the bottom flange, all of which lead to leaks.
- Regular inspections should be conducted twice annually, focusing on exterior caulk condition, sill slope, drainage gaps, and interior moisture signs, especially after storms.
- Recaulking over faulty flashing provides only temporary relief; a full flashing rebuild involving removal, inspection, and proper lapping is necessary for lasting repair.
- When sealing, avoid fully sealing the flange against the sill; maintaining a drainage gap is critical for water escape and long-term durability.
Table of Contents
- What causes window sill flashing leaks?
- How do you inspect a window sill for a flashing leak?
- How do you fix a leaking window sill flashing?
- How often should you inspect window sills to prevent leaks?
- When should you hire a professional for window sill flashing repair?
- An Oshawa caulking specialist’s take on sill flashing failures
- How Kettle Contracting fixes window sill flashing leaks for good
- Sources
- FAQ
What causes window sill flashing leaks?
Most window sill flashing leaks come down to one of three problems: the sill pan wasn’t installed right, it was installed but improperly lapped, or the materials simply gave out after years of Ontario’s freeze-thaw punishment. A sill pan is the shaped membrane or flashing piece under the window rough opening that’s supposed to catch any water that gets past the window and route it back outside instead of into your wall framing. It only works if it has a back dam (a raised lip at the interior edge that stops water from running inward) and a sloped sill that drains water toward the exterior instead of letting it pool.
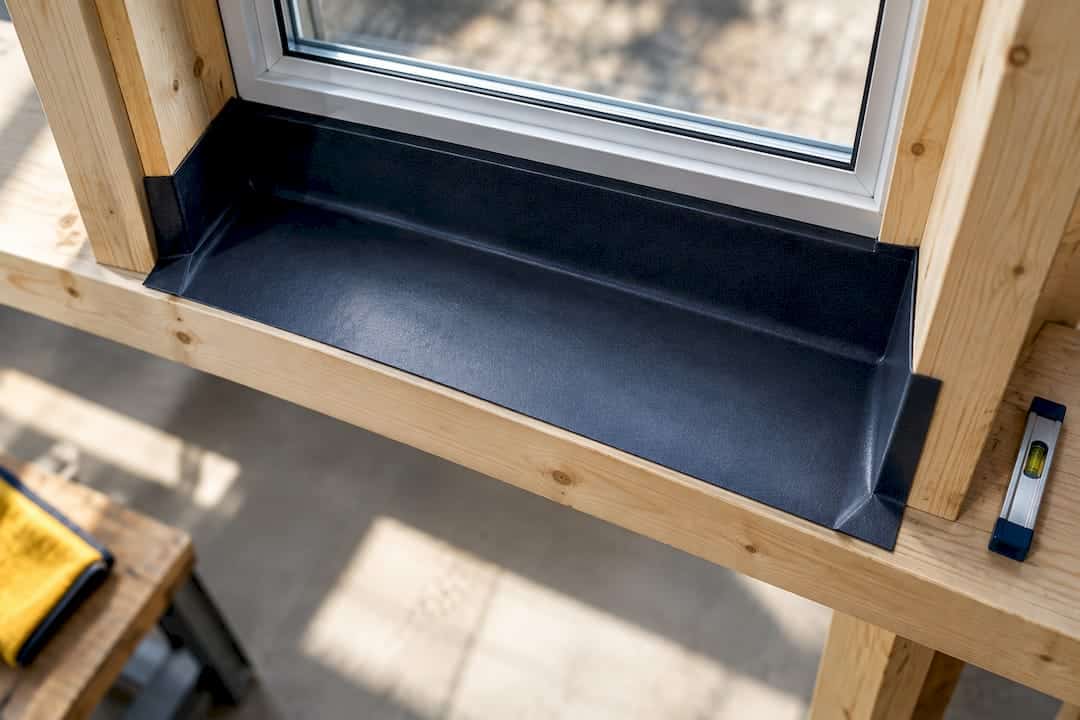
The National Research Council sets the baseline here: sill flashing needs a minimum slope of 1/15, and the membrane has to run at least 150 mm up the jambs on both sides so water can’t sneak around the corners. When that lap is short, or when installers seal the window flange on all four sides instead of leaving the bottom open, water gets trapped instead of drained. That single mistake, sealing the bottom of the flange, is one of the most common field errors we run into on GTA homes.
Common causes we see on inspections:
- Sill pan missing entirely (common in older homes built before this became standard practice)
- Flashing membrane lapped in the wrong order relative to the water-resistive barrier (WRB), so water runs behind it instead of over it
- Drainage gap behind the flange sealed shut, trapping incidental water against the sheathing
- Original caulk or sealant reaching the end of its service life, typically 10 to 15 years depending on exposure and product
How do you inspect a window sill for a flashing leak?
You don’t need special equipment to get a good first read on what’s happening. Work through this in order:
- Check the exterior sill and caulk joint. Look for cracked, shrunk, or missing caulk, gaps where the sill meets the brick or siding, and any sign the sill itself slopes the wrong way (toward the house instead of away from it).
- Check the interior trim and drywall below the window. Staining, bubbling paint, soft drywall, or a musty smell almost always point to water getting past the exterior seal, and patching caulk alone usually isn’t enough to solve it once damage has started.
- Run a controlled water test. Spray the sill and lower sash area with a garden hose for 10 to 15 minutes while someone watches inside. Water showing up at the base of the window frame within that window means the flashing, not just the caulk, has failed.
- Check for a drainage gap behind the flange. Look at how the window is fastened. Flanges set on shims or button-head nails leave a small 2 to 3 mm gap that lets trapped water escape. A flange sitting flush and fully caulked has nowhere for that water to go.
- Bring in a moisture meter or a contractor if you find soft wood, a musty smell, or repeat staining after a dry recaulk job. At that point you’re diagnosing a structural moisture problem, not a cosmetic one.
Pro Tip: If staining shows up on the interior side but the exterior caulk looks fine, don’t assume the flashing is fine too. Water often travels sideways along the sill before it finds a way in, so the leak point and the stain point are rarely the same spot.
How do you fix a leaking window sill flashing?
Recaulking a leaking sill without addressing the flashing underneath is the repair we get called back to fix the most. It looks done, it holds for a season, maybe two, and then the same stain reappears because caulk was never built to manage bulk water on its own. It’s a sealant, not a drainage plane.
Temporary measures have their place, but be honest about their limits:
- Fresh exterior caulk over sound flashing: reasonable if the sill pan and lapping are intact and the caulk itself has simply aged out. Expect several years of effective performance from a quality sealant, depending on conditions.
- Backer rod and sealant in wider gaps: buys time on minor cracking, generally 2 to 3 years before it needs attention again.
- Interior sealing around trim: stops drafts but does nothing for the water source. Treat it as cosmetic, not a repair.
When the sill pan itself is missing, damaged, or wasn’t lapped correctly with the WRB, the fix means going back to the studs. A proper repair sequence looks like this:
- Remove the exterior cladding or trim around the affected window enough to expose the rough opening.
- Remove and inspect the old sill pan or flashing, and check the sheathing underneath for rot or staining.
- Install a new sill pan with a proper back dam and a slope of at least 1/15 toward the exterior.
- Extend the flashing membrane a minimum of 150 mm up each jamb, following the same lapping principle NRC recommends for the wall-window interface.
- Lap the WRB over the sill membrane at the jambs in shingle fashion, so gravity always moves water outward, layer over layer.
- Reinstall the window with a drainage gap behind the flange, then seal the interior air barrier separately from the exterior water management layer.
Building envelope transitions, windows, doors, sills, account for a disproportionate share of leak failures relative to how little wall area they cover, which is exactly why commissioning these details properly matters more than the square footage suggests.
For sealant choice, cold-climate performance rules out anything that goes brittle below freezing. Neutral-cure silicone, polyurethane, and hybrid polymer sealants each handle Ontario’s freeze-thaw movement differently, and the right one depends on the joint width and substrate, not a one-size-fits-all pick.
How often should you inspect window sills to prevent leaks?
An annual or bi-annual inspection catches most problems before they become drywall replacement jobs. Toronto’s own guidance on building envelope maintenance recommends this cadence specifically because staining and finish damage tend to show up well after the water intrusion started, not the moment it began.
Focus your seasonal checks like this:
- Spring: inspect for winter damage after freeze-thaw cycling, since ice expansion is what typically opens up small cracks into real gaps.
- Fall: reseal or patch before the first freeze so water isn’t sitting in a joint when temperatures drop.
- After any major storm: a quick visual check of sills and trim costs you ten minutes and can catch a problem while it’s still small.
A few habits go a long way between full inspections:
- Keep drainage weeps and gaps clear of paint, caulk overspray, or debris; they only work if water can actually get through them.
- Replace failed caulk with backer rod and fresh sealant rather than just layering new caulk over old, cracked caulk.
- Never seal the flange fully against the sill; that bottom gap is doing real work.
- Keep a simple log of what you find and when, so you can spot patterns like a window that leaks every spring versus a one-time event.
Our own maintenance checklist walks through this in more detail, and seasonal home maintenance guidance from other trades echoes the same pattern: small, regular checks beat waiting for a visible problem.
When should you hire a professional for window sill flashing repair?
Call a contractor once you’re past simple recaulking. That means: staining that returns after a fresh caulk job, soft or discoloured wood at the sill, visible daylight or gaps around the frame, or any sign of mould on interior trim.
A competent contractor’s scope should include:
- A full inspection of the sill, jambs, and surrounding cladding, not just a look at the caulk line.
- Cladding removal where needed to actually see the sill pan condition, not a guess based on the exterior symptoms alone.
- A correctly lapped sill pan integrated with the WRB, tied into the interior air barrier separately from the exterior seal.
- A written estimate that specifies materials and sequence, not just “reseal and caulk.”
Ask any contractor how they handle the drainage gap behind the flange and whether they’re replacing the sill pan or just resealing over it. Their answer tells you a lot. For direct help with this, our residential window caulking page outlines what our inspection and repair process covers.
An Oshawa caulking specialist’s take on sill flashing failures
The mistake I see most often isn’t bad material, it’s sequence. Someone seals the flange on all four sides thinking they’re being thorough, and they’ve just built a bathtub inside the wall. Ontario’s freeze-thaw cycles don’t forgive shortcuts like that; they find every gap you left and every one you shouldn’t have sealed. Get the sequence right the first time, sill pan, slope, lap, drainage gap, and the repair outlasts the house.
— Felix
How Kettle Contracting fixes window sill flashing leaks for good
Kettle Contracting is the direct alternative to guessing your way through a recaulk that won’t hold. Where a generic patch job treats the symptom, we inspect the sill pan, back dam, and lapping first, then scope the actual repair, whether that’s a resealing job or a full brick window sill replacement, before we quote a dollar figure. You get an honest answer on whether you need a maintenance reseal or a proper flashing rebuild, not a sales pitch either way.

Our inspection process checks exterior caulk condition, sill slope, drainage gap clearance, and interior signs of moisture before we recommend anything. For homes, that means a clear path through residential window caulking. For multi-unit buildings and commercial properties across the Greater Toronto Area, our building envelope sealing service covers sill flashing as part of a broader look at your building’s water management. If you’ve spotted staining, drafts, or a sill that’s due for attention, book an inspection and get a written estimate before winter locks in whatever’s already wrong.
Sources
For readers who want to verify these recommendations directly, the National Research Council publishes the sill flashing detailing NRC recommends, Tarion outlines its two-year warranty coverage for water penetration in new Ontario homes, and Toronto’s building guidance sets out recommended inspection cadence for caulking and seals.
- Window sill details for effective drainage of water (NRC)
- Toronto guidance on air sealing and maintenance (2025)
FAQ
Is a leaking window sill covered under home warranty?
For new homes in Ontario, yes. Tarion’s construction performance guidelines treat water penetration through windows as a defect covered under the statutory two-year warranty. Older homes outside that window fall to the homeowner or a contractor to diagnose and repair.
Can I just recaulk a leaking window sill myself?
Recaulking works only if the sill pan flashing underneath is intact and correctly lapped, and the leak is purely a worn sealant issue. If water is reaching the interior trim or framing, the flashing itself has likely failed and needs proper inspection before any resealing.
How much slope does a window sill need for proper drainage?
The National Research Council recommends a minimum slope of 1/15 on the sill pan, sloping away from the house, along with flashing that extends at least 150 mm up each jamb.
How often should window sills be inspected for leaks?
Annual or bi-annual inspections are recommended, since staining and finish damage often appear well after water intrusion actually starts. Spring and fall checks, plus a look after major storms, catch most problems early.
What does Kettle Contracting charge for a window sill inspection?
Pricing depends on the scope of the inspection and any repair work needed, so current rates aren’t published for a general estimate. You can request a quote directly through our residential window caulking page and get a written estimate based on your specific sill condition.
