
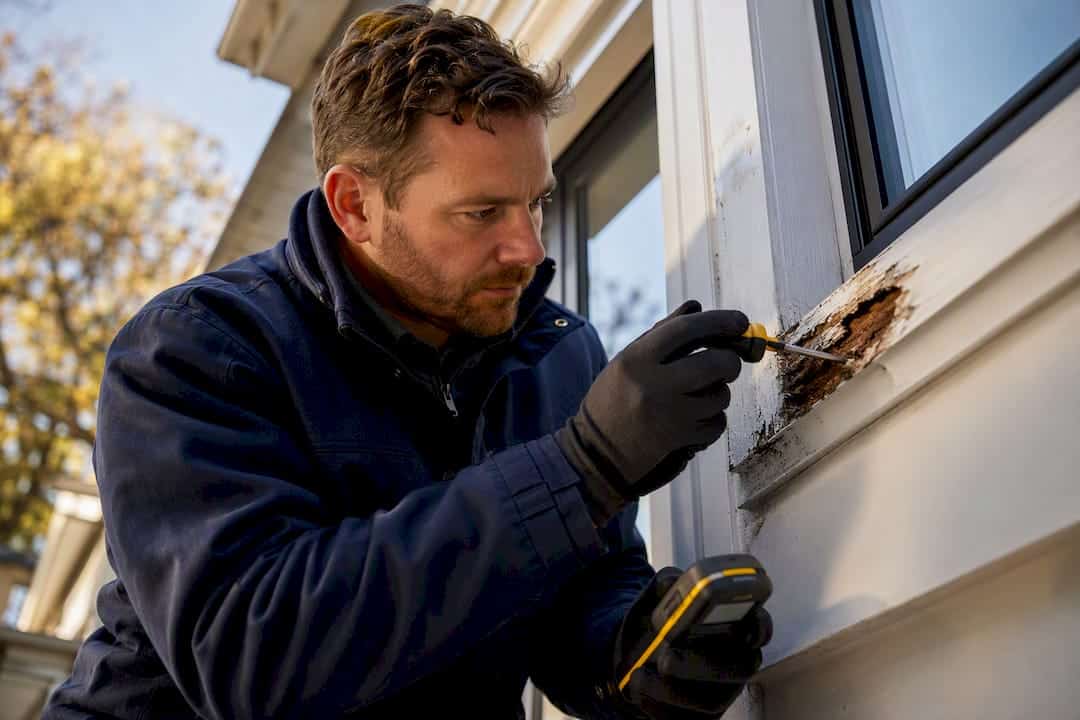
Small, localized rot in window trim usually can be repaired with a two-step epoxy system: a liquid consolidant to harden softened fibres, followed by a putty filler to rebuild shape. Once rot spreads into the framing, covers more than a small, localized portion of the sill, or shows up on multiple faces of the board, repair stops being worth the effort and replacement takes over. Either way, the job isn’t done until you’ve found and fixed whatever let water in — otherwise you’re just buying time before the same trim rots again.
TL;DR:
- Repair in place for small, shallow rot confined to one small area with good surrounding wood and moisture content below 18%.
- Use a Dutchman patch for larger, isolated damage at the end of a sill or corner, matching the original wood’s species and thickness.
- Replace the entire piece when rot extends into the framing, spans a wide area, or past patches have failed repeatedly due to ongoing moisture issues.
- Proper water management through flashing, drip grooves, and sealing joints with elastic sealant is crucial to prevent rot recurrence.
- Prioritize fixing water pathways over epoxy repairs, as moisture infiltration is the root cause of window trim rot.
Table of Contents
- How do you find window trim rot and check how far it’s spread?
- Should you repair it in place, patch it, or replace the whole piece?
- How do you repair rotted trim with epoxy step by step?
- How do you cut in a Dutchman patch for bigger damaged sections?
- What tools, materials, and safety gear do you actually need?
- How do you stop window trim rot from coming back?
- When should you call a professional instead of fixing it yourself?
- Trade-tested caulking and sealing advice from Kettle Contracting
- Why most DIY guides skip the part that actually matters
- Sources
- FAQ
How do you find window trim rot and check how far it’s spread?
Rot hides. That soft spot you can see is often the edge of a much bigger problem tucked behind the paint, and the only way to know for sure is to test it properly.
Start with the probe test. Take a flathead screwdriver or an awl and press it into the wood at the centre of the sill and along the lower jambs, where water sits longest. Sound wood resists the point. Rotted wood lets it sink in with almost no pressure. This is exactly how the Canadian Wood Council recommends checking for decay, and it’s the same test tradespeople use on every callout.
Don’t stop at the surface. Push the probe at least 50 millimetres into the frame on both sides of any soft spot you find, because rot tunnels sideways under paint long before it shows on the face.
- Probe the full width of the sill, not just the spot that looks bad.
- Check a moisture meter reading before doing any epoxy work; you want wood under 18% moisture content for a solid bond.
- Strip paint locally with a scraper to inspect the underside of the sill and the rough opening, where hidden spread is common.
- Watch for soft sheathing, a sagging sill, or visible fungal growth. These point past a cosmetic fix and into the rough opening and framing.
Pro Tip: If the probe sinks in easily but you can’t see any surface damage, check the paint film closely. Rot often pushes paint into a slight bubble or crack before it ever shows as discoloured wood.
Should you repair it in place, patch it, or replace the whole piece?
Once you know how far the rot has travelled, the decision gets a lot simpler. Three paths cover almost every situation you’ll run into on a window.
Repair in place when the damage is shallow, confined to one small area, and the wood around it still passes the probe test. This is squarely epoxy territory, and it’s the fastest, cheapest fix when it applies.
Use a Dutchman patch (a scarfed or spliced-in section of new wood) when the rot is larger but still isolated, usually at the end of a sill or the bottom corner of a jamb. Splicing in sound wood restores both the shape and the load-bearing strength that a filler alone can’t provide over a big span.
Replace the piece when rot has moved into the framing behind the trim, when it spans a wide section of the board, or when you’re looking at a spot that’s already been patched once and failed again. Repeated failure at the same location almost always means the moisture source was never fixed, and no amount of epoxy will outlast an active leak.
A few practical factors tip the decision one way or the other:
- How exposed is the location? South and west facing sills in direct weather rot faster and deserve a more durable fix.
- What’s your budget and timeline? Epoxy repair can be done in a weekend; a full sill replacement is a bigger job.
- Has this spot failed before? A second repair on the same rot is a sign to replace, not patch again.
ConServ Epoxy’s guidance backs this up plainly: epoxy suits small, localized decay, while anything larger needs a Dutchman or full replacement.
How do you repair rotted trim with epoxy step by step?
This is the sequence trade crews actually use, and it works whether you’re fixing a sill, a jamb, or a piece of casing.
- Set up and remove the punky wood. Lay down a drop cloth, put on your respirator and gloves, and dig out every bit of soft, crumbly wood with a chisel or a die grinder fitted with a core-box bit. Vacuum the cavity clean. Anything soft left behind will keep rotting under the repair.
- Check moisture content. Test with a meter before you touch the epoxy. If the reading is above 18%, stop and let the wood dry, or find and fix the moisture source first, per This Old House’s repair guidance. Epoxy applied to wet wood won’t bond properly and the repair will fail early.
- Apply the liquid consolidant. Brush or pour a liquid epoxy consolidant into the cavity to saturate whatever soft fibres remain. This hardens the wood from the inside out and gives the filler something solid to grip.
- Apply the epoxy filler while the consolidant is still tacky. Mix a two-part epoxy putty and pack it into the cavity, building it slightly higher than the surrounding wood. Fine Homebuilding recommends using a short length of galvanized metal as a screed, since it holds the filler’s shape and doubles as a straightedge once you start sanding.
- Let it cure fully, following the product’s stated cure time. Cold weather slows this down considerably, and some epoxies won’t reach full strength if the work area drops too low. Heat the space or wait for a warmer stretch rather than rushing the cure.
- Sand, prime, and paint. Sand the cured epoxy flush, wear a respirator for this step since epoxy dust isn’t something you want to breathe, then prime with an exterior-grade primer and finish with paint. The paint isn’t cosmetic here. Cured epoxy degrades under UV exposure, so the paint film is what protects your repair for the long haul.
Pro Tip: Mix epoxy in small batches. It sets faster than you’d expect once it’s out of the tube, and a batch that skins over halfway through application is wasted product and a rougher finish.
How do you cut in a Dutchman patch for bigger damaged sections?
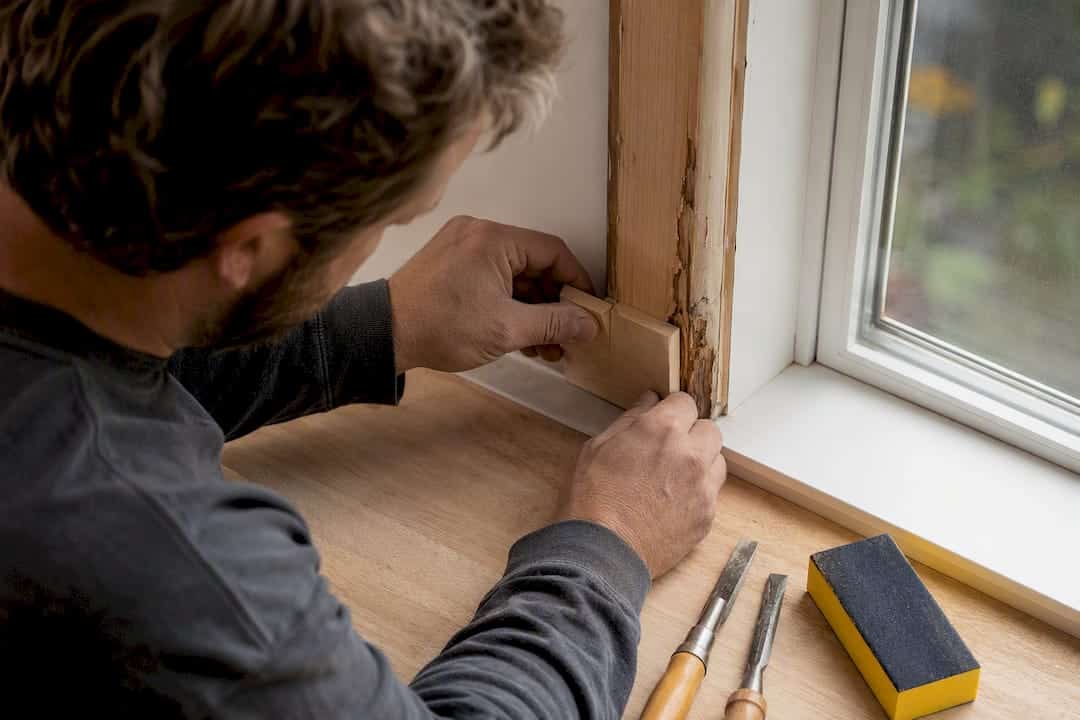
When the rot is too big for filler but still contained to one end of a board, a Dutchman patch gives you a repair that’s structurally sound and, done well, invisible under paint.
Start by finding the line between rotted and sound wood, then move your cut another inch or two past it. You want to be cutting into wood you’re confident is solid, not wood that just passed a single probe test. Use a square to mark a clean, straight line and set your saw depth to match the board thickness exactly, so the cut goes all the way through without gouging whatever is behind the trim.
- Match the new piece’s species and thickness to the original board; a mismatch shows up fast once paint goes on and the two pieces expand differently.
- Prime the cut ends of both the new patch and the remaining original board before glue-up. Bare end grain wicks moisture fast, and priming it now slows that down for years.
- Join with a scarf joint, spline, or biscuits, using epoxy or a waterproof wood glue, and clamp it until fully cured. Don’t rush this step; a joint that isn’t fully set will work loose under seasonal movement.
- Sand the patch flush with the surrounding wood, prime any exposed edges, then paint and caulk every seam. The caulk line is what keeps water from finding the new joint in the first place.
Dunn Lumber’s trim repair notes make a good point here: priming cut ends immediately, before you even get to the glue-up, measurably improves how long a splice holds up outdoors.
What tools, materials, and safety gear do you actually need?
You don’t need a full shop to do this properly, but a few specific items make the difference between a repair that holds and one that doesn’t.
Tools: flathead screwdriver or awl for probing, wood chisels, a die grinder or router with a core-box bit for cleaning out cavities, a moisture meter, a shop vac, and a sanding block.
Materials: two-part epoxy consolidant, epoxy filler or putty, exterior-grade primer, 100% acrylic exterior paint, a borate wood preservative for treating adjacent sound wood, and a paintable exterior caulk rated for window joints.
Safety: a NIOSH or CSA-approved respirator for both epoxy fumes and sanding dust, safety glasses, nitrile gloves, and enough ventilation to mix and apply epoxy without breathing the fumes in an enclosed space.
Most of this is available at any general hardware retailer, and heavier tools like a good die grinder are worth renting if you’re only doing one repair. Borate preservatives are worth the extra step: the Canadian Wood Council recommends them as a field treatment on adjacent sound wood, not just as a preventative product for new lumber.
How do you stop window trim rot from coming back?
Rot needs moisture, oxygen, and a moderate temperature to take hold, and it doesn’t slow down much between about 4°C and 38°C, according to research from the National Research Council. Cut off the moisture and you’ve cut off the problem at the source, which is the whole reason a repair without a moisture fix rarely lasts.
Start at the top of the window. Head flashing, sill pans, and step flashing where the trim meets siding all need to be doing their job, directing water away from the wood rather than letting it pool. If you’re repainting or caulking around a window, leave the drip groove alone. That small kerf cut into the underside of the sill exists to let water detach cleanly instead of running back along the wood, and sealing it shut with caulk or paint is one of the most common ways homeowners re-create the exact problem they just fixed.
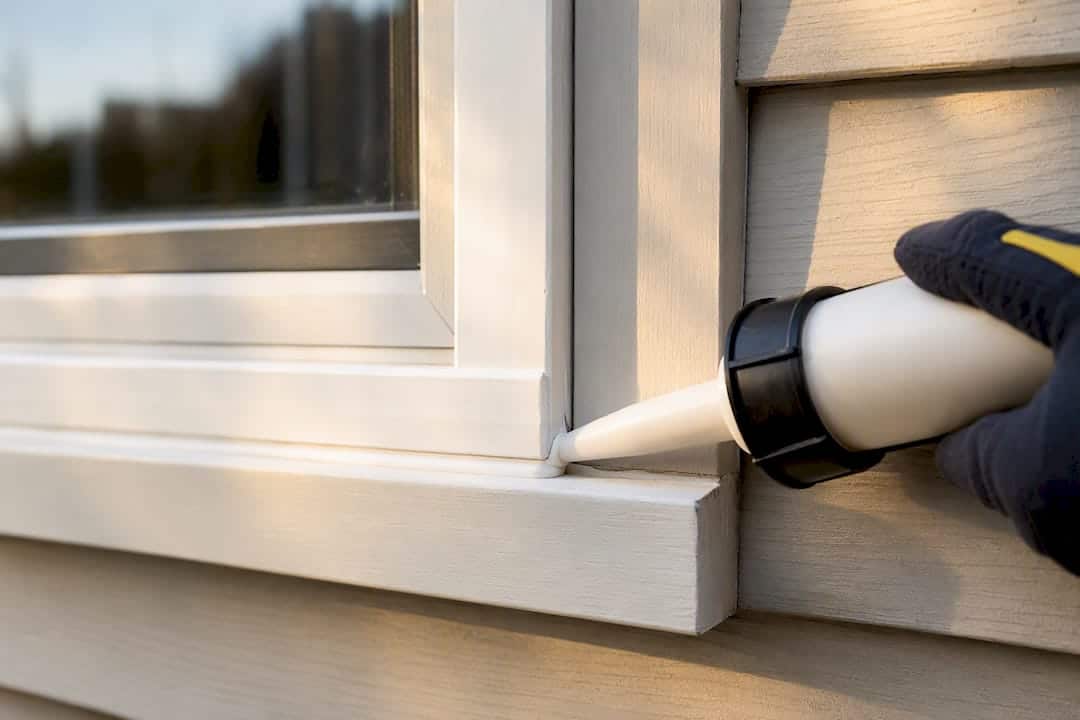
Caulking technique matters just as much as flashing. Backcaulk joints before final installation where possible, choose a sealant rated for the amount of movement a window joint sees through Ontario’s freeze-thaw cycles, and tool every bead so it seals fully rather than sitting on the surface. A properly chosen and applied caulk is doing real structural work, not just filling a gap.
Beyond the window itself, look at the building around it: gutters that overflow onto the wall below a window, grading that slopes toward the foundation instead of away, sprinklers hitting the siding, and vegetation growing tight against the wall all feed moisture into places it shouldn’t be.
Pro Tip: Walk your windows every spring and fall. Check for cracked or shrunken caulk lines, probe any spot that looks discoloured, and confirm the drip groove is clear of paint buildup. Catching a soft spot early is the difference between a small epoxy repair and pulling out the whole sill.
A seasonal caulking maintenance checklist helps keep this on a schedule instead of something you only think about after you’ve found rot.
When should you call a professional instead of fixing it yourself?
Some jobs go past what a weekend DIY repair should handle. Call a contractor when rot has reached the framing or sheathing, when it’s showing up in more than one spot on the same window, when a past patch has already failed, or when the repair location is high enough that access alone is the bigger risk.
Ask any contractor you’re considering how deep their inspection goes, what their flashing plan looks like, and which sealant chemistry they’re proposing for the joint. A reputable pro’s scope checks the rough opening and sheathing, not just the visible trim.
- No written scope of work before the job starts.
- Vague answers about which materials they’re using.
- A quote noticeably lower than others, with no inspection to back it up.
Trade-tested caulking and sealing advice from Kettle Contracting
Twenty-five years of chasing water leaks around windows teaches you that most trim rot isn’t a wood problem first, it’s a sealant problem that became a wood problem. The repair matters, but the joint around it is what decides whether that repair is still good in five years.
Backcaulking, running a bead of sealant on the back of a piece of trim before you set it, matters more than most homeowners realize. Ontario’s freeze-thaw cycles push and pull every joint on a window dozens of times a season, and a joint that’s only caulked on the face will crack open from the inside long before it looks bad from the street.
- Not every caulk belongs on a window. High-movement joints need a sealant with real elasticity, not a rigid filler that’ll crack after one winter.
- A patch-only job and a proper weatherproofing scope aren’t the same thing. One covers the hole; the other checks why the hole got there.
- Checking the rough opening isn’t optional on a job with any history of rot. Skipping it just moves the next failure a few years down the road.
If you only caulk what you can see, you’re sealing the symptom. The joints that actually fail are usually the ones nobody backcaulked in the first place, and by the time it shows on the surface, the framing’s already been wet for a season or two.
Getting the sealant chemistry and the joint prep right the first time is most of what separates a repair that lasts through a decade of Ontario winters from one you’re redoing in three years. If a repair on your place has you wondering whether the surrounding caulking needs attention too, Kettle Contracting’s building envelope sealing service is built around exactly that kind of full-scope check.
Why most DIY guides skip the part that actually matters
Most guides to fixing rotted window trim treat it as a woodworking problem: dig it out, fill it, paint it, done. That’s not wrong, but it’s incomplete. The probe test and the epoxy sequence get all the attention because they’re the visible, satisfying part of the job. The flashing detail and the caulk joint get a passing mention, if that.
That’s backwards. Rot is a symptom of a moisture problem, and if you fix the wood without fixing the water path, you’ve scheduled your next repair, not prevented it.
If you take one thing from this guide, prioritize the drip groove and the caulk joint over the epoxy technique itself. Get those right, and you’ll rarely need the epoxy skills in the first place. Get them wrong, and no filler on earth will make the fix permanent.
— Felix
Sources
- Wood decay and repair | Canadian Wood Council
- Wood rot and epoxy FAQs | ConServ Epoxy
- How to repair rotted trim with epoxy | This Old House
- Repairing exterior trim | Fine Homebuilding
FAQ
How do you fix rotted window trim?
Sand, prime, and paint once fully cured.
How can you fix rot in window frames specifically?
Frame rot follows the same probe and moisture-check process as sill rot, but you also need to check the rough opening and sheathing behind the frame. If those are soft or wet, a cosmetic patch won’t hold, and the section usually needs replacing rather than filling.
How do you fix rotted wood around a window?
Test the extent of the damage with a screwdriver probe pushed at least 50 millimetres into the frame, then decide between an epoxy repair for small areas, a Dutchman patch for larger isolated damage, or full replacement if rot has spread into the framing.
What type of filler is best for fixing rotted window frames?
A two-part epoxy putty applied over a liquid epoxy consolidant is the standard approach for structural trim repairs. The consolidant hardens the remaining soft fibres first, and the putty rebuilds the missing shape once it’s shaped and cured.
