
When you manage caulking deficiencies during a site walkthrough, you are doing far more than checking off boxes on a list. Small gaps and failing seals around windows, doors, and joints may look like cosmetic problems, but cracked caulk leads to water intrusion, mould growth, energy loss, and wood rot. For property owners and managers in Ontario, where freeze-thaw cycles stress sealants harder than almost anywhere else in the country, getting this right is part of responsible building maintenance.
Table of Contents
- Key takeaways
- Preparing for your caulking site walkthrough
- Executing the deficiency walkthrough
- Managing and prioritising the deficiencies you find
- Common mistakes that shorten caulk lifespan
- Verifying repairs and setting up ongoing maintenance
- My take on what property managers consistently miss
- How Kettlecontracting can help you stay ahead
- FAQ
Key takeaways
| Point | Details |
|---|---|
| Inspect at least annually | Time walkthroughs before and after seasonal transitions to catch moisture-related failures early. |
| Document everything you find | Photos and severity notes help you prioritise repairs and track recurring problem areas over time. |
| Prioritise by risk, not by visibility | Structural joints and roof penetrations cause the most damage when left unsealed, even if the gap looks small. |
| Match your caulk to the location | Using the wrong product for the area causes premature failure and mould, regardless of how well it was applied. |
| Surface prep is non-negotiable | New caulk applied over old residue or contamination will fail early, wasting both time and money. |
Preparing for your caulking site walkthrough
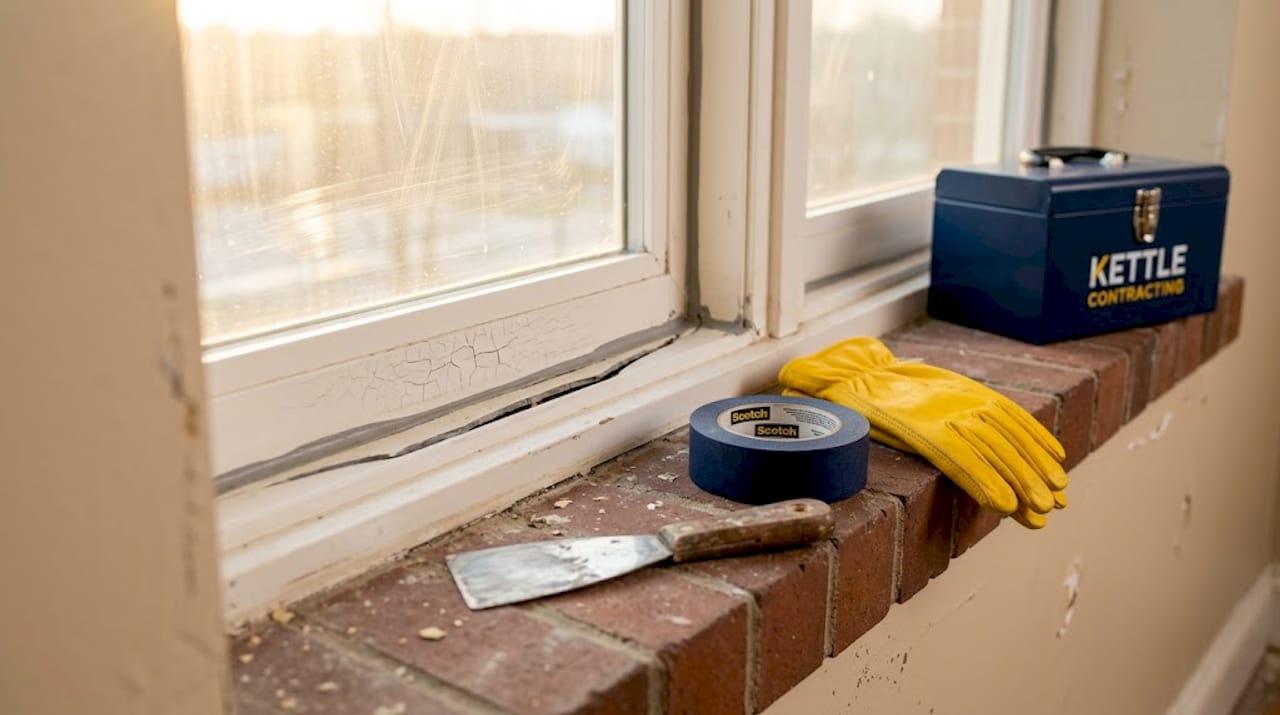
A thorough caulking inspection process starts before you set foot outside. Having the right tools on hand means you can assess conditions accurately rather than guessing based on a quick visual scan.
What to bring:
- A flashlight or headlamp for shadowed corners, soffits, and interior reveals
- A moisture metre to detect trapped water behind surfaces
- A narrow scraper or pick tool to test adhesion without causing damage
- A notepad or your phone for photos and written notes
- A site walkthrough checklist specific to caulking and sealant locations
Knowing where to look is just as important as knowing what to look for. The most common problem areas include window and door perimeters, expansion joints in concrete and masonry, roof penetrations, chimney bases, utility entry points, and the transitions between dissimilar materials like wood meeting brick or metal flashing meeting stucco.
| Location | Why it fails | Risk level |
|---|---|---|
| Window and door frames | Thermal movement causes adhesion loss | High |
| Roof penetrations and flashings | Exposure to UV and standing water | High |
| Expansion joints in masonry | Joint movement exceeds caulk elasticity | High |
| Interior wet areas (baths, kitchens) | Humidity cycles cause shrinkage and mould | Medium |
| Exterior trim and siding transitions | Paint trapping moisture below caulk | Medium |
Timing matters too. Annual inspections are the minimum, with high-moisture areas requiring more frequent checks. In Ontario, scheduling a walkthrough in late spring and again in early autumn gives you the best view of what winter and summer have done to your seals.
Pro Tip: Do your exterior walkthrough on a dry day, at least 48 hours after rain. Wet surfaces hide adhesion failures that become obvious once the substrate has dried out.
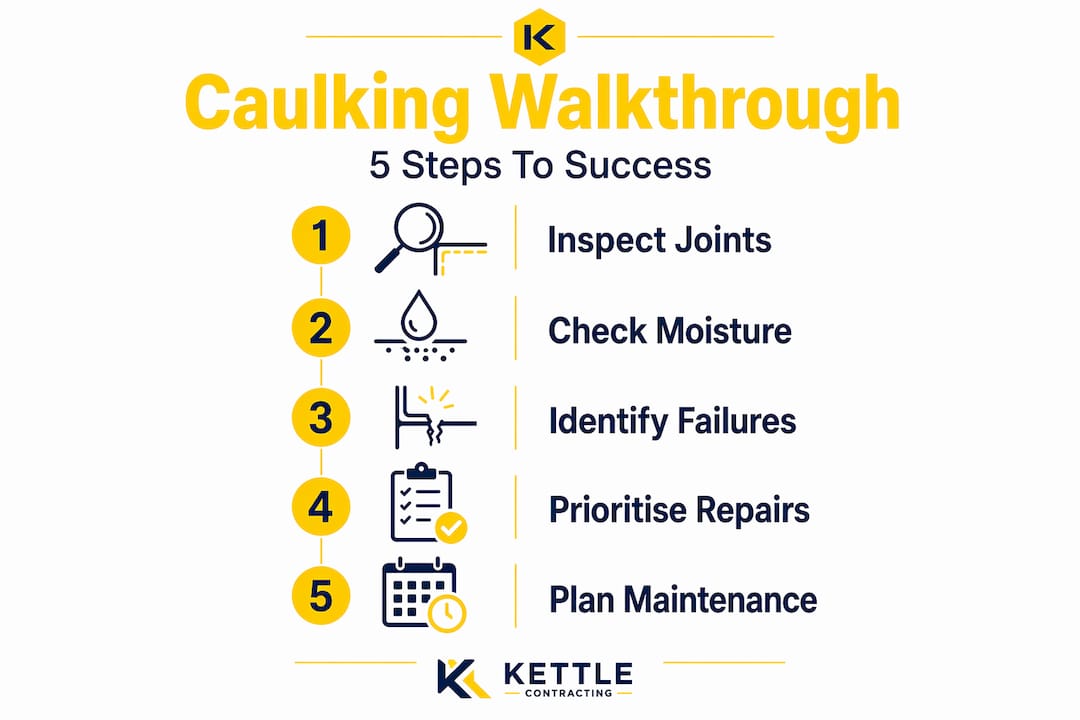
Executing the deficiency walkthrough
Once you are on site with your tools and checklist, the goal is to identify caulking issues systematically rather than wandering from one obvious problem to the next. Work in a set pattern, such as exterior perimeter first, then roofline, then interior wet areas, so nothing gets skipped.
Here is a step-by-step process to follow:
- Start at the roofline and work down. Look at flashings, chimney bases, and any penetrations through the roof deck or parapet. 70% to 80% of interior water stains near rooflines are caused by sealant or flashing failure, not roofing defects. A gap that looks minor here can cost ten times more to fix later.
- Inspect all window and door perimeters. Run your pick tool lightly along the caulk bead. If it lifts easily, pulls away from the substrate, or crumbles, the bond has failed. Note whether the failure is on one edge or both, since that tells you whether the issue is adhesion or joint movement.
- Check expansion joints and control joints in masonry. These joints are designed to move, and standard caulk often cannot keep pace. Look for tears across the bead rather than along the edges, which signals the joint is moving beyond the product’s elasticity.
- Move to interior wet areas. Bathrooms, utility rooms, and kitchens need close attention around fixtures, tub surrounds, and transitions from tile to painted walls. Use your flashlight to look for discolouration, and use the moisture metre at suspicious spots.
- Document each deficiency with a photo and a brief note. Record the location, the type of failure you see (cracking, peeling, shrinkage, adhesion loss, mould), and a quick severity rating: cosmetic, moderate, or urgent.
Distinguishing cosmetic damage from structural failure is the most important skill you will develop. Surface crazing on an otherwise bonded bead is a cosmetic concern. A gap that opens to the weather, or a bead that lifts completely off one substrate, is a structural failure that needs repair before the next rain event.
Moisture damage works behind the scenes long before stains and mould appear. If your moisture metre reads elevated levels near a joint that looks intact, treat it as a deficiency. The caulk may be holding its shape while water passes behind it.
Pro Tip: Shine your flashlight at a low angle across a caulk bead rather than straight at it. This raking light technique reveals surface irregularities and gaps that are invisible under direct light.
Managing and prioritising the deficiencies you find
Once you have a documented list of issues, the next step is deciding what gets fixed first and how. Not every deficiency carries the same risk, and how you respond should reflect that.
Assess by impact, not by size. A hairline crack at a window corner that opens directly to a cavity wall is more urgent than a peeling bead on an interior trim piece that leads nowhere. Use this framework to sort your findings:
- Urgent. Any gap that allows water or air to enter the building envelope. This includes open joints at roof penetrations, failed caulk around windows in rain-exposed walls, and any location where your moisture metre shows elevated readings nearby.
- Moderate. Adhesion failure on one edge of a bead that is still partially sealed, surface crazing that has not yet opened, and interior joints showing early mould but no active moisture infiltration.
- Cosmetic. Discolouration, minor surface cracking on interior trim, or slight shrinkage where the bead remains bonded on both sides.
Choosing the right product matters as much as choosing the right time. Wrong product use causes adhesion failure and mould, regardless of how careful your application is. Silicone performs best on exterior surfaces, glass, and wet interior areas because it resists UV and moisture. Acrylic latex works well on painted interior trim and areas with minimal movement. Using acrylic on an exterior joint exposed to Ontario winters will almost always result in failure within one or two seasons. Kettlecontracting’s comparison of silicone versus acrylic caulk walks through this decision in detail if you want to go deeper on product selection.
When to call a professional. Joints showing repeated failures, locations with active moisture infiltration, expansion joints in commercial facades, or any area where the joint movement itself may exceed caulk elasticity all benefit from professional assessment. Poor substrate prep or joint movement beyond a product’s elasticity range may indicate a need for joint redesign, not just re-caulking. A professional can determine whether the underlying problem is the sealant, the joint, or the structure.
Pro Tip: Before committing to a full re-caulk of a large façade, test one representative joint first. Apply fresh caulk over properly prepared substrate and monitor it through one freeze-thaw cycle. This tells you whether the product and joint design are right before you scale up.
Common mistakes that shorten caulk lifespan
Ontario’s climate is hard on sealants. The same joint that gets baked by July sun will be compressed by February ice. Avoiding these mistakes is what separates repairs that last five years from ones that fail in five months.
| Mistake | Why it matters | What to do instead |
|---|---|---|
| Skipping old caulk removal | New caulk over old residue fails at the weak point | Remove old caulk completely and clean with alcohol |
| Wrong backer rod diameter | Rod that is too small lets caulk sag and deform under movement | Use a rod 25% larger than the gap width |
| Dry tooling | Drag marks weaken the bead and reduce adhesion at edges | Tool with a wet finger or a damp tool |
| Applying in cold or wet conditions | Below 5°C and moisture prevent proper cure and bonding | Apply between 10°C and 25°C on a dry surface |
| Using one product everywhere | Different locations need different chemistries | Match product to location: silicone for wet and exterior, acrylic for painted interior trim |
Pro Tip: Apply caulk at a 45-degree angle pushing forward rather than pulling the gun toward you. This technique presses sealant into the joint rather than pulling it across the surface, which gives you a stronger mechanical bond from the start.
Verifying repairs and setting up ongoing maintenance
Once repairs are done, your job is not finished. A brief post-repair inspection and a standing maintenance schedule will save you from repeating this process under pressure.
How to check newly applied caulk:
- Wait the full cure time listed on the product. This is typically 24 to 72 hours for silicone and less for acrylic, but always check the label.
- Press lightly along the bead with a gloved finger. It should feel firm and spring back slightly, not soft, sticky, or hollow.
- Look for voids, thin spots, or areas where the bead has pulled away from either substrate.
- Check the edges under raking light for any lifting or air pockets.
Signs of a potential problem after curing:
- Milky or cloudy appearance in silicone (indicates moisture was present during application)
- Wrinkling along the bead surface (indicates the product was applied too thick)
- Peeling at one edge within the first week (indicates contamination or incompatible substrate)
For ongoing maintenance, build a seasonal maintenance schedule into your property management calendar. In most Ontario properties, a detailed exterior inspection each spring and autumn is the baseline. High-exposure locations like rooftop joints, east-facing walls, and any area that shows a history of deficiency should be checked twice as often.
A standing window caulking maintenance checklist is one of the most practical tools you can maintain. It keeps each walkthrough consistent and creates a record you can use to spot patterns over time.
My take on what property managers consistently miss
I have been doing caulking inspections in the Oshawa area for 25 years, and the most common pattern I see is not negligence. It is that property managers do their walkthroughs looking at the building in general and see caulking as a background detail. A failing bead does not announce itself the way a broken window does.
What I have learned is that the joints you cannot easily see cause the worst damage. Soffits, expansion joints behind downspouts, and the transition points where two different materials meet are where water finds its way in. Those spots rarely get checked unless someone is specifically looking for them.
I have also seen property owners attempt repairs over contaminated or damp surfaces and then wonder why the new caulk failed within a season. Surface preparation is where most DIY repairs break down. You can buy the right product, use a good technique, and still get early failure if the substrate was not properly cleaned first.
The other thing I tell every client is this: Ontario’s freeze-thaw cycle does not give you much room for half-measures. A repair that might last three years in a warmer climate might last eight months here. That is not pessimism. That is just the reality of the climate, and it is why I always push for doing the job properly rather than quickly.
How Kettlecontracting can help you stay ahead

If your site walkthrough has turned up deficiencies and you are not sure where to start, Kettlecontracting has put together detailed resources built for exactly this situation. Our guide on preparing surfaces for caulking covers the prep steps that most repairs skip, and our resource on fixing caulk like a pro walks through the most common repair scenarios with clear, practical guidance. Serving residential and commercial properties across the Greater Toronto Area, Kettlecontracting specialises in high-performance sealing that holds up through Ontario’s demanding climate. Reach out for a professional assessment or to discuss a repair plan that actually lasts.
FAQ
How often should I inspect caulking during a site walkthrough?
Walkthroughs should happen at least annually, ideally before and after seasonal transitions. High-moisture areas and roofline joints benefit from checks twice a year.
What are the most common signs of caulking failure?
Look for cracking, shrinkage, peeling along one or both edges, discolouration, and any gap that opens to the exterior. Elevated moisture metre readings near an intact bead are also a reliable indicator of hidden failure.
When should I hire a professional instead of doing repairs myself?
Call a professional when joints show repeated failure, when active moisture infiltration is present, or when joint movement appears to exceed the caulk’s elasticity. These situations may require joint redesign rather than a simple re-caulk.
Does caulk type really affect how long repairs last?
Yes, significantly. Silicone suits exterior and wet areas, while acrylic latex works on painted interior trim. Using the wrong product for the location is one of the leading causes of premature caulk failure.
What is the biggest mistake people make during caulking repairs?
Skipping surface preparation. Removing all old caulk and cleaning with alcohol before applying fresh product is the single most important step for a lasting bond, and it is the step most often cut short.
— Felix
Recommended
- Preparing Your Windows for Caulking: A Comprehensive Guide – Kettle Contracting
- The Biggest Mistakes People Make When Caulking Windows – Kettle Contracting
- Fixing Caulk Like a Pro: Solving the Most Common Caulking Issues – Kettle Contracting
- What Are the Common Mistakes in Window Caulking? | Don’t Make These Errors – Kettle Contracting