Value-add renovation exterior sealing is the targeted improvement of your home’s weather barrier by closing gaps, cracks, and penetrations in the building envelope to increase property value, reduce energy costs, and prevent structural damage. In the industry, this practice is more precisely called building envelope air sealing or weatherproofing, and understanding both terms helps you have better conversations with contractors. Unlike cosmetic upgrades, exterior sealing works at the structural level, protecting your investment from Ontario’s freeze-thaw cycles, moisture infiltration, and air leakage year-round. For homeowners and property managers in the Greater Toronto Area, it is one of the most cost-effective value-add home improvements available.
What is value-add renovation exterior sealing and why does it matter?
Value-add renovation means increasing property value through active improvements rather than waiting for passive market appreciation. Applied to exterior sealing, this means deliberately closing the gaps and weak points in your building envelope to unlock real, measurable gains in performance and protection.
The value created by exterior sealing comes from three directions at once:
- Energy savings: Sealing air leaks around windows, doors, vents, and penetrations reduces the load on your heating and cooling systems. In Ontario’s climate, where temperatures swing dramatically between seasons, those savings add up quickly on your utility bill.
- Damage prevention: Moisture that enters through unsealed gaps causes mould, rot, and structural degradation over time. Regular sealing and cleaning prevent this deterioration and the costly repairs that follow.
- Deferred maintenance costs: A properly sealed building envelope postpones expensive interventions like window replacement, insulation upgrades, and drywall repairs by keeping water and air where they belong.
A comprehensive approach to exterior renovation ROI includes resale value, utility savings, and prevented costs like water and pest damage. This means you capture the full return on sealing work even if you are not planning to sell. For property managers overseeing multi-unit buildings, the math is especially clear: fewer emergency repairs and lower operating costs directly improve net income.
Sealing is often misunderstood as a cosmetic fix. It is not. It protects structural longevity by stopping the moisture cycle before it starts. A building that stays dry and airtight simply lasts longer and costs less to maintain.
How exterior sealing adds value beyond appearance upgrades
The most common mistake homeowners make is treating exterior sealing as a finishing touch. It is actually a foundational layer of building performance. Air sealing targets gaps around windows, doors, attics, basements, vents, and penetrations, and closing these gaps is what drives energy efficiency gains. This is not a minor detail. Uncontrolled air leakage is one of the leading causes of high heating bills in Ontario homes.
From a financial standpoint, the benefits of exterior sealing extend well beyond what shows up at resale. Lower monthly utility costs, reduced wear on HVAC equipment, and avoided moisture repairs all contribute to the total return. Property managers who seal their buildings proactively spend less on reactive maintenance over a five to ten year horizon.
There is also a curb appeal dimension that is easy to overlook. Properly sealed siding joints, window perimeters, and door frames look clean and well-maintained. Buyers and tenants notice when a building looks cared for, and that perception supports both sale prices and rental rates.
Key components and techniques of exterior sealing renovations
A professional exterior sealing project covers more ground than most homeowners expect. The typical locations addressed include:
- Window and door perimeters, where gaps between the frame and rough opening allow significant air and water infiltration
- Attic and basement penetrations, including pipe chases, electrical conduits, and HVAC ducts
- Vents, exhaust fans, and hose bibs that penetrate the exterior wall
- Siding joints and transitions between different cladding materials
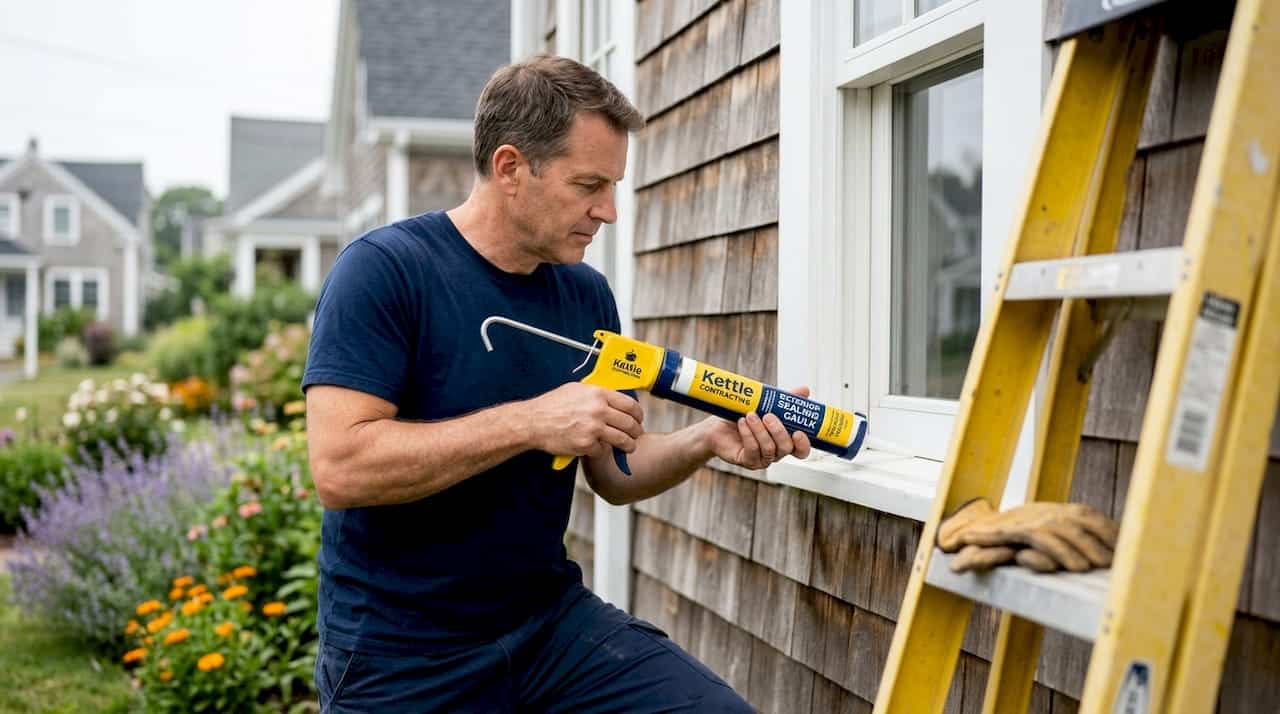
The materials used depend on the gap size and location. Caulk handles fine joints and perimeter sealing. Expanding foam sealant fills larger voids around pipes and conduits. Weatherstripping addresses moving parts like door bottoms and window sashes. Each material has a specific role, and using the wrong one in the wrong location leads to early failure.
Durable exterior sealing relies on system layering, not caulk alone. Flashing directs water away from penetrations. Backer rods give caulk the correct joint geometry so it can flex without tearing. Without these layers in place, even a high-quality sealant will fail within a few seasons. This is the detail that separates a professional sealing job from a DIY patch.

Pro Tip: Before applying any sealant, inspect the joint for existing failed caulk, debris, and moisture. Applying new caulk over old, cracked material is one of the most common reasons sealing fails prematurely. Clean the joint down to a solid substrate first.
Sequencing also matters. Weatherproofing layers, including flashing and membrane tape, must be installed before finish sealing with caulk. Reversing this order traps moisture and creates the exact problem you are trying to prevent. Exterior insulation also needs sealant to perform correctly, which means sealing decisions interact with your insulation strategy from the start.
Cost considerations and budget expectations for exterior sealing
Understanding what exterior sealing costs in Canada helps you plan realistically and avoid being misled by low quotes. Typical air sealing costs in 2026 range from $500 to $8,000 depending on the area sealed and the method used, with attic sealing being the most common and cost-effective entry point. Whole-home sealing and crawl space encapsulation sit at the higher end of that range.
| Scope of work | Typical cost range (CAD) |
|---|---|
| Attic air sealing | $500 to $1,500 |
| Window and door perimeter sealing | $800 to $2,500 |
| Whole-home air sealing | $2,000 to $8,000 |
| Crawl space encapsulation | $3,000 to $7,000 |
Several factors push costs up or down: the number and type of penetrations, accessibility of the work area, the materials specified, and whether diagnostic testing is included. A blower door test, which measures airtightness before and after sealing, adds cost but confirms the work actually achieved its target. Skipping this step means you are guessing at results.
Pro Tip: When comparing quotes, ask each contractor whether their price includes a blower door test or airtightness verification. A quote that omits diagnostics is not a complete sealing job, regardless of how low the price looks.
Low upfront quotes often indicate less thorough work. A contractor who skips joint preparation, backer rods, or diagnostic testing will deliver a result that fails faster and costs more to redo. Combining sealing with insulation installation in a single project can reduce total labour costs, since both trades are working in the same areas at the same time.
How to plan and implement an exterior sealing renovation effectively
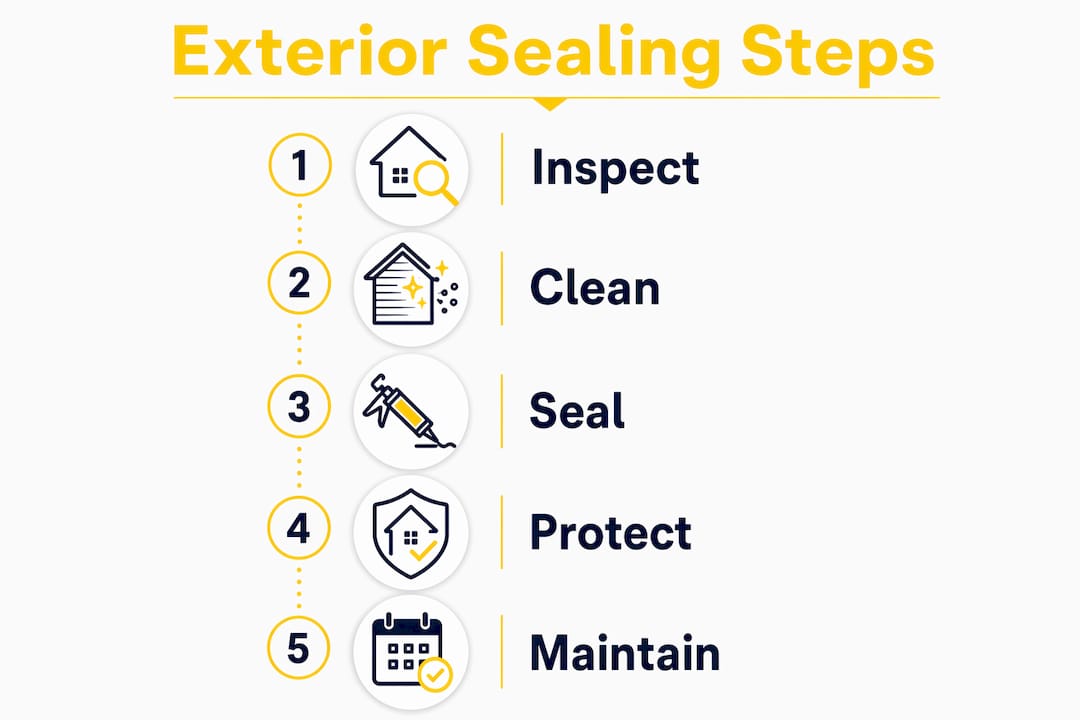
A well-executed exterior sealing renovation follows a clear sequence. Rushing any step or skipping the planning phase leads to missed areas and callbacks. Here is how to approach it properly:
- Start with an inspection. Walk the perimeter of your building and note every location where different materials meet, where pipes or conduits exit the wall, and where you can feel drafts near windows or doors. This becomes your work scope.
- Sequence the work correctly. Sealing must follow all structural work, window and door installation, and flashing installation. Sealing before flashing is complete traps moisture and creates hidden damage.
- Choose materials for your climate. In Ontario, sealants must handle wide temperature swings and UV exposure. Silicone and polyurethane caulks outperform latex in exterior applications because they remain flexible through freeze-thaw cycles.
- Seal from the outside in. Address the exterior face first, then move to interior air sealing at the attic floor, basement rim joists, and around penetrations. This layered approach catches what either side alone would miss.
- Verify with testing. A blower door test after sealing confirms airtightness targets have been met. Without verification, you cannot know whether the work was thorough or whether gaps remain.
- Plan for maintenance. Caulk and sealants have a service life. Inspect exterior joints every two to three years, particularly after harsh winters. Catching a failing joint early costs far less than repairing the water damage it causes if left unaddressed.
Signs that your sealing needs attention include visible cracks or gaps in caulk joints, paint peeling near window frames, frost on interior walls in winter, and unexplained increases in heating or cooling costs. Each of these points to a break in the building envelope that is costing you money and potentially causing hidden damage.
Key takeaways
Exterior sealing is the most cost-effective value-add renovation available to homeowners and property managers because it simultaneously reduces energy costs, prevents structural damage, and protects long-term asset value.
| Point | Details |
|---|---|
| Sealing is structural, not cosmetic | Closing gaps in the building envelope prevents moisture damage and extends the life of your home. |
| ROI includes more than resale | Factor in utility savings and avoided repair costs to capture the full return on sealing work. |
| Layered systems outperform caulk alone | Flashing, backer rods, and proper sequencing are what make sealing durable through Ontario winters. |
| Diagnostics confirm results | A blower door test verifies airtightness and separates thorough work from incomplete patching. |
| Maintenance preserves the investment | Inspecting and re-sealing joints every two to three years prevents small failures from becoming expensive repairs. |
What 25 years of sealing work in Ontario has taught me
The homeowners I work with most often come to me after a cheaper fix has already failed. They had someone caulk around their windows, the caulk cracked after one winter, and now there is water staining on the interior drywall. The frustrating part is that the failure was predictable. Ontario’s freeze-thaw cycles are hard on sealants. A joint that is not properly prepared, backed, and tooled will not last. Full stop.
What I have seen work, consistently, is treating sealing as a system rather than a product. The caulk is the last line of defence, not the first. Flashing, membrane tape, and backer rods do the heavy lifting. The caulk seals the final gap. When contractors skip those layers to save time or money, the caulk carries load it was never designed to carry, and it fails.
I also want to be honest about ROI timelines. You will not see the full return on a sealing project in the first year. The value accumulates over five to ten years through lower utility bills, avoided repairs, and a building that simply holds up better. Homeowners who understand this are the ones who make good decisions about where to spend their renovation budget.
The other thing worth saying plainly: regular maintenance matters more than most people realise. A $200 re-caulking visit every few years is far cheaper than the water damage repair it prevents. Protecting your asset long term is not a one-time project. It is an ongoing commitment to keeping the envelope intact.
— Felix
Work with Kettlecontracting on your exterior sealing project

Kettlecontracting has been delivering professional-grade caulking and exterior sealing across the Greater Toronto Area for over 25 years. If you are planning a sealing renovation or dealing with failing joints around windows, doors, or siding, the team at Kettlecontracting brings the diagnostic skill and hands-on experience to do the job correctly the first time. Start with the detailed window preparation guide to understand what proper preparation looks like before any sealant is applied. For homeowners dealing with existing caulk failures, the common caulking issues guide covers the most frequent problems and how to address them properly. Reach out to Kettlecontracting at kettlecontracting.com to discuss your project.
FAQ
What does value-add exterior sealing mean for homeowners?
Value-add exterior sealing means improving your building envelope by closing gaps and penetrations to increase property value, lower energy costs, and prevent moisture damage. It is a targeted renovation tactic that delivers returns through utility savings and avoided repairs, not just resale price.
How much does exterior air sealing cost in Ontario?
Air sealing costs typically range from $500 to $8,000 depending on the scope, with attic sealing at the lower end and whole-home or crawl space work at the higher end. Always confirm whether the quote includes diagnostic testing like a blower door test.
Is caulking alone enough to seal a home exterior?
Caulk alone is not sufficient for durable exterior sealing. Proper sealing requires flashing, backer rods, and correct joint preparation before caulk is applied. Without these layers, sealant fails prematurely, especially through Ontario’s freeze-thaw cycles.
How often should exterior sealing be inspected and maintained?
Exterior joints and caulk should be inspected every two to three years, and after any particularly harsh winter. Catching a cracked or separating joint early prevents water infiltration and the structural damage that follows.
Does exterior sealing improve energy efficiency?
Yes. Air sealing gaps around windows, doors, attics, and penetrations directly reduces heating and cooling loads by stopping uncontrolled air exchange. For Ontario homeowners, this translates to measurable reductions in utility costs across both heating and cooling seasons.