
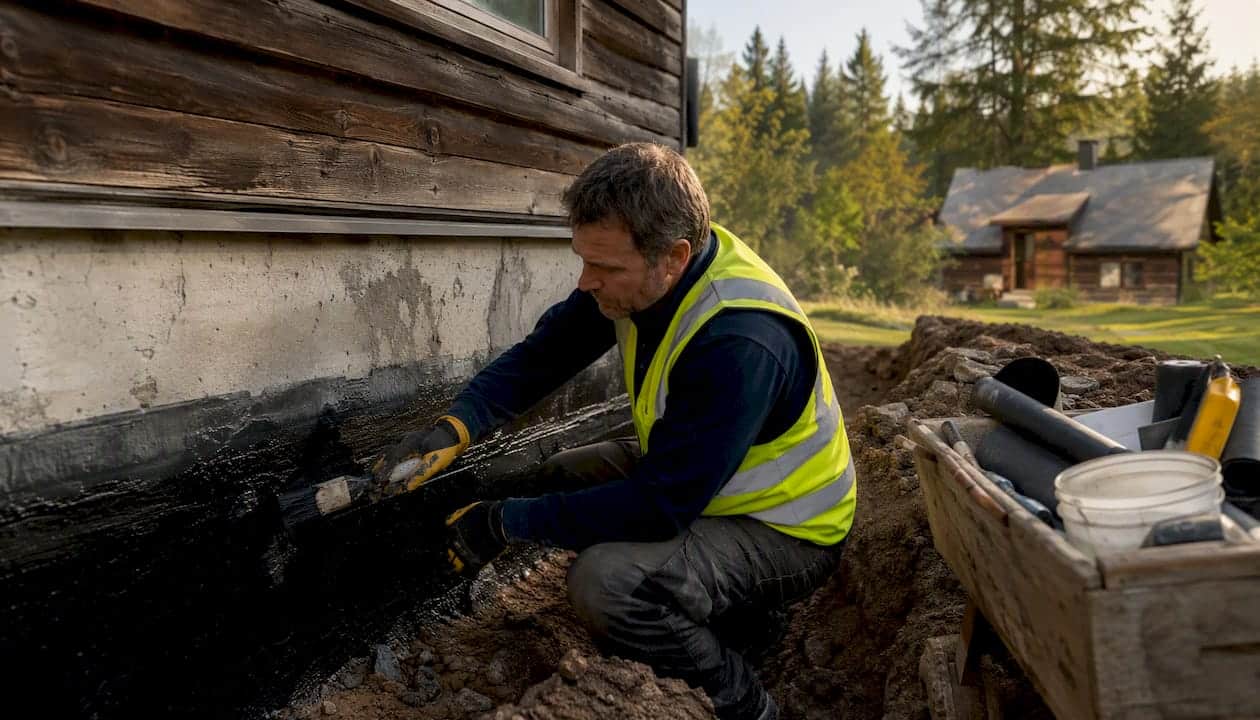
The three highest-impact things you can do right now to protect your home’s foundation from water are: regrade the soil within about 1.8 m of the foundation to slope away sufficiently to direct water away from the foundation, clear and extend your downspouts so they discharge well away from the wall, and confirm your perimeter drain and sump pump are working before the next heavy rain. Canada.ca’s foundation maintenance guidance and the Insurance Bureau of Canada both point to surface drainage as the first line of defence, and after 25 years of caulking and sealing work across the GTA, the team at Kettlecontracting sees the same pattern on every job: water problems that look structural almost always start at the surface.
What you can do today:
- Walk the perimeter and look for soil that slopes toward the foundation; add topsoil and regrade if needed.
- Check every downspout extension — if water discharges within 1 m of the wall, it will eventually find a crack.
- Test your sump pump by pouring a bucket of water into the pit; the float should trigger the pump immediately.
- Clear gutters of debris so they drain freely rather than overflow at the fascia.
- Check window wells for standing water after rain.
- Inspect visible foundation penetrations (gas lines, electrical conduit, hose bibs) for gaps or cracked sealant.
Pro Tip: In Ontario’s freeze-thaw climate, pay special attention to caulking around any penetration through the foundation wall. Water that enters a hairline gap in October can freeze, expand, and turn that gap into a crack by March. A quick visual check in late October takes ten minutes and can prevent a costly repair.
Table of Contents
- What to put (and not put) immediately next to your foundation
- How your gutters and downspouts protect the foundation
- How perimeter drains and French drains work, and when you need one
- Waterproofing the foundation wall: what actually works in Canada’s climate
- Year-round inspection checklist and early warning signs
- What you can do yourself and when to call a contractor
- Where professional caulking fits in foundation protection
- Typical Canadian cost ranges and how long jobs take
- Key takeaways
- What I actually see on real jobs
- Kettlecontracting can help you protect your foundation
- Useful Canadian resources and next steps
- FAQ
What to put (and not put) immediately next to your foundation
The material you place against the foundation wall has a direct effect on how much moisture reaches it. Clean crushed stone or coarse gravel is the best choice for the first 30–60 cm: it drains freely, doesn’t retain moisture against the wall, and won’t compact over time the way soil does. Free-draining granular backfill serves the same purpose below grade.
Materials that work:
- Crushed stone or pea gravel (drains fast, doesn’t hold moisture)
- Coarse granular backfill against the foundation wall
- Permeable ground cover that allows water to move away from the wall
Materials to avoid:
- Heavy mulch piled directly against the foundation wall (retains moisture and can hide deteriorating sealant)
- Compacted clay or dense topsoil within 1.8 m of the wall
- Raised garden beds that hold water against the foundation
- Dense ground cover plants with shallow root systems that disrupt weeping tiles
Grading guidance from the Intact Centre recommends a minimum 5% slope within 1.8 m of the foundation. That’s roughly a 9 cm drop over 1.8 m — achievable with a few bags of topsoil and an afternoon of work.
Paved areas like patios and driveways are a common problem. A concrete pad that slopes toward the house acts like a funnel. If regrading the hardscape isn’t practical, a trench drain installed across the low point intercepts and diverts that runoff before it reaches the wall.
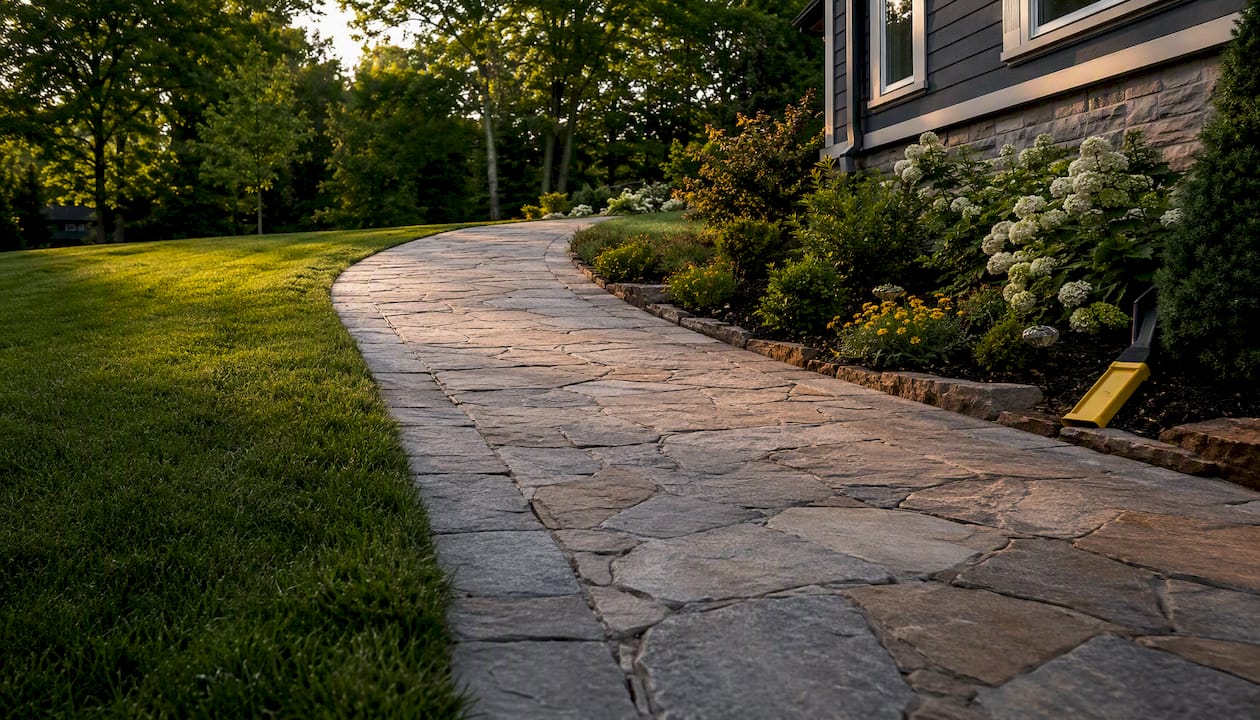
Pro Tip: Tree and shrub roots can crush or displace weeping tiles over time. Keep large trees at least 3 m from the foundation, and avoid planting willows or silver maples anywhere near the drainage line.
How your gutters and downspouts protect the foundation
Roof drainage is responsible for a large volume of water during any significant rain event. A blocked or overflowing gutter sends that water straight down the wall and into the soil at the foundation. Keeping the system clear and properly directed is one of the simplest and most cost-effective ways to prevent basement flooding.
Gutter and downspout maintenance checklist:
- Clean gutters at least twice a year: once in late spring after seeds and debris fall, and again in November after the leaves are down.
- Check that gutters are pitched toward the downspout — standing water in a gutter means the pitch is off.
- Inspect gutter fasteners; sagging sections pull away from the fascia and create overflow points.
- Check downspout connections at the gutter and at the elbow — these are common leak points.
- Extend downspout discharge at least 1.8–3 m from the foundation using rigid extensions or flexible corrugated pipe.
- Use a splash block at the discharge point to prevent soil erosion and direct flow away from the wall.
- If underground downspout routing is used, inspect the outlet annually to confirm it isn’t blocked or collapsed.
- After any major storm, walk the perimeter while it’s still raining to see exactly where water is discharging.
For gutter installation on older homes, consider upgrading to larger 5-inch or 6-inch gutters if your roof has a large catchment area — undersized gutters overflow even when clean.
How perimeter drains and French drains work, and when you need one
A perimeter drain (also called a weeping tile or French drain) is a perforated pipe laid in a gravel trench at the base of the foundation footing. Its job is to collect groundwater before it builds up against the wall and route it to a sump pit or a gravity outlet. Canada.ca describes the typical installation as a perforated pipe wrapped in filter fabric, set in gravel, and sloped to drain. Perforations are often oriented downward to collect water from beneath the pipe, and the filter fabric prevents fine soil particles from clogging the pipe over time.
Perimeter drains have an expected service life of several decades, but homes built before 1960 may have no drain at all, or one that was connected to the sanitary sewer — a setup that’s now prohibited in most Canadian municipalities and a significant flood risk during heavy rain events.
Signs you may need a new or repaired perimeter drain:
- Chronic dampness or wet spots on basement walls after rain or snowmelt
- White powdery deposits (efflorescence) on concrete or block walls
- Musty smell in the basement that returns after drying
- Visible cracks in the foundation wall with moisture staining
- Pooling water in window wells or at the base of the wall
| Feature | Exterior perimeter drain | Interior drain under slab |
|---|---|---|
| Best for | Long-term groundwater management | Managing water that’s already entered |
| Cost shape | Higher upfront (excavation required) | Lower upfront, no excavation |
| Maintenance | Annual visual check, filter sock replacement | Sump pump testing, battery backup check |
| DIY difficulty | Not DIY — requires excavation and backfill | Partial DIY (sump pump swap); drain install is a pro job |
| Lifespan | ~40 years with proper installation | Sump pump: 7–10 years; drain channel: longer |
The Insurance Bureau of Canada recommends disconnecting foundation drains from sanitary sewers and installing an isolated sump with battery backup as the highest tier of protection. If your home still has the original clay tile drains connected to the sewer, that disconnection should be near the top of your priority list.
Waterproofing the foundation wall: what actually works in Canada’s climate
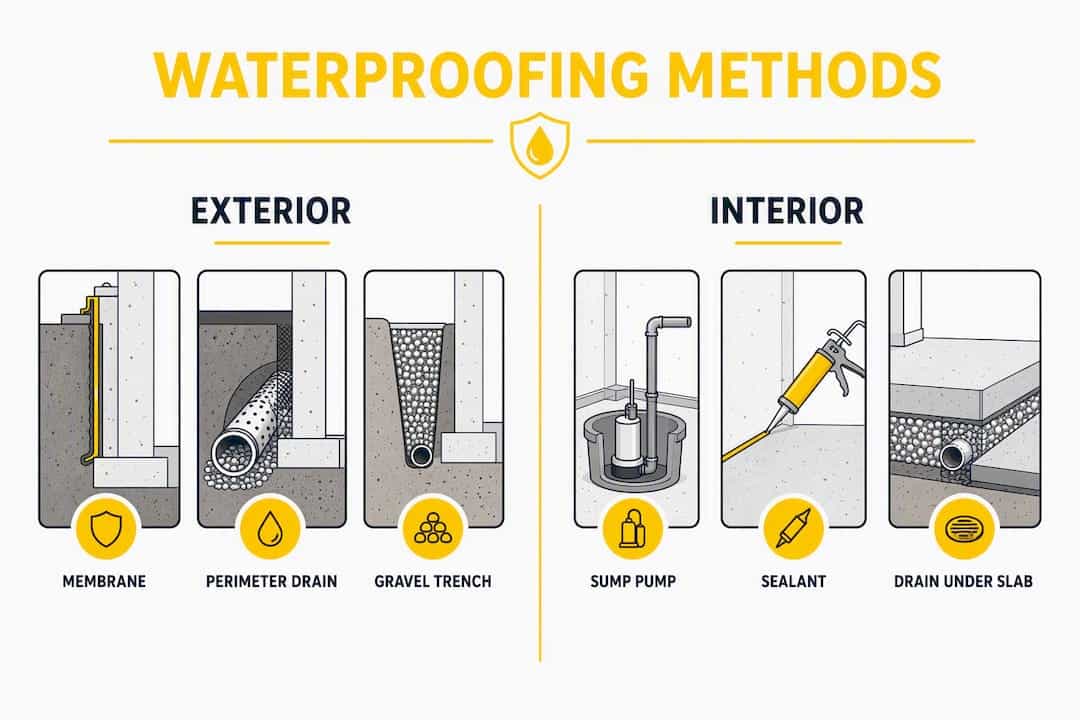
Exterior membrane plus a functioning perimeter drain is the long-term answer for keeping water out of a foundation wall. Interior sump systems are a critical backup, not a substitute. That distinction matters when you’re deciding where to spend money.
| Method | Best for | Cost shape | Maintenance | DIY difficulty | Expected lifespan |
|---|---|---|---|---|---|
| Liquid coating (e.g., Drylok, Liquid Rubber) | Short-term fix, minor seepage on dry walls | Low | Reapply every few years | DIY-possible | 3–7 years |
| Exterior membrane + drainage board | Comprehensive long-term upgrade | High (excavation) | Minimal after install | Not DIY | 20–30+ years |
| Interior drainage channel + sump | Managing active water entry | Moderate | Sump pump annual test | Partial DIY | Pump: 7–10 years |
| Granular backfill + drainage board | New construction or full excavation | Moderate-high | Low | Not DIY | 25+ years |
A vertical drainage membrane installed against the exterior foundation wall creates an air space that directs infiltrating water downward to the weeping tile rather than allowing it to saturate the wall assembly. This is why exterior membrane work should always be paired with a functioning perimeter drain — one without the other is an incomplete system.
Canadian climate considerations:
- Freeze-thaw cycles put repeated stress on any coating or sealant applied directly to the foundation wall. Products like Drylok and Liquid Rubber are useful for minor seepage on interior walls, but they won’t hold against hydrostatic pressure and they don’t address the source of the water.
- Soil heave in clay-heavy soils (common across southern Ontario) can shift drainage board and crack membranes over time. Proper backfill with granular material reduces this risk.
- Salt used on driveways and walkways accelerates concrete deterioration. Keep de-icing salt away from the foundation wall and seal any exposed concrete joints annually.
Exterior waterproofing combined with effective drainage is the long-term solution; sump pumps are effective when gravity discharge isn’t practical and should be paired with alarms and battery backups.
Year-round inspection checklist and early warning signs
Foundation water problems rarely appear overnight. They develop over months or years, and catching them early is almost always cheaper than fixing them after the damage is done. A seasonal inspection routine takes less than an hour and gives you a clear picture of where your home stands.
Seasonal inspection schedule:
- Spring (March/April): Check for frost heave around the foundation perimeter; inspect grading after snowmelt; look for new cracks or efflorescence on basement walls; test the sump pump.
- Pre-summer (May): Clean gutters after spring seed drop; confirm downspout extensions are in place; check window well drainage.
- Post-storm (any season): Walk the perimeter during or after heavy rain to observe where water pools or flows.
- Fall (October): Clean gutters after leaves fall; inspect and re-caulk any penetrations showing cracked or missing sealant; confirm sump pump battery backup is charged.
- Pre-freeze (November): Disconnect and drain any exterior hose connections; check that window wells are clear; confirm grading hasn’t shifted over the summer.
What each warning sign likely means:
- Efflorescence (white powder on walls): Water is moving through the concrete and depositing minerals. The drain or grading needs attention.
- Musty smell without visible moisture: Condensation or slow seepage behind finishes. Check the exterior grade and downspout discharge points first.
- Horizontal cracks in block walls: Lateral soil pressure — get a structural assessment before doing anything else.
- Vertical or diagonal cracks: Often settlement-related; mark the ends with a pencil and date to track movement. If a crack grows more than 3 mm in a season, call a contractor.
- Damp spots after rain only: Surface water infiltration, usually grading or a failed penetration seal.
Photograph every crack, stain, and damp spot with a date stamp. Those photos are useful for tracking progression and for getting accurate contractor estimates. For a broader look at how moisture enters home walls, the pathways are often more numerous than homeowners expect.
What you can do yourself and when to call a contractor
Some foundation water tasks are genuinely DIY-friendly. Others look simple but have consequences when done wrong — a perimeter drain installed without proper slope or filter fabric will fail within a few years, and you won’t know until the basement is wet again.
DIY tasks most homeowners can handle:
- Regrading small areas near the foundation with topsoil
- Cleaning gutters and repositioning downspout extensions
- Applying Drylok or Liquid Rubber to dry interior walls for minor seepage
- Sealing hairline cracks with a masonry-rated caulk (after removing all old failed sealant)
- Testing and replacing a sump pump float or pump unit
- Clearing window wells and adding gravel drainage at the base
Jobs that need a licensed contractor or trade:
- Installing or replacing a perimeter drain (excavation, backfill, slope, filter fabric — all need to be right)
- Disconnecting weeping tiles from the sanitary sewer (requires a licensed plumber in most Ontario municipalities)
- Full exterior membrane application (surface prep, drainage board, backfill)
- Sump pump electrical connections and battery backup wiring (licensed electrician)
- Trench drain installation across a driveway or paved area
Questions to ask any contractor before hiring:
- Are you licensed for excavation and foundation work in this municipality?
- Will you pull the required permits for drainage work?
- What filter fabric and pipe specification will you use?
- How do you handle backfill — granular or native soil?
Decision rule: If the fix requires breaking ground, touching the sanitary sewer, or applying a membrane to an excavated wall, hire a licensed contractor. If it’s above-grade, surface-level, or a sealant application on a dry surface, most homeowners can manage it with the right product and preparation.
For guidance on how caulking prevents water damage at penetrations and transitions, the preparation steps matter as much as the product choice.
Where professional caulking fits in foundation protection
Caulking and joint sealing aren’t a substitute for drainage, but they’re a necessary part of any complete foundation protection plan. Water finds the path of least resistance, and that path is almost always a penetration: a gas line through the foundation wall, a window well frame, an expansion joint between the slab and the wall, a utility conduit. Seal those points correctly and you close off the entry routes that drainage systems can’t address.
Professionally specified caulking at foundation penetrations and transitions stops water entry at the points drainage systems can’t reach. The key is preparation: old failed sealant must be removed completely, the substrate must be dry and clean, and the product must be rated for masonry adhesion and freeze-thaw movement. Applying new caulk over old failed material is one of the most common mistakes we see — it looks done but it won’t hold through a single Ontario winter.
Canada.ca confirms that old failed sealant must be removed before re-caulking, and that products must be rated for concrete and masonry adhesion with flexibility for freeze-thaw movement.
What a professional sealing job at the foundation typically includes:
- Full removal of old, cracked, or debonded sealant at all penetrations
- Surface preparation: cleaning, priming where required, confirming the substrate is dry
- Application of a masonry-rated, flexible sealant (polyurethane or hybrid formulations for exterior use)
- Sealing of window well frames, door thresholds, utility penetrations, and expansion joints
- A written scope so you know exactly what was sealed and what wasn’t
Kettlecontracting’s approach pairs caulking and sealing work with a clear recommendation on whether drainage or grading issues need to be addressed first. Sealing a penetration on a wall that’s under hydrostatic pressure won’t hold — the drainage problem has to come first. Understanding why caulking is trade-specific work helps homeowners set realistic expectations for what sealing alone can and can’t do.
Typical Canadian cost ranges and how long jobs take
These are realistic ranges for the GTA and southern Ontario. Prices vary by site conditions, access, and scope — treat these as planning figures, not quotes.
| Job | Typical cost range (CAD) | Typical timeline |
|---|---|---|
| Gutter cleaning + downspout extension | $150–$400 | Half day |
| Trench drain installation (driveway) | $1,500–$4,000 | 1–2 days |
| Perimeter drain replacement (full exterior) | $8,000–$20,000+ | 3–7 days |
| Exterior membrane + drainage board | Included in perimeter drain scope or $3,000–$8,000 added | Same mobilisation |
| Sump pump installation (basic) | $800–$2,500 | Half to full day |
| Sump pump with battery backup | $1,500–$4,000 | 1 day |
| Professional caulking at foundation penetrations | $300–$1,200 | Half day |
Funding and permits:
- The Canada Greener Homes programme has focused primarily on insulation and energy retrofits, but check Natural Resources Canada’s current intake — programme scope and eligibility change. Some municipalities offer separate basement flood protection subsidies; Toronto, for example, has offered a Basement Flooding Protection Subsidy Program in past years.
- Building code requirements in most provinces require permits for drainage work that connects to municipal systems or involves excavation near the foundation. Check with your local building department before starting any perimeter drain or sump installation.
A simple decision rule: If your basement has never flooded and you have no visible signs of water entry, start with surface fixes (grading, gutters, caulking) — cost is low and impact is high. If you have recurring dampness or a drain older than 30 years, budget for a perimeter drain assessment. If you’ve had water in the basement more than once, the exterior membrane and drain replacement conversation is worth having now rather than after the next event.
Key takeaways
Protecting your home’s foundation from water starts at the surface: correct grading and functioning roof drainage prevent the majority of water from ever reaching the wall.
| Point | Details |
|---|---|
| Grade first | Slope soil away from the foundation at 5% within 1.8 m to stop surface water at the source. |
| Extend downspouts | Discharge at least 1.8–3 m from the wall; overflowing gutters are a leading cause of foundation dampness. |
| Perimeter drain lifespan | Drains last roughly 40 years; annual checks catch failures before water enters the basement. |
| Exterior membrane is the long-term fix | Liquid coatings (Drylok, Liquid Rubber) address minor seepage; full exterior membrane plus drainage board is the durable upgrade. |
| Kettlecontracting for sealing | Kettlecontracting handles professional caulking and joint sealing at foundation penetrations across the GTA, paired with honest guidance on when drainage work needs to come first. |
What I actually see on real jobs
The most expensive foundation water problems I encounter aren’t caused by failed membranes or collapsed drains. They’re caused by things that were ignored for years because they didn’t look serious: a driveway that pitches toward the garage, mulch piled 30 cm high against the foundation wall, downspouts that terminate 20 cm from the house, and caulking around a basement window that was last touched in 1998.
Homeowners often focus on interior fixes — a coat of Drylok, a new sump pump — because those are visible and feel like progress. The problem is that interior fixes manage water that’s already inside the building envelope. They don’t stop it from getting there. A sump pump running constantly isn’t a sign that your basement is protected; it’s a sign that water is finding its way in and you’re managing the symptom.
The other pattern I see regularly: people apply new sealant over old failed caulk. It looks fine for a season, then the bond fails at the old interface and you’re back to square one. Strip it out, prep the surface properly, use the right product for the substrate and the movement expected, and it holds. That’s the difference between a repair that lasts and one that needs to be redone every two years.
Major work — a full perimeter drain replacement, exterior membrane, sump disconnection from the sewer — costs real money and takes real time. But it’s almost always less expensive than the water damage it prevents. The homeowners who call after a finished basement floods for the second time always say the same thing: they wish they’d done the drain work when it was first recommended.
Kettlecontracting can help you protect your foundation
Stopping water at the penetrations and transitions is where Kettlecontracting’s work fits into a complete foundation protection plan. While drainage contractors handle the underground systems, Kettlecontracting focuses on the sealing work that drainage alone can’t address: foundation wall penetrations, window well frames, expansion joints, door thresholds, and utility conduit entries.

A site assessment from Kettlecontracting covers a visual inspection of all accessible seals and joints around the foundation perimeter, a clear priority list of what needs sealing now versus what can wait, product recommendations suited to your substrate and Ontario’s freeze-thaw conditions, and written documentation you can use for your own records or to coordinate with other trades. Kettlecontracting serves residential and commercial properties across the Greater Toronto Area. To book an assessment or get a straight answer about what your foundation actually needs, visit kettlecontracting.com.
Useful Canadian resources and next steps
Before starting any drainage work, check your local municipality’s permit requirements. Most Ontario municipalities require a permit for any work that connects to or modifies the municipal drainage system, and some offer subsidies for disconnecting foundation drains from sanitary sewers.
- Foundation maintenance (Canada.ca) — practical guidance on perimeter drain upkeep, inspection intervals, and sealant application.
- French drains, trench drains and weeping tiles (Canada.ca) — installation standards, filter fabric guidance, and pipe orientation.
- BC Housing — Builder Guide to Site and Foundation Drainage — technical reference for drainage system design and below-grade enclosure performance.
Always confirm current permit requirements with your local building department before excavating near the foundation or modifying any drainage connection to the municipal system. Rules vary by municipality and are updated periodically.
This article provides general information for homeowners and is not a substitute for advice from a licensed contractor, engineer, or municipal building official. Confirm current regulations and programme eligibility with the relevant authority before proceeding.
FAQ
What can I put around my foundation to keep water out?
Use clean crushed stone or coarse gravel for the first 30–60 cm against the wall, and make sure the soil slopes away at a minimum of 5% within 1.8 m of the foundation. Avoid heavy mulch or compacted clay directly against the wall.
How do you waterproof a house foundation?
The most durable approach is an exterior waterproofing membrane paired with a functioning perimeter drain at the footing level. For minor interior seepage on dry walls, products like Drylok or Liquid Rubber offer a lower-cost short-term fix, but they don’t address hydrostatic pressure.
How do I stop water from coming through my foundation wall?
Start by fixing the source: regrade soil, extend downspouts, and clear the perimeter drain. Then seal any penetrations and cracks with a masonry-rated, freeze-thaw-flexible caulk after removing all old failed sealant. If water persists, an exterior membrane or interior sump system is the next step.
What is the cheapest way to keep water away from the foundation?
Regrading the soil near the foundation and extending downspout discharge are the lowest-cost, highest-impact fixes — often under a few hundred dollars in materials. Cleaning gutters and adding splash blocks costs almost nothing and removes a major source of concentrated water at the wall.
Does Kettlecontracting handle foundation sealing in the GTA?
Yes. Kettlecontracting provides professional caulking and joint sealing at foundation penetrations, window wells, expansion joints, and door thresholds for residential and commercial properties across the Greater Toronto Area.
